Most businesses maintain a single, standard price for their products or services to charge their customers, while some businesses would want to charge customers based on usage or consumption of these products and services.
For example,
With Chargebee's metered billing solution, you can flawlessly charge your customers based on their usage of your products and services. You can define plans and addons as metered components in Chargebee. The invoices for subscriptions created containing these metered components are generated in a pending state.
Only user assigned to the Full Access Role within Chargebee will be able to add usages associated with metered billing. Also, this action cannot be completed by any custom roles created. Learn more about Users and Roles here.
Chargebee allows you to choose either of the following mode of configuration for metered billing:
Invoices for subscriptions without metered components can also be generated in pending status, if required. You can add charges as required before closing and sending the invoice to the customer.
The usage for these subscriptions can be added to the subscription records. Based on the usage added (sum of all the usage data, the latest usage data, or the maximum usage data), Chargebee calculates and adds the price to the respective invoice for closing the invoice. You can automate closing these invoices that are in pending status and email them to the respective customers.
You can add, remove, or view the usage data for invoices and subscriptions whenever required.
To enable and configure metered billing in your Chargebee site, follow these steps:
Click Settings > Configure Chargebee > Billing LogIQ > Billing & Invoices > Metered Billing.
In the Metered billing page, pick a mode of configuration for metered billing.
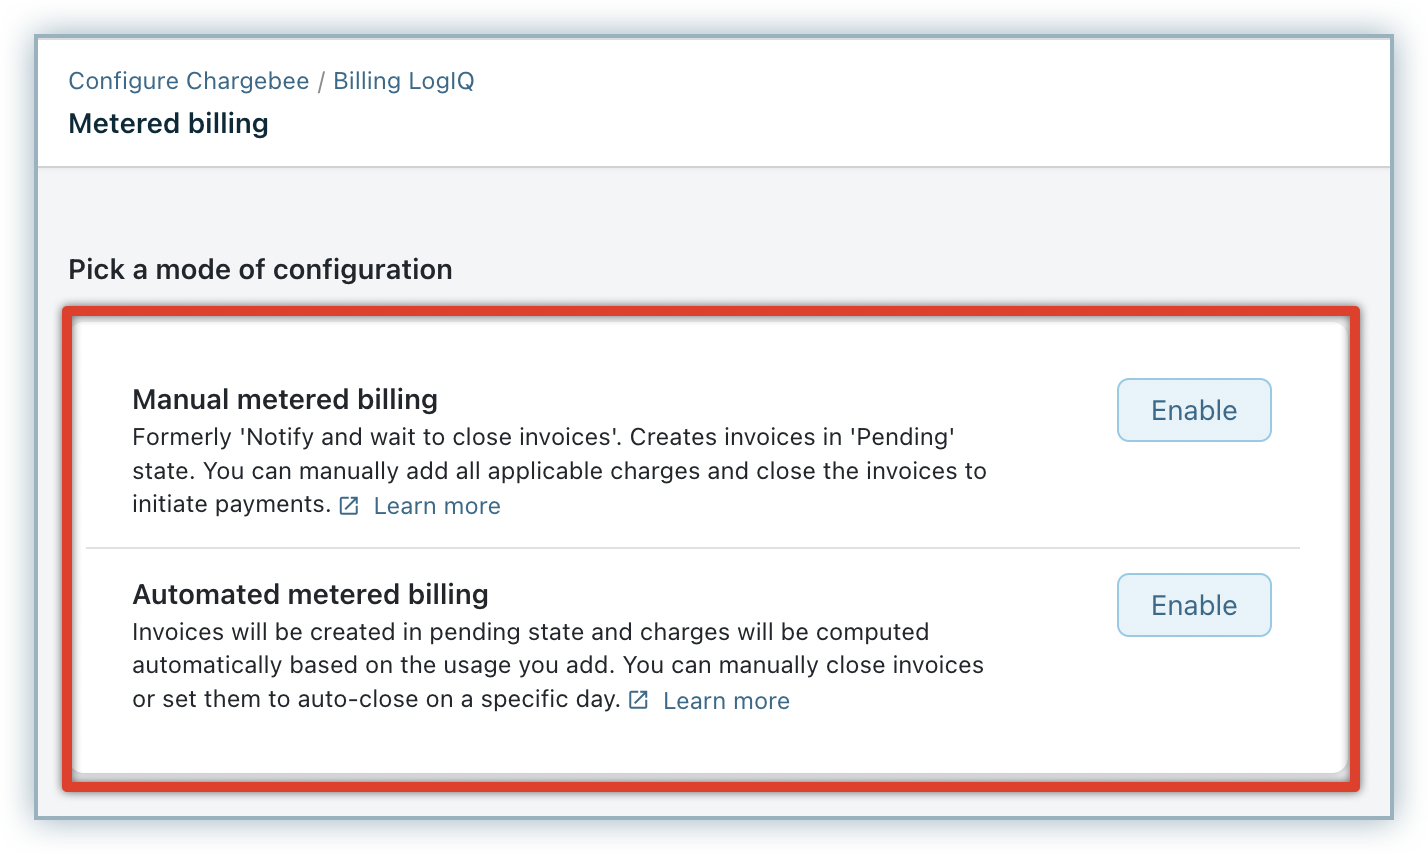
To configure the Manual metered billing mode, click Enable next to manual mode.
On the Manual metered billing popup, click the toggle and under Choose the type select the invoice date that you want to display on the invoices from the drop-down. You can select from the following options:
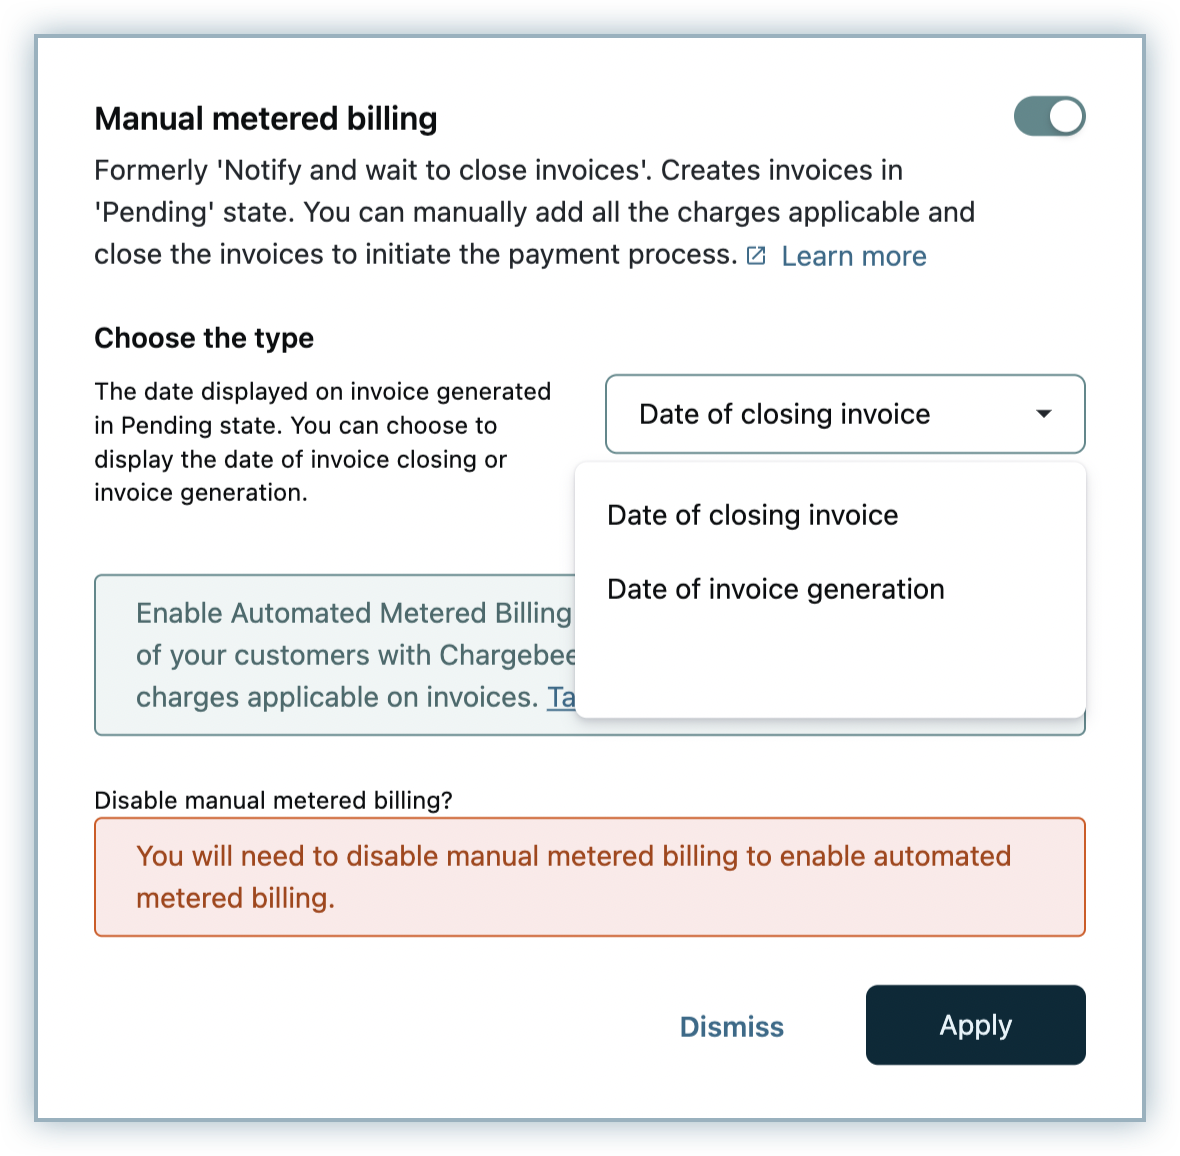
Click Apply.
To configure the Automated metered billing mode, click Enable next to automated mode.
Under Enabled Metered Billing, click Enable.
In the Metered billing page, configure the following settings that define your metered billing workflow:
Automatically close invoices: Chargebee processes the usage data that you share and automatically closes and sends the invoice to customers. The maximum time limit that you can select here is 50 days.
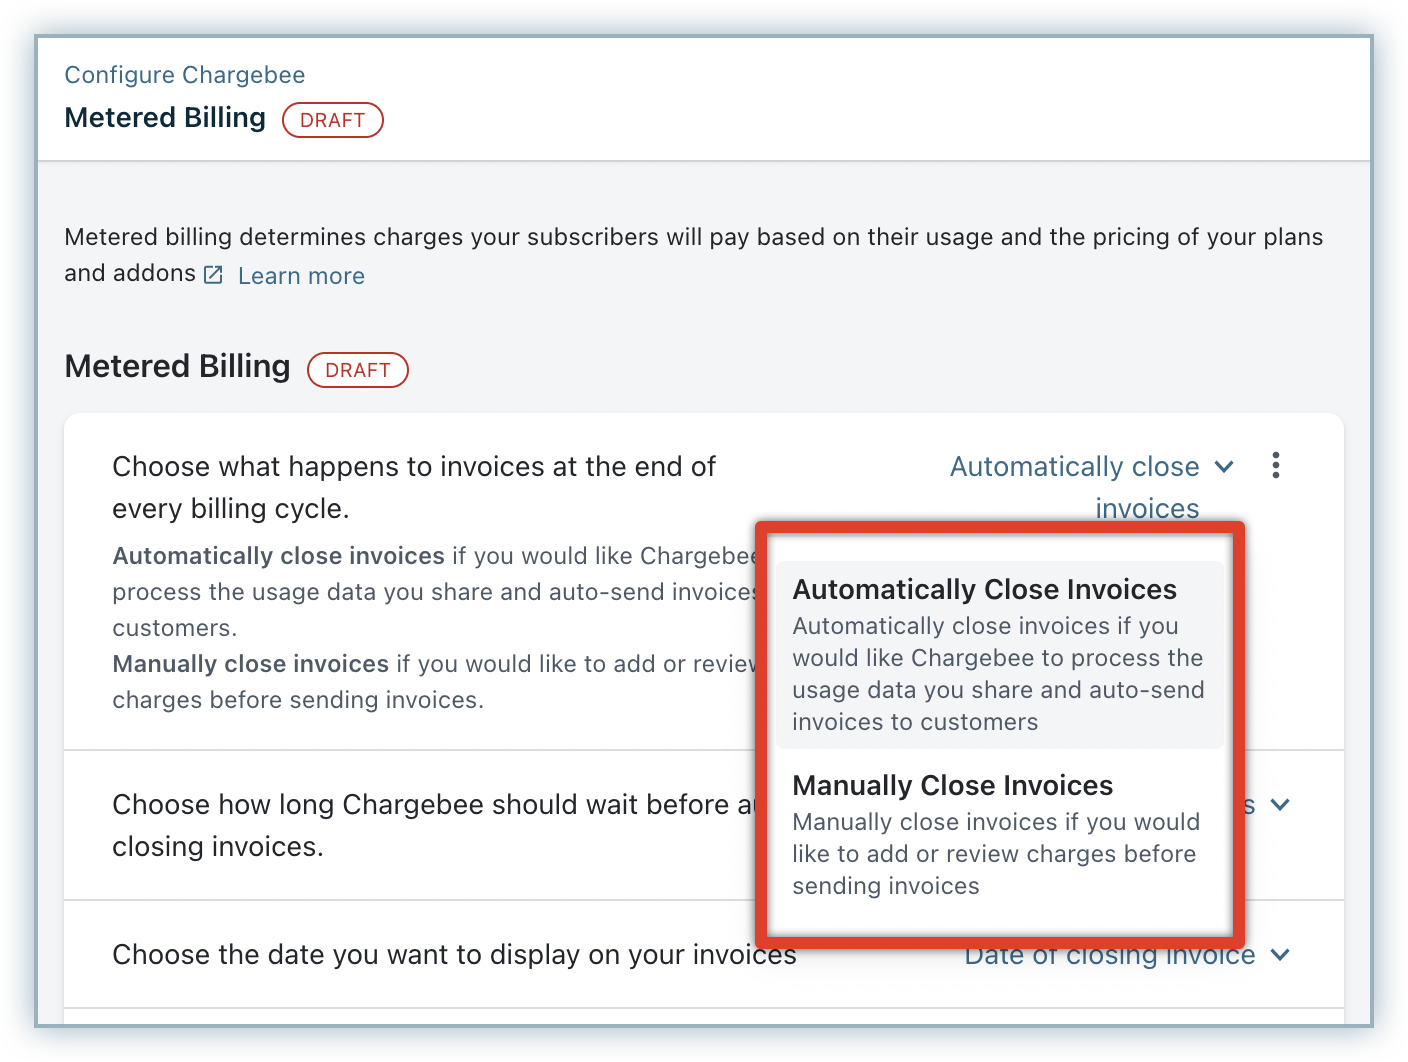
Manually close invoices: You can add/review the charges and manually close the invoices.
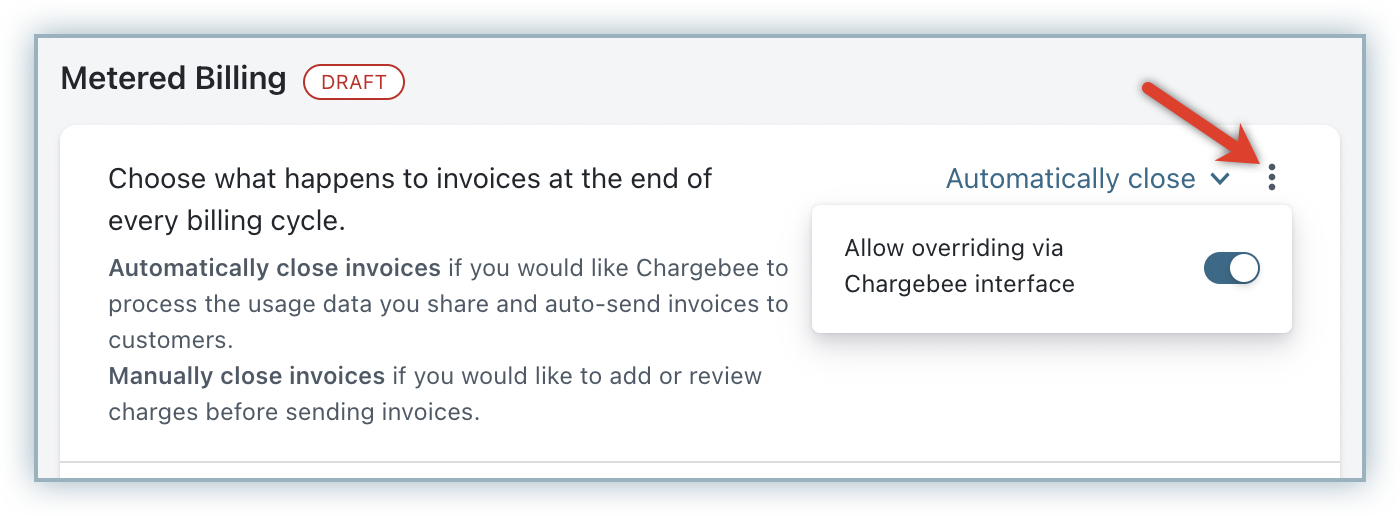
When overriding is allowed, users can turn off auto-closing the invoices for specific customer or subscription records.
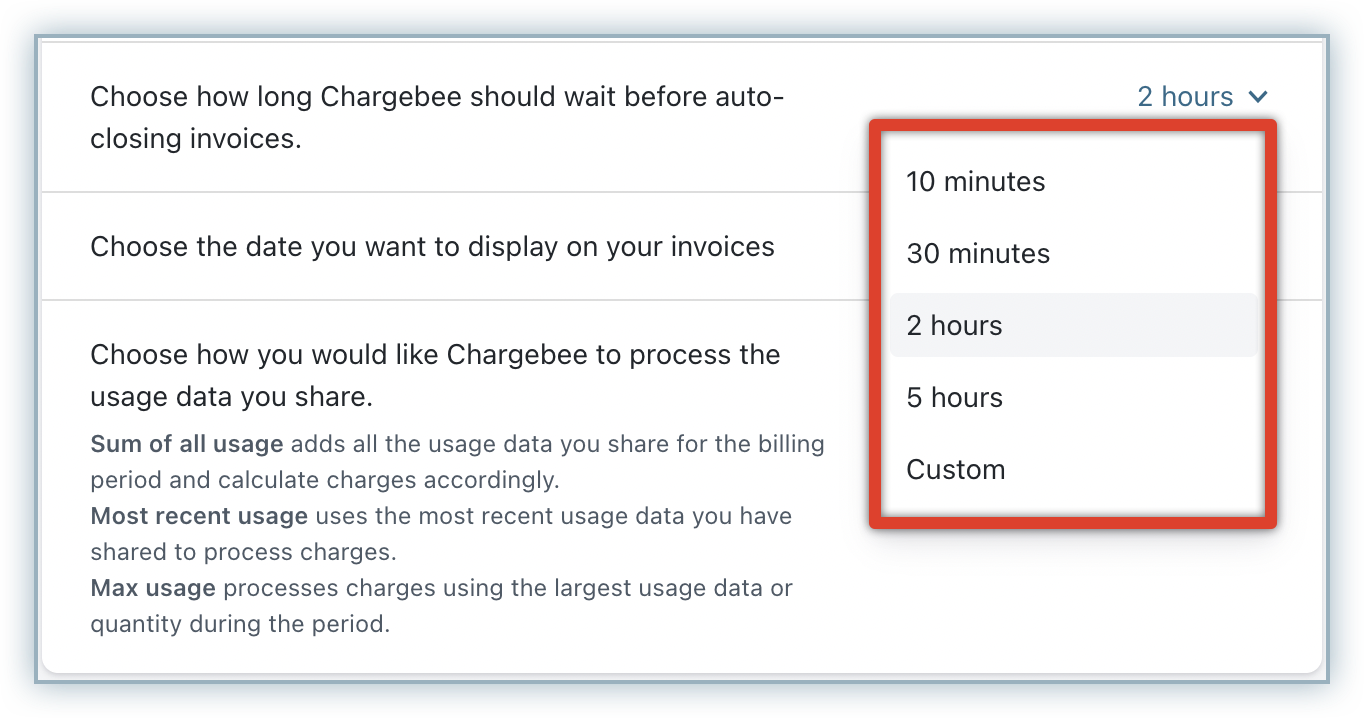
Choose how long Chargebee should wait before auto-closing invoices: You can specify how long Chargebee should wait before auto-closing the invoices, during when you can add or review the charges as required. By default, Chargebee displays two hours as waiting duration. You can click the drop down to select your preferred duration, or add a custom duration. You can specify 10 minutes at the minimum.
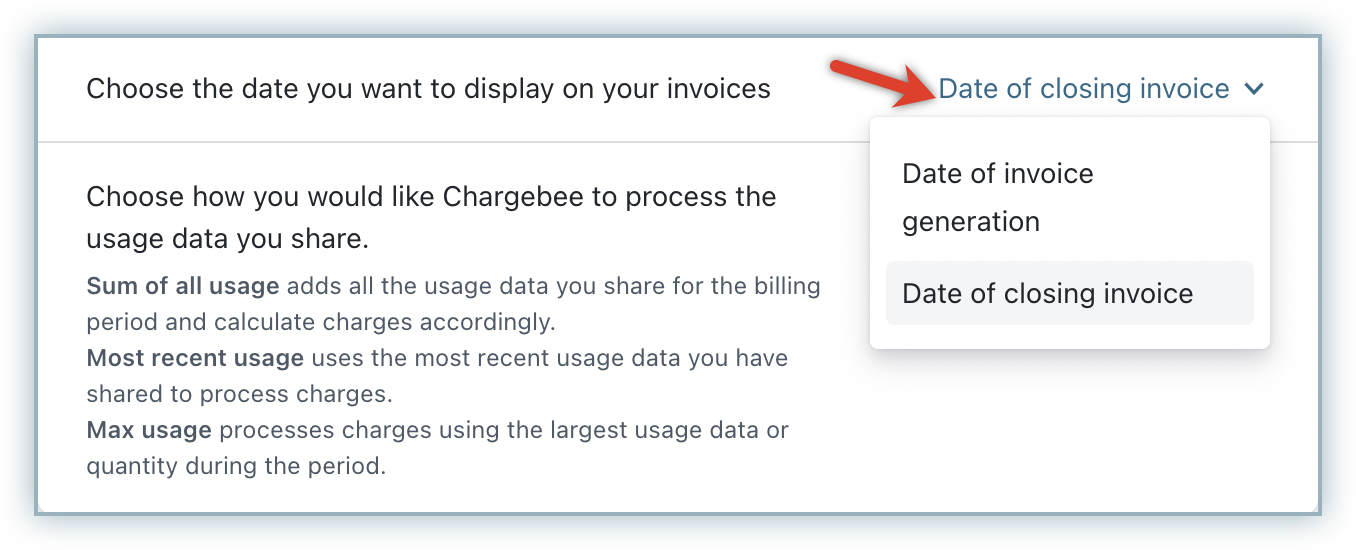
Choose the date that you want to display on your invoices: Select the Invoice date that you want to display on the invoice from the drop-down list. You can select which date gets displayed from the following options:
Choose how you would like Chargebee to process the usage data that you share: You can select from the following options:
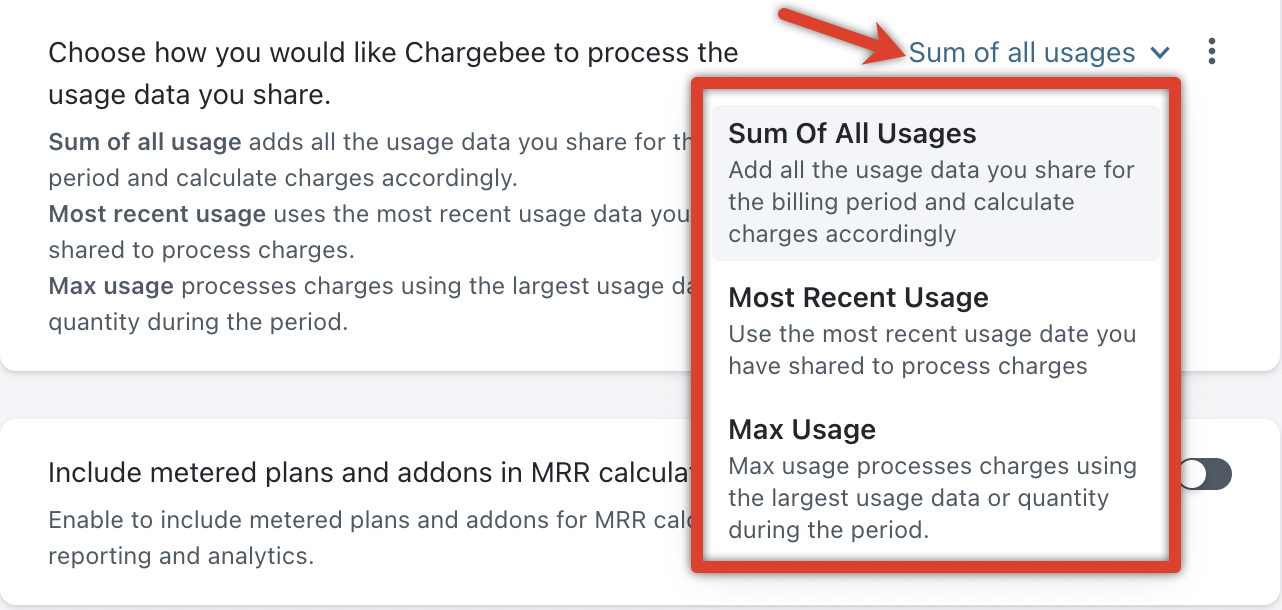
You can enable the setting to Include metered plans and addons in MRR calculations.

Click Apply to save your configuration.
After enabling the Metered Billing feature, you can maintain both metered and non-metered plans and addons in your Chargebee site. Plans/addons for which you want to charge your customers on usage basis can be marked as metered components.
While creating a new plan/addon or updating an existing plan/addon, you can mark them as metered components. To define plans and addons as metered components, follow these steps:
Click Product Catalog > Plans/Addons > Create Plan/Addon.
In the Create a New Plan/Addon page, specify the plan/addon details.
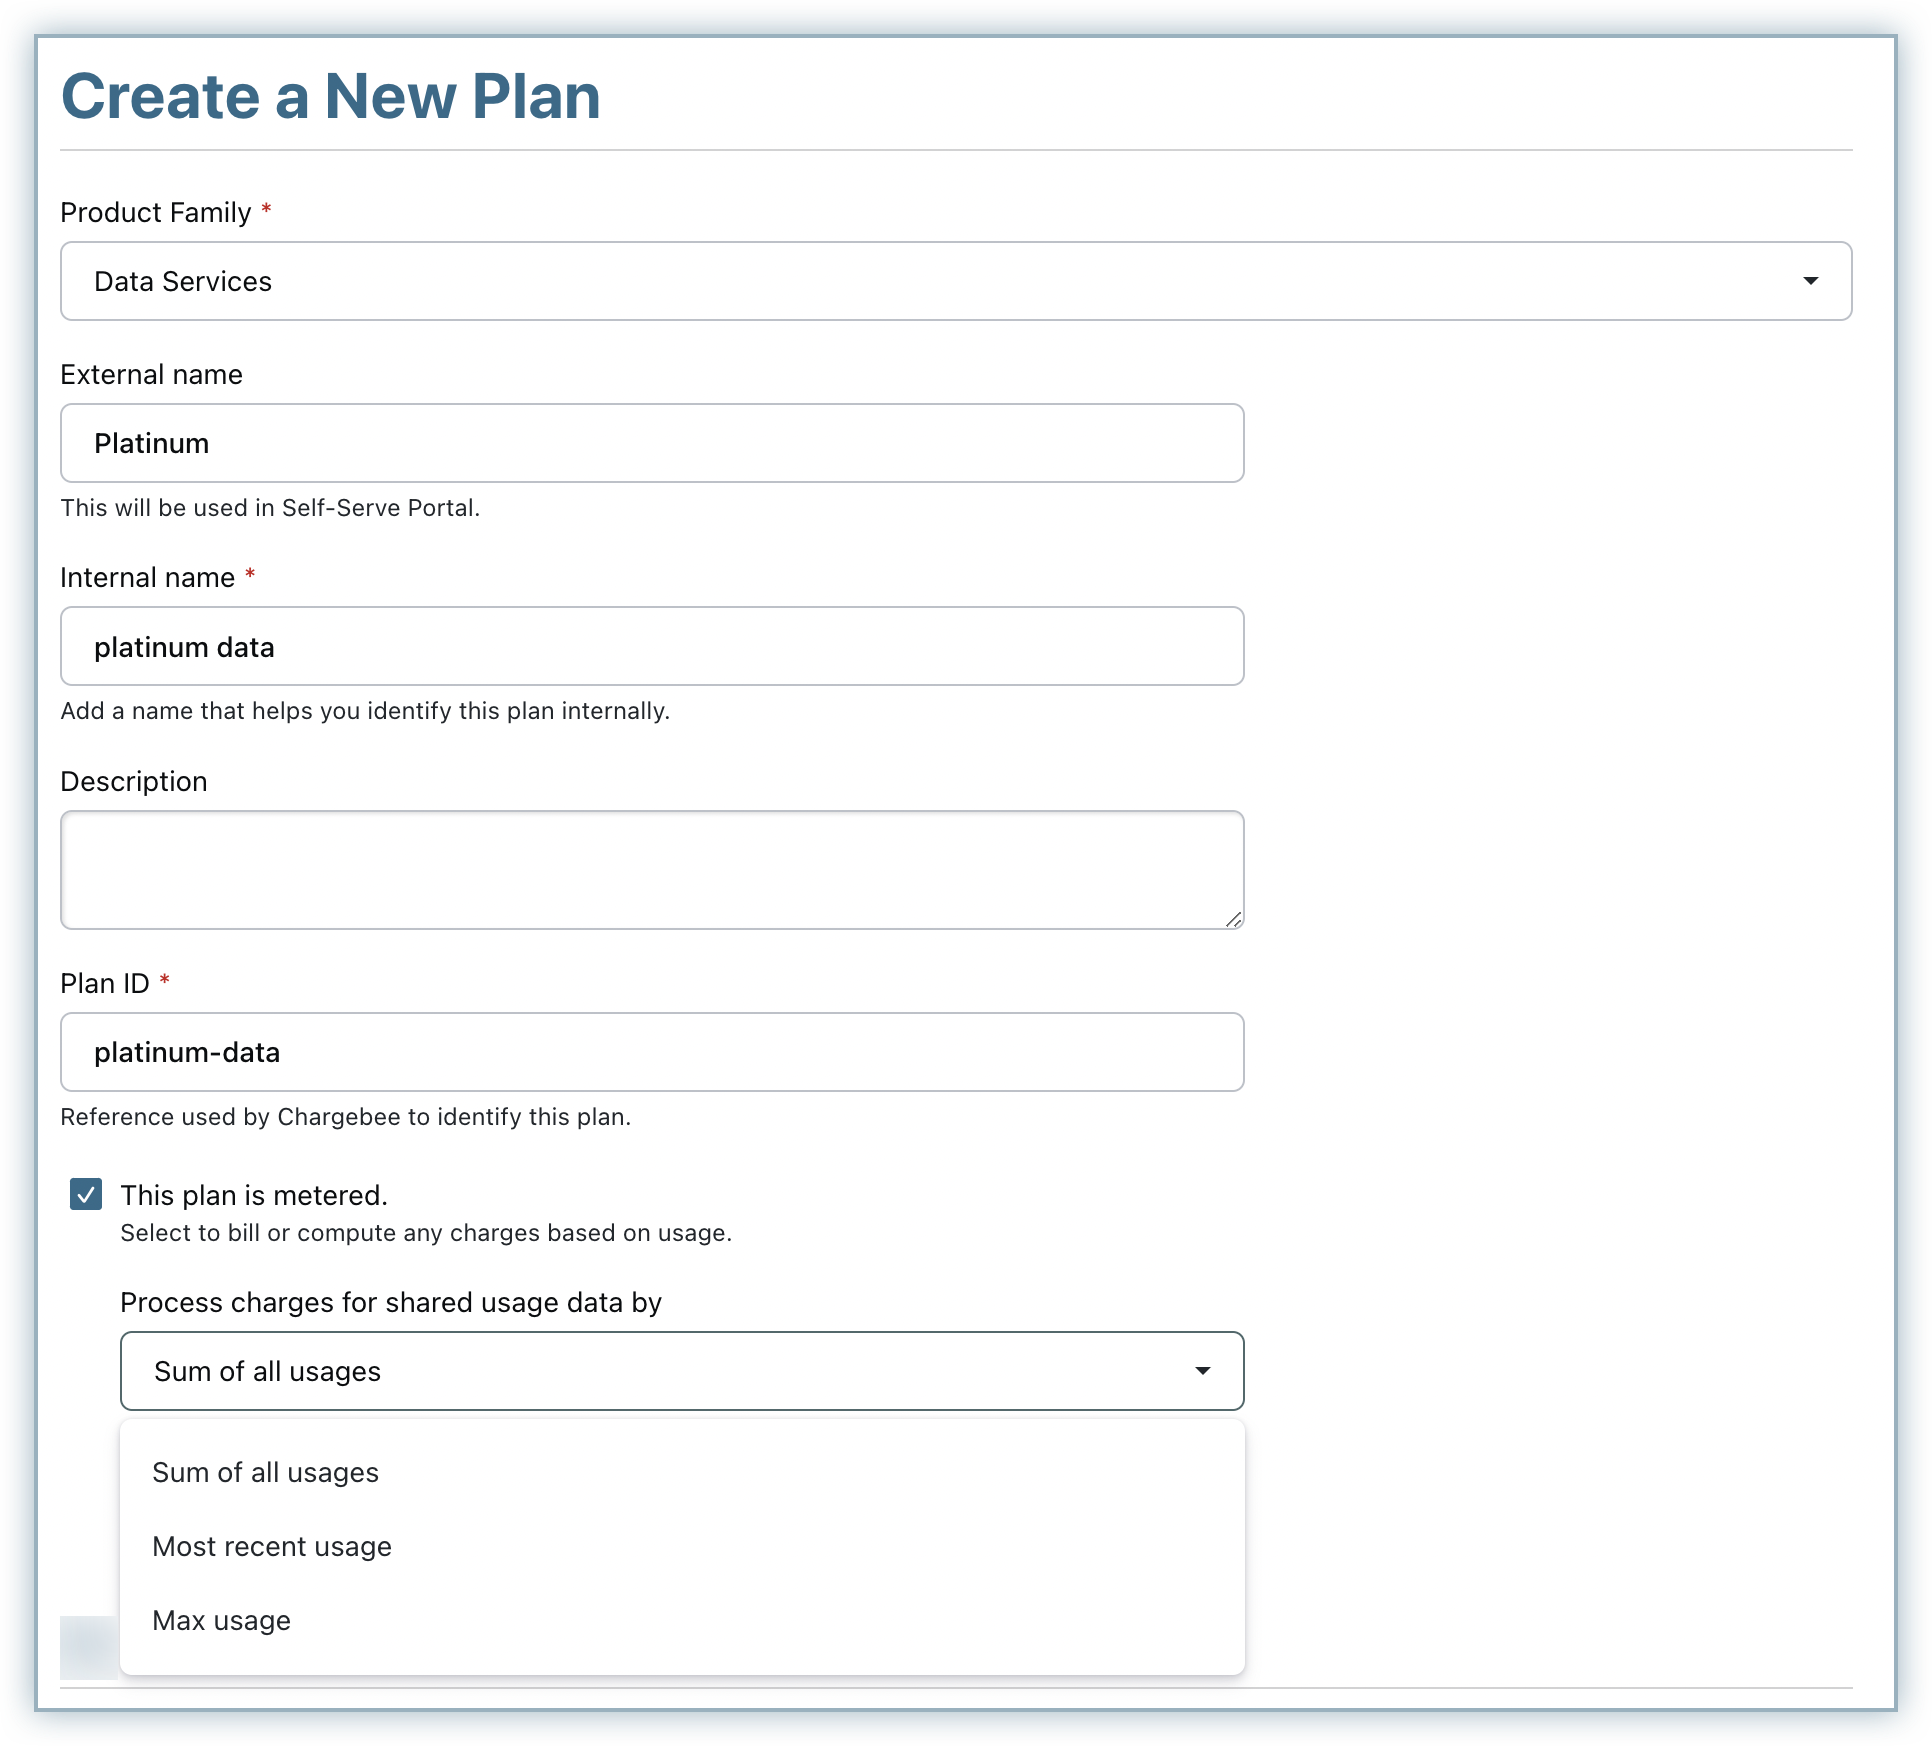
Select This plan/addon is metered. Invoices created for this plan/addon will be in draft state to add usage based charges before closing them.
Click Create.
The plan/addon is successfully created as a metered component. You can start defining price points for your plan/addon as required.
After creating plans/addons as metered components in your Chargebee site, you can start adding and tracking the usage data for metered components in subscriptions. You can add usage via Chargebee interface from the subscription details page or by using bulk import/export options. You can also add usage for subscriptions via API.
To add usage data to a subscription with metered components via Chargebee interface, follow these steps:
Navigate to the subscription details page.
Click Add Usage.
Specify the date and time for when the usage is being added.
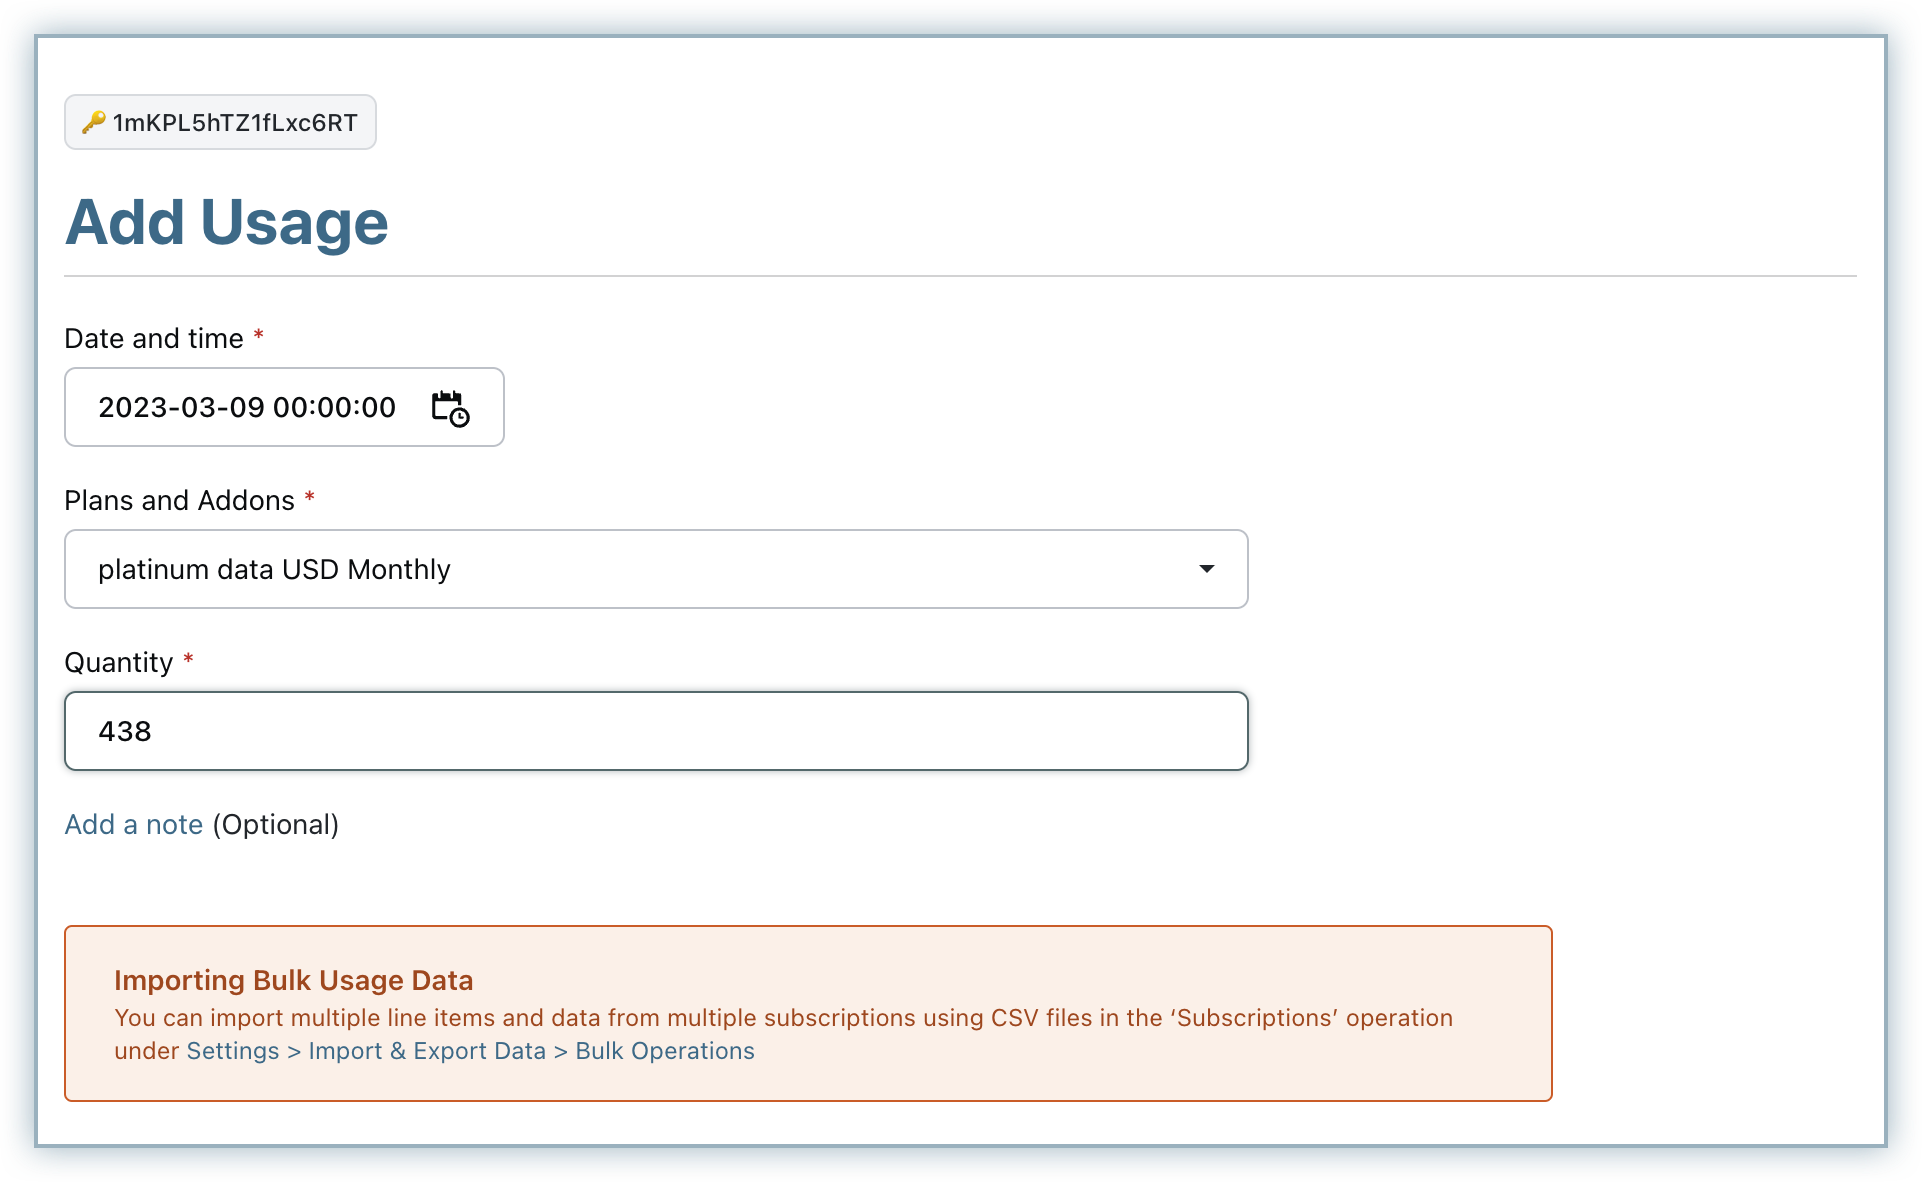
Select the Plans/Addons for which you are adding the usage.
Specify the usage units in Quantity field.
You can optionally add a note while adding usage.
Click Add.
The subscription details page displays the usage details for metered compontents as shown in the below screenshot.
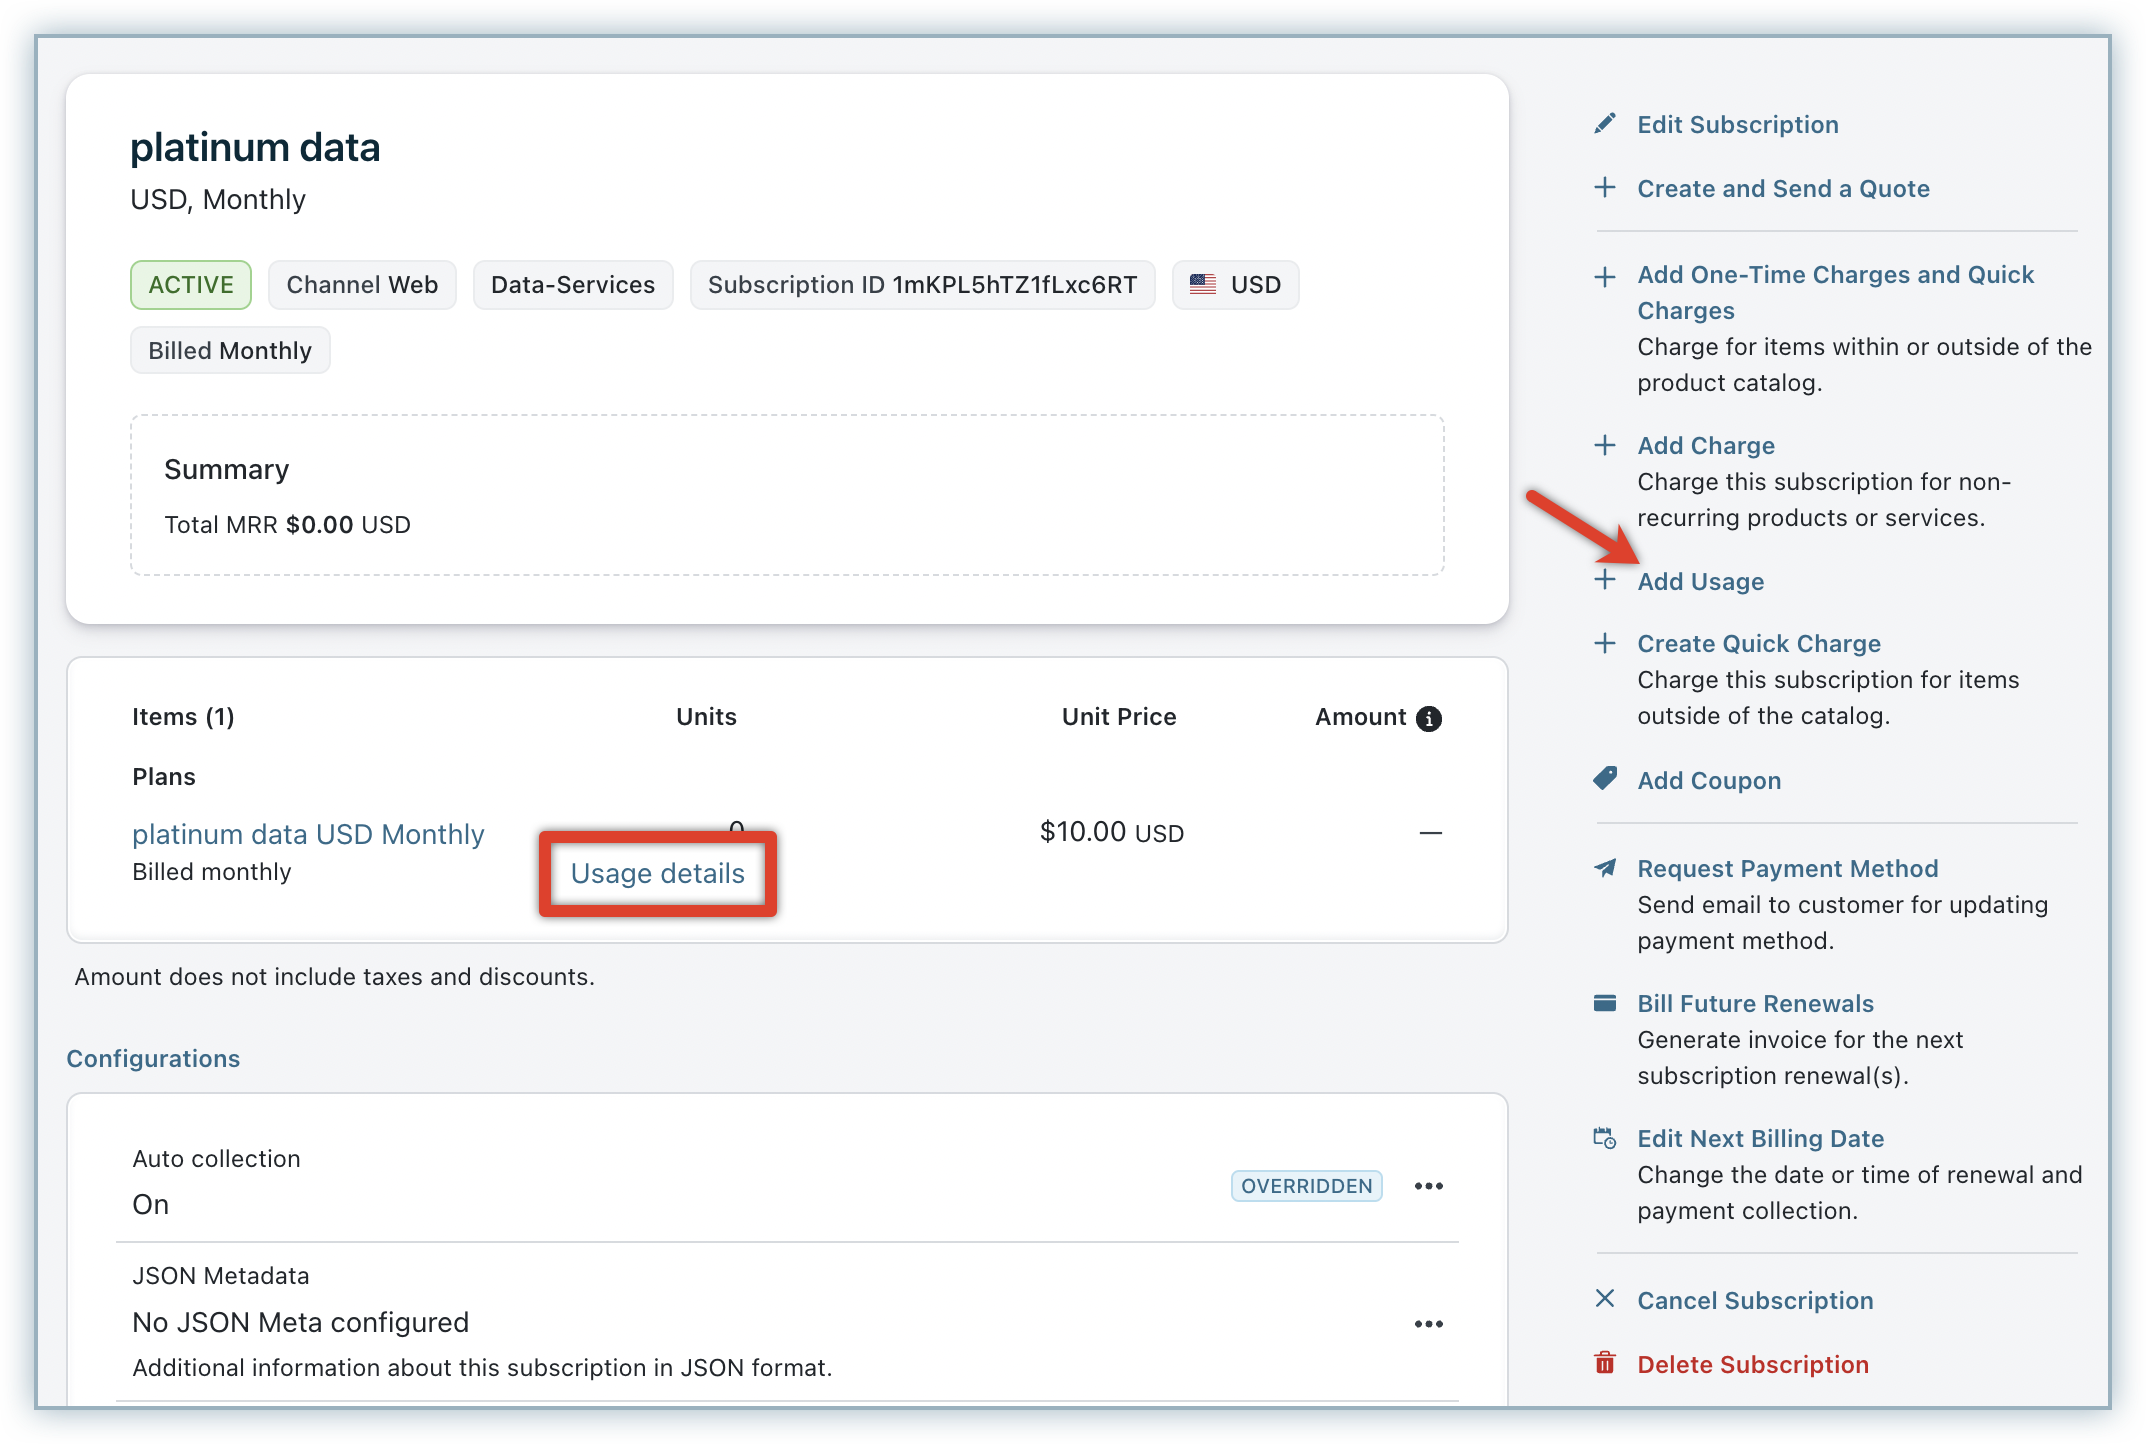
Click Usage details to view the complete list of usage data added for the respective metered plan/addon.
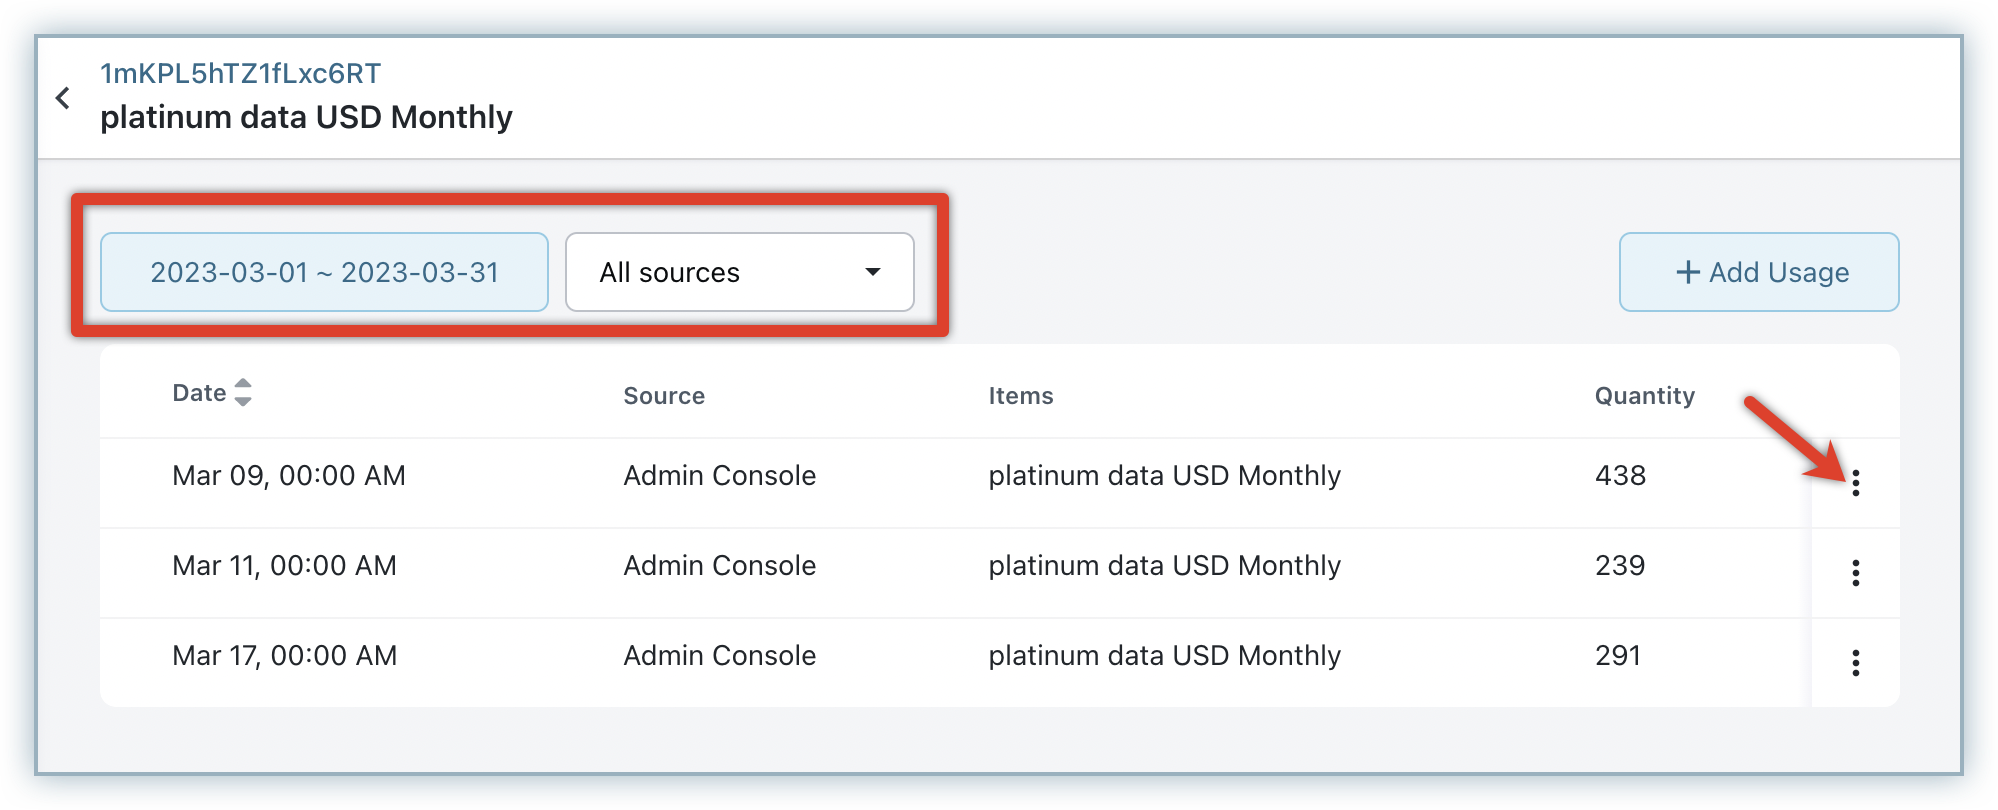
You can use the Duration and All sources filters to track usage added for particular time period and via specific sources.
Click the ellipsis icon to Delete usage if required.
Chargebee considers the usage of your metered components added to the subscription(sum/most recent) based on your site setting, and calculates the invoice amount based on the pricing model.
For example, if you have created a metered plan that's priced on per unit model,
Price per GB - 10.45$
Usage added - 250 units. This usage can be arrived either by summing up all of the usage that is added to the subscription, or by using the most recent usage that is added to the subscription.
Invoice Amount = Plan Price X Usage added.
At any given point of time, Chargebee considers usage added only for the previous billing period of the subscription. For example, when the current billing period is June 15 to July 15, any usage added for the period of May 15 to June 15 is only considered for invoice amount computation. Usage added for outside this period will not be considered for the July 15 renewal cycle.
Invoices for subscription with metered components are automatically generated in pending state. You can add the usage data to the subscription and the invoices are closed manually or automatically, based on your site setting for metered billing.
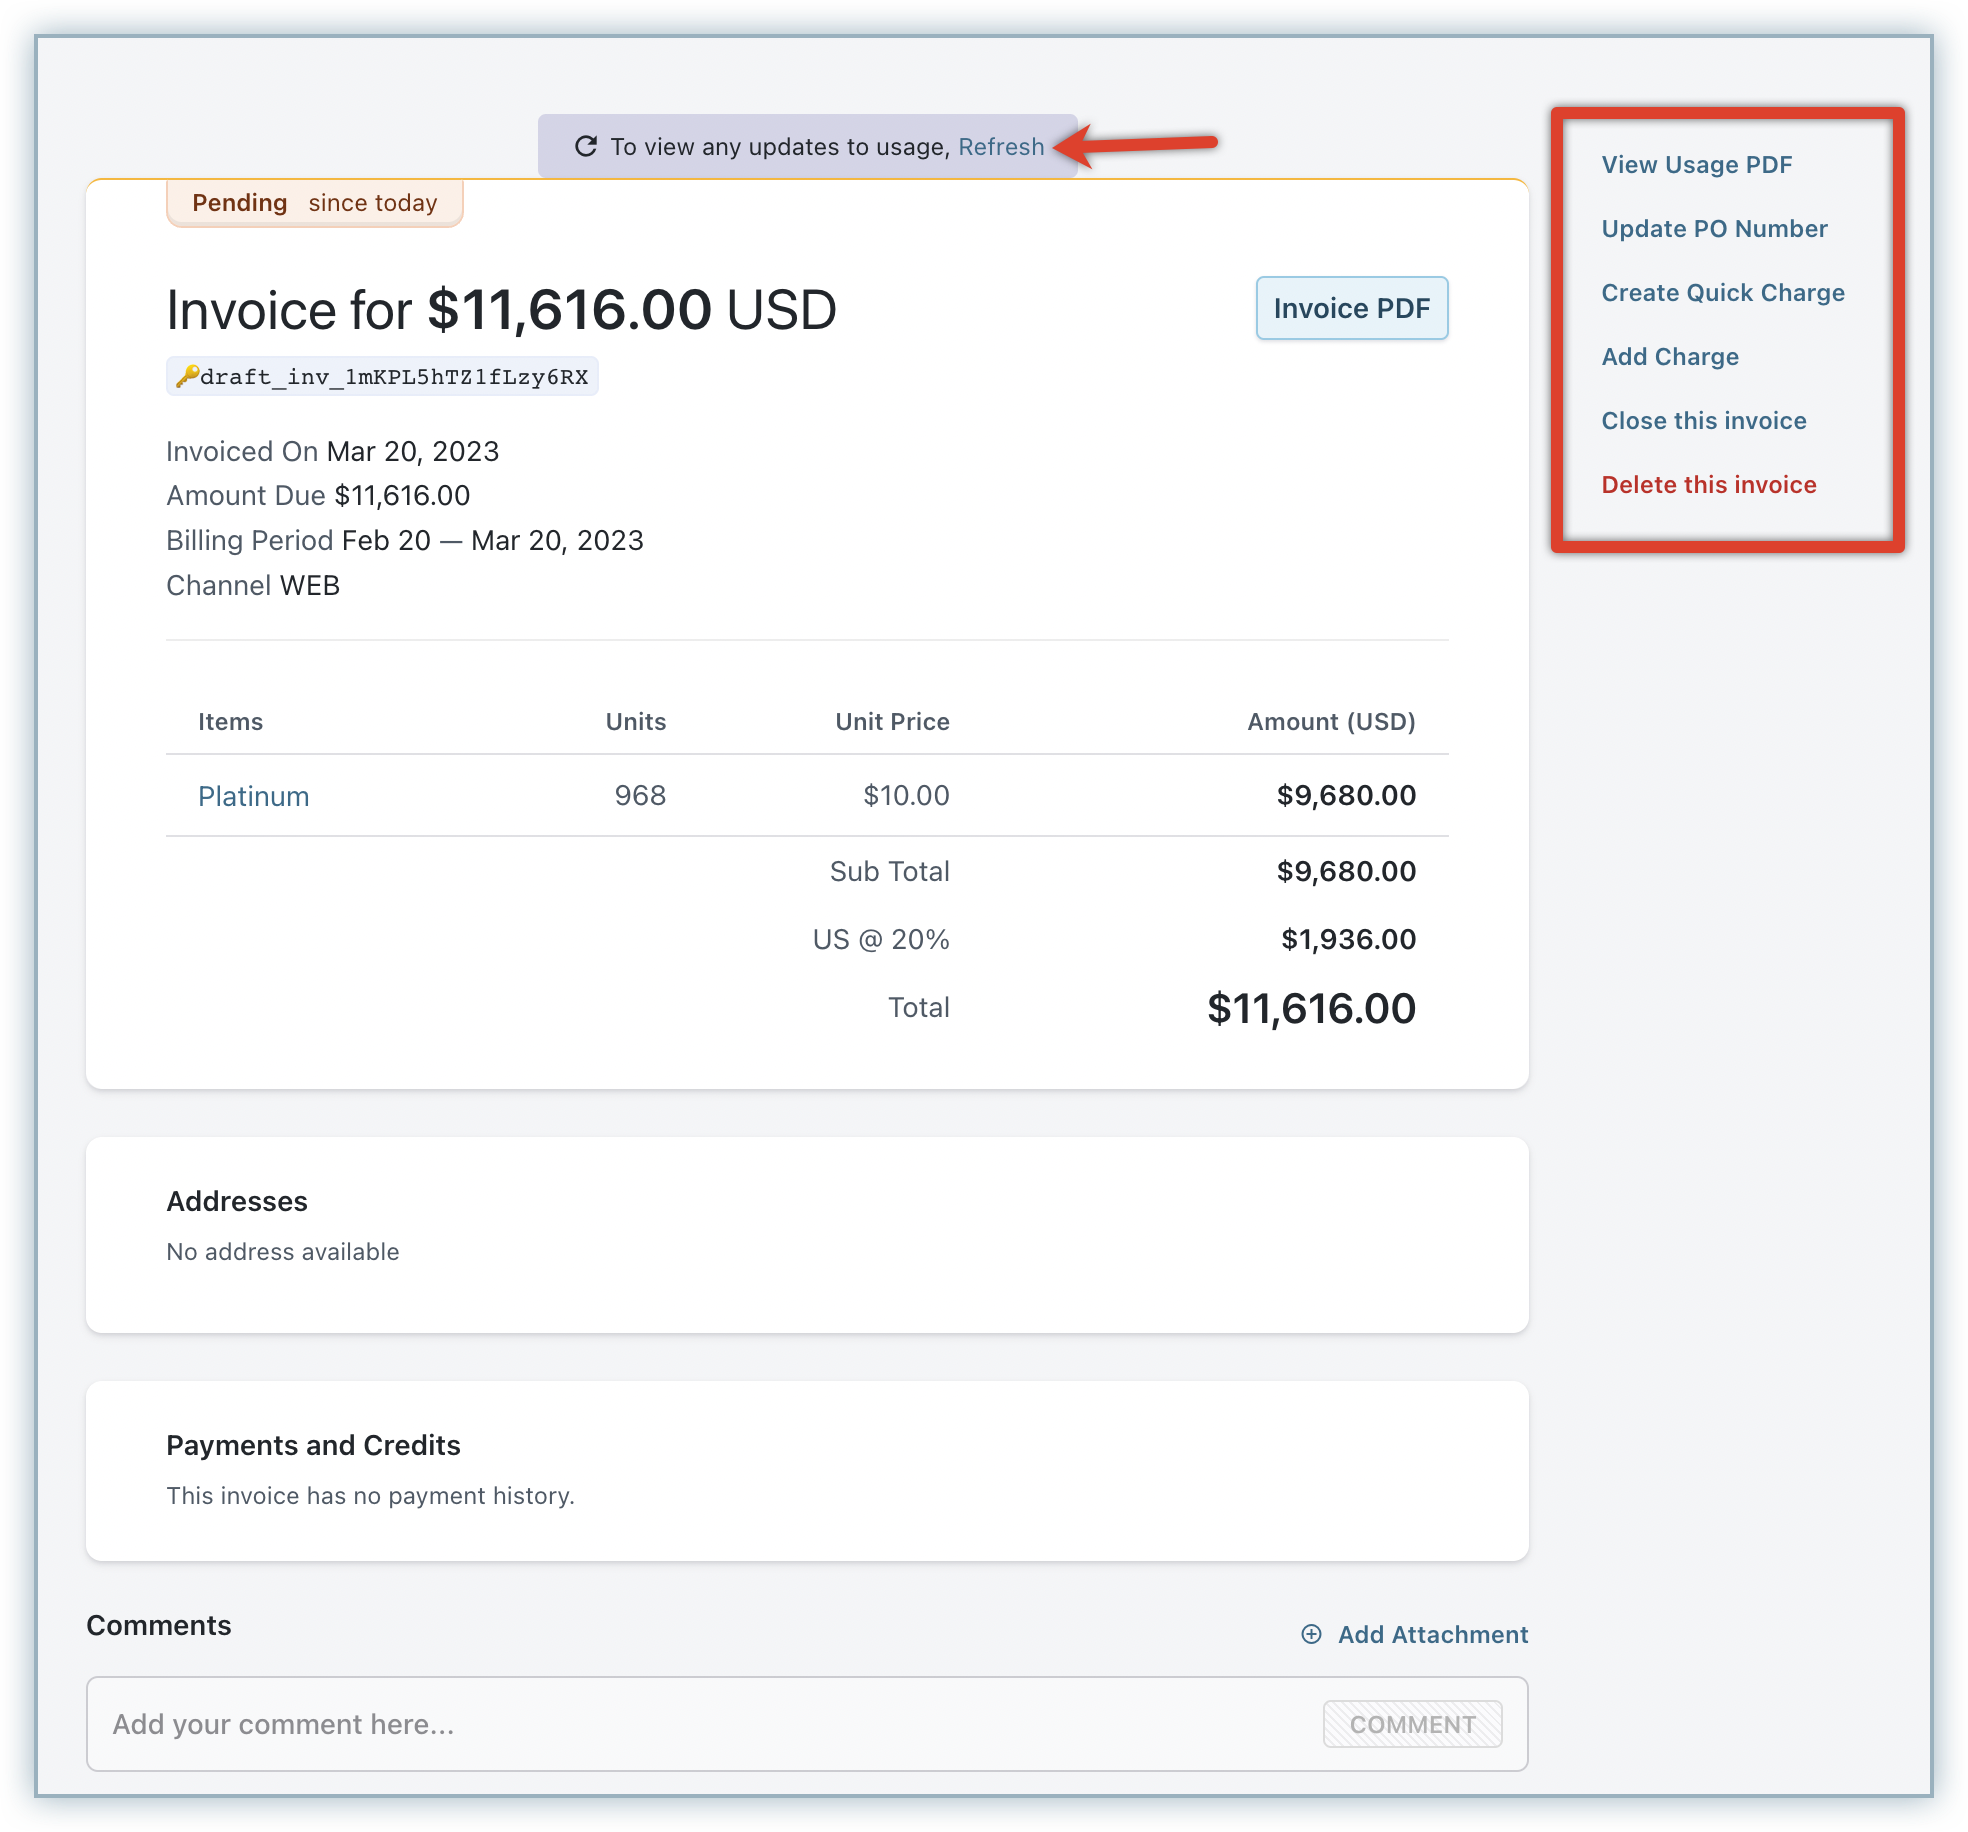
When you have opted to manually close the invoices for metered components, invoices remain in pending status until you close them. After you have added all usage based charges to the subscription, follow these steps to close an invoice:
Navigate to the Invoice details page.
Click Refresh to update all usage based data.

You can optionally click View Usage PDF to view itemized usage breakdown in a PDF format.
Click Close this Invoice.
The Close Invoice dialog displays all the Invoice notes present for this invoice. You can remove some of these notes and add a new note as required. This note is displayed first in the invoice under Invoice Notes. You can even add comments for internal reference.
Click Confirm.
This initiates the payment process and the status of the invoice changes from Pending to Payment Due/Paid/Not Paid/Posted.
While closing the pending invoice, the invoice number will be assigned based on the current invoice number sequence.
While creating a subscription in your Chargebee site, the Add Plan/Addon dialog displays all the existing plans/addons for selection.
Metered components can be easily differentiated using the metered icon as shown in the screenshot below:
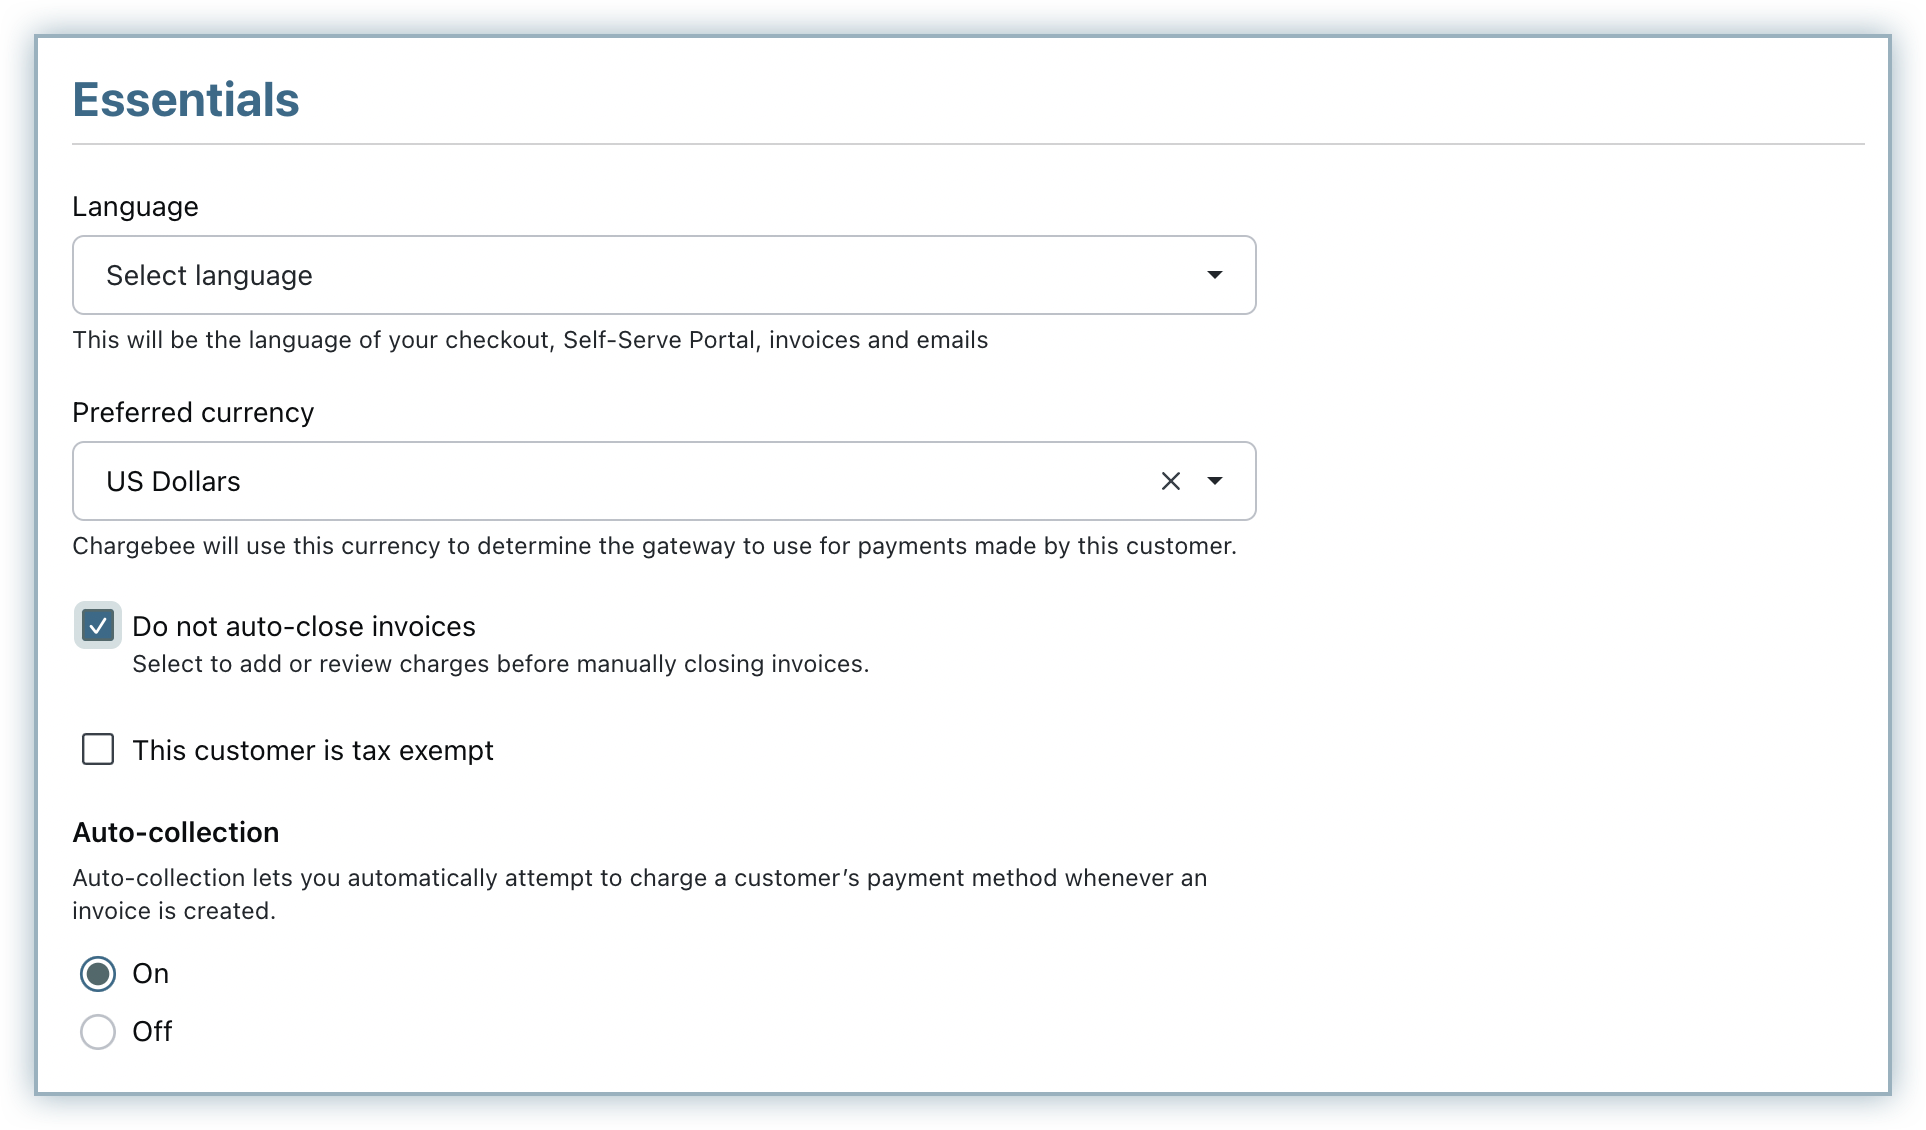
Subscriptions with metered components: When the subscription contains metered components and you have configured to auto-close invoices with overriding enabled, you can override the setting by selecting Do not auto-close invoices. You can even enable Also generate first invoice in pending state. You can select this option when you want to add or import previous usage data to the first billing cycle of the subscription.
Subscriptions without metered components: If your business requires invoices to be renewed without the addition of metered components, you can do so by clicking Generate all renewal invoices in pending state. All renewal invoices, excluding the first invoice for the subscription gets generated in pending state. The invoices are closed automatically or manually, based on your site setting for metered billing. You can also enable Also generate first invoice in pending state to add or import previous usage data to the first billing cycle of the subscription.
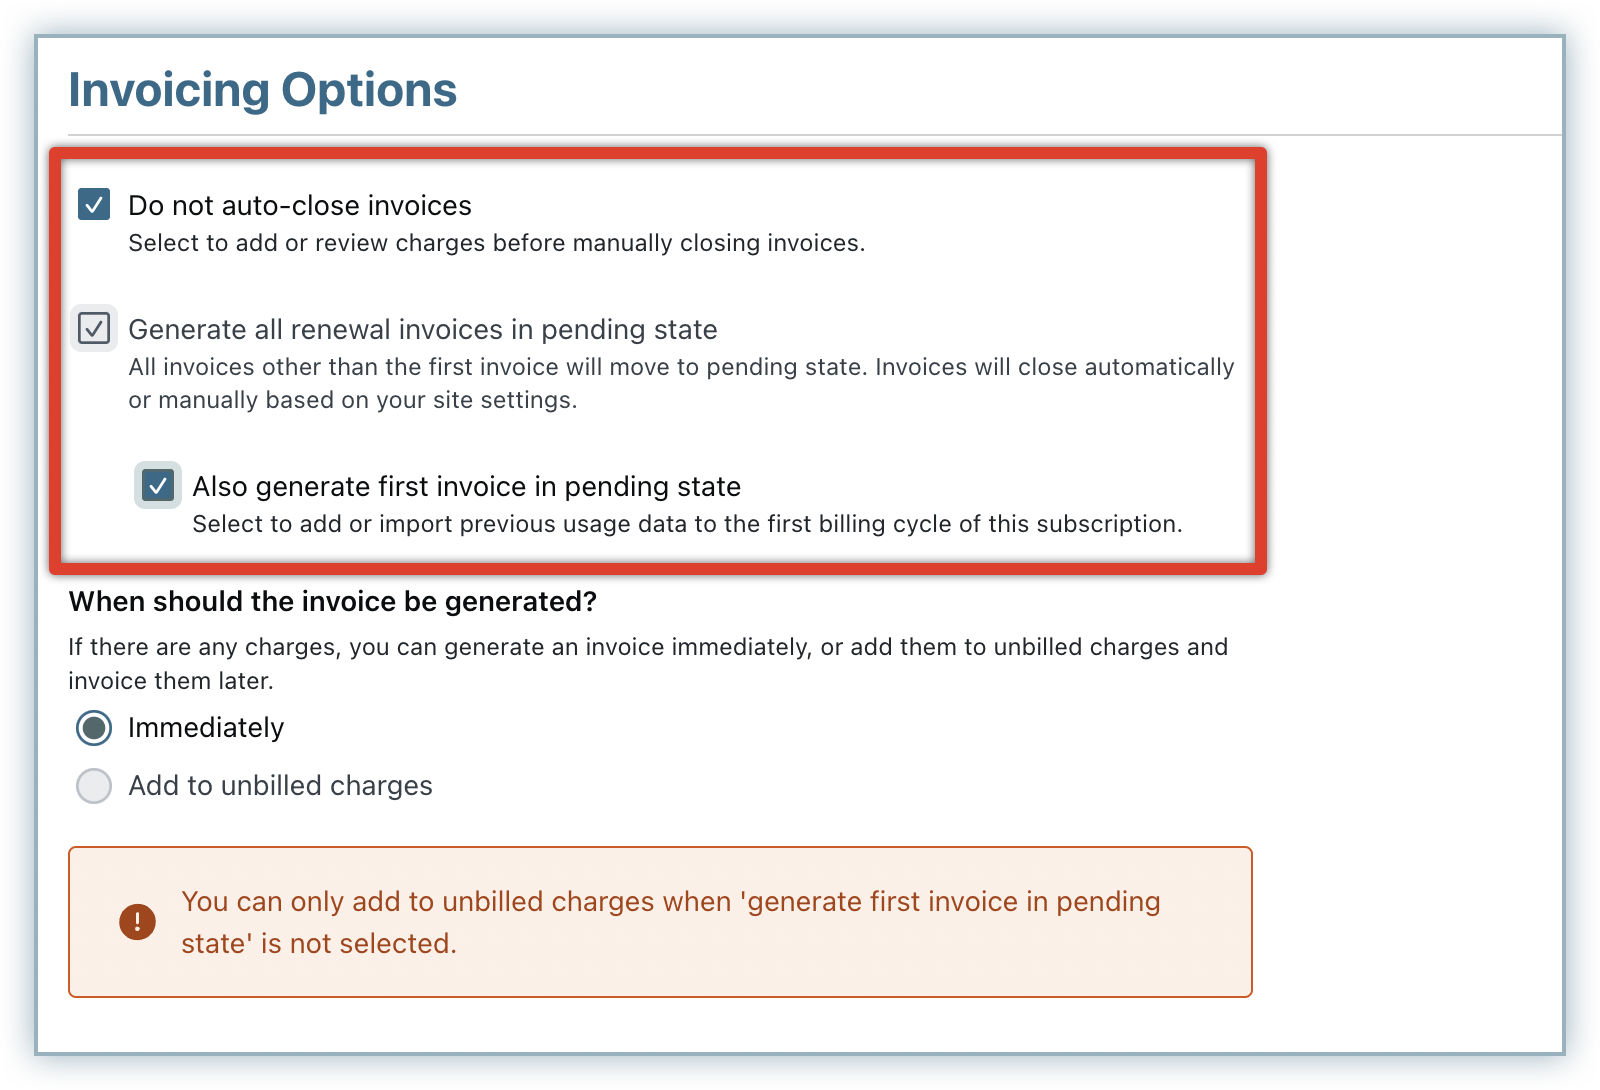
The Do not auto-close invoices setting in a subscription takes precedence over the same setting in a related customer record. The setting, if enabled, overrides the site setting for auto-closing invoices.
For upgrades and downgrades of subscriptions that contain metered components, customer will receive an invoice with the usage based charges by the end of the respective billing cycle.
For upgrades and downgrades of subscriptions with both metered and non-metered components, customer will receive an invoice with prorated charge for the non-metered items immediately. The metered components(plan or addon) will not be invoiced during the mid period change and will be billed only by the end of the billing cycle.
Say a customer upgrades from Plan-A to Plan-B and the subscription cycle for both the plans starts on the 1st of the month and ends on 31st of the month.
At the time of the upgrade, the subscription contains a metered Plan-A with usage charges for $100 and non metered add-on charge as $50. On 15th, a mid-period upgrade happens to Plan-B, a non-metered plan $200, and the add-on is removed.
The invoice raised during this upgrade will consist of prorated charges for Plan-B ($100) + credits for the add-on downgrade ($25).
The usage charges of $100 for Plan-A will be billed only on 31st when the subscription renews.
Subscriptions with metered components can be paused. The pause and resume workflows for such subscriptions work as follows:
In-term Resumption: This is when a subscription is paused and resumed within the billing term of the subscription. When the subscription is on pause:
Out-of-term Resumption: When a paused subscription resumes after the renewal date/time, it is considered as an out-of-term resumption. When the subscription moves from current billing cycle to the next billing cycle and is still on pause:
Subscriptions with metered components can be cancelled. When a subscription with both metered and non-metered components is cancelled, customer receives an invoice with prorated charges for the non-metered items and usage charges for the usage added till cancellation for metered components.
When cancellation is scheduled for a subscription with both metered and non-metered components, you can still add usage when the subscription is in an active state. The customer receives an invoice with prorated charge for the non-metered items, and usage charges for the usage added till cancellation for metered components, at the time of cancellation.
1. How do I charge a base fee for a metered plan?
If you have a business case where you want to charge a base fee for a plan and also add usage-based charges, you can create a non-metered plan that carries the base fee and attach a metered addon to the plan. The metered addon gets automatically attached to all subscriptions created for this plan. Usage can be added to the subscriptions via the addon, based on which usage-based charges can be calculated along with the plan's base fee.