Docs
Prerequisites
We need a check to be added on Chargebee side to ensure merchants are on the latest Salesforce version before they enable MBE flag at Chargebee. This is a hard dependency for MBE GA.
Below are the steps for a new site migrating from Single Business Entity to Multi Business Entity
Enable Multi Business Entity in Chargebee .
The Site in Chargebee will have a default Multi Busines Entity created
There should be only 1 site connected to the Salesforce org.
a. This can be verified by navigating to Chargebee Settings > Dashboard > Sync Overview section. It should list only one domain under Chargebee domain dropdown
b. Alternatively in Chargebee Site (chargebeeapps_CB_Sites_c), we should be able to see only 1 entry in the developer console.
c. If multiple sites are connected, duplicate site data will be cleaned up. However, for a valid multi-site connection, you must migrate from a multi-site setup to a single-site configuration within your Salesforce org.
It is recommended to initiate MBE migration to Salesforce during off-business hours as the migration can take long depending on the amount of data and the Salesforce flows / triggers in your Salesforce org. Additionally, the sales driven workflows will be locked for the sales user until the migration is completed.
Due to this it is very hard to estimate a time. But in absence of any custom flows / triggers, we can assume a speed of about 60K per hour for each object. We recommend to test out the migration and speed in the test site so that you can have a fair estimate of the time needed for migration.
Unsupported
When Salesforce org has more than one site connected and if one of the site is changed to MultiEntity, currently, such migration is not supported.
In this case, the data in salesforce for the second site which got converted to Multi Entity needs to be cleaned up; then attempt can be made to migrate with Advanced Actions in Salesforce as mentioned in Step #8
Alternatively, it would involve manually updating the records with the help of engineering team and create the Multi Entity entry in salesforce manually.
Follow these instructions to successfully migrate to Multi-Business Entity in Salesforce.
Login to the Salesforce organization and navigate to Chargebee Settings.
Next, the sync runs after MBE is enabled in Chargebee
a. This ensures the latest Chargebee settings are synced to Salesforce. Salesforce will identify that MBE has been enabled in Chargebee but not in Salesforce. Salesforce identifies that we need a migration for Multi Business Entity.
b.This option is selected by default.
Customer records are synced to Pipedrive even if they do not have subscriptions attached.
Salesforce starts showing a message in all the screens stating
"Sync is paused for the site fuji-test(site domain name) because a new feature called Multi Business Entity was enabled in Chargebee. Navigate to Chargebee Settings ➔ Post-Update Scripts, and run a script that will prepare the Chargebee for Salesforce package to work with this feature.
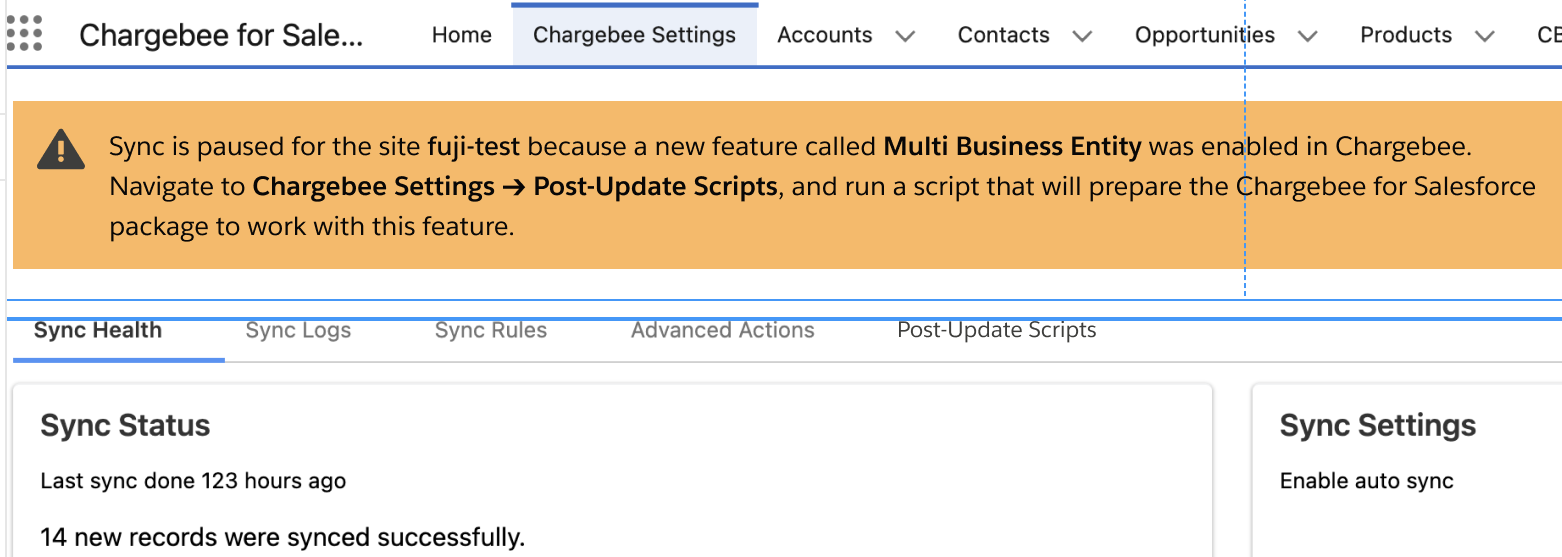
Go to the Chargebee Settings screen > Post-Update Scripts tab
Click the Run button associated with the site where Multi-Entity is enabled. This will initiate the MBE migration from Chargebee to Salesforce.
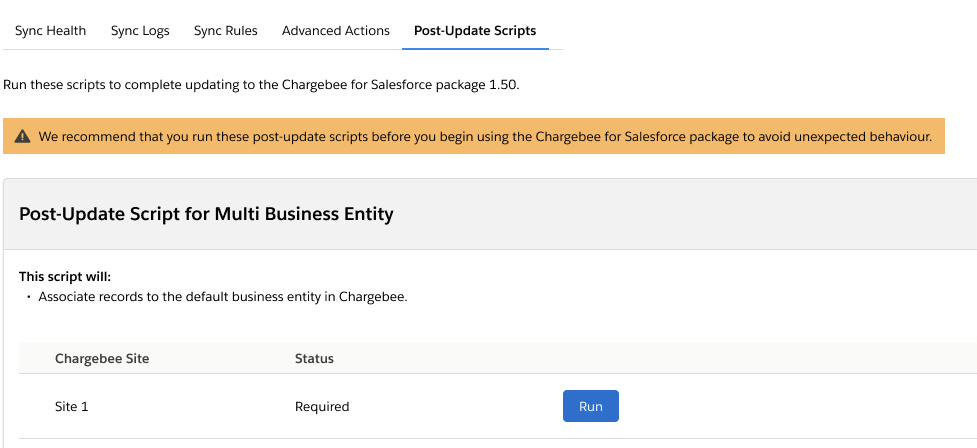
This process of migration will update all business entity lookups in various existing Salesforce objects such as CB_Subscription_c, Accounts, CB_CreditNotes_c, CB_Invoices_c, CB_Quotes_c, Sync_Error_Log__c.
In Chargebee Settings > Post-Update Scripts tab, wait for the status to update to Done. This indicates the migration of the first/default business entity is complete.

Once the migration is completed in Salesforce, the next business entity can be created in Chargebee.
Navigate to Chargebee Settings > Advanced Actions tab to migrate the new business entity created in Step #7 to Salesforce.
Click Add/Remove Domain option on the left navigation. It will show Connect Business Entity > Connect a business entity in Chargebee to Salesforce.
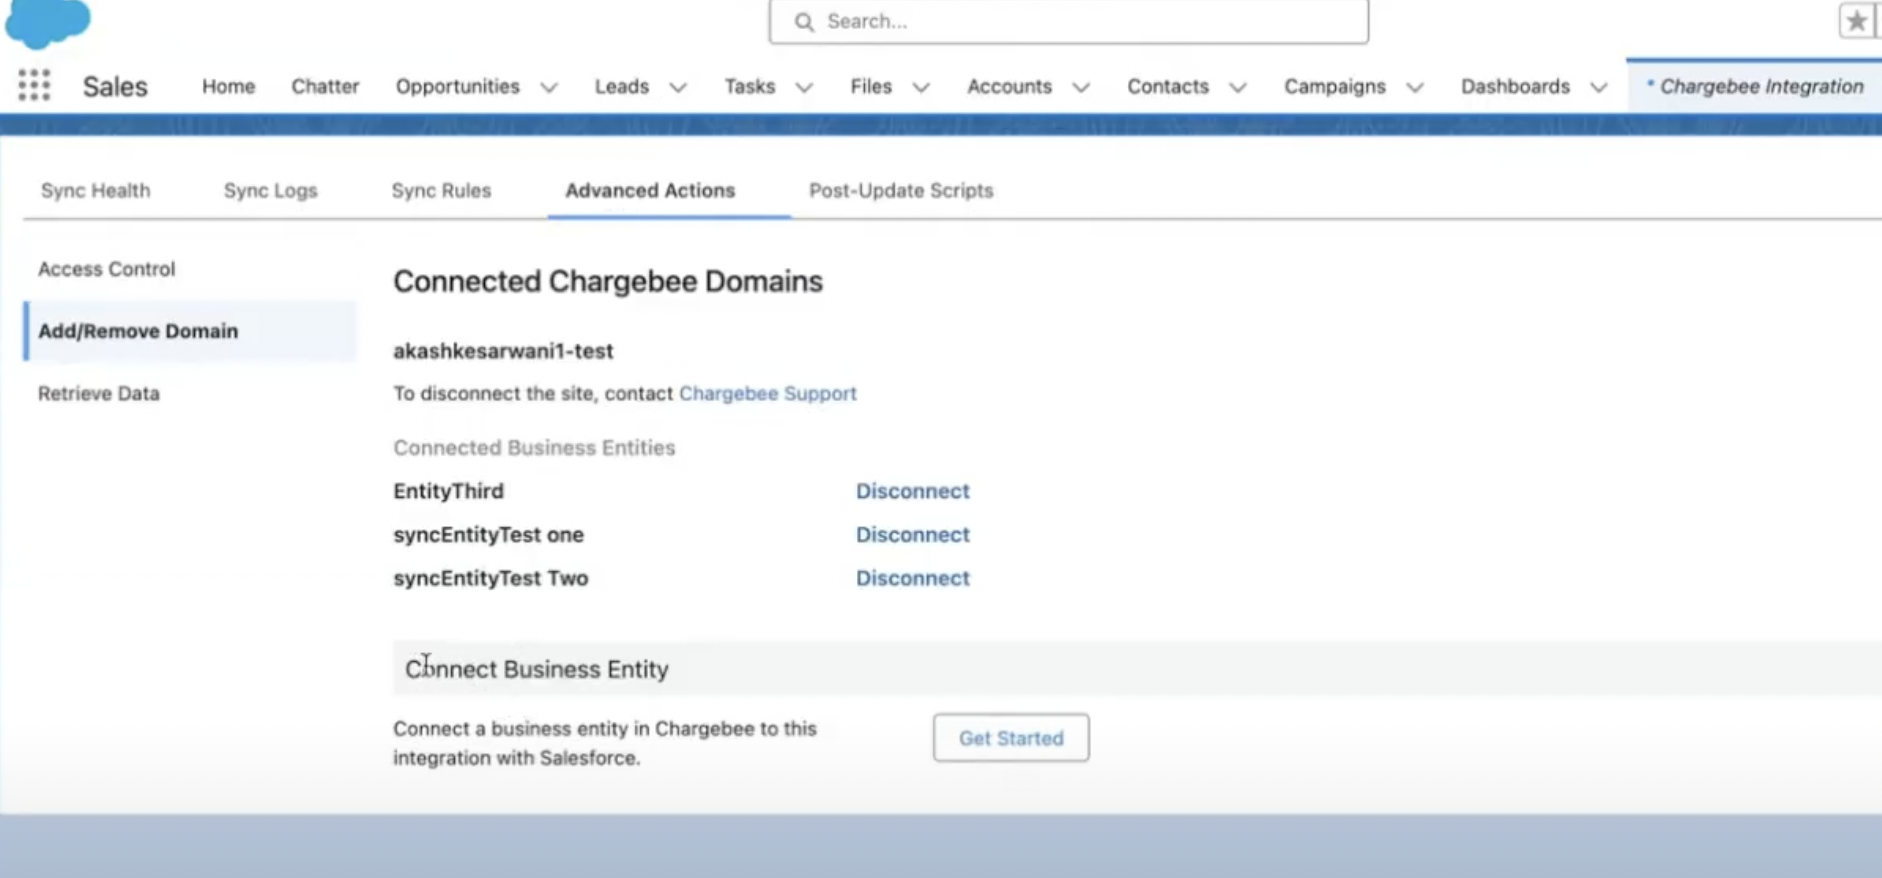
Next, click the Get Started button.

It will list all Business Entities created in Chargebee and not integrated into the Salesforce organization. Select the Business Entity in Chargebee that needs to be synced to Salesforce and click Proceed.
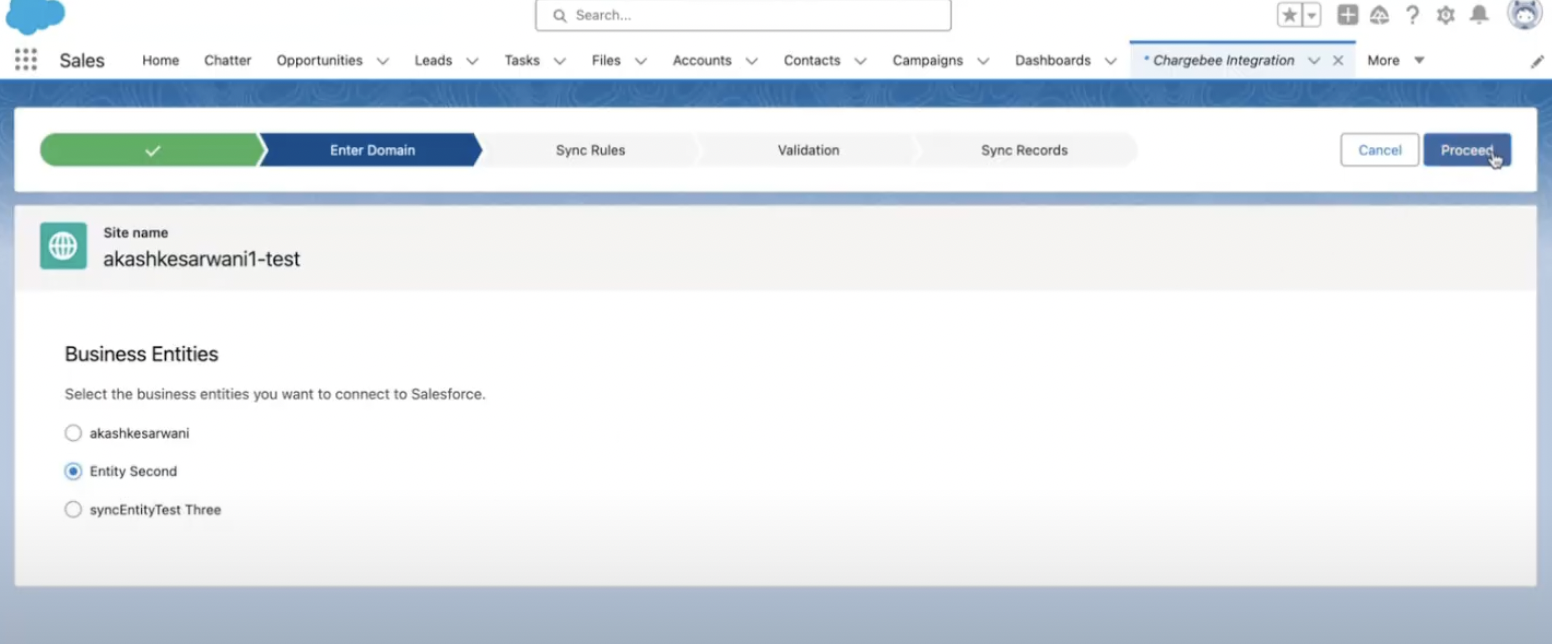
Next few steps will be similar to setting up a new Salesforce Integration with Chargebee.
View the Sync Rules of Chargebee Settings / Integration. Select the appropriate settings and click Save and Proceed for all 5 steps.
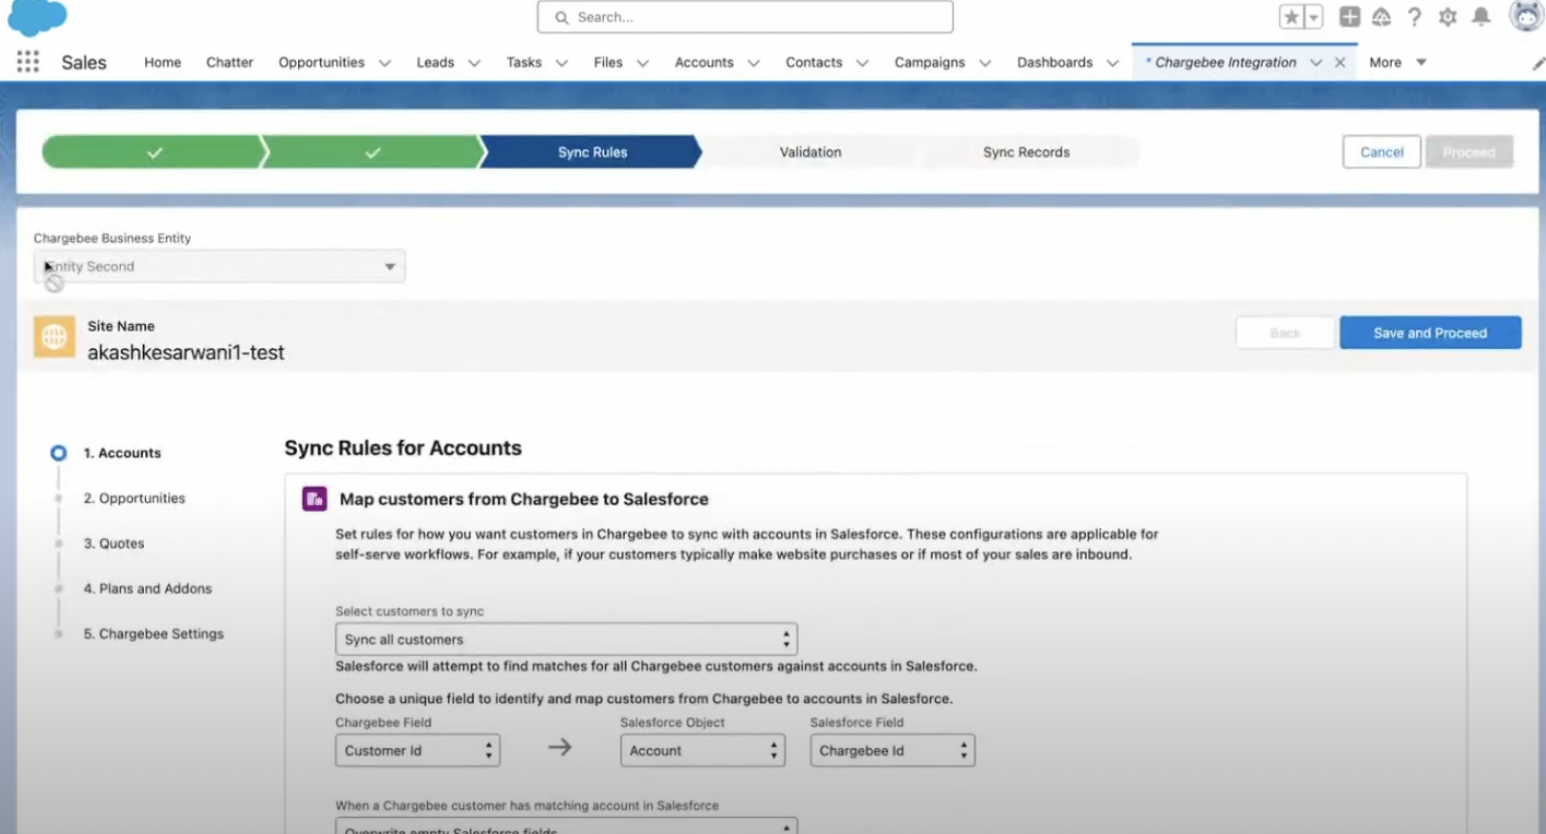
Next, in the Validation step, click Start Pre-sync Validation.
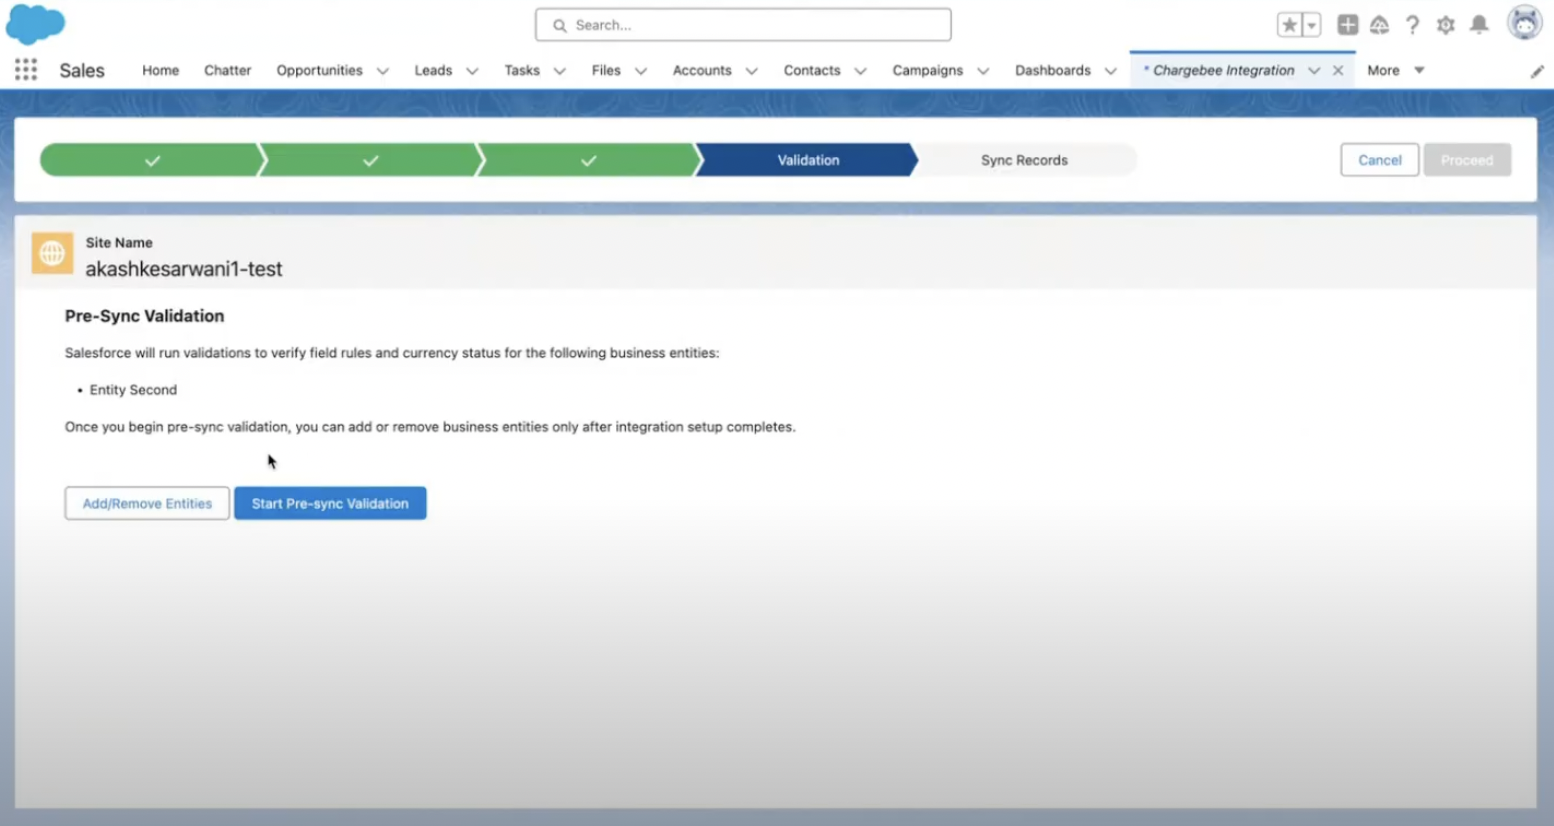
Once the Pre-Sync Validation is complete, click Proceed.
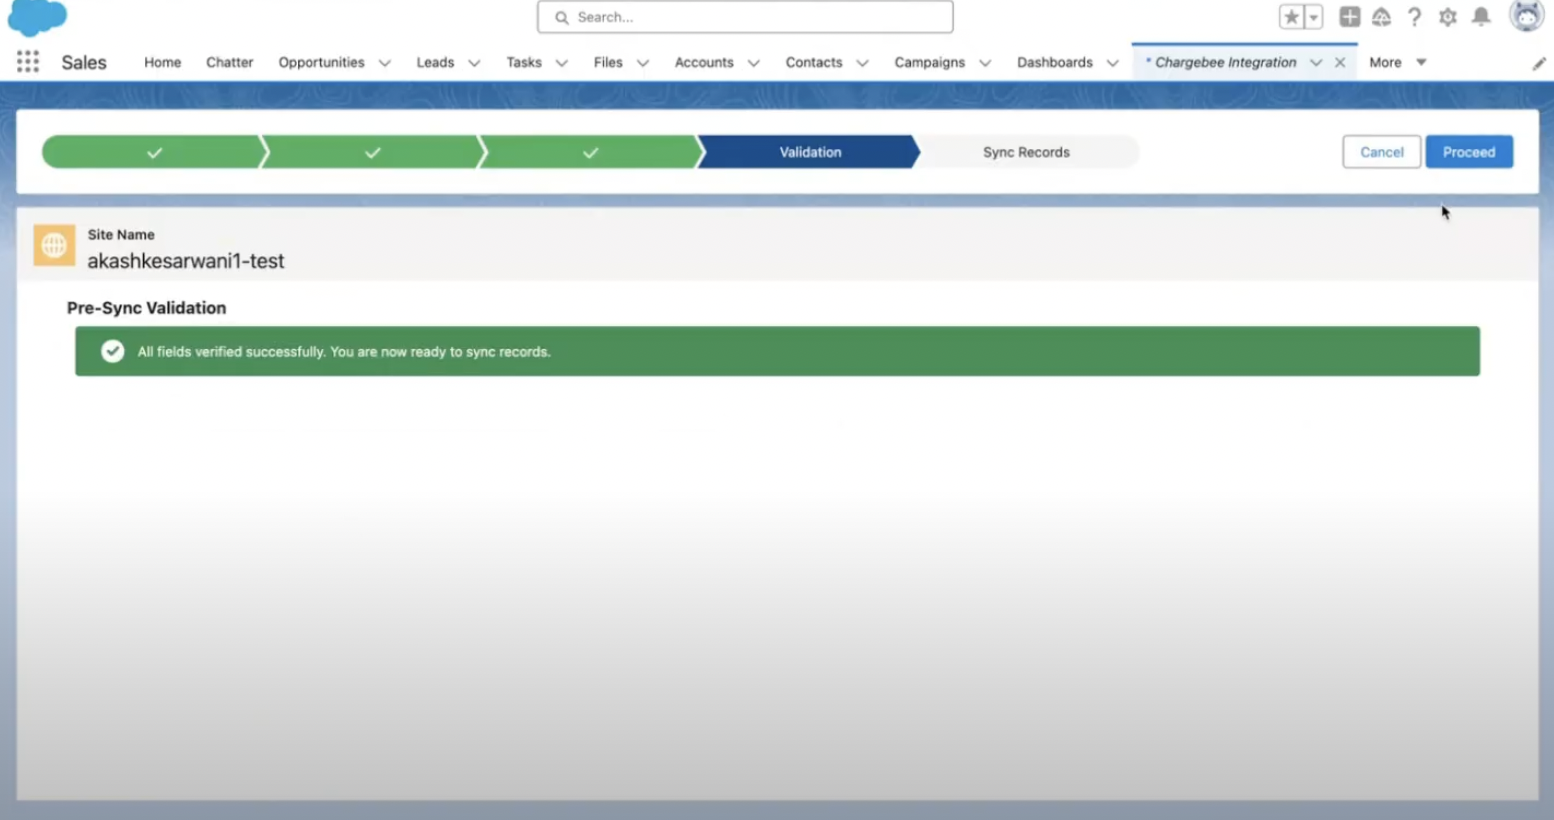
Next, it will initiate the Initial Sync and display a message Initial Sync is in progress.

On completion, it shows a success message. Click Proceed.

Click Start Full Sync to initiate a complete sync.

Click Done, while it runs in the background.
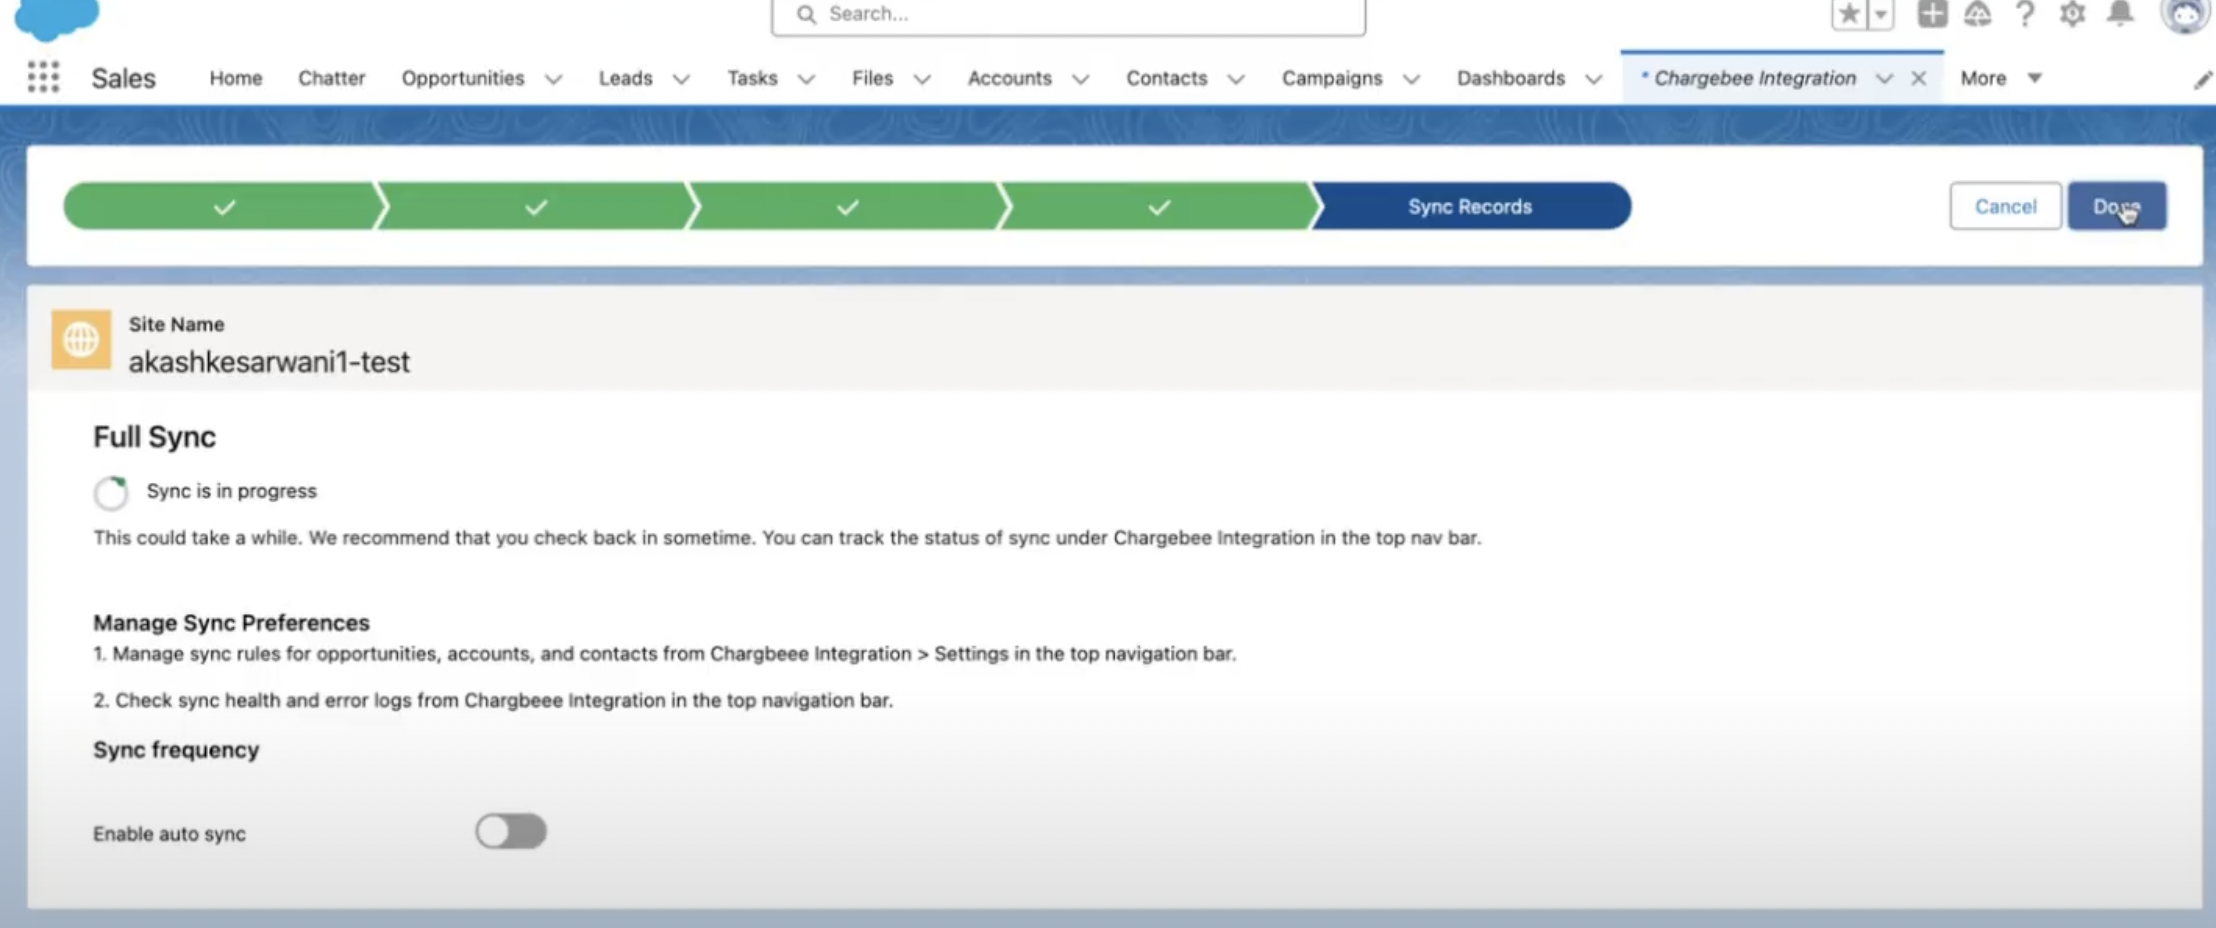
It redirects to the Dashboard > Sync Overview, upon selecting the latest business entity, it shows various syncs that have completed or are in-progress.
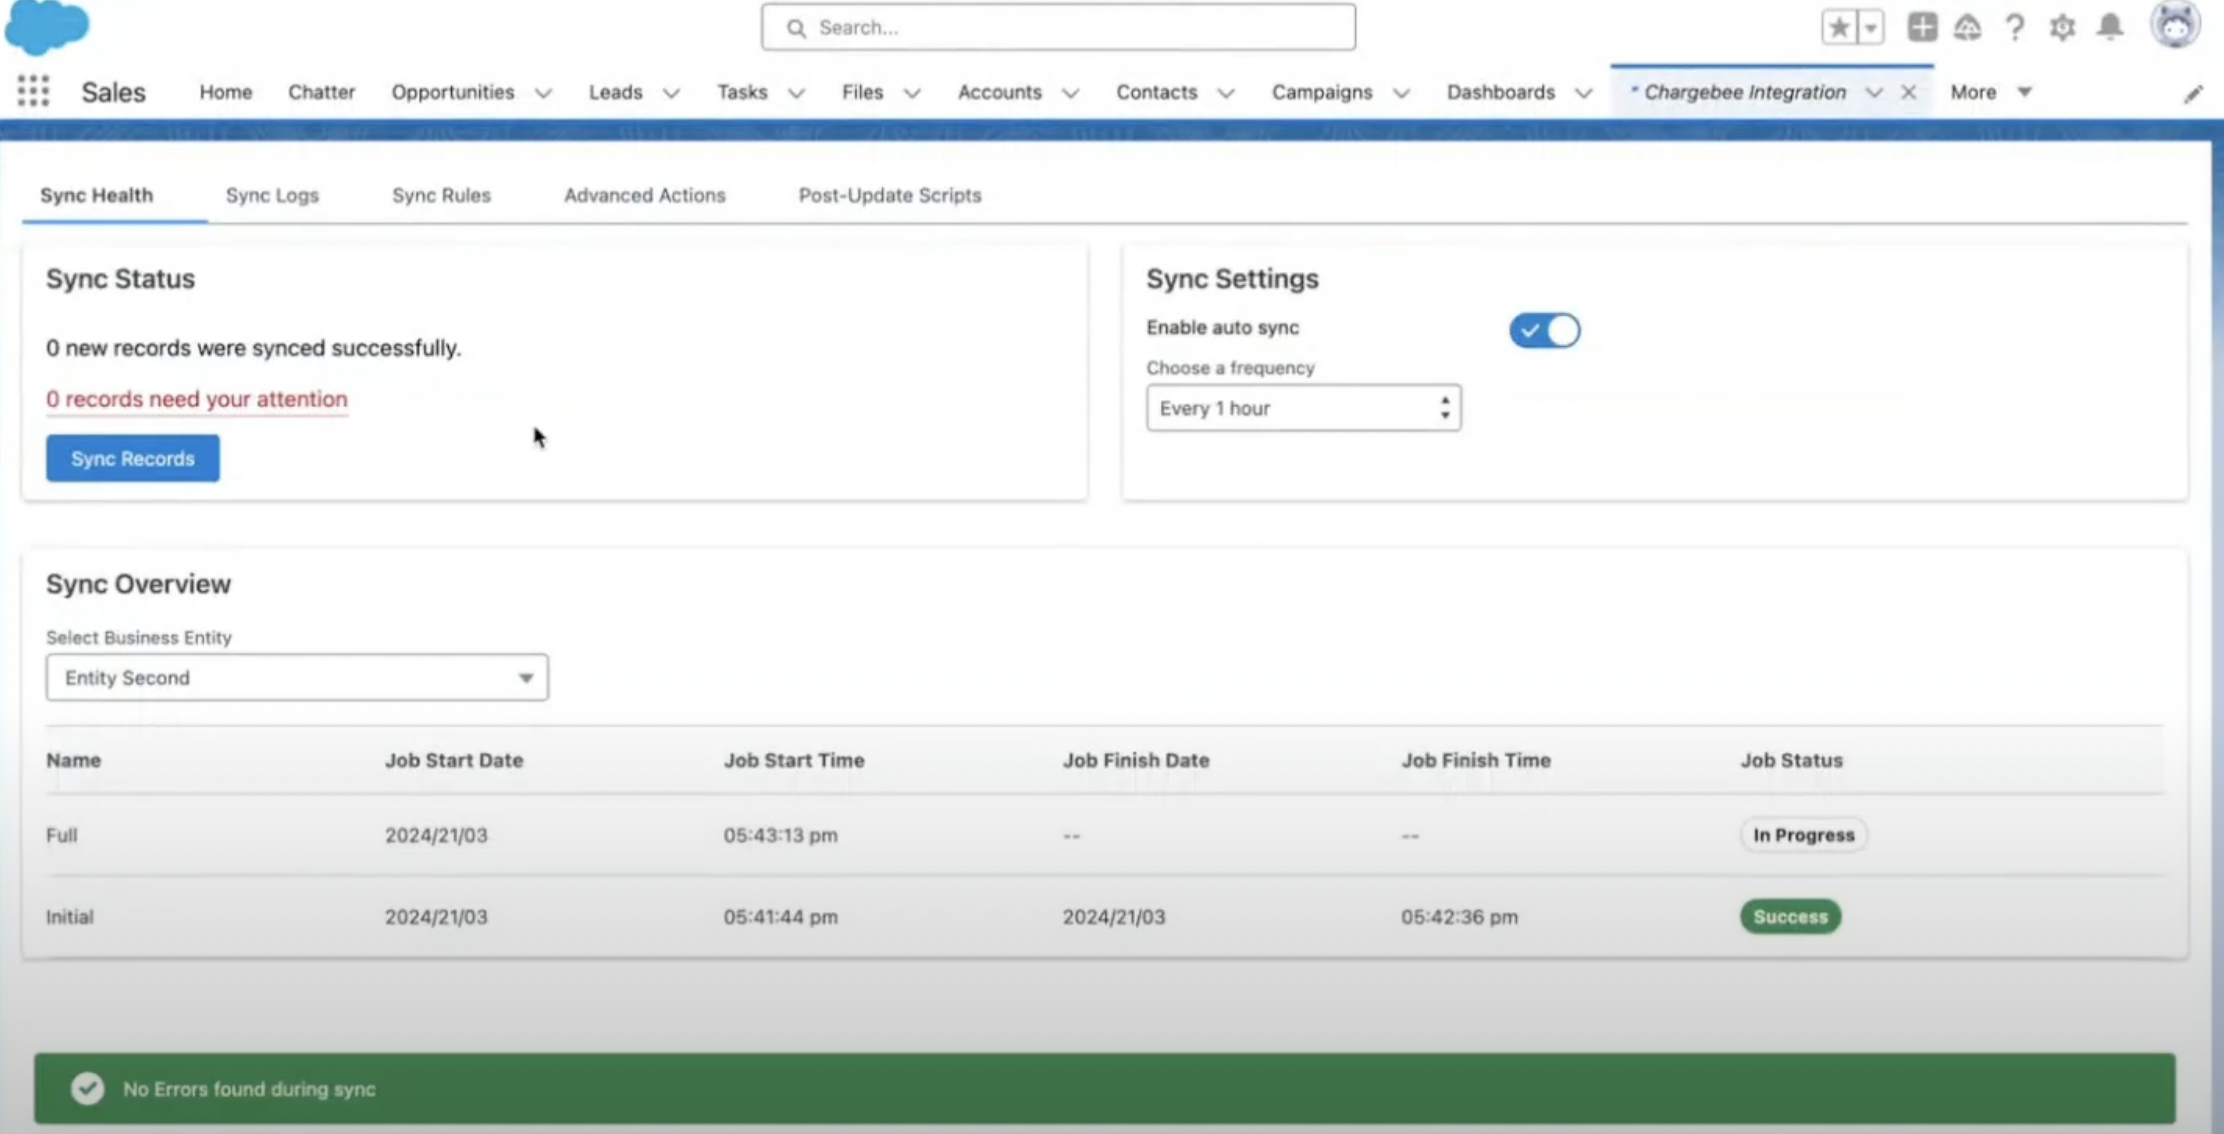
Once the sync is completed, this concludes syncing of the next business entity.
Repeat steps 7 to 20 for every new business entity that needs to be created / connected and migrated to Salesforce.