Docs
Zendesk is a cloud based customer support application which helps in tracking and managing customer support tickets, enabling the support teams to resolve customer issues effectively. Chargebee's plugin for Zendesk displays subscription information right next to the support ticket. It boosts the productivity of your customer support teams by eliminating the need to toggle between browser tabs in search of the customer's subscription information.
Learn More about the plugin .
Step 1: Sign up with Zendesk, if you don't already have an account.
Step 2: Navigate to Apps > Go to Marketplace, or navigate to Zendesk Marketplace
Step 3: click Install.
Step 4: Choose your Zendesk account to install the Chargebee plugin.
This will display the account details.
Attention Firefox Users:
Please be aware that Chargebee currently supports Zendesk on Firefox versions up to 93.0. If you are using a newer version of Firefox, you may experience compatibility issues with Zendesk. We are working on updating our support for the latest version of Firefox. In the meantime, we recommend using an alternative browser, such as Google Chrome, for the best experience with Chargebee and Zendesk.

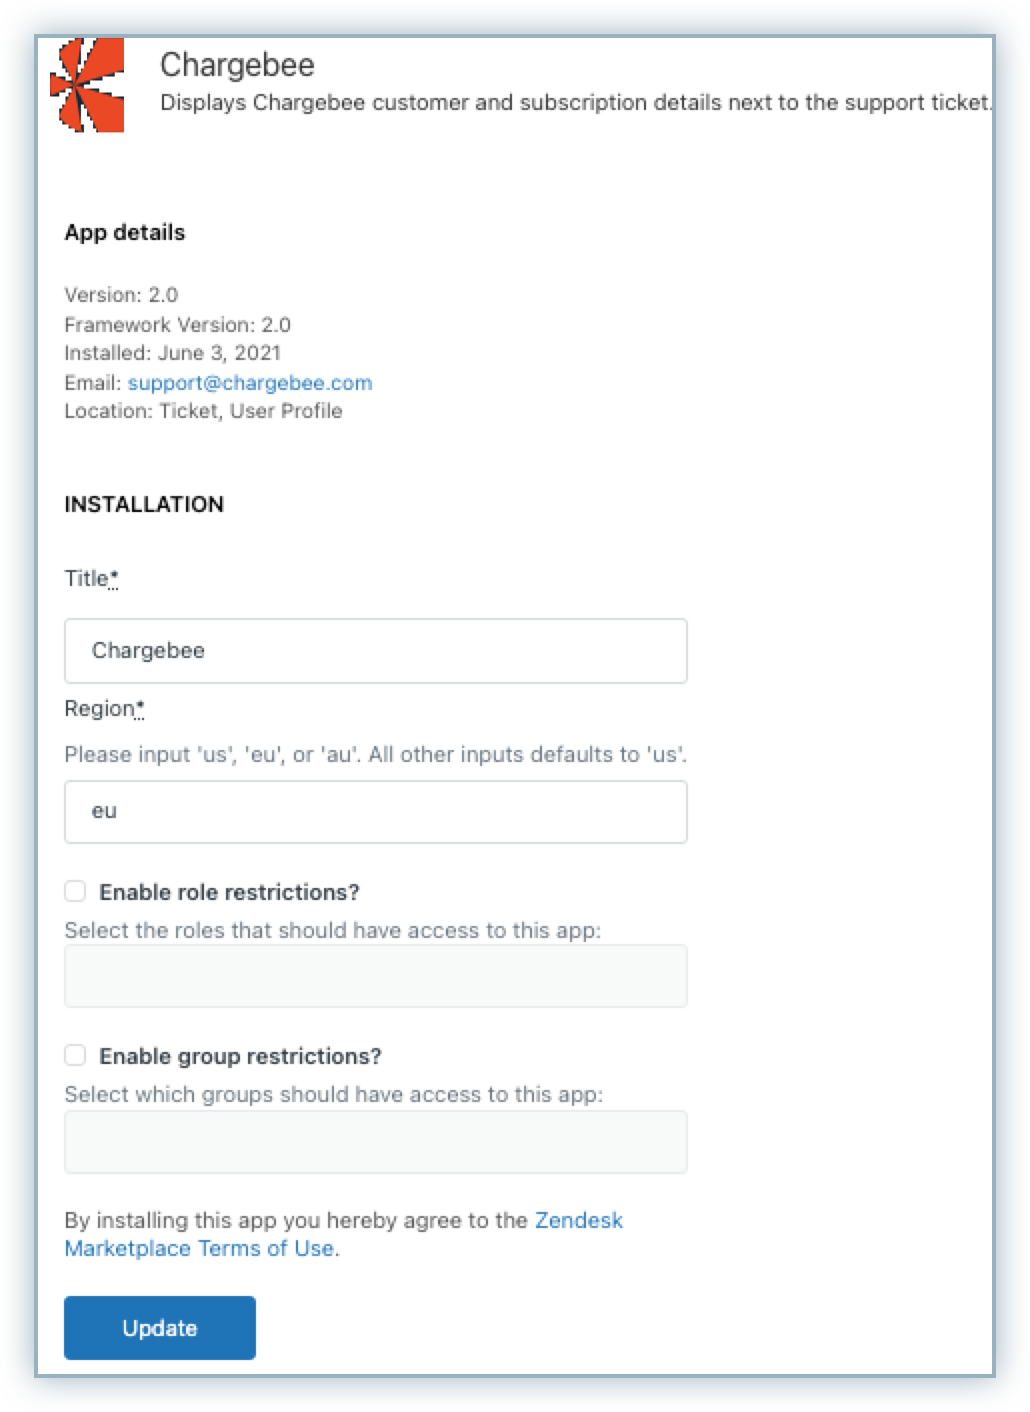
Step 5: Enter the title for your account.
Step 6: In the Region field, add the custom hosting region where the server is installed. For example, enter EU if the hosting region is European union, US for United States, and AU for Australia.
Step 7: Enable Role and Group restrictions based on your requirements and click Update.
Once the Chargebee plugin is installed in Zendesk, the widget appears next to the support ticket. It displays the customer's subscription details, payment methods and the number of payment due invoices.

What happens if a user raises tickets from different email addresses?
If the email used to create the ticket is not found, the domain name (@abc.com) will be used to display the subscription information in the widget.
