Docs
The Payment Schedules feature is currently in Beta. Contact Support to enable this feature on your Chargebee Billing site.
Payment schedules feature in Chargebee Billing empowers you to offer flexible payment options to your customers by breaking down larger purchases into manageable payment schedules over set intervals. You can create and maintain payment schedule schemes that can be used to split the total invoice amount into fixed or flexible parts, and collect them according to the schedule.
Payment schedules benefit you and your customers wherein you can make higher-cost products and services more accessible while building stronger customer relationships through added convenience. By reducing the upfront financial commitment for customers, payment schedules allow you to cater to a broader audience and potentially boost sales, all while ensuring predictable and periodic revenue.
Ensure that you read and understand the following limitations before enabling and using the Payment Schedules feature on your Chargebee Billing site:
The Payment Schedules feature is currently in Beta. Contact Support to enable this feature on your Chargebee Billing site.
To create payment schedules in your Chargebee Billing site, follow these steps:
Navigate to Settings > Configure Chargebee > Billing LogIQ > Payments > Payment Schedules.
Click Payment Schedule Scheme to create a new scheme.
On the Add Payment Schedule Scheme page,
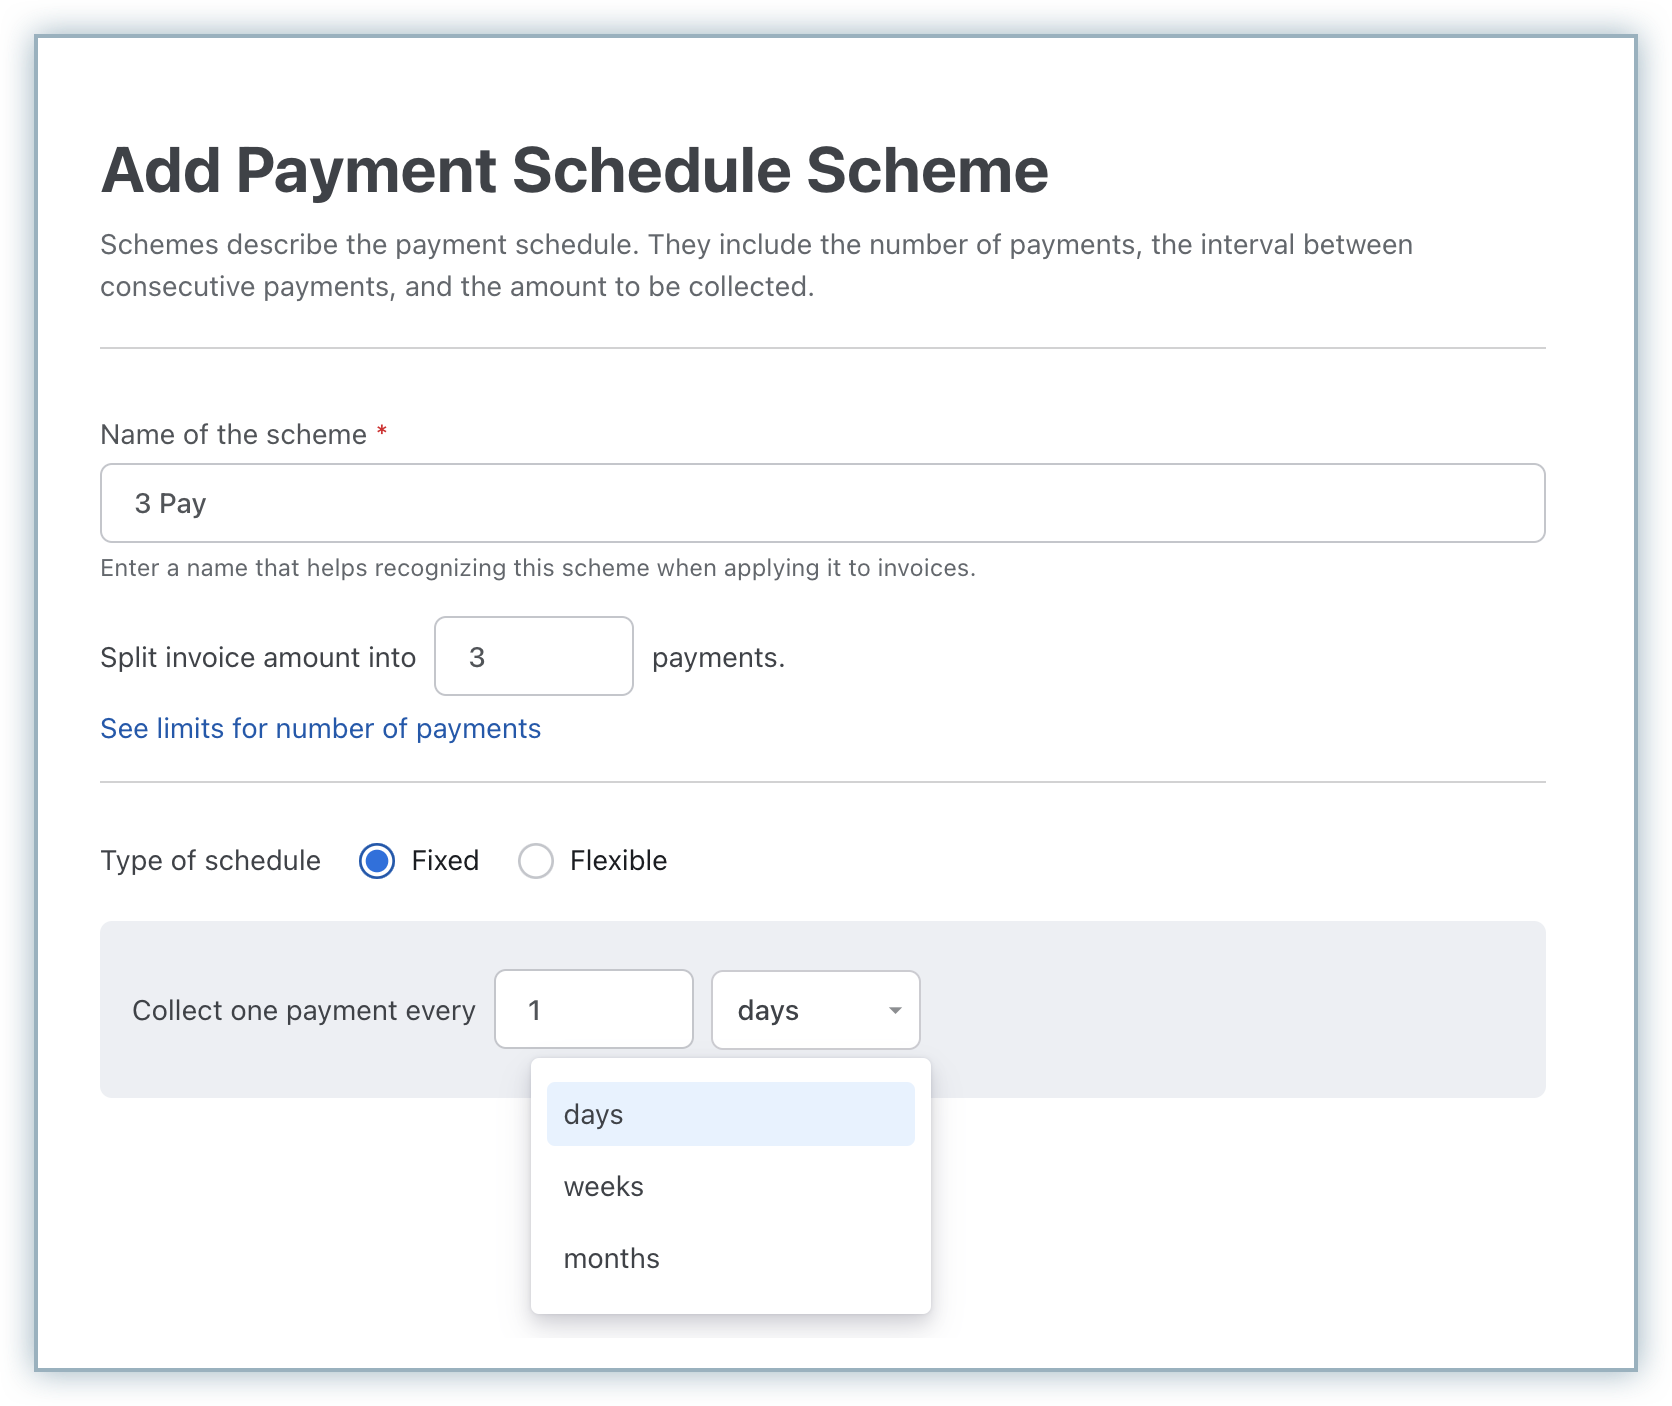
Fixed: Selecting this option allows you to collect the specified number of payments in fixed intervals. You can define the interval period by entering a number and selecting a preferred interval duration - days, weeks, or months from the drop-down. For example, if you've opted to split the invoice into 3 payments, you can define a fixed scheme to collect the payment in 3 schedules running one month apart, one week apart, or 20 days apart.
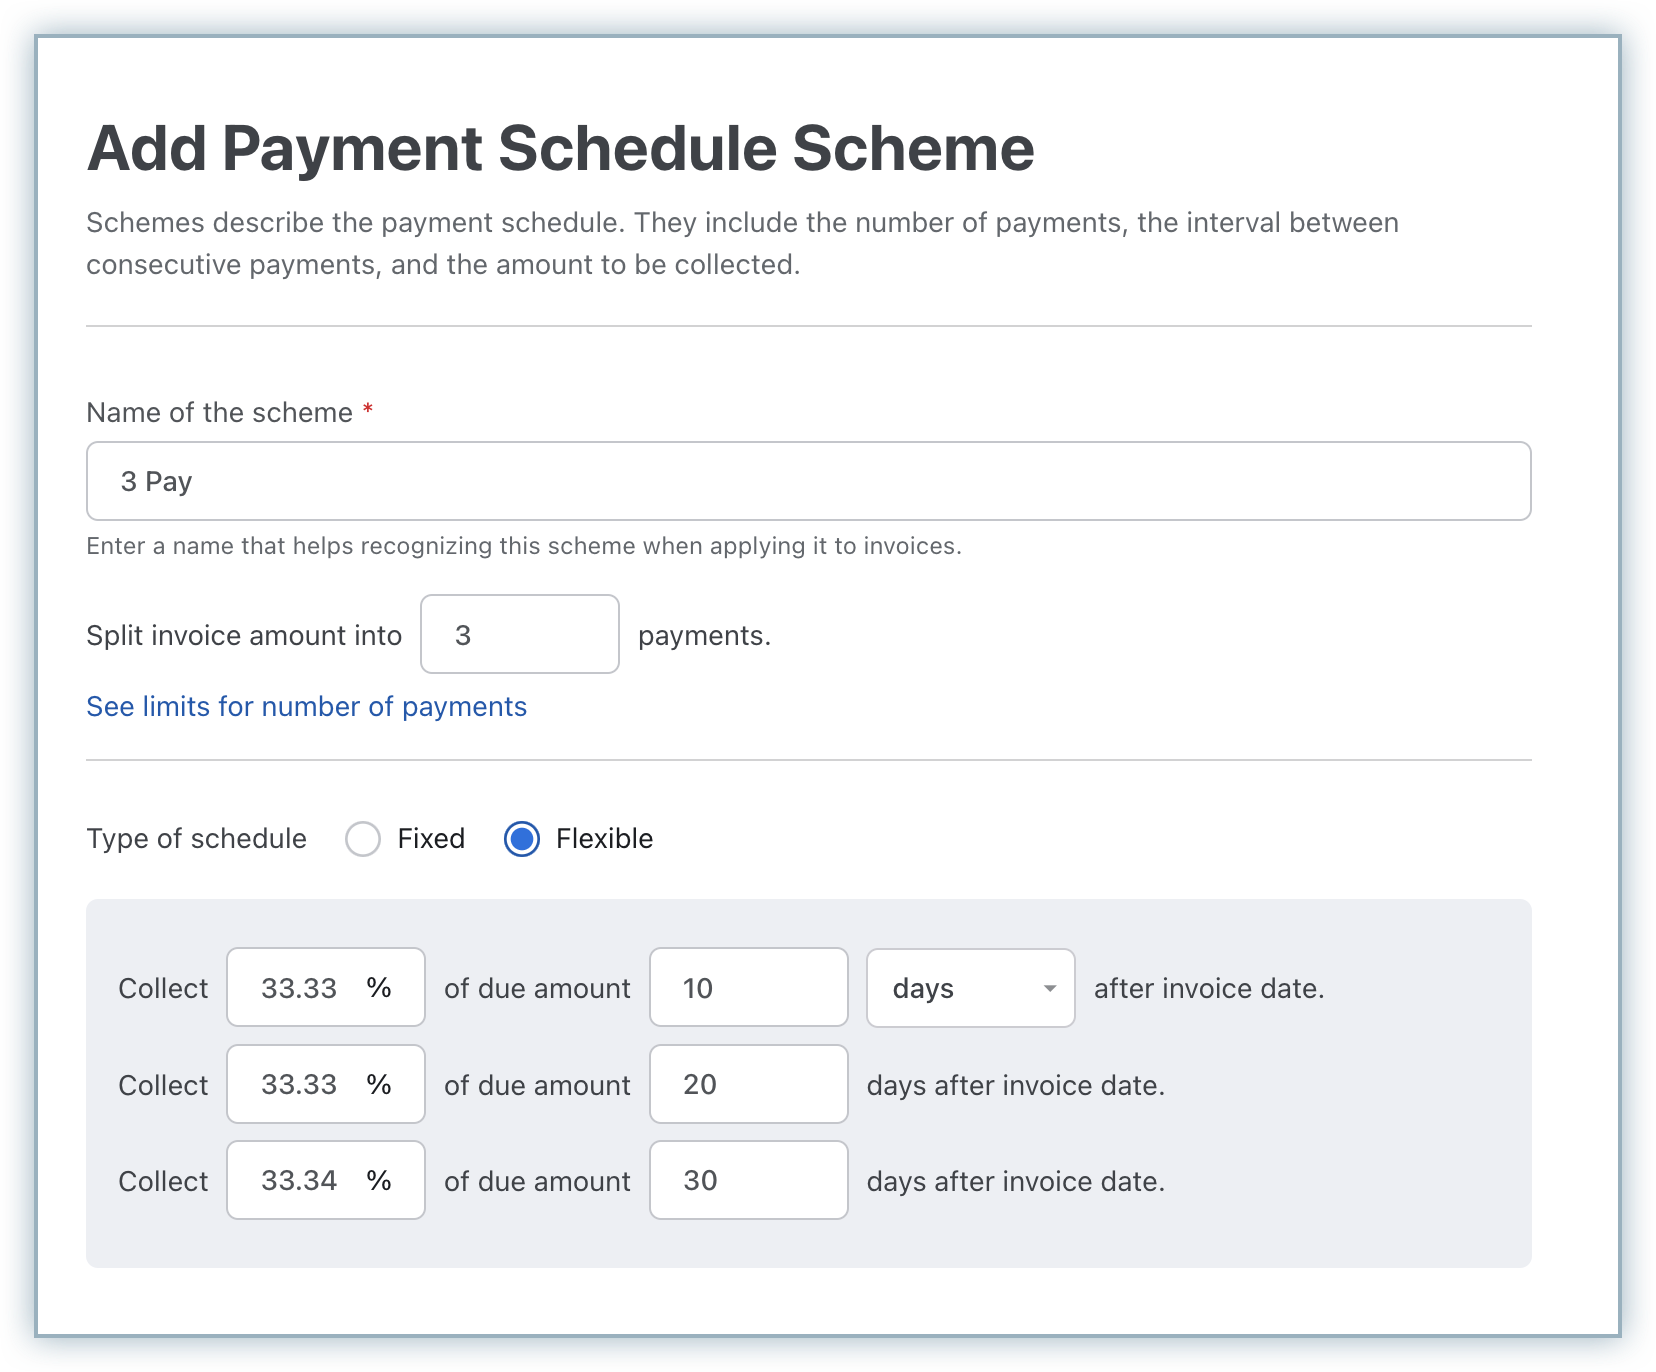
Flexible: Selecting this option allows you to allocate flexible percentages to collect the entire invoice amount based on fixed intervals. For example, you can collect 50% on Jan 1, followed by 40% on Feb 1, and the remaining 10% on Mar 1.
Click Save.
You have successfully created a payment schedule scheme that can be applied to your invoices. You can click Add Scheme to create more schemes based on your business requirements and have them applied to your invoices as necessary.
Once you enable and create payment schedules on your Chargebee Billing site, you may want to configure Dunning to define how you'd like Chargebee to retry payment collection for scheduled installment payments that fail.
To configure dunning for scheduled payments, follow these steps:
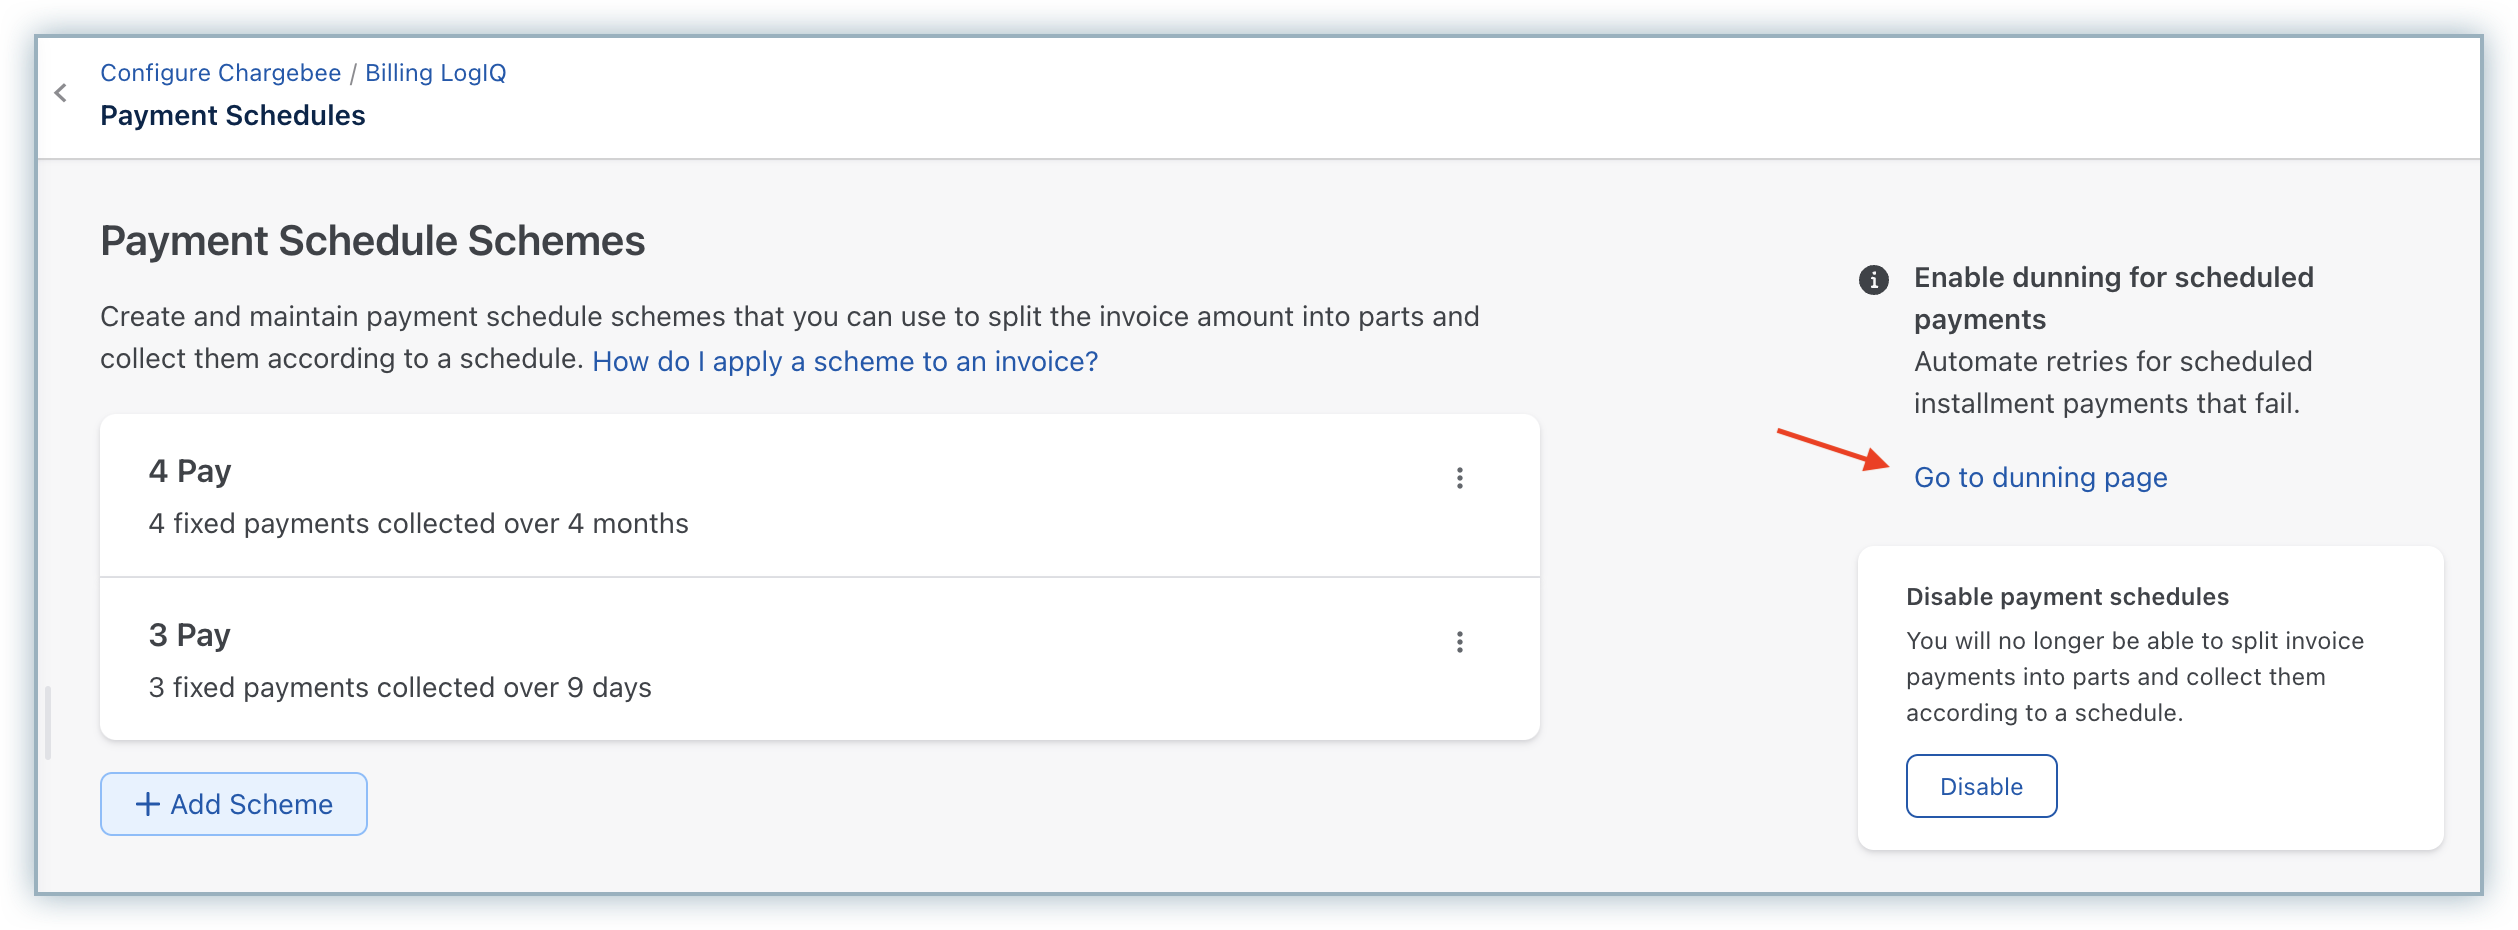
Navigate to the Payment Schedules page and click Go to dunning page. Alternatively, click Settings > Configure Chargebee > Dunning for online/offline payments.
Click the toggle to enable Dunning for scheduled payments.
Click the dropdown and specify a dunning period for each scheduled payment.
Configure further dunning settings for scheduled payments by referring to this section, and click Apply to save your changes.
Once dunning rules are configured for scheduled payments, the dunning settings are applied to invoices to retry payment collection for scheduled payments that fail. You can manage the dunning operations for these invoices from the respective invoice details page.
Once payment schedule schemes are created, you can apply them on Payment Due/Posted invoices and even set schedule level dunning operations.
To apply payment schedule schemes to your invoice, follow these steps:
Navigate to the payment due or posted invoice for which you're applying the payment schedule scheme.
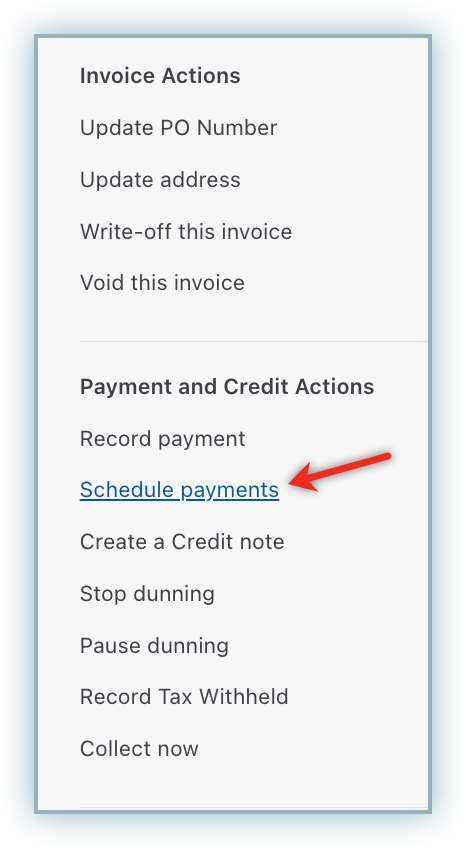
Click Schedule Payments under Payments and Credit Actions.
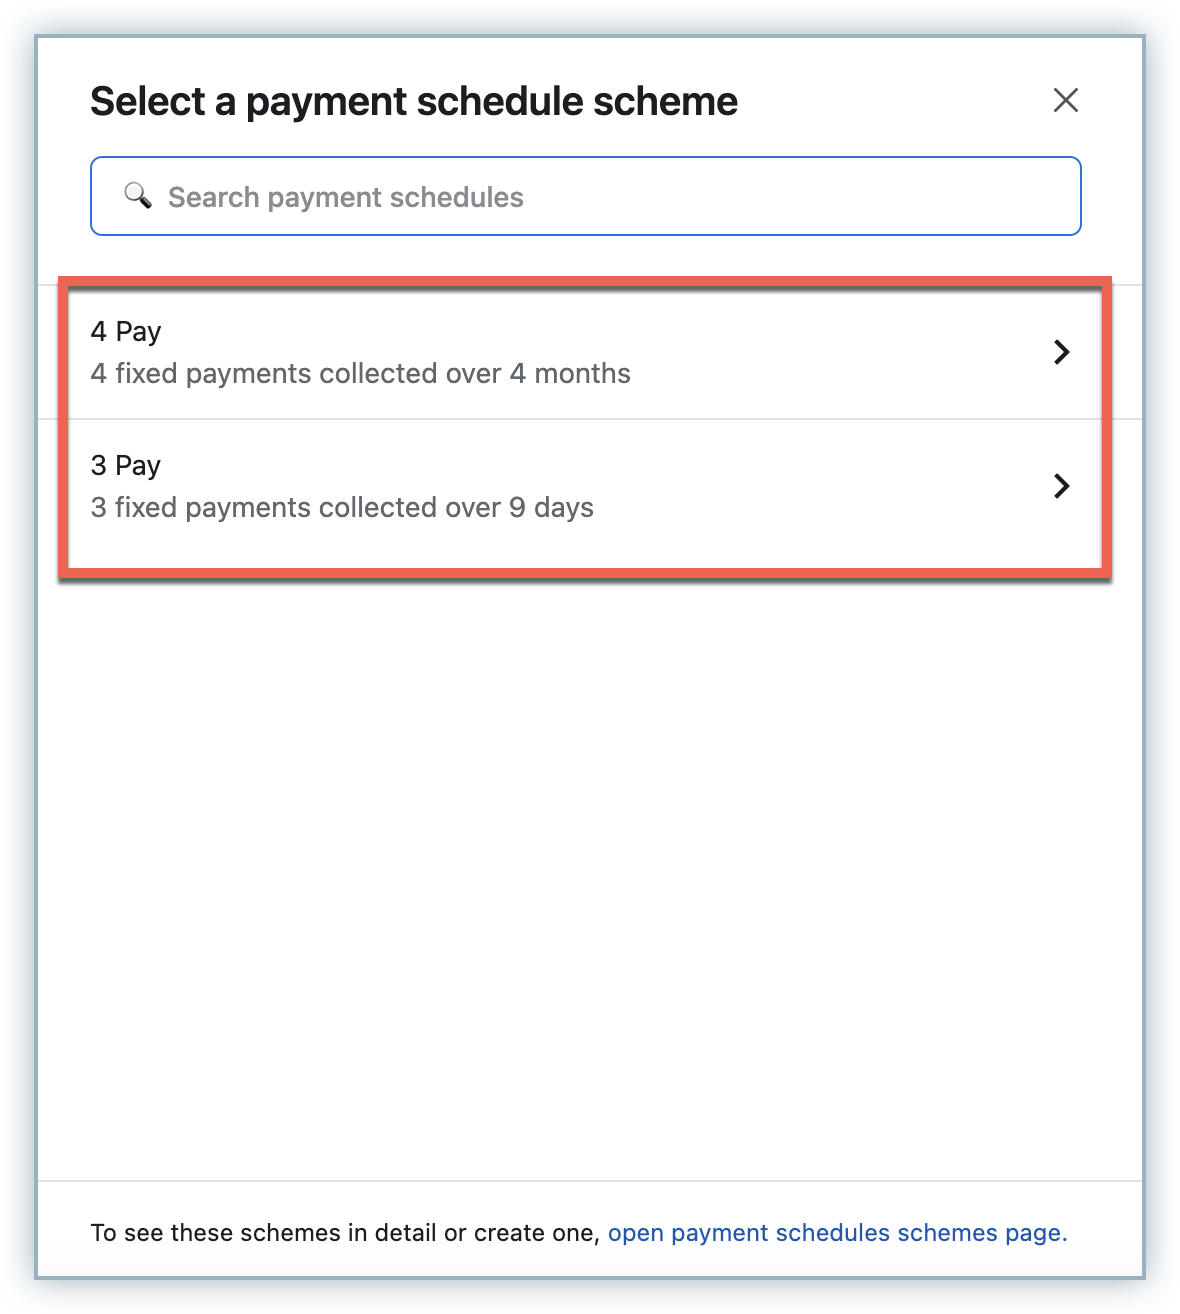
On the Select a payment schedule scheme pop-up, all the available schemes are listed. Select a preferred scheme to be applied for this customer's invoice. The total payment schedule gets displayed based on the scheme that you select.
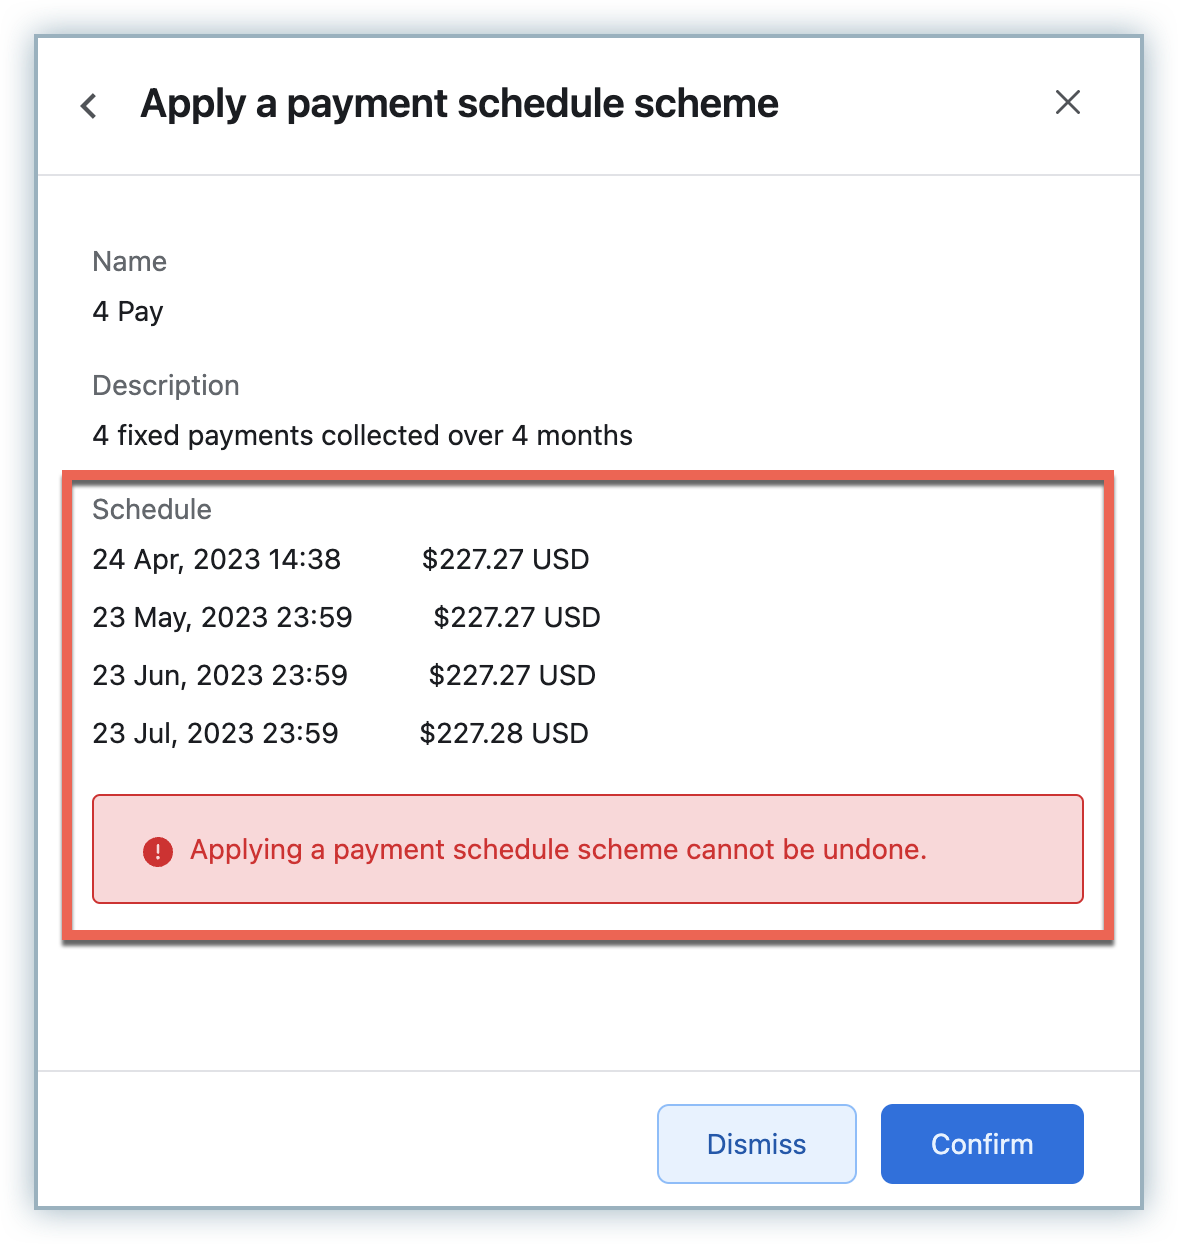
Click Confirm.
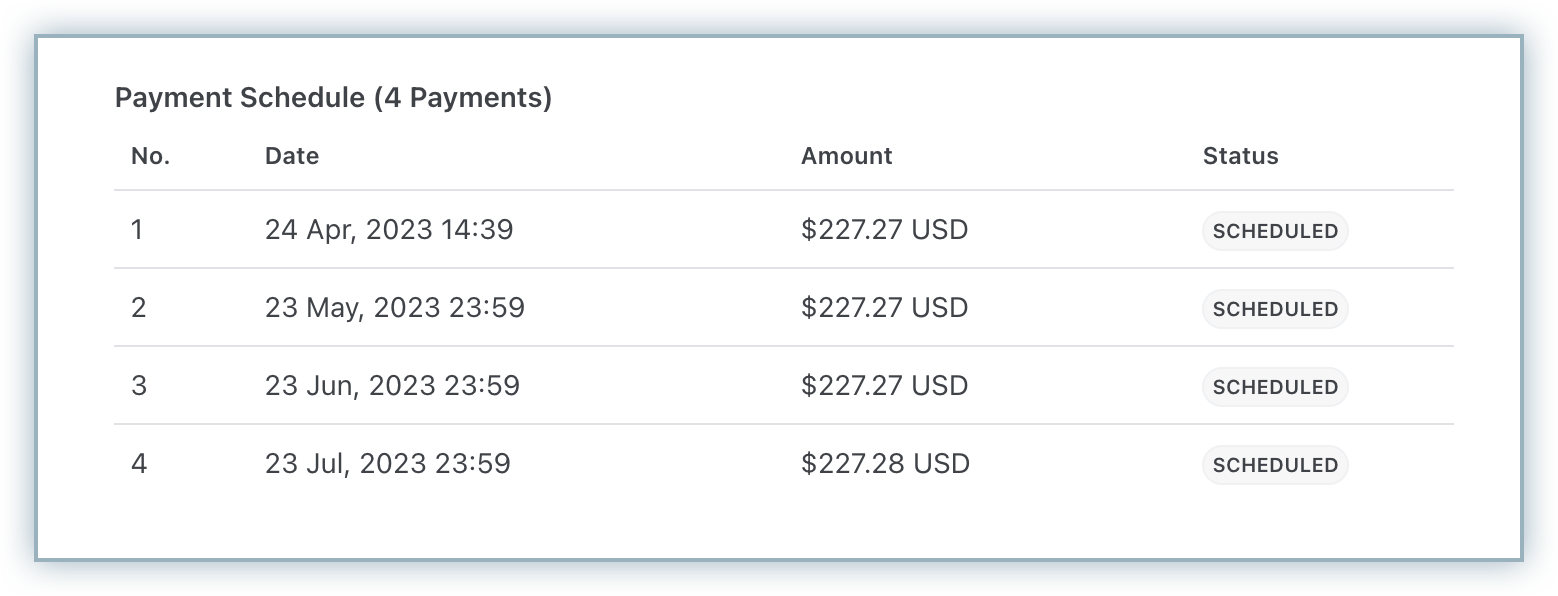
Once the scheme is applied on the invoice, the invoice details page displays the payment schedule for your reference.
To diable payment schedules feature on your Chargebee Billing site, follow these steps:
All the payment schedule schemes that were created will automatically be deleted, and you will no longer be able to schedule payments for invoices. However, disabling the feature will not affect any past invoices with scheduled payments. They scheduled payments will be collected as per the schedule, and dunning for failed payments will kick-in as configured.