This feature is a Private Beta Release. Contact support to enable Venmo via Braintree for your Test and Live site.
Venmo is a US-based peer-to-peer (P2P) payment solution that allows users to transfer and receive money easily and quickly via a smartphone application. It is one of the most popular payment methods in the US. With this integration, Braintree allows you to add and configure Venmo as a payment method option. Learn more about Venmo via Braintree integration.
You can integrate Venmo via Braintree using the following:
While configuring Venmo via Braintree in Chargebee, you will require the Merchant Account ID and Venmo Profile ID from your Braintree account to be entered in Chargebee. Let us see how you can retrieve these IDs:
Merchant Account ID is the ID for the account that you want to use to redirect users while paying using Venmo. Follow these steps:
Login to your Braintree account .
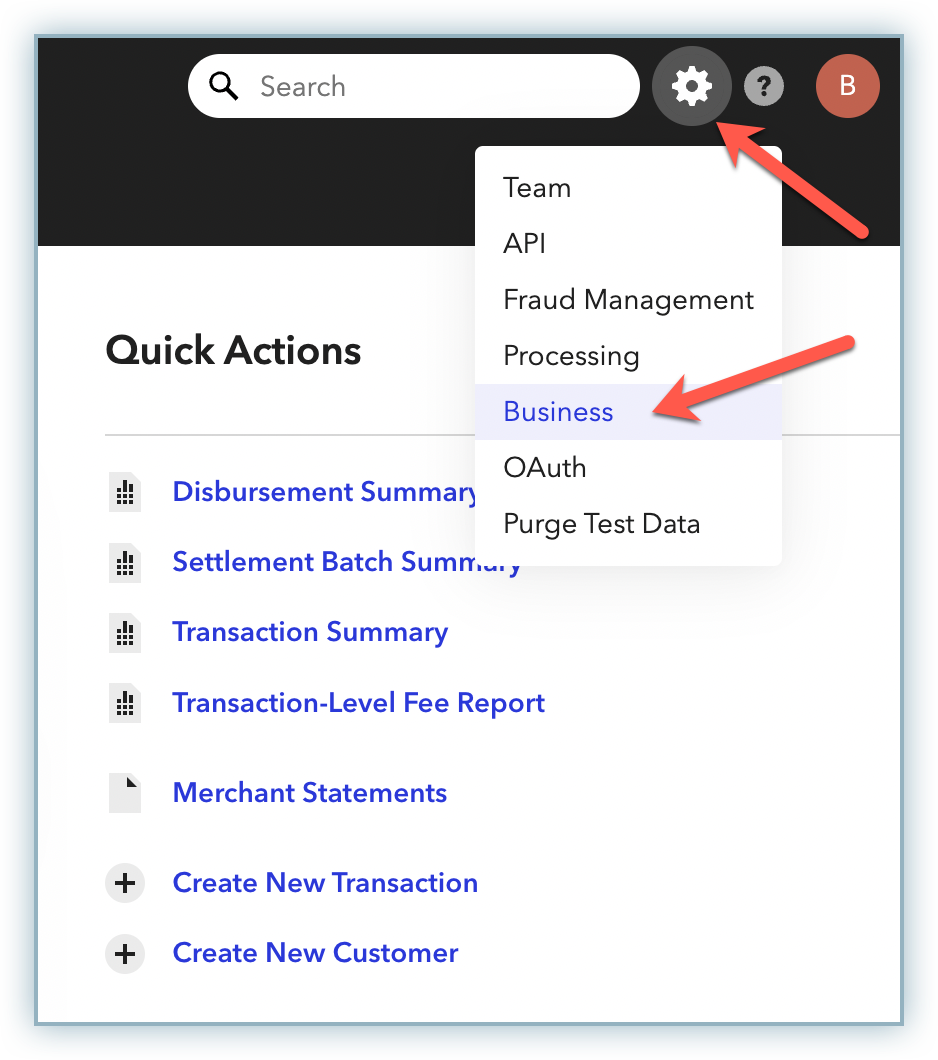
Click the Settings icon on the top-right corner and then click Business.
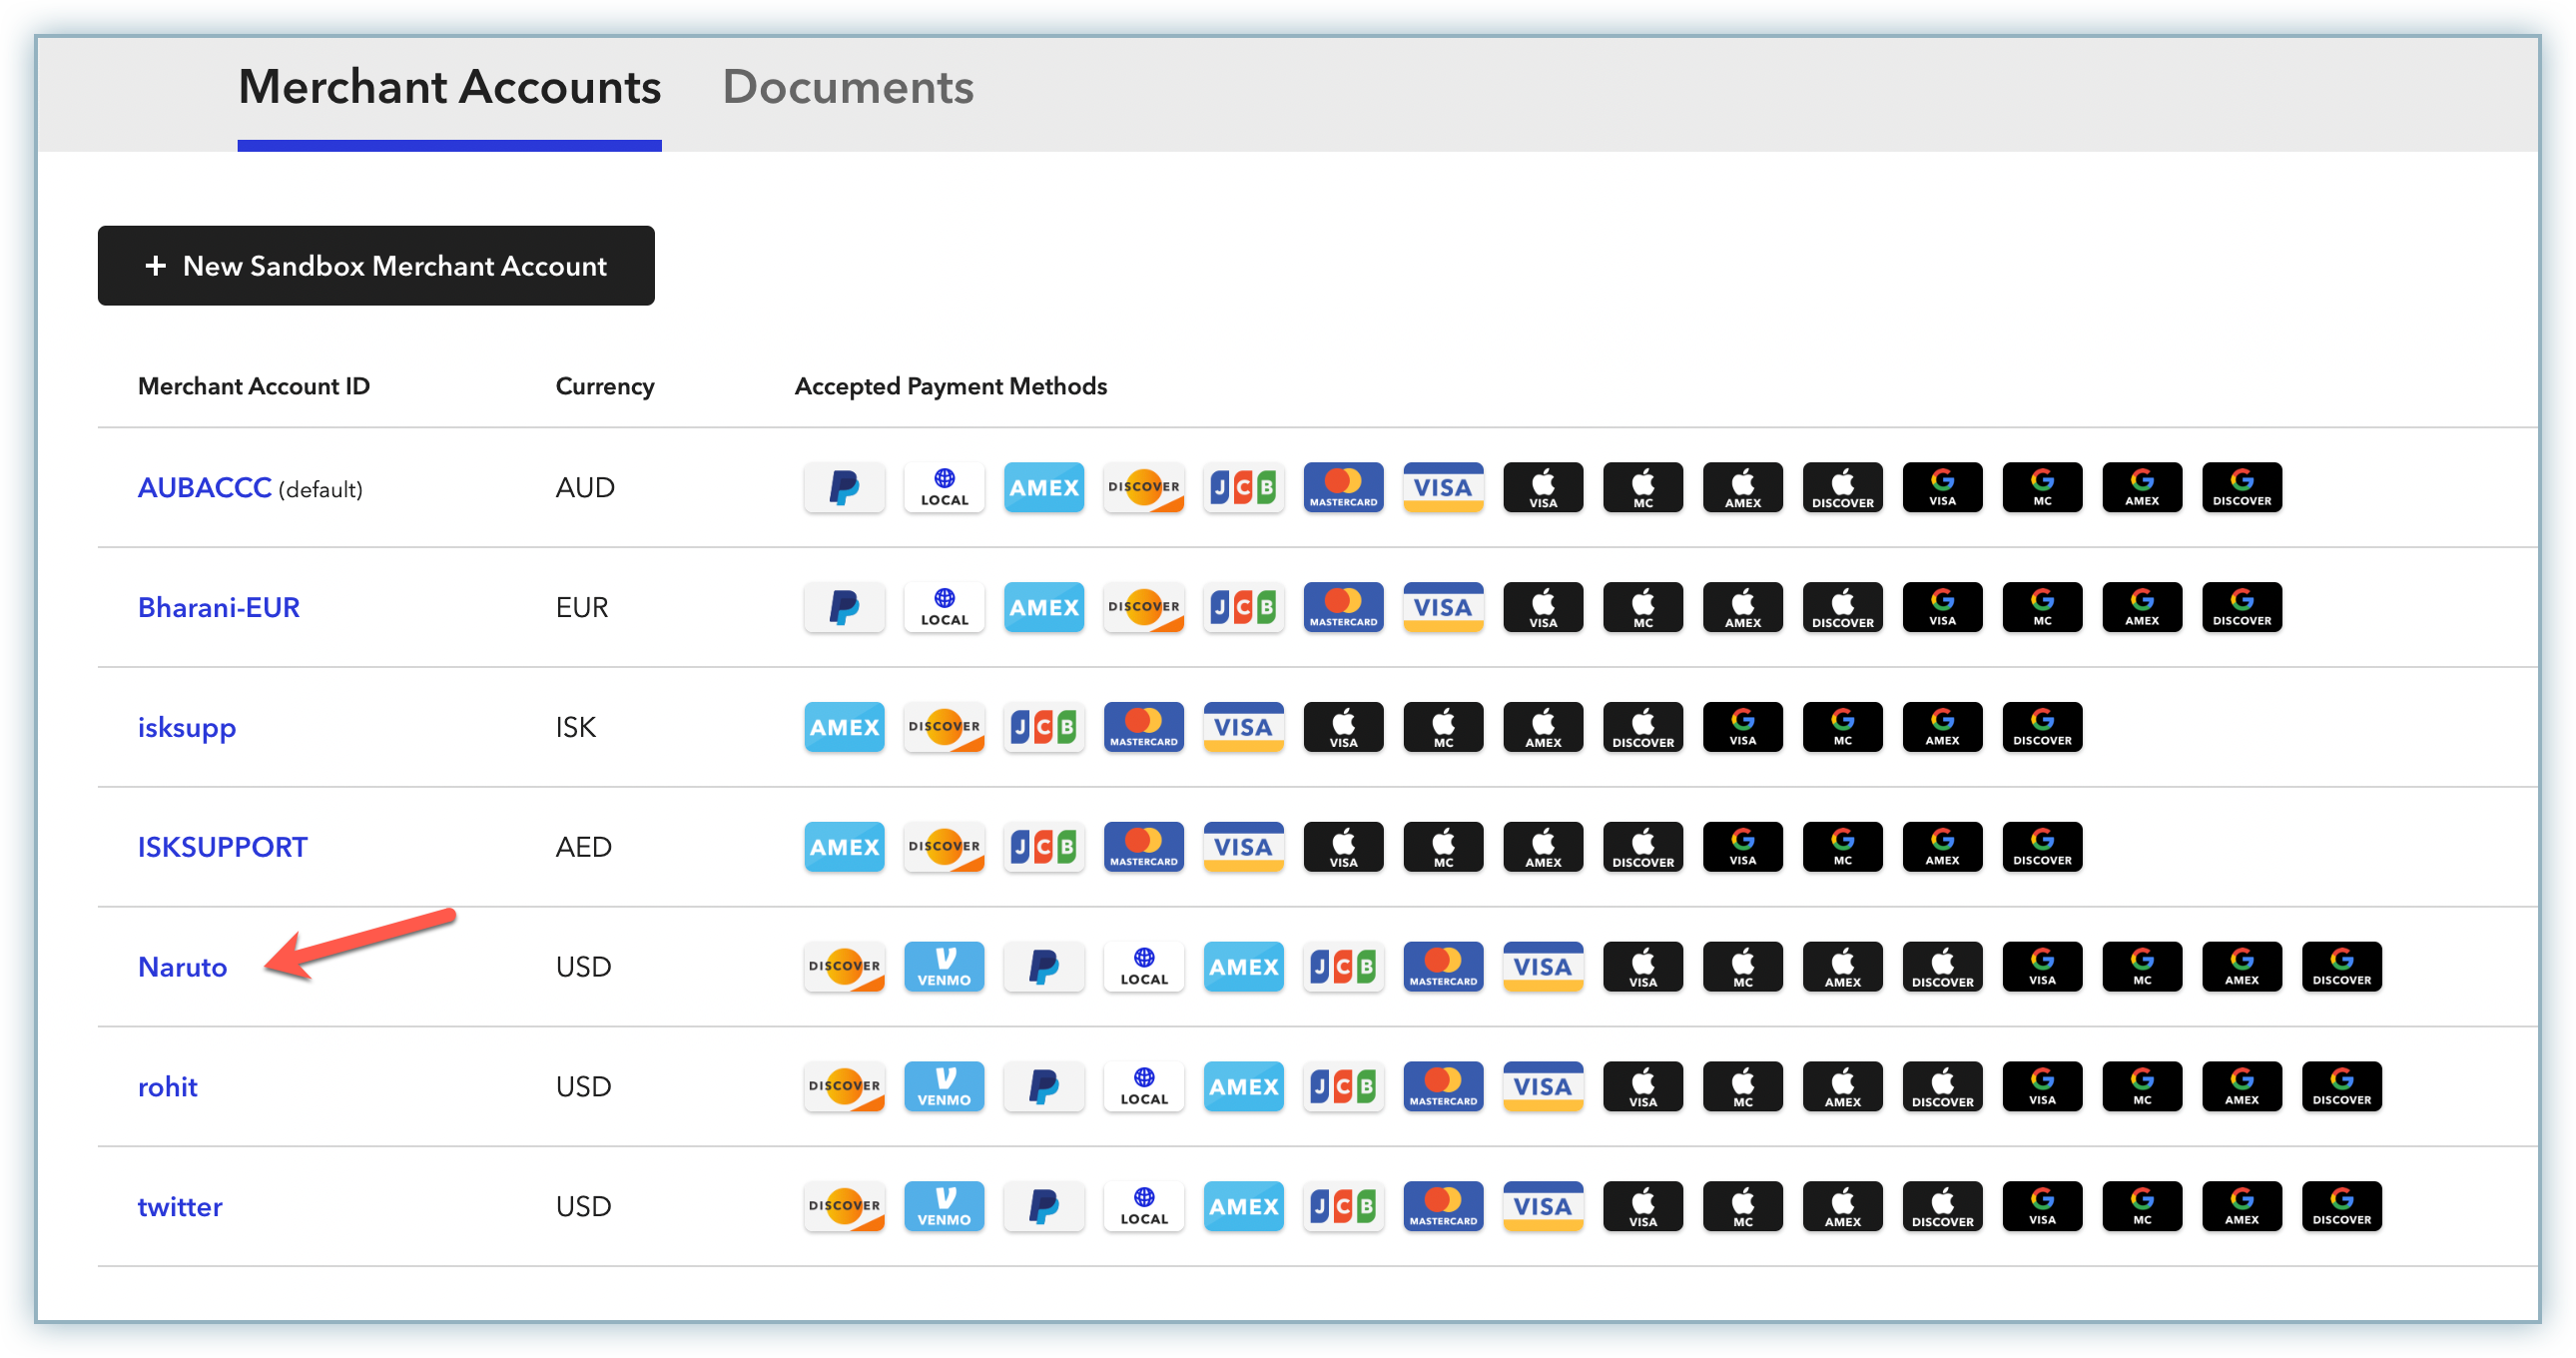
Scroll down to the Merchant Accounts section, copy the desired Merchant Account ID from the first column, and keep it saved for later use.
Follow these steps to retrieve the Venmo Profile ID from your Braintree account:
Login to your Braintree account if not logged in already.
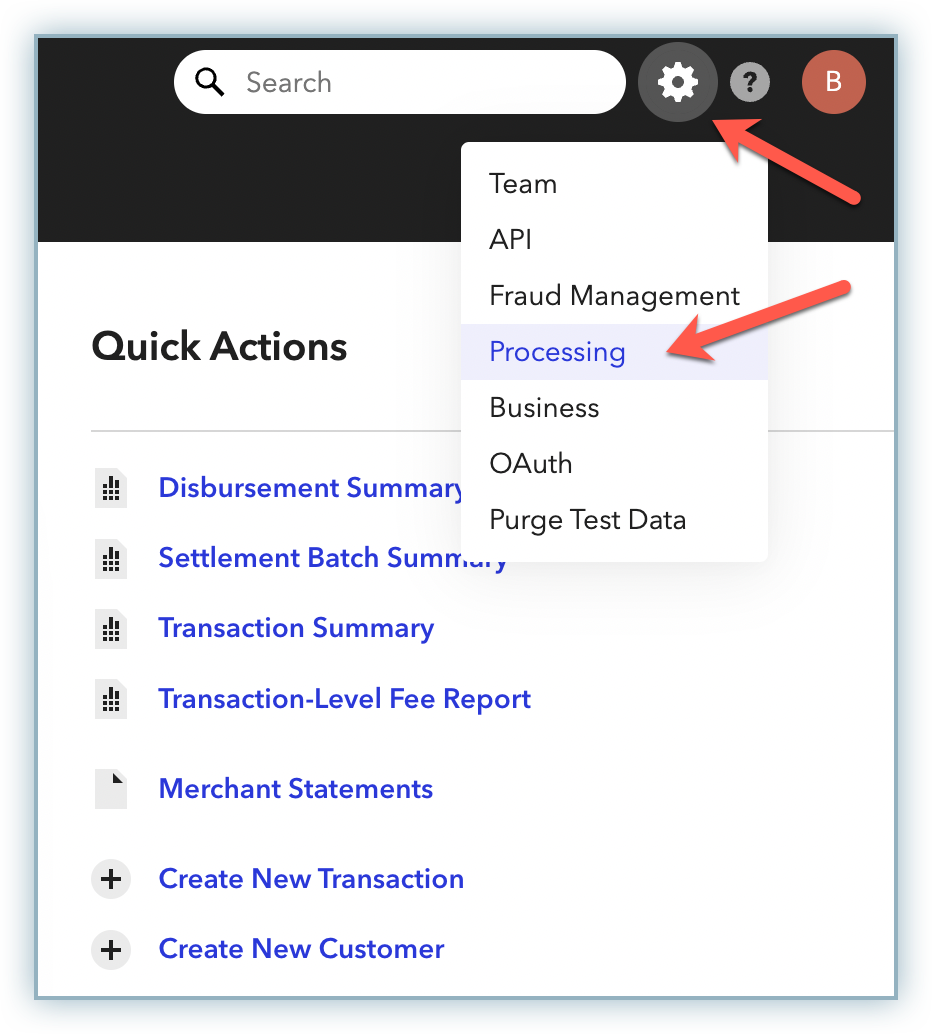
Click the Settings icon on the top-right corner and click Processing.
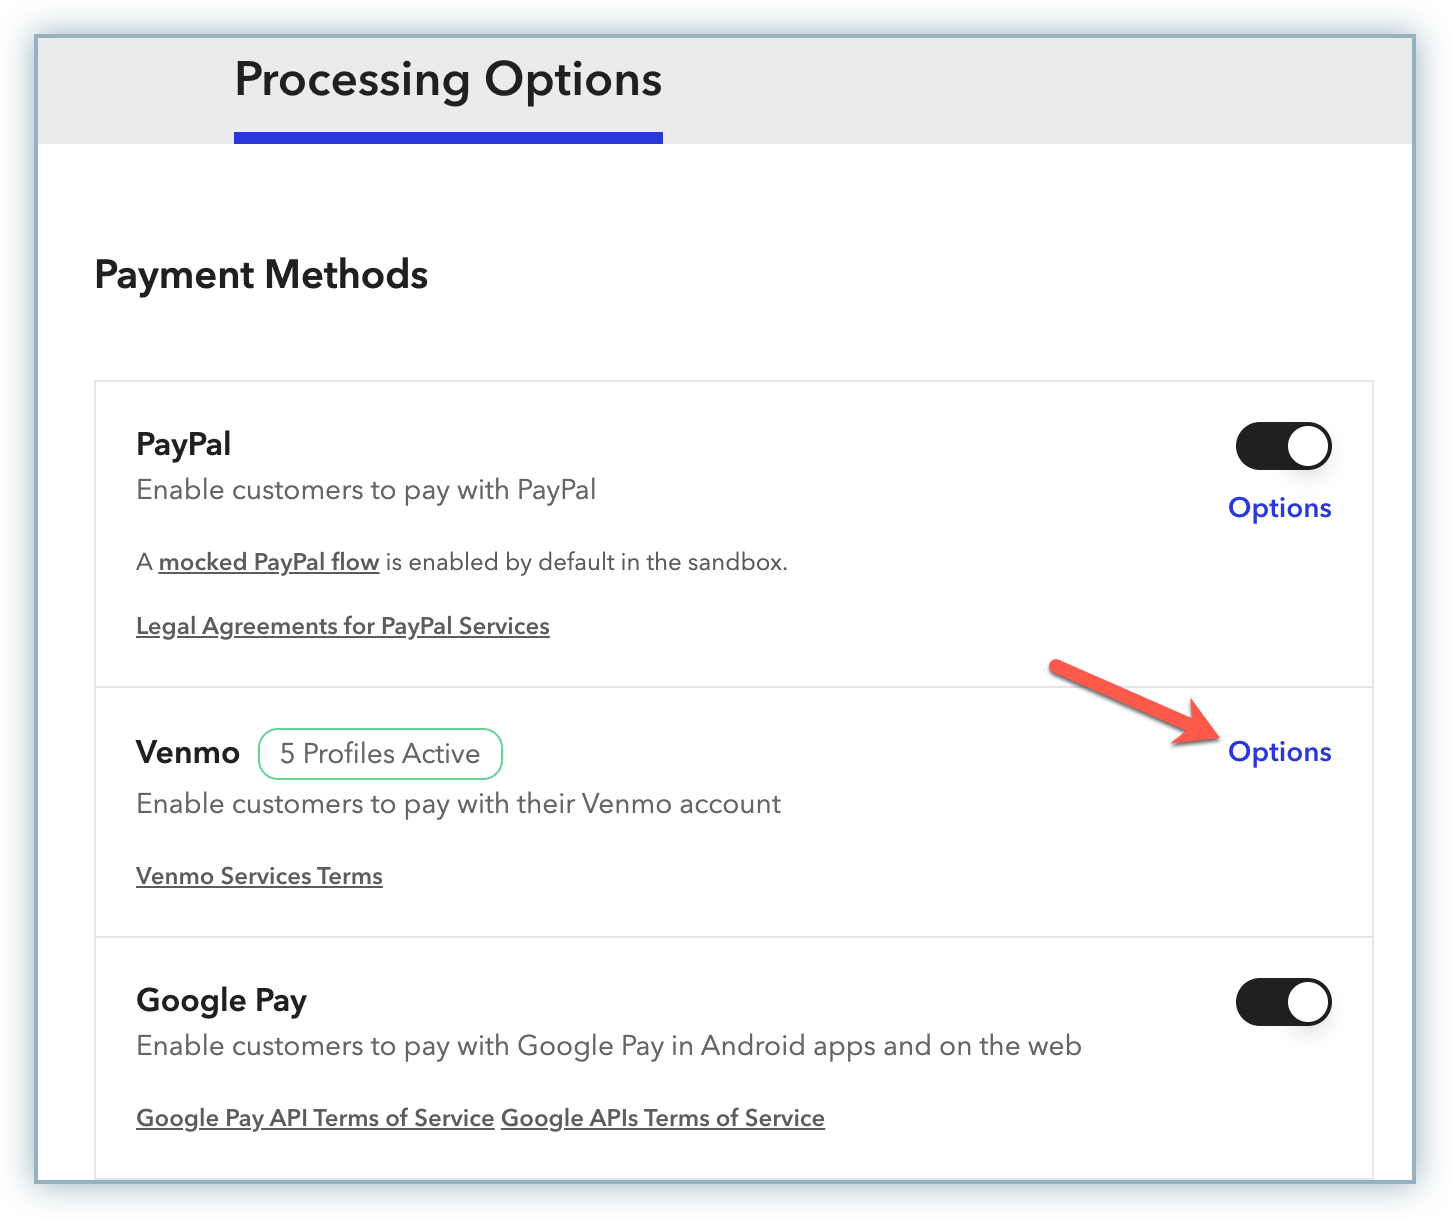
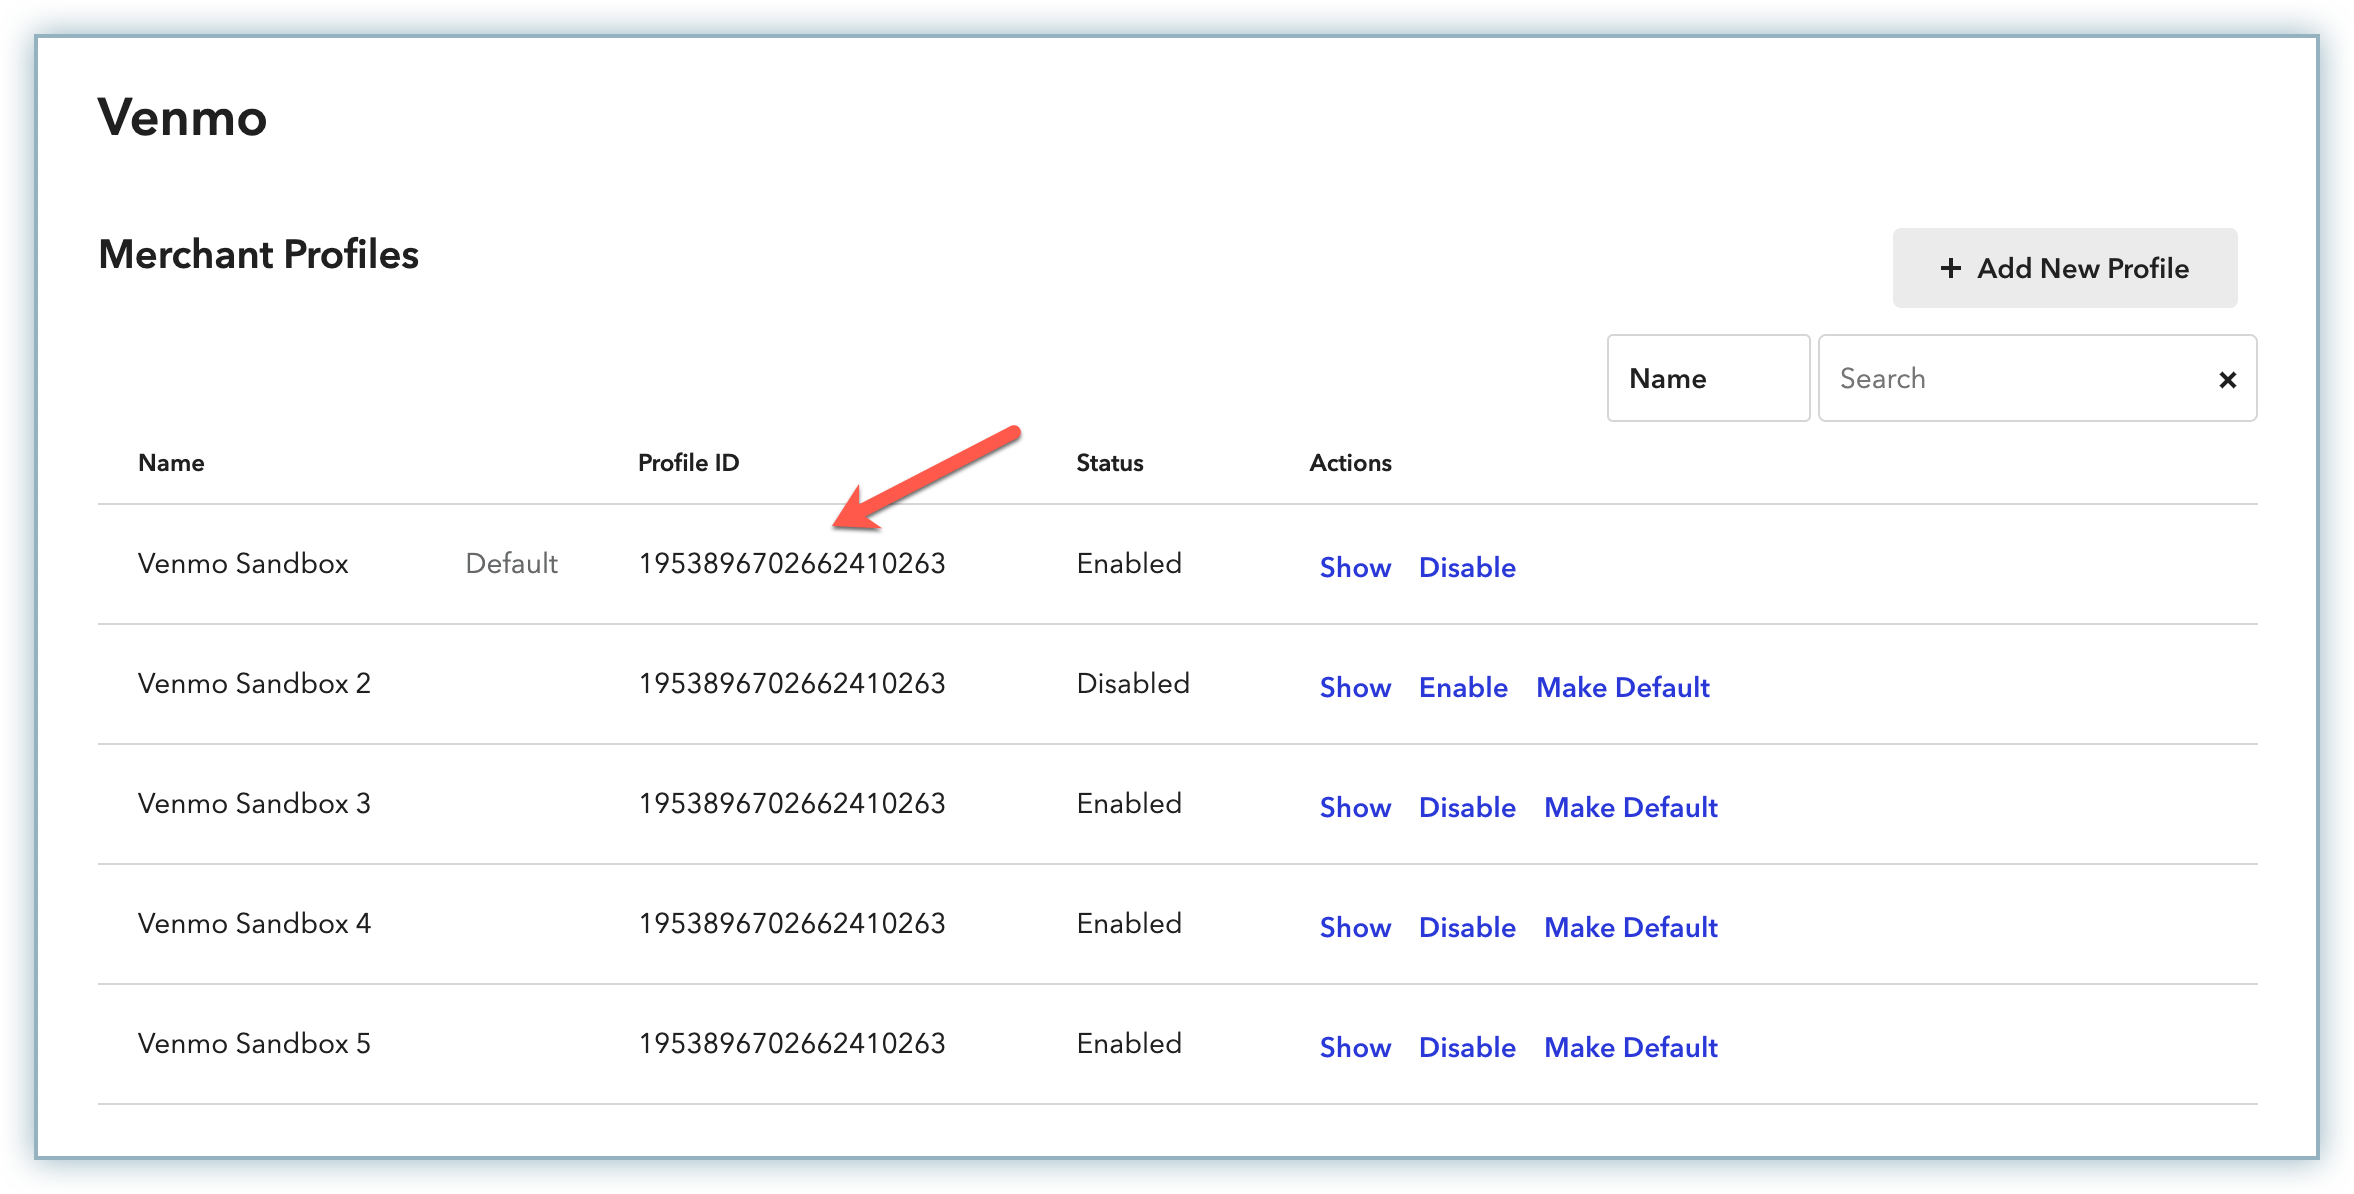
On the Processing Options page, click Options for Venmo from the Payment Methods list.
On the Venmo Merchant Profiles page, copy the Profile ID of the desired profile and keep it saved for later use.
Make sure Venmo via Braintree is enabled for your Chargebee account before moving forward. If not enabled, contact Chargebee Support to get it enabled.
Follow these steps to enable and configure Venmo via Braintree:
Log into your Chargebee site.
Go to Settings > Configure Chargebee > Payment Gateways.
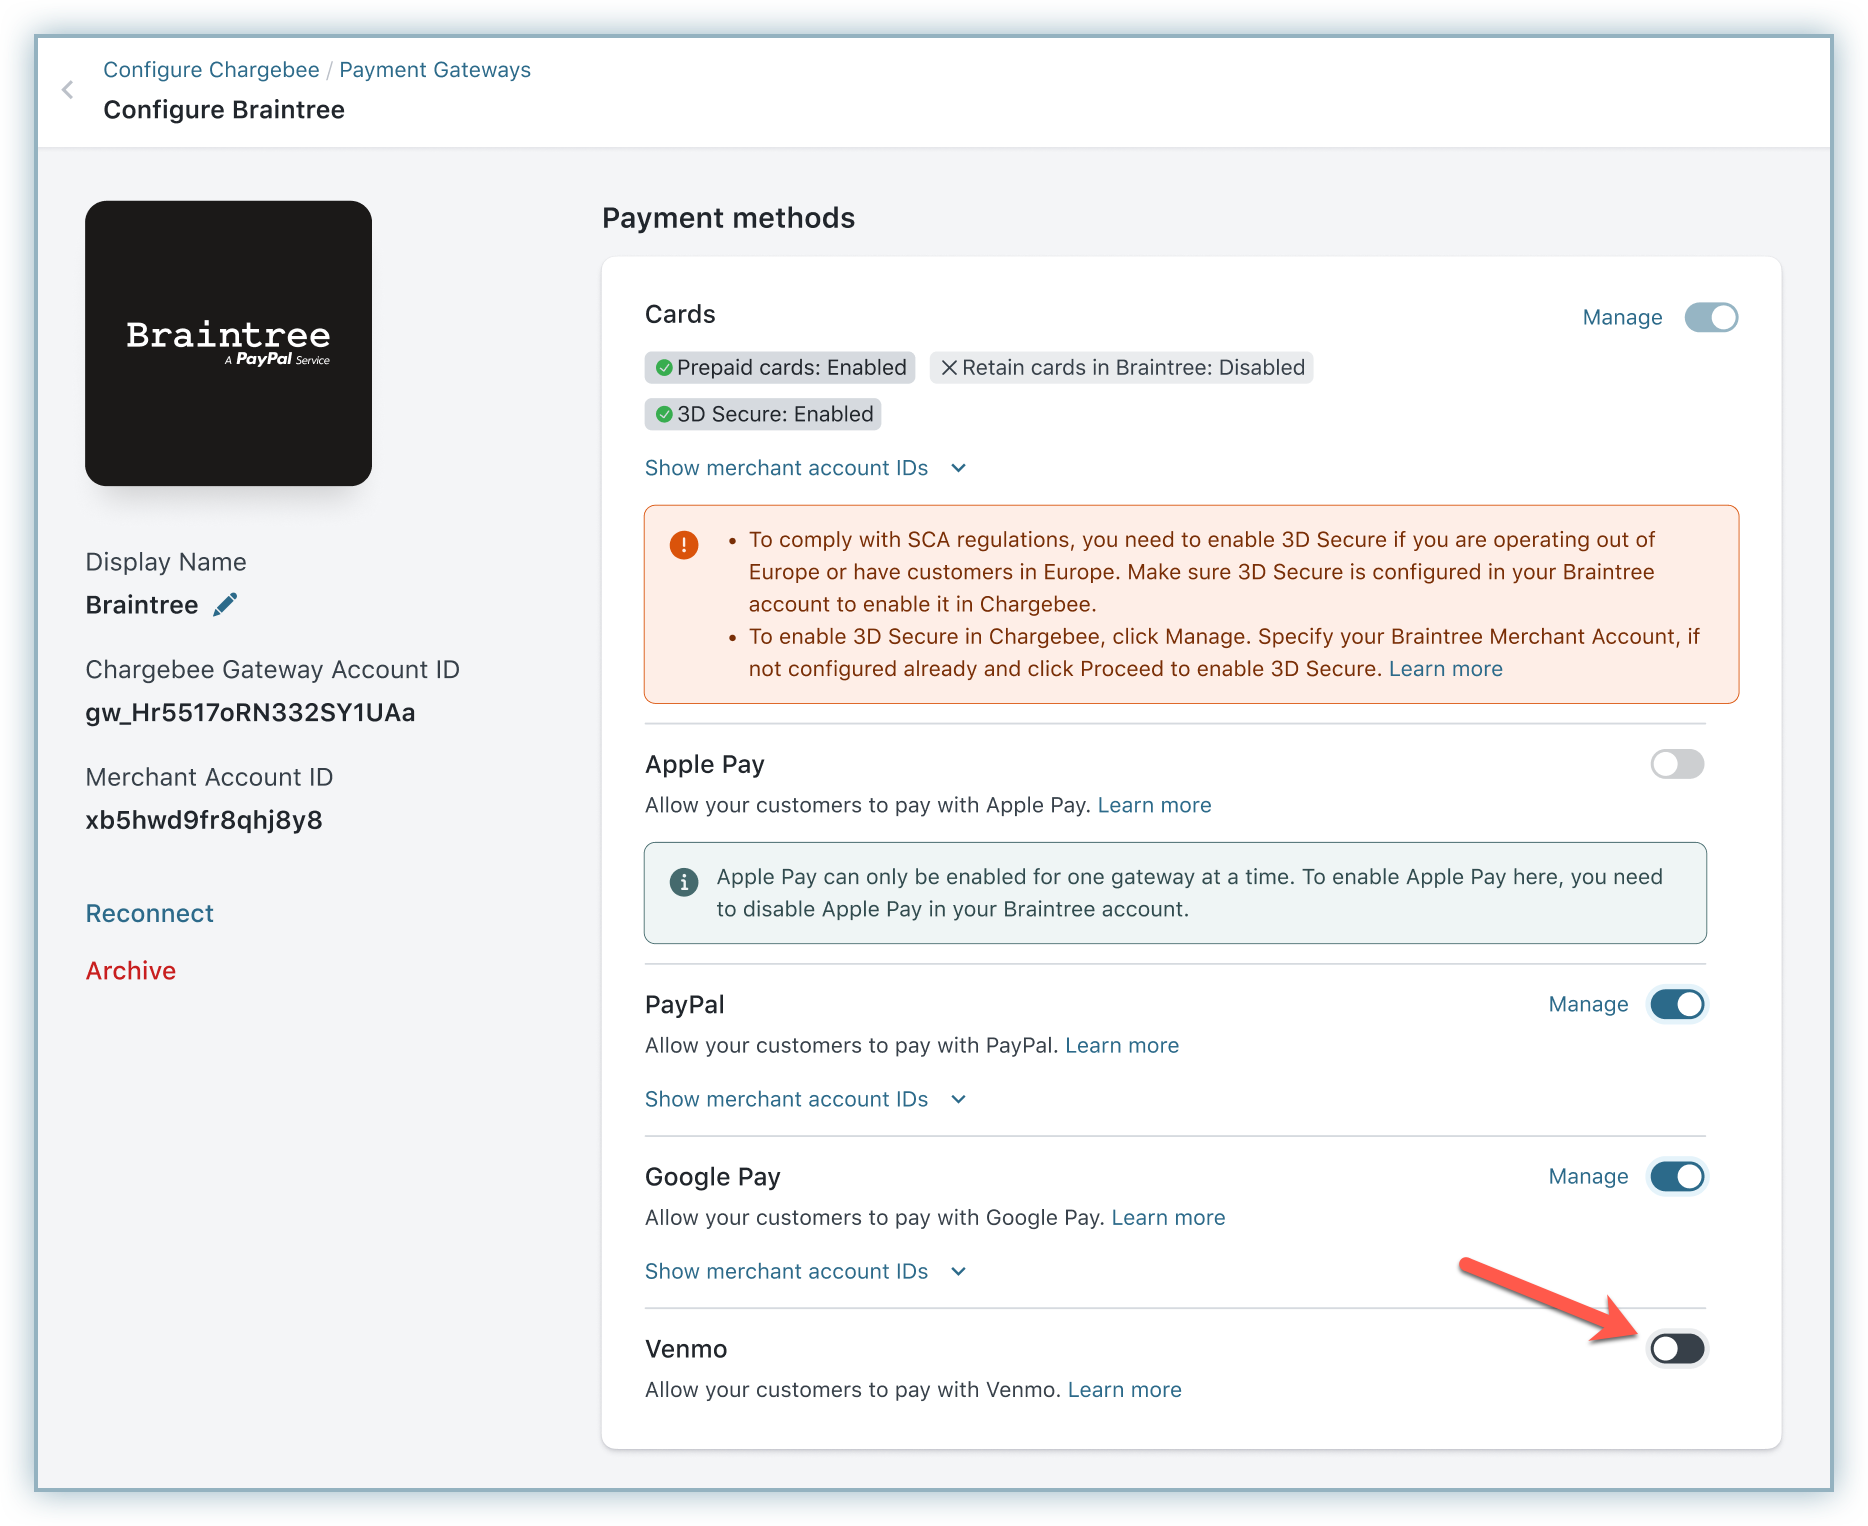
Click the Braintree instance in which you want to enable Venmo. The Configure Braintree page appears.
Enable the toggle button for Venmo.
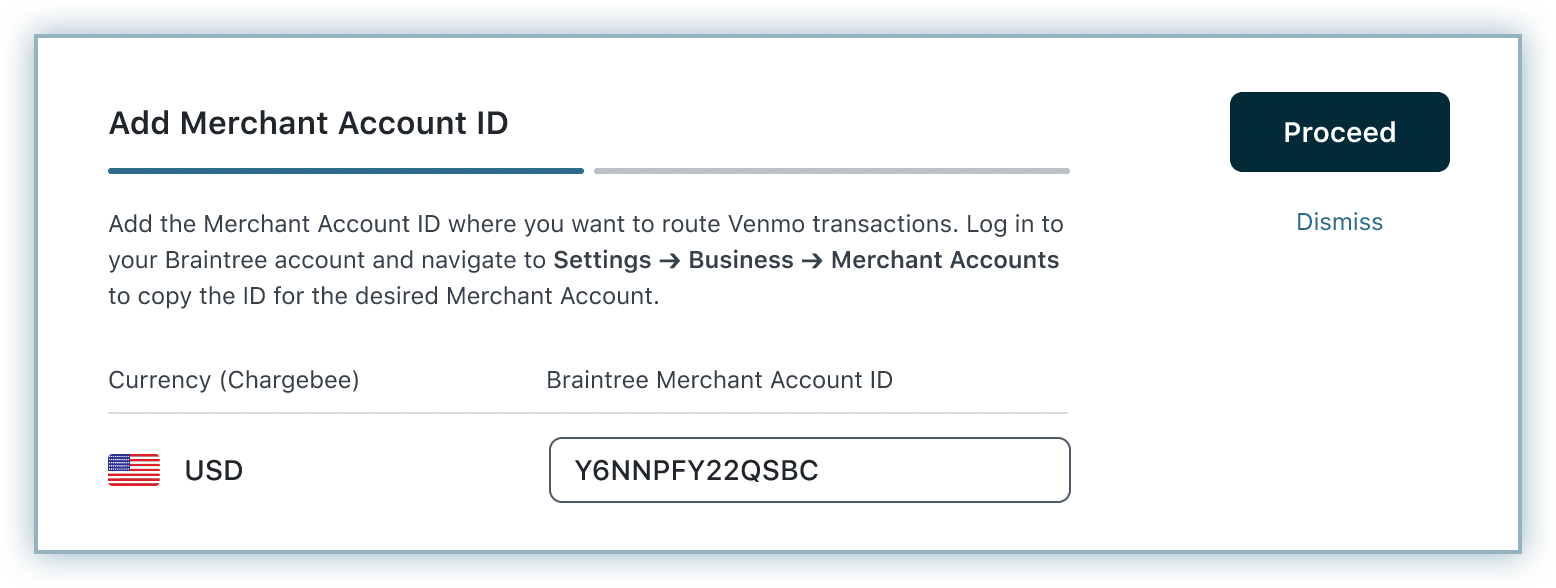
Enter the Merchant Account ID copied from your Braintree account and click Proceed.
Enter the Venmo Profile ID copied from your Braintree account.
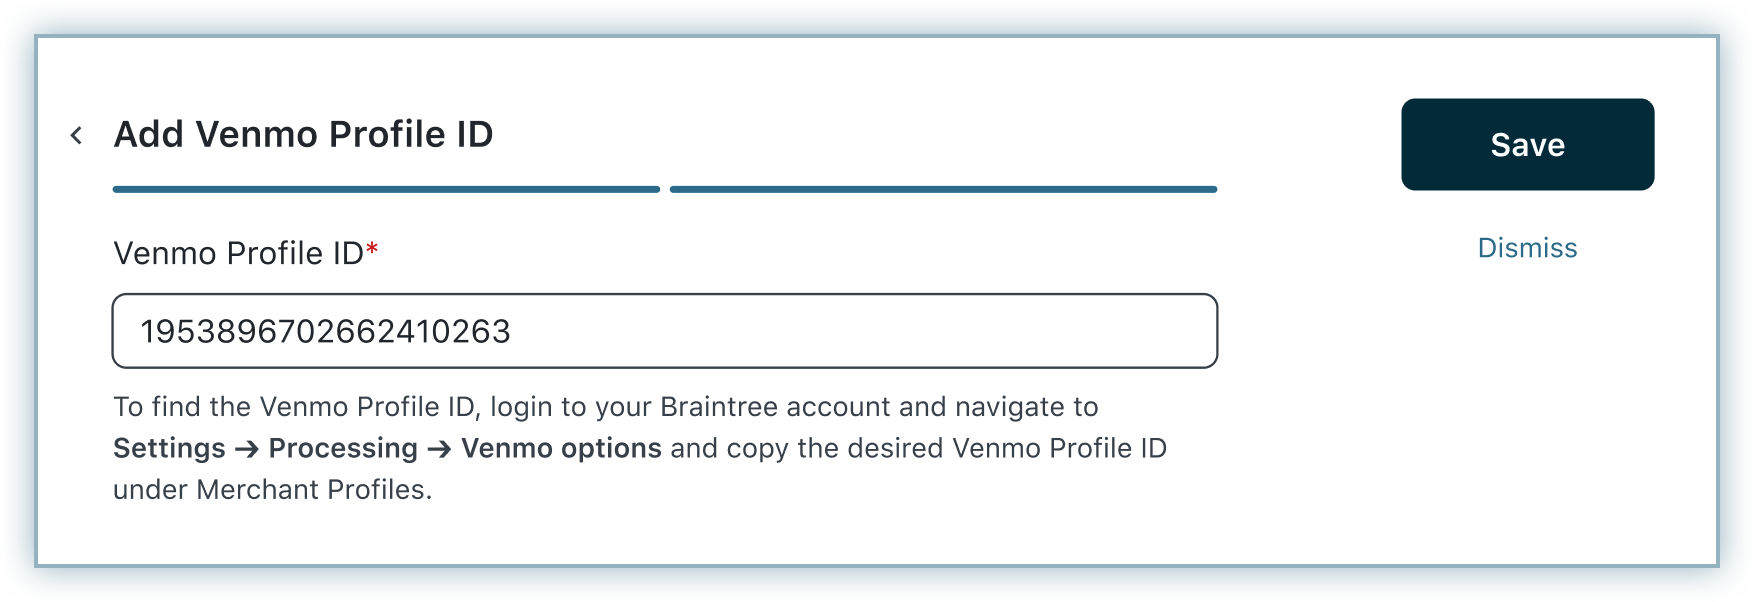
Click Save.
This integration supports the following tokens in the mentioned format:
| Token | Description | Format and Sample |
|---|---|---|
| Permanent Token | Permanent token is a combination of the customer ID and payment method ID available at the gateway.) | Format: customer_id/payment_method_id Sample: 17629028099/8ck8p8pc |
| Temporary Token (Nonce) | Temporary tokens are tokenized card/bank details provided by the gateway. For this integration, we pass this token as we receive from Braintree. | NA |
| Chargebee Payment Intent ID | <This is the Payment Intent ID returned after a successful bank authorization process. | Format - payment_intent[id] Sample - __dev__8assMTnewj7fO__dev__cLD08udLibvNLcunV3uq81iAIujLLibhD
|

Braintree supports Venmo via the Mobile and Desktop Browser flow. The Desktop Browser flow has two types - Desktop Web Login and Desktop QR Code. In this integration, we are offering support for the Desktop Web Login. This indicates that at the end of the checkout, customers will be redirected to the Venmo desktop webpage where they can log in and complete their payments.
The checkout flow contains the following steps:
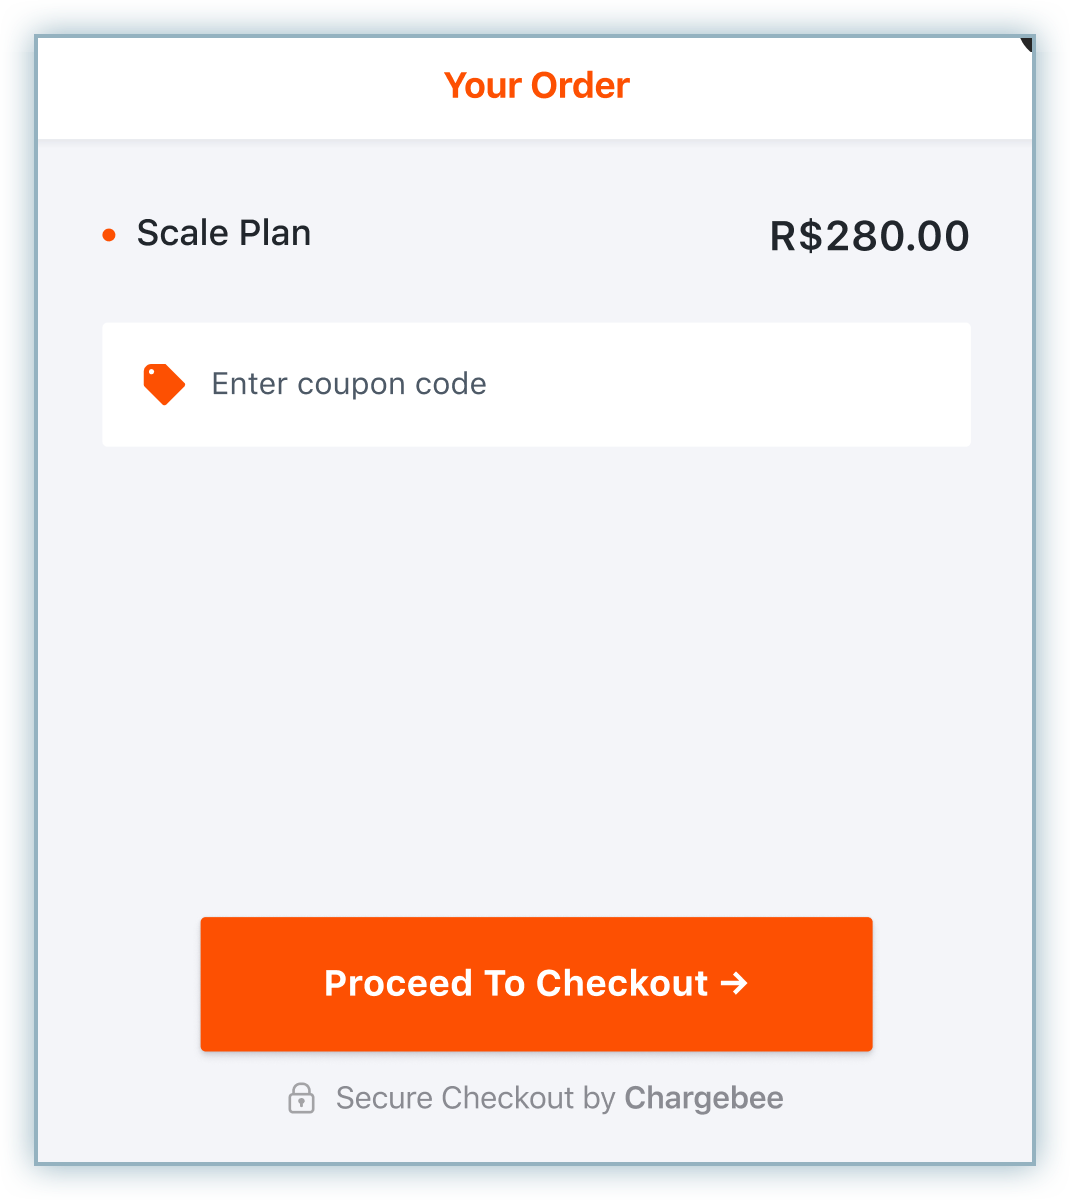
Click Proceed to Checkout from the Your Order page to initiate a purchase.
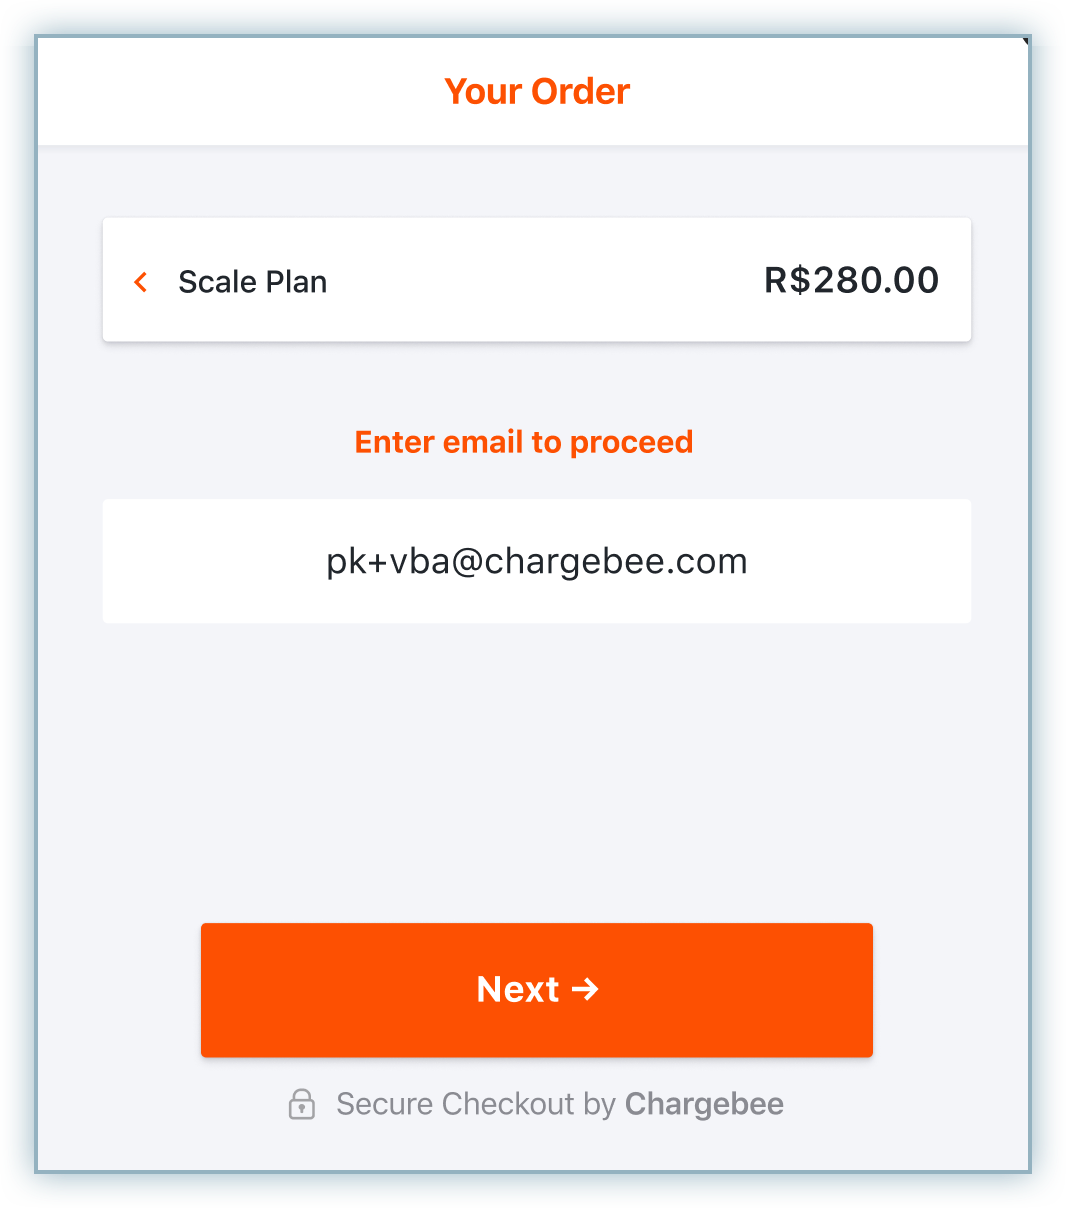
Enter your email to proceed and click Next.
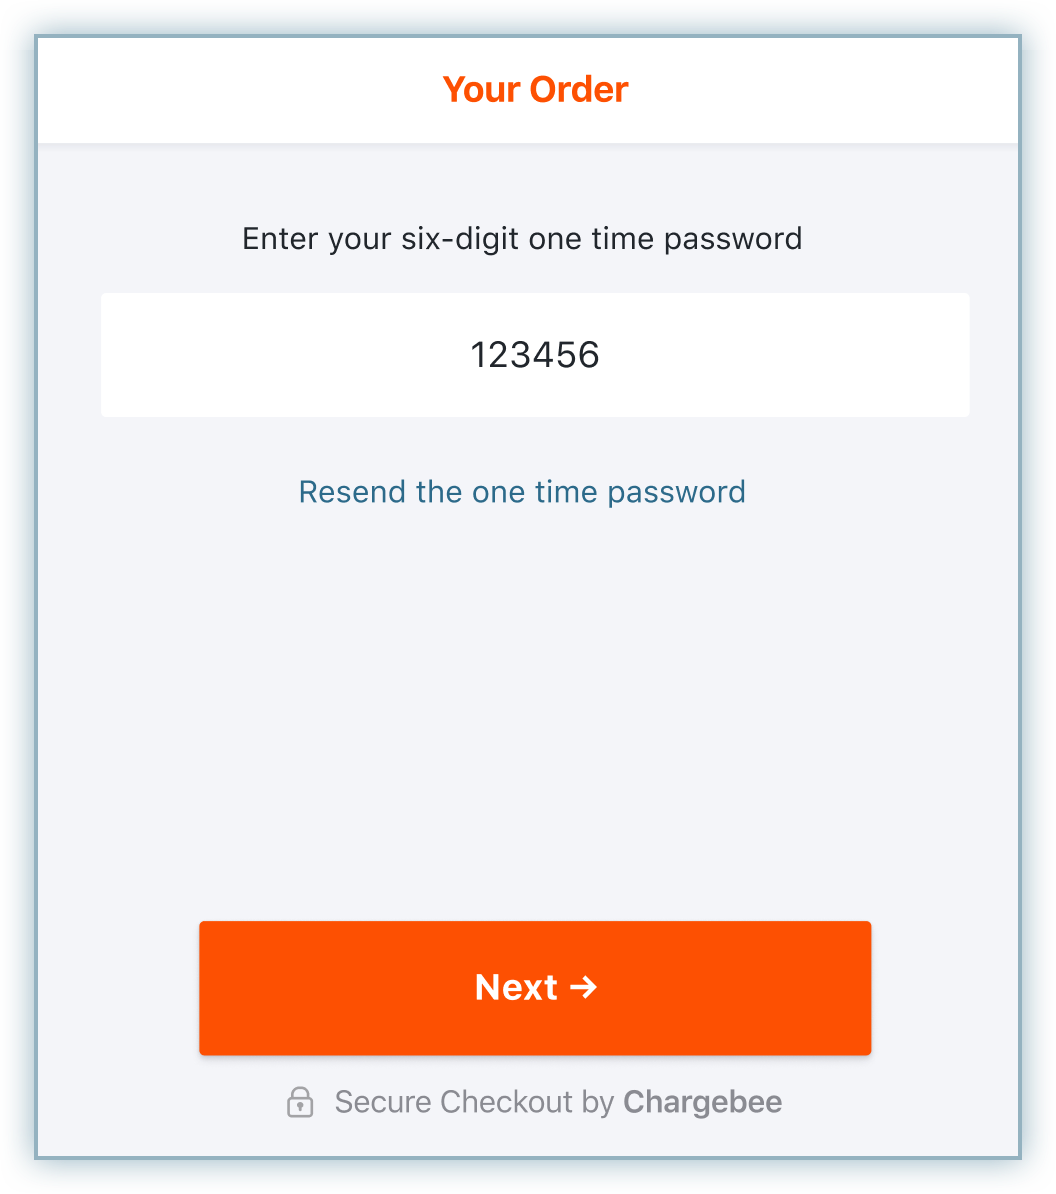
Enter the One Time Password (OTP) received on your email address and click Next.
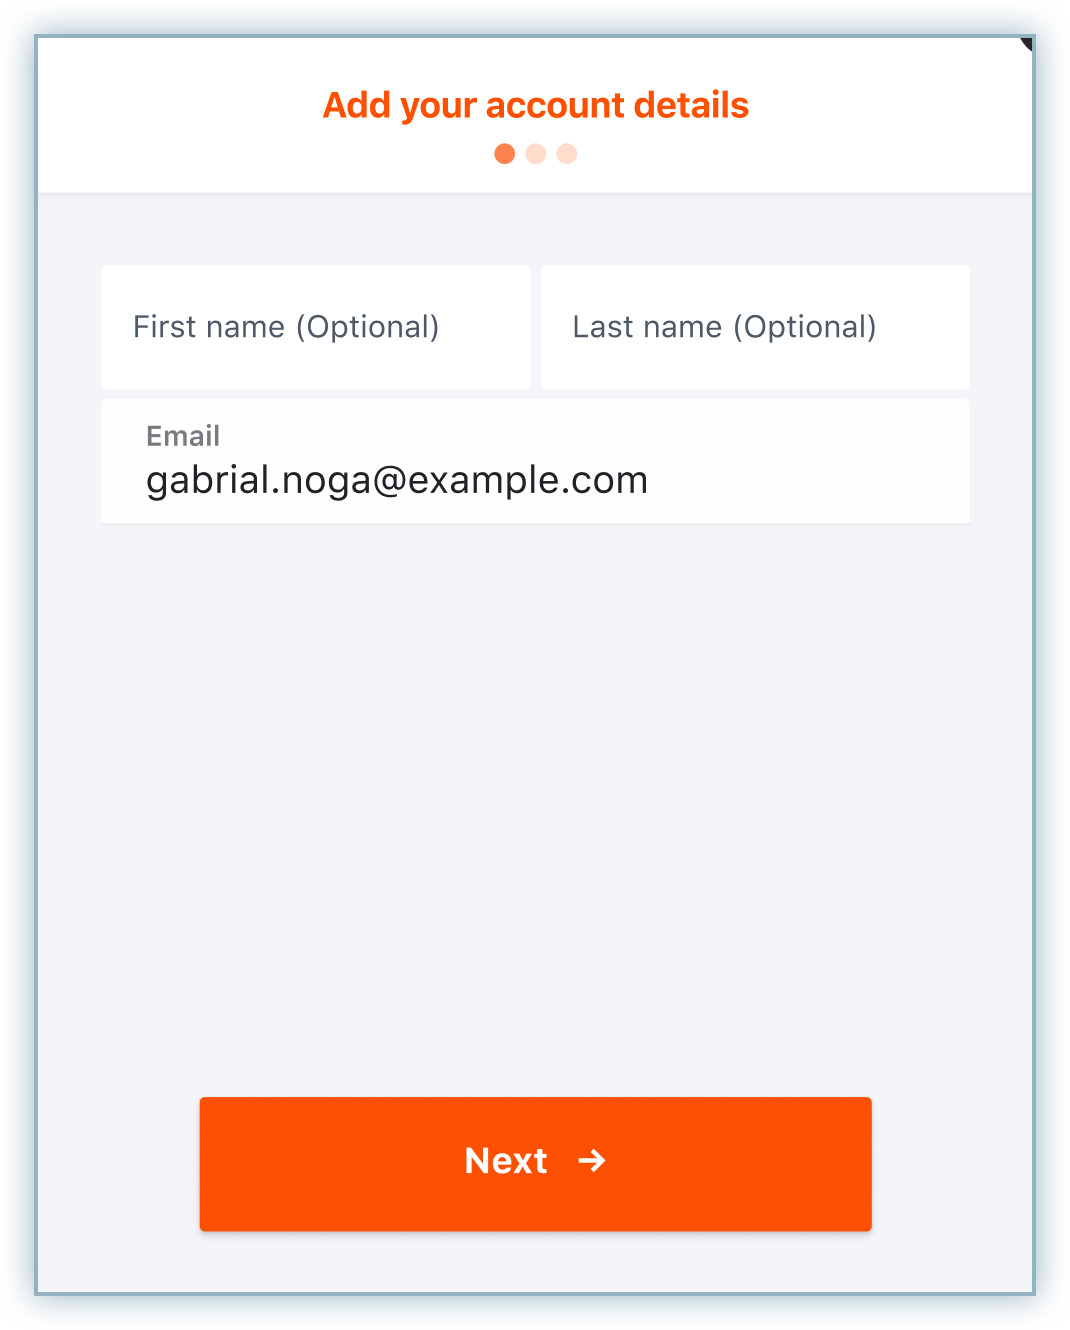
Enter your Account Details field, i.e. First Name, Last Name, and Email Address, and click Next.
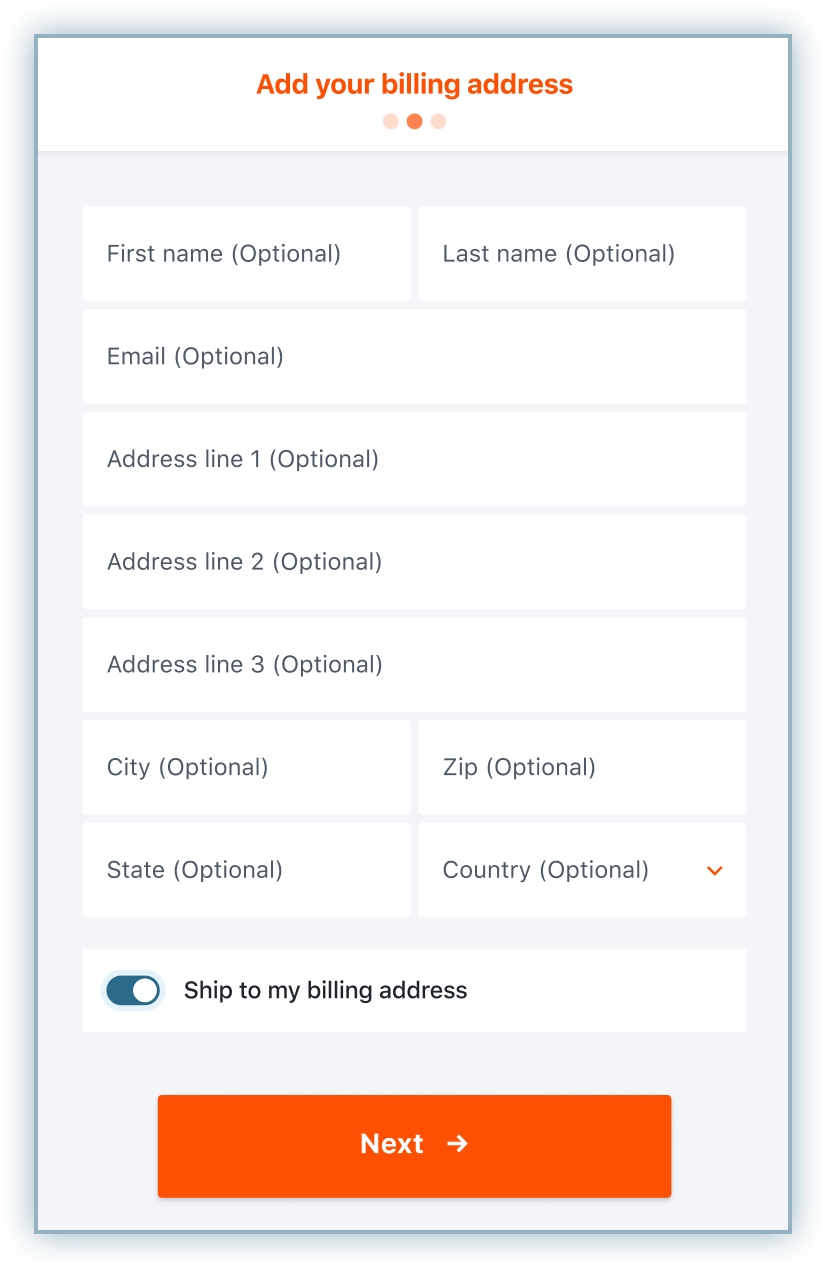
Enter the Billing Address details and click Next.
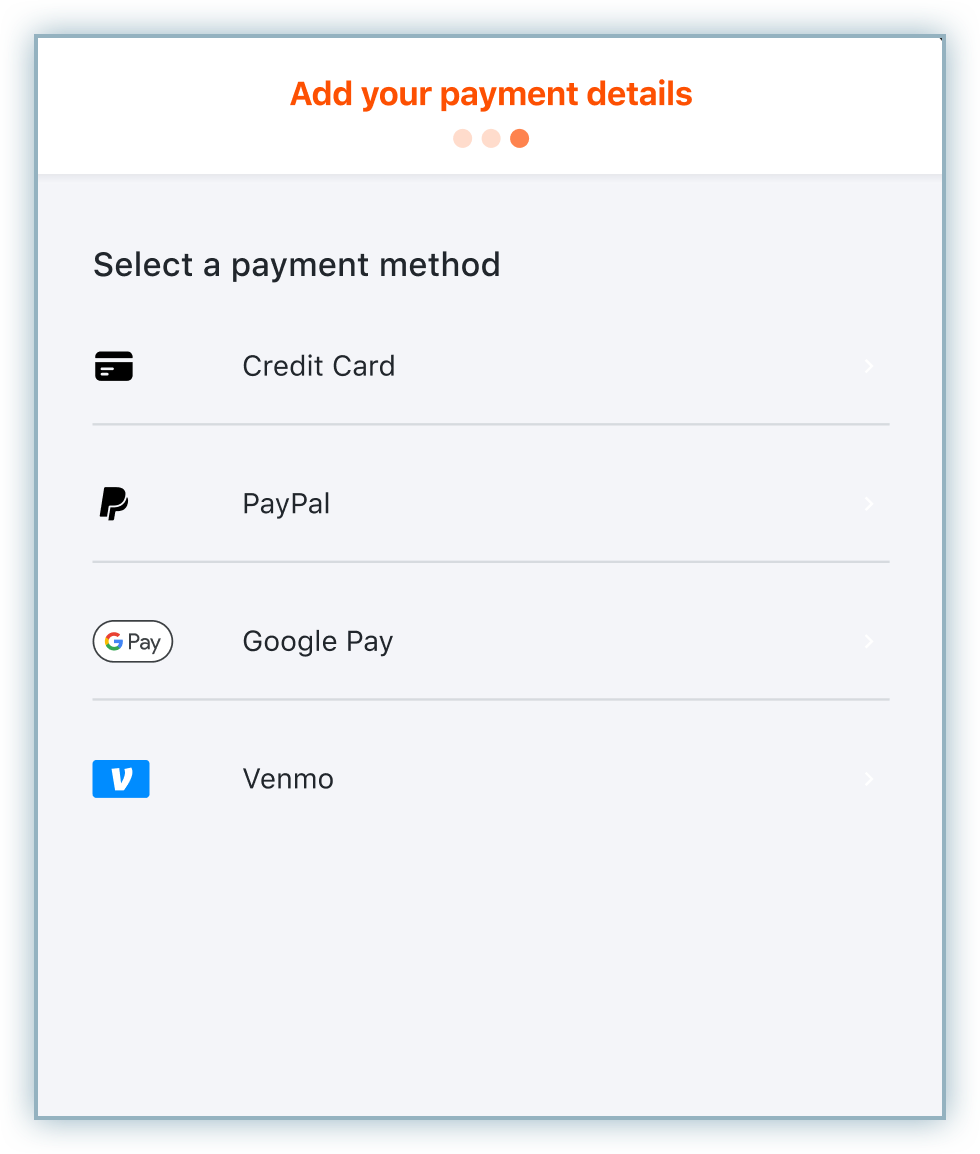
Select Venmo as the payment method.
Click the Venmo button.
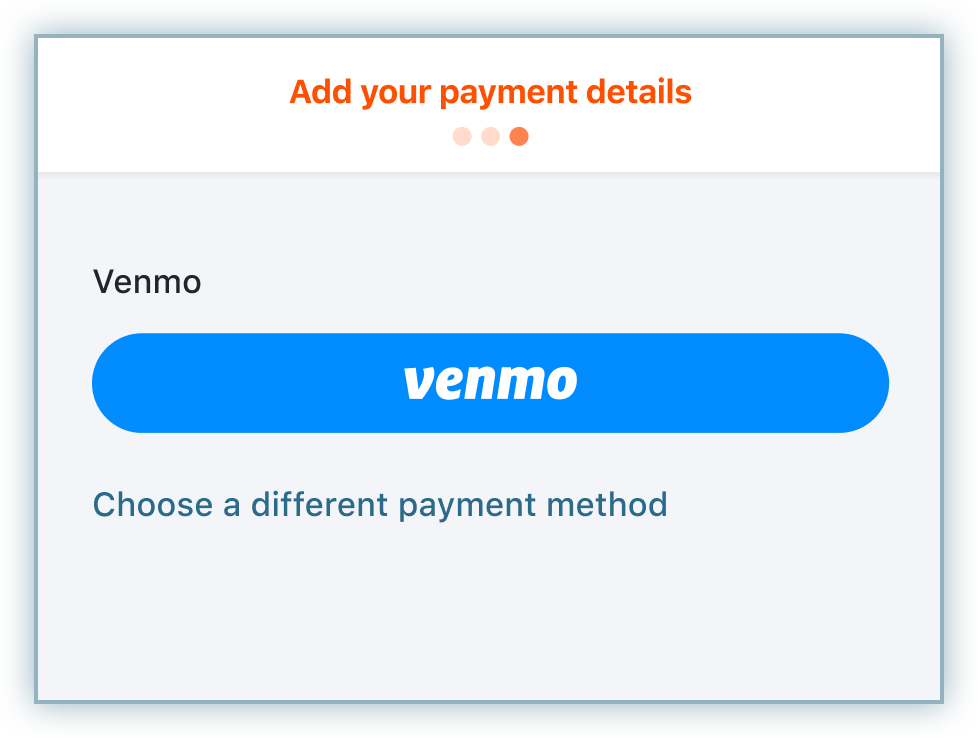
You will be redirected to the Venmo Desktop Webpage in a pop-up where you can log in, select the desired payment method and approve the payment in your Venmo account.
Then you will be redirected back to Chargebee's checkout where you can review all the important information and check the boxes at the bottom.
Once reviewed, click Pay
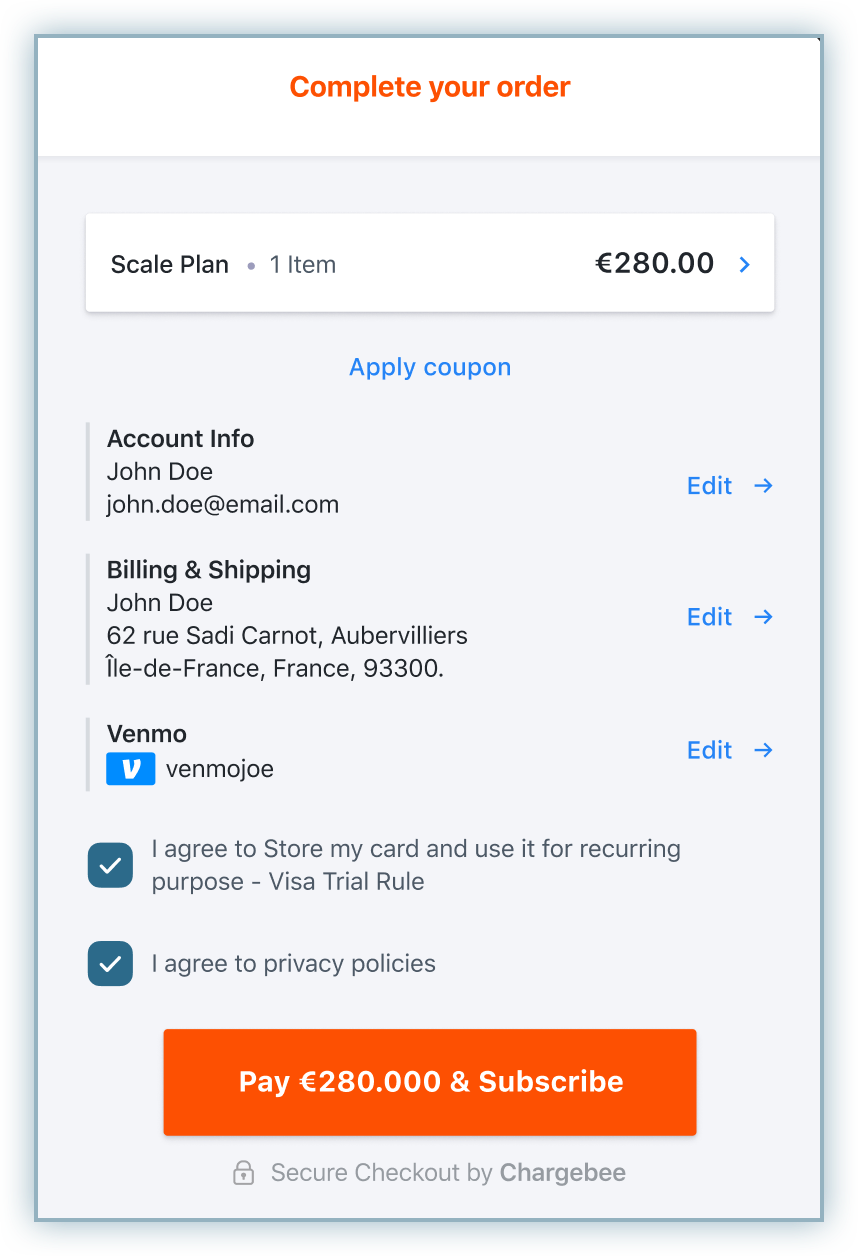
You can add Venmo as a payment method for a customer in two ways:
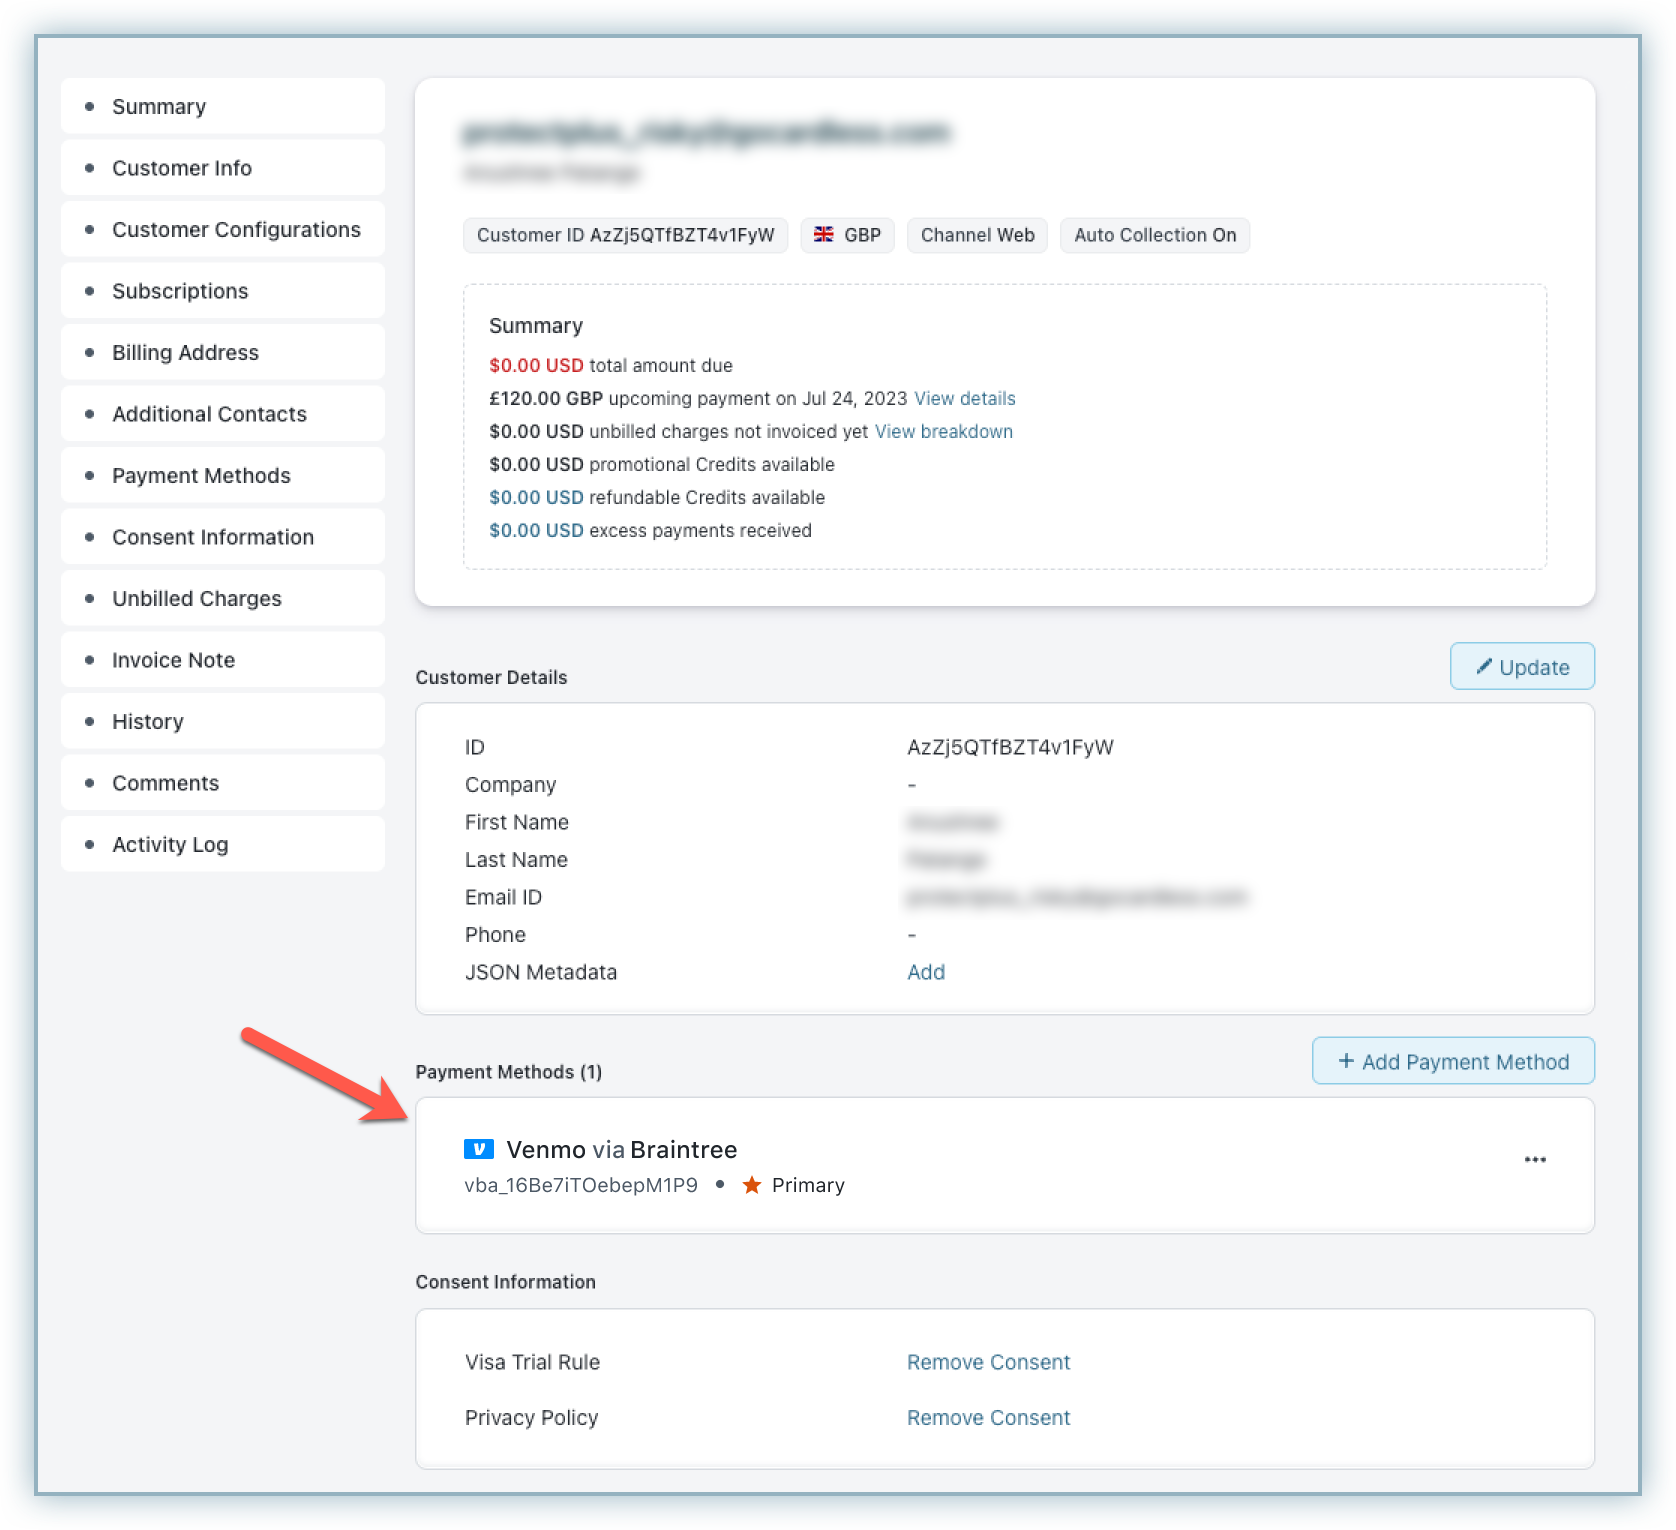
Venmo via Braintree recommends sending email notifications for payments done using Venmo. In this process, you have to add a mergevar called Venmo Username in the following email notifications:

Follow these steps to navigate to these notification templates and add the Venmo Username mergevar:
Go to Settings > Configure Chargebee > Email Notifications.
Select Payments and credits.
Click Edit for any of the two notifications (listed above).

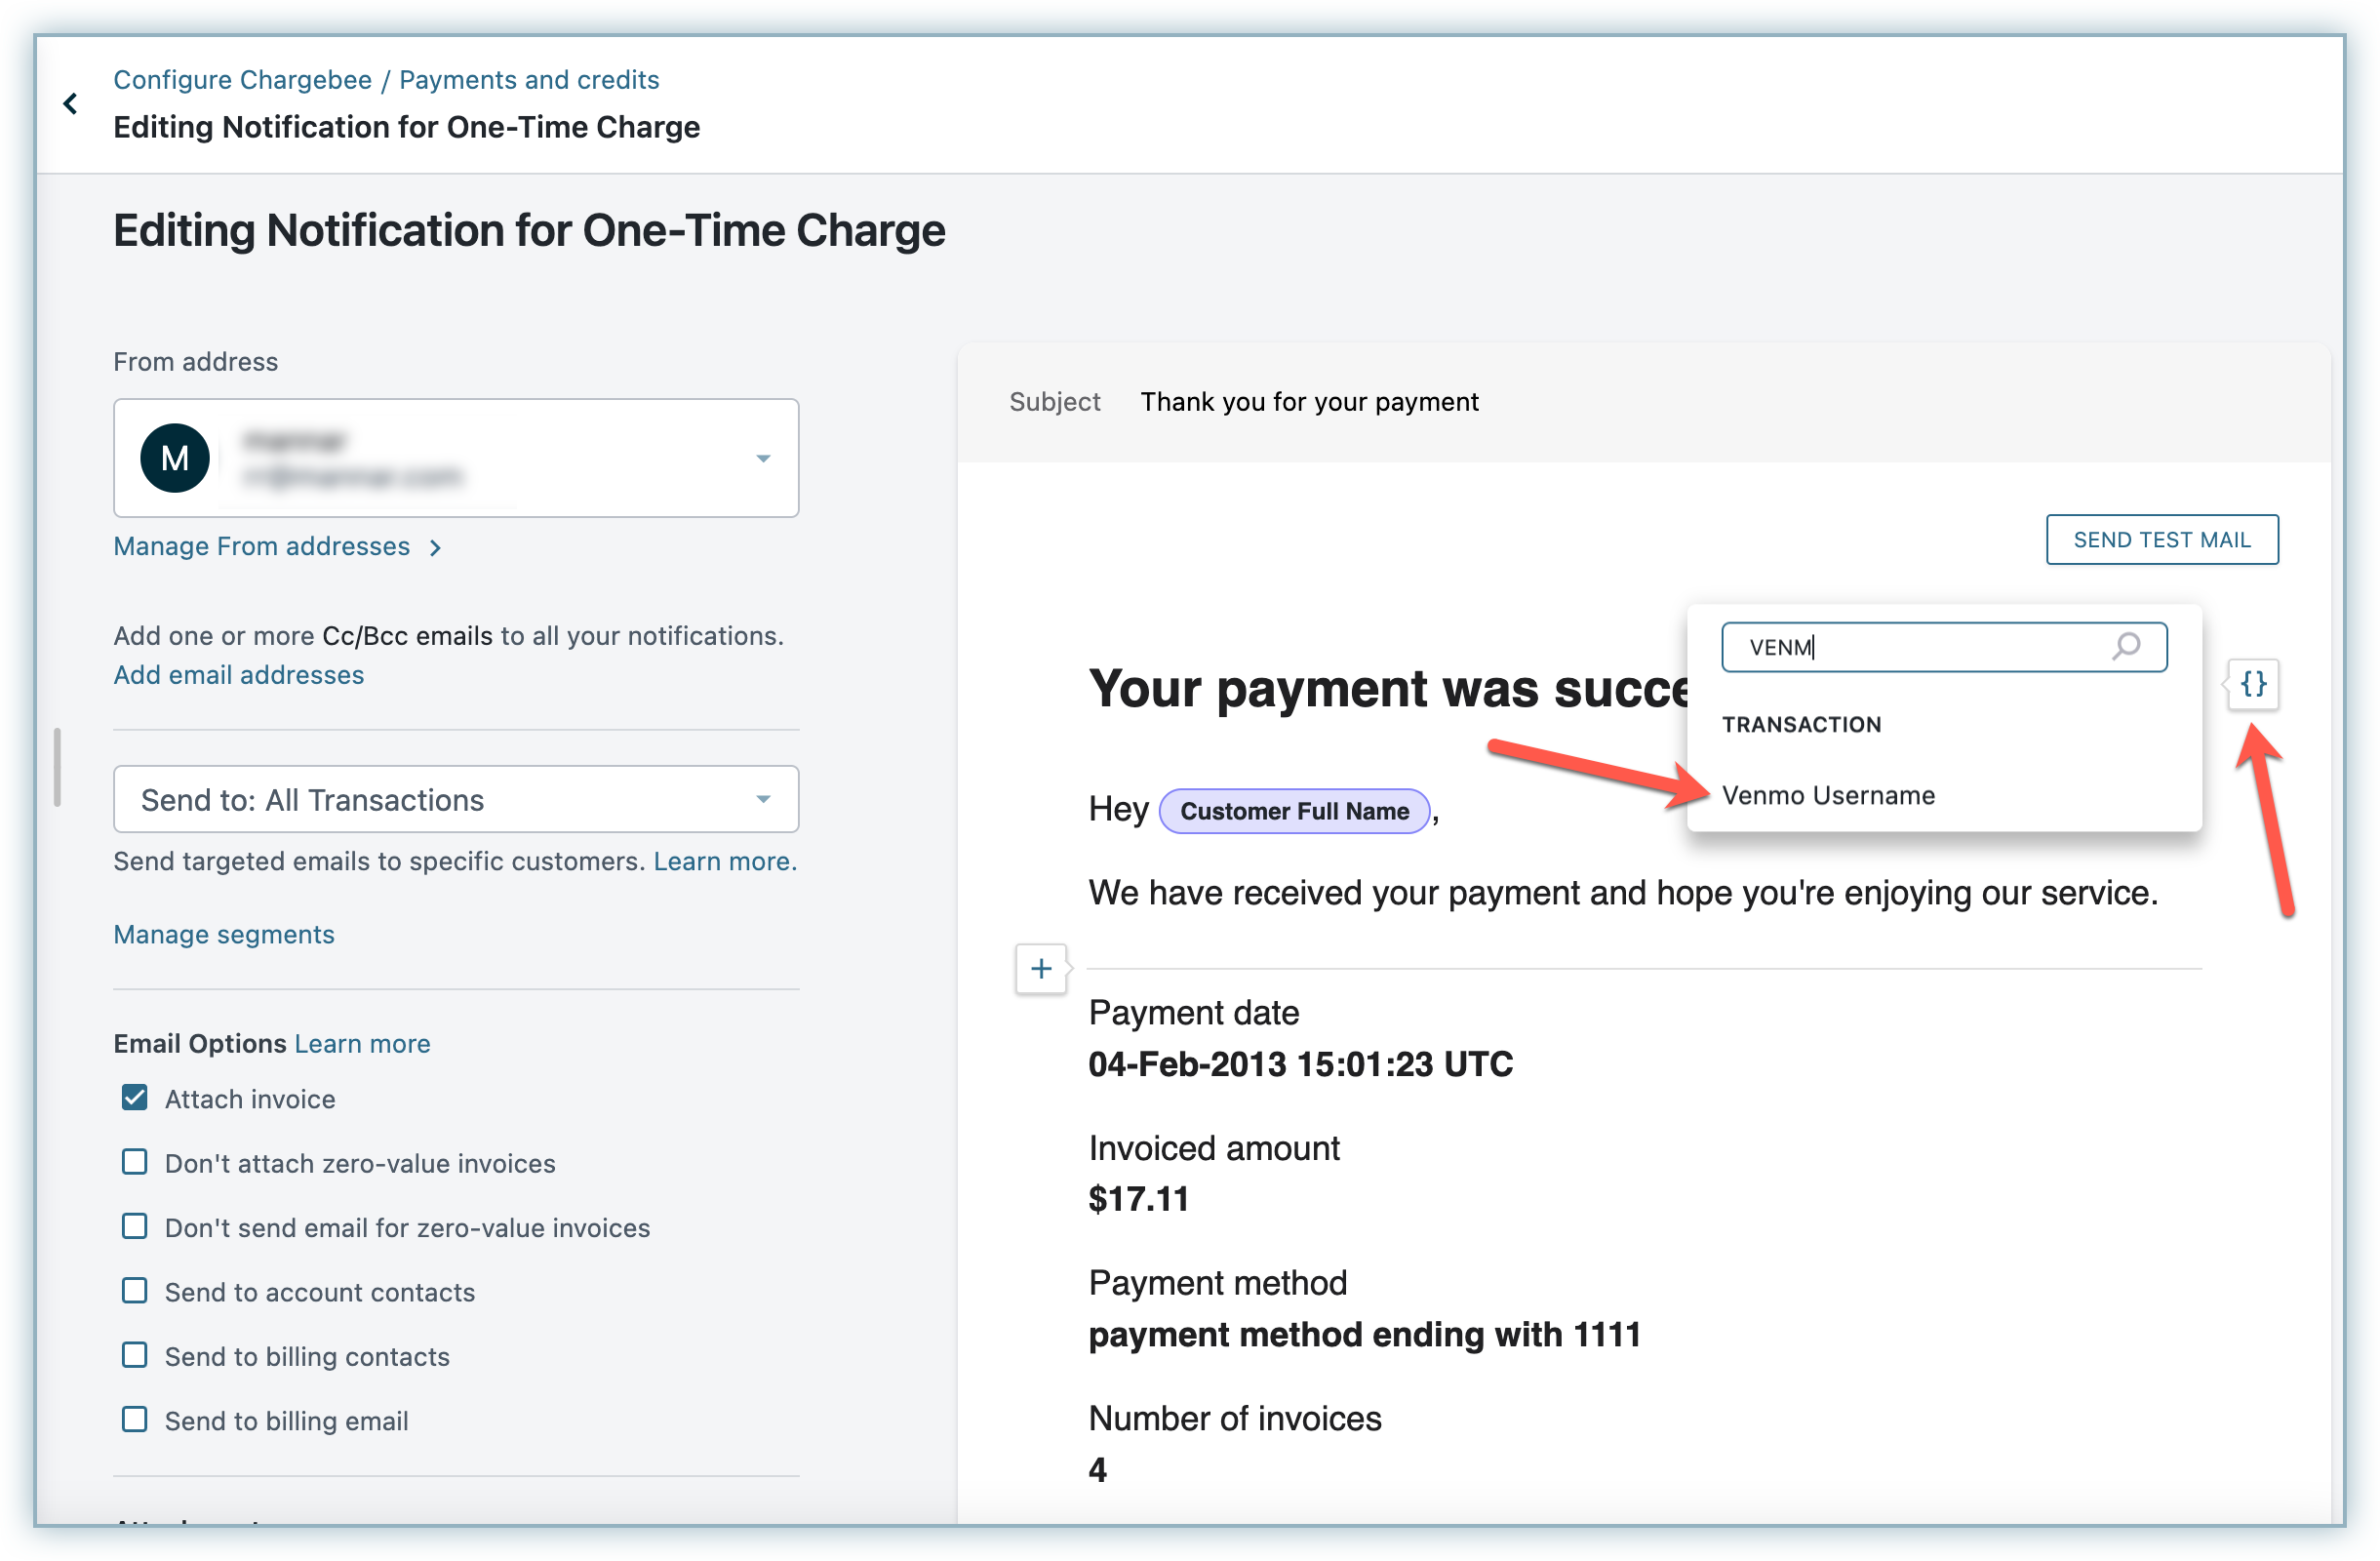
In the template, click on any of the existing sections or add a new text box in the template and click the { } button on the right.
Search the name of the mergevar (mail merge field) and click it from the result to add it to the email.
Publish your template when you are done with all changes.