Docs
Chargebee's Transfer configurations capability, allows you to copy configurations from one Chargebee site to another, irrespective of whether it is a Live or a Test site.
| Source | Destination | How it works |
| Live Site | Test Site | 1. Either clear or retain Chargebee Test site data. 2. All configurations as well as product catalog data is allowed to be transferred. |
| Test Site | Live Site | 1. Copy Configurations and relevant/associated product catalog data. |
To transfer configurations between two Billing sites, follow these steps:
On your Chargebee site, click Settings > Configure Chargebee > Transfer Configurations > Get Started.

On the Transfer Configurations screen, the current logged-in site gets pre-selected at the SOURCE. Click the source drop-down to update the Chargebee site from which the configurations will be copied.
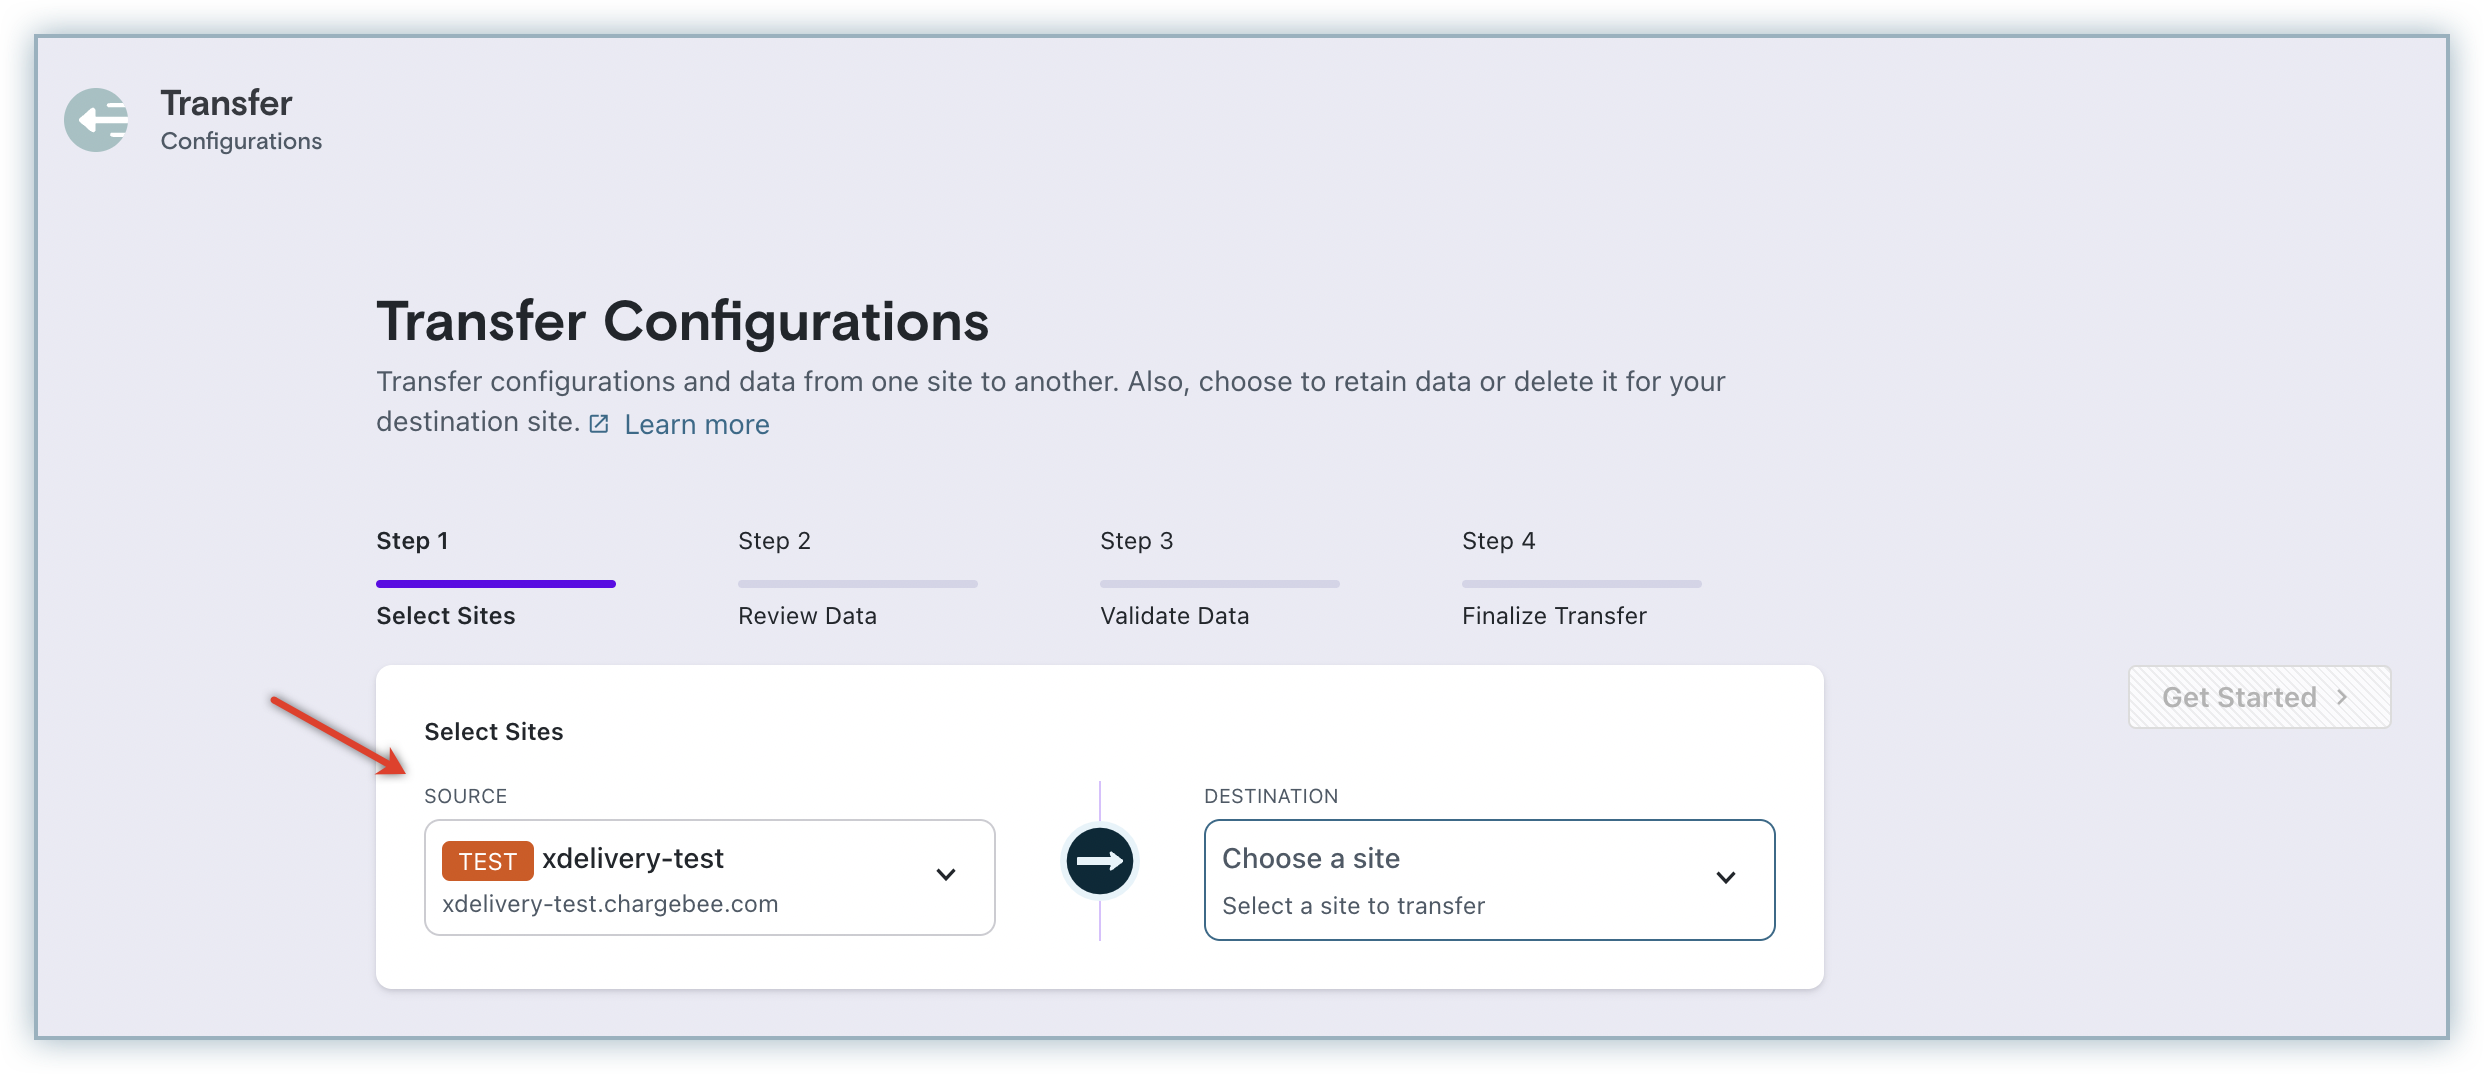
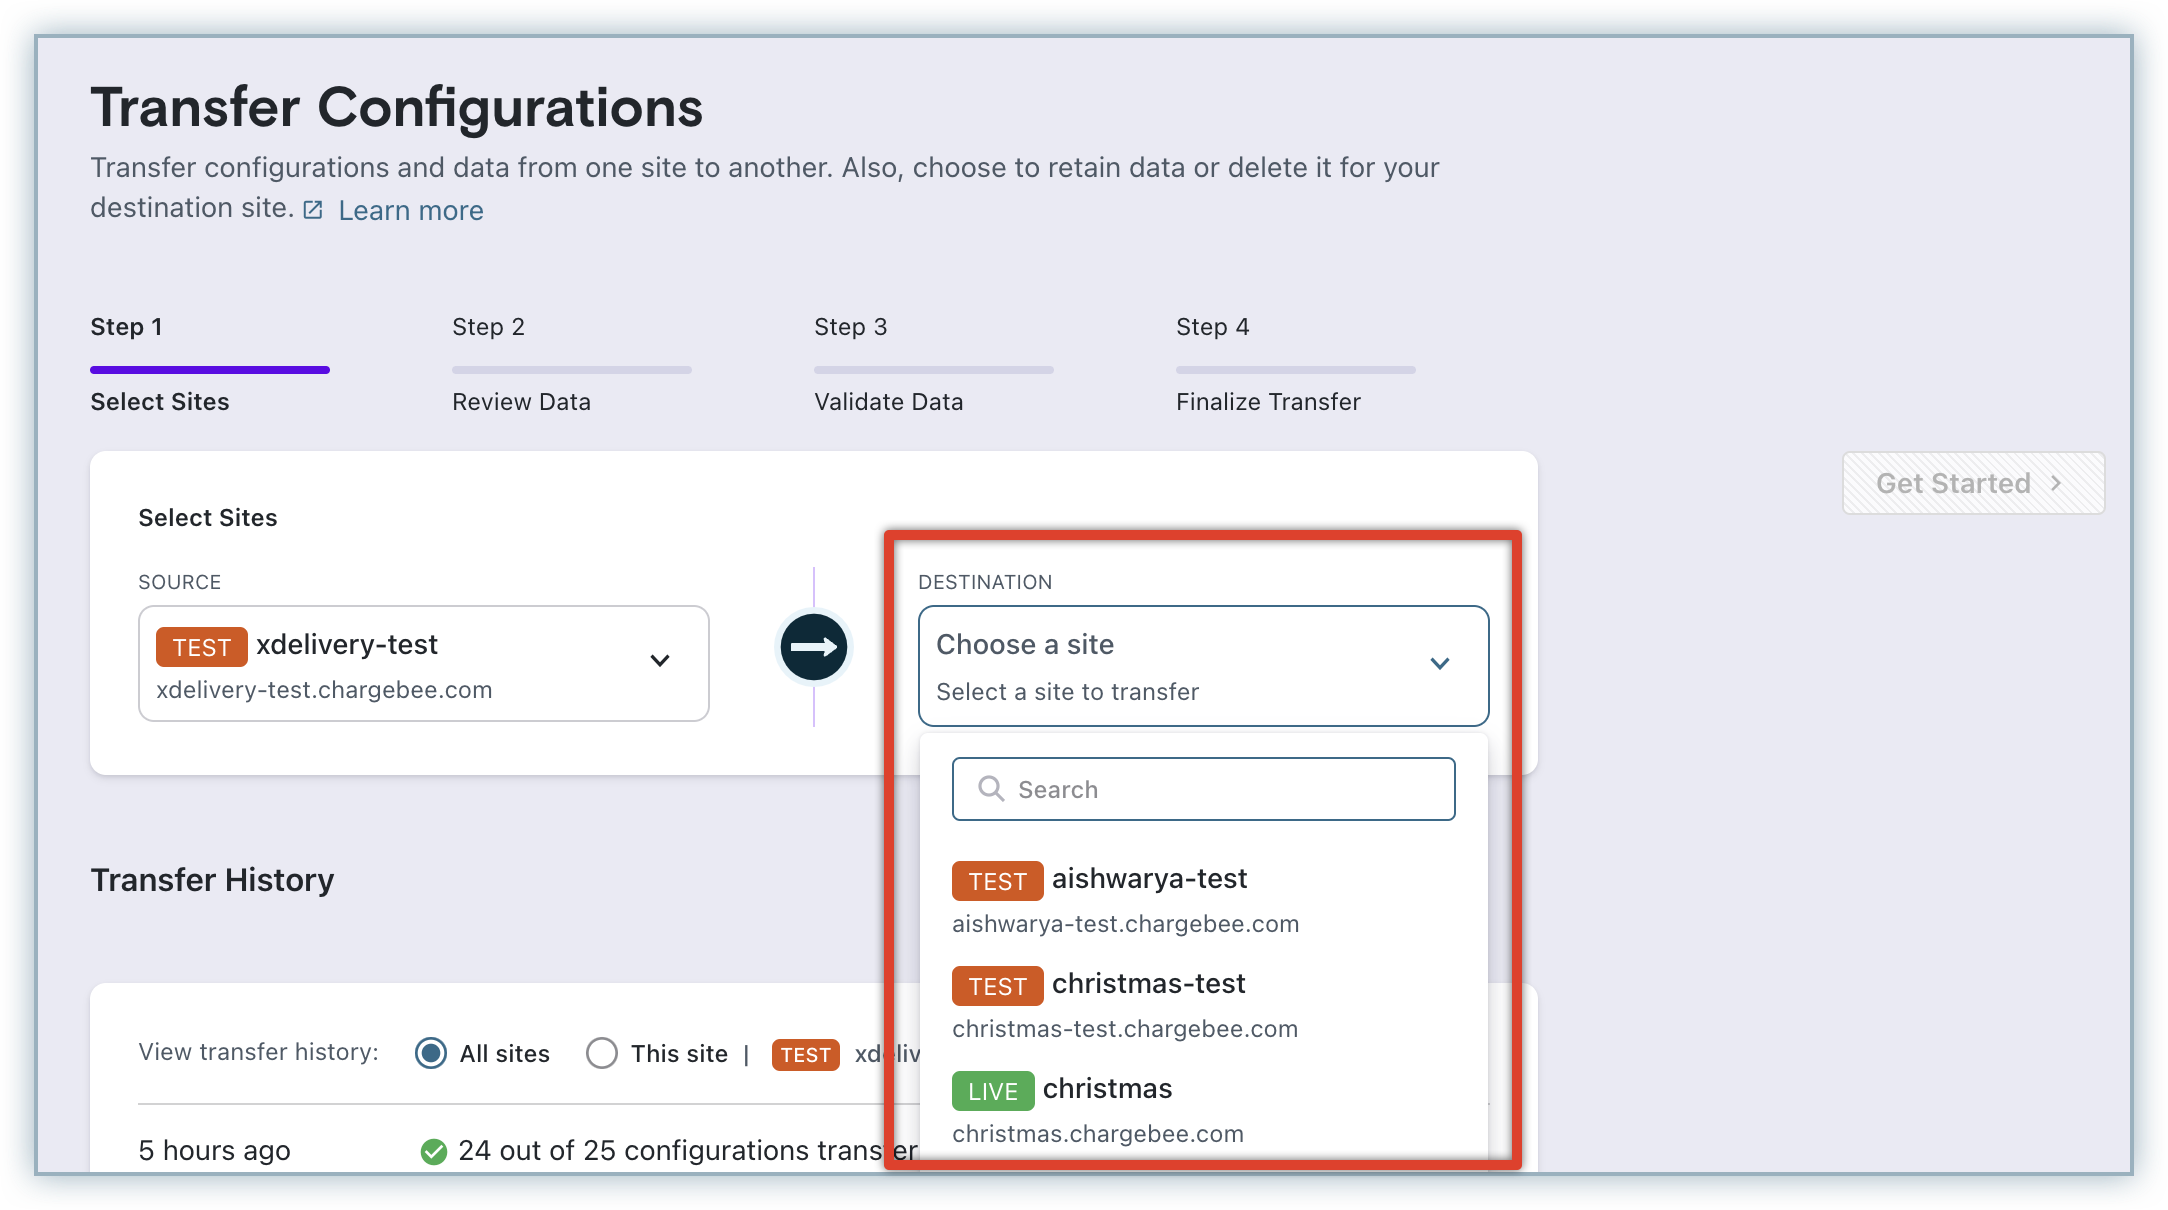
Select a DESTINATION site from the drop-down, to which you want the configurations from the SOURCE site to be copied. You can select from the list of Test or Live sites.
Click Get Started. You might encounter errors in the following scenarios:
On the Review Data step, if you've selected a Test site as your Destination, you can choose whether you want to Retain or Delete the data from the destination TEST site before transferring configurations.
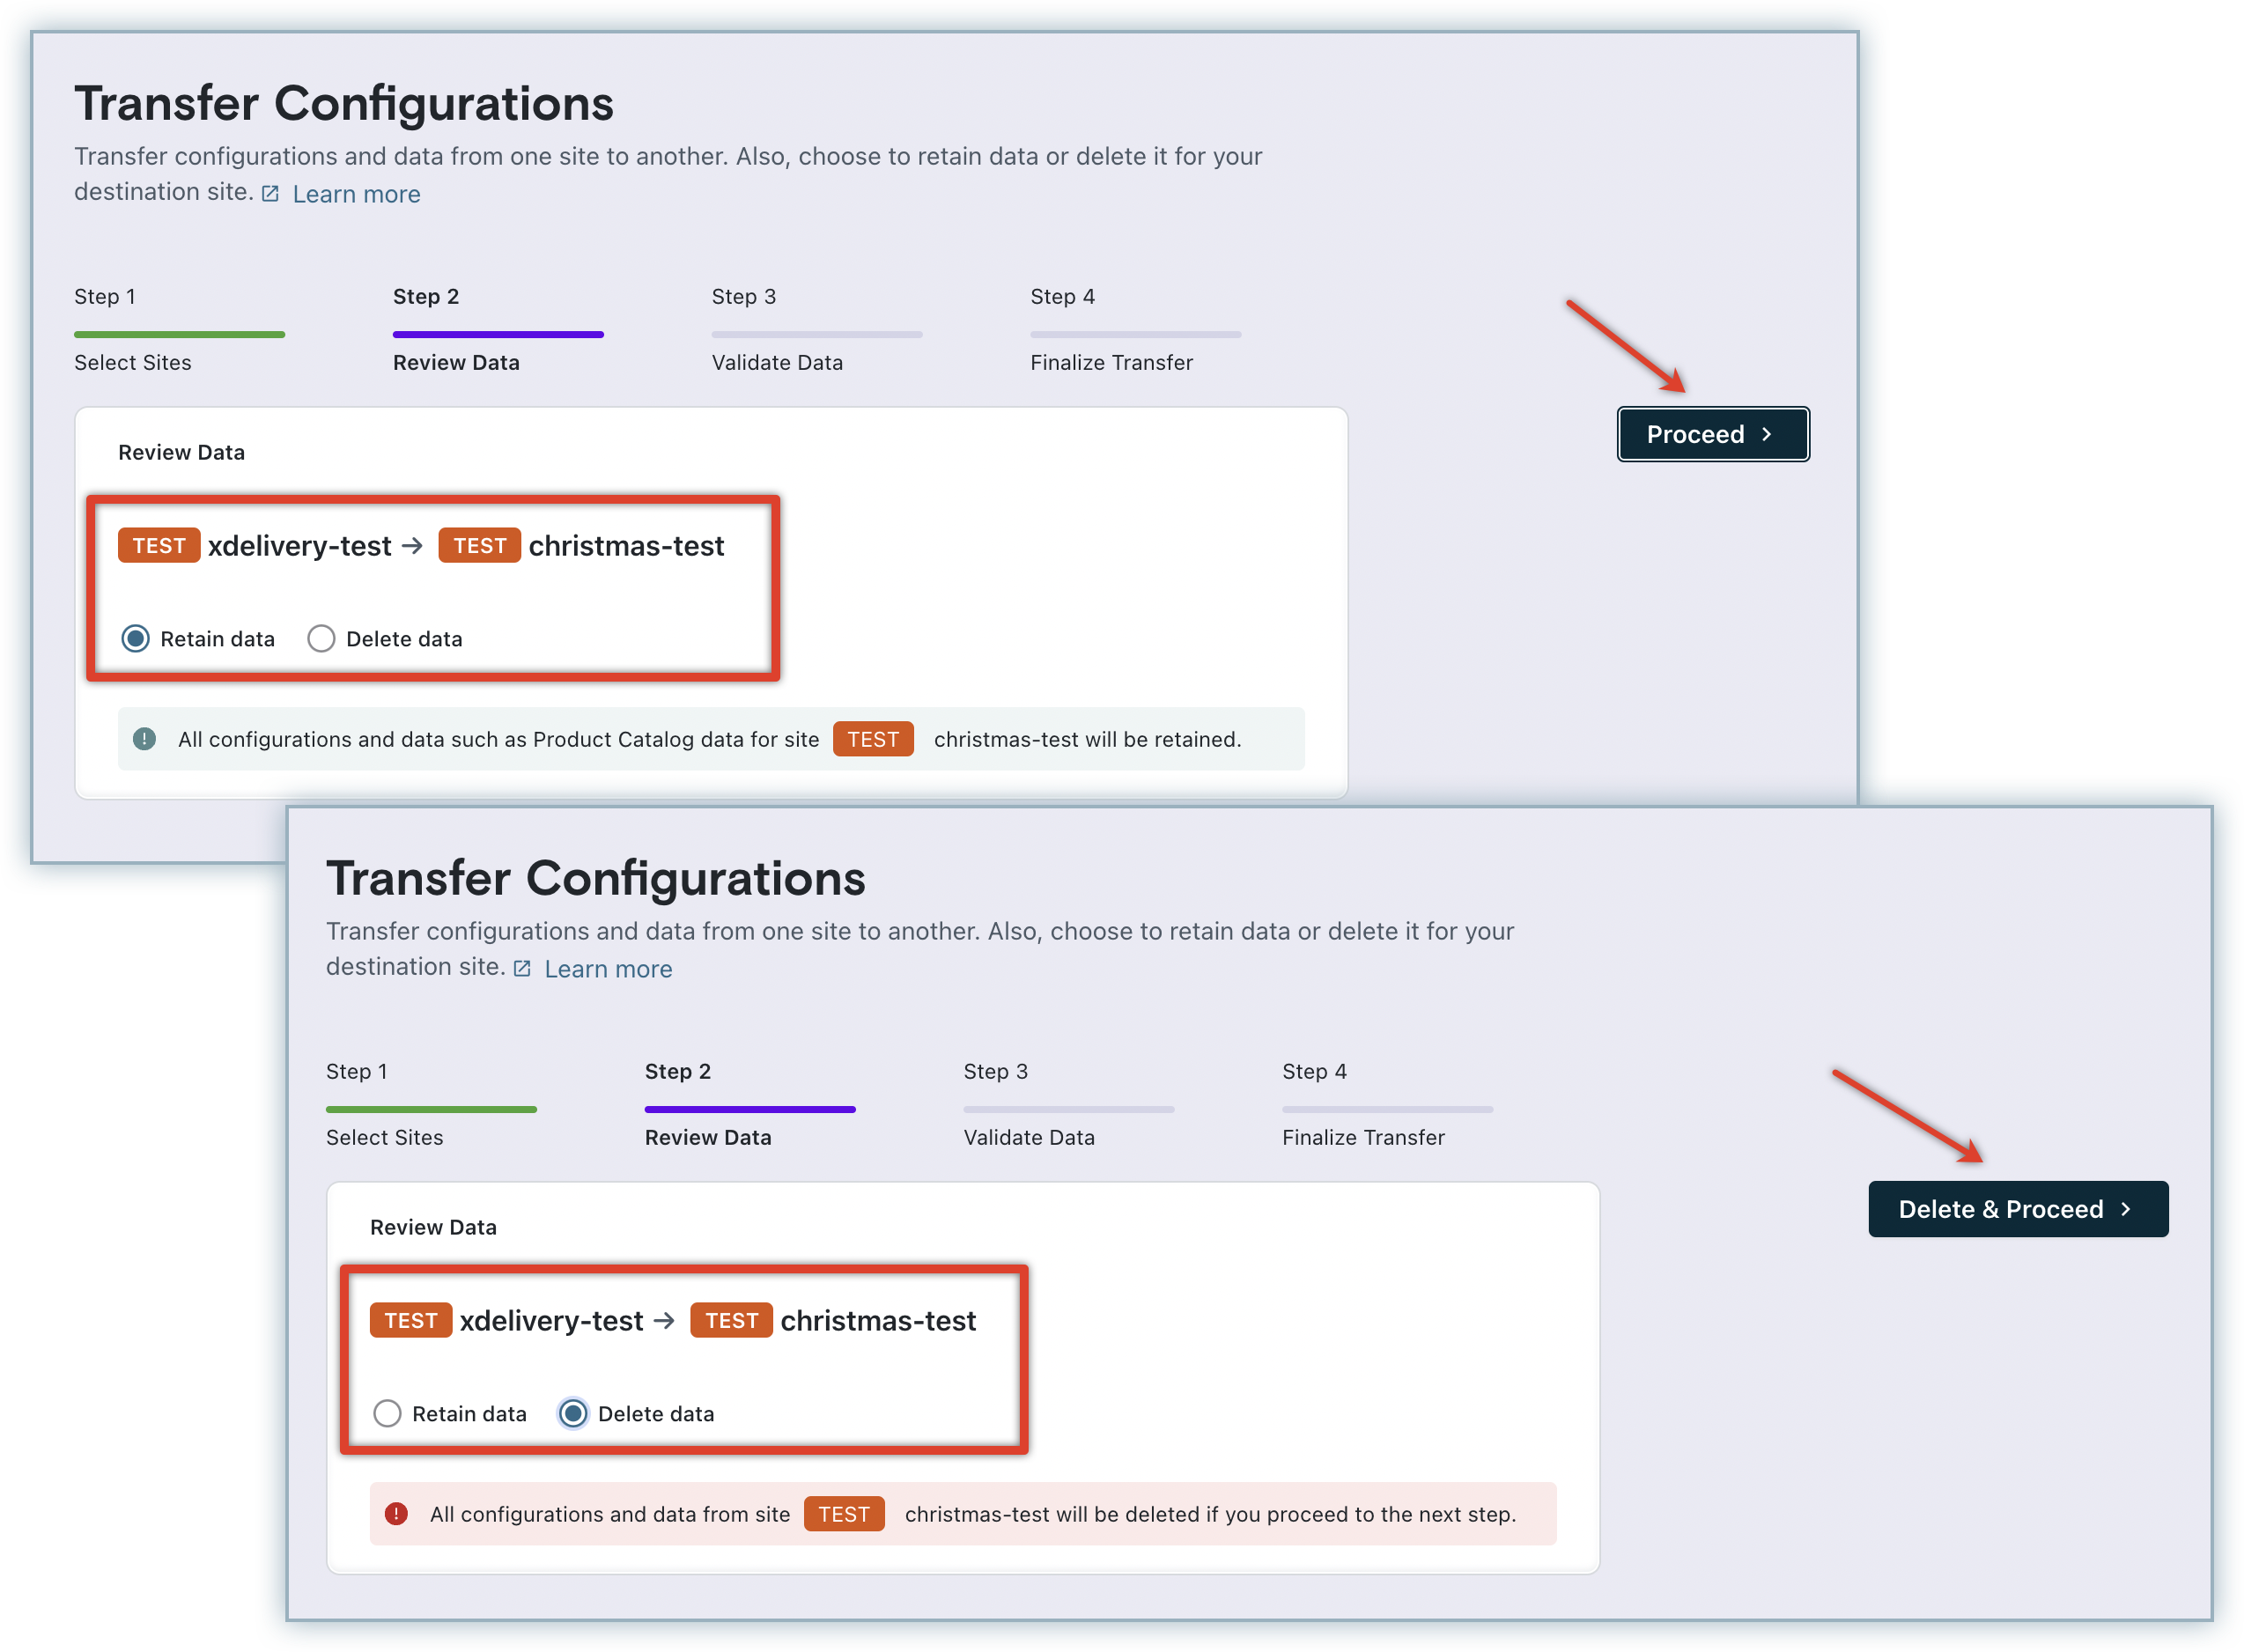
Based on your selection to retain or delete data, click Proceed or Delete and Proceed.
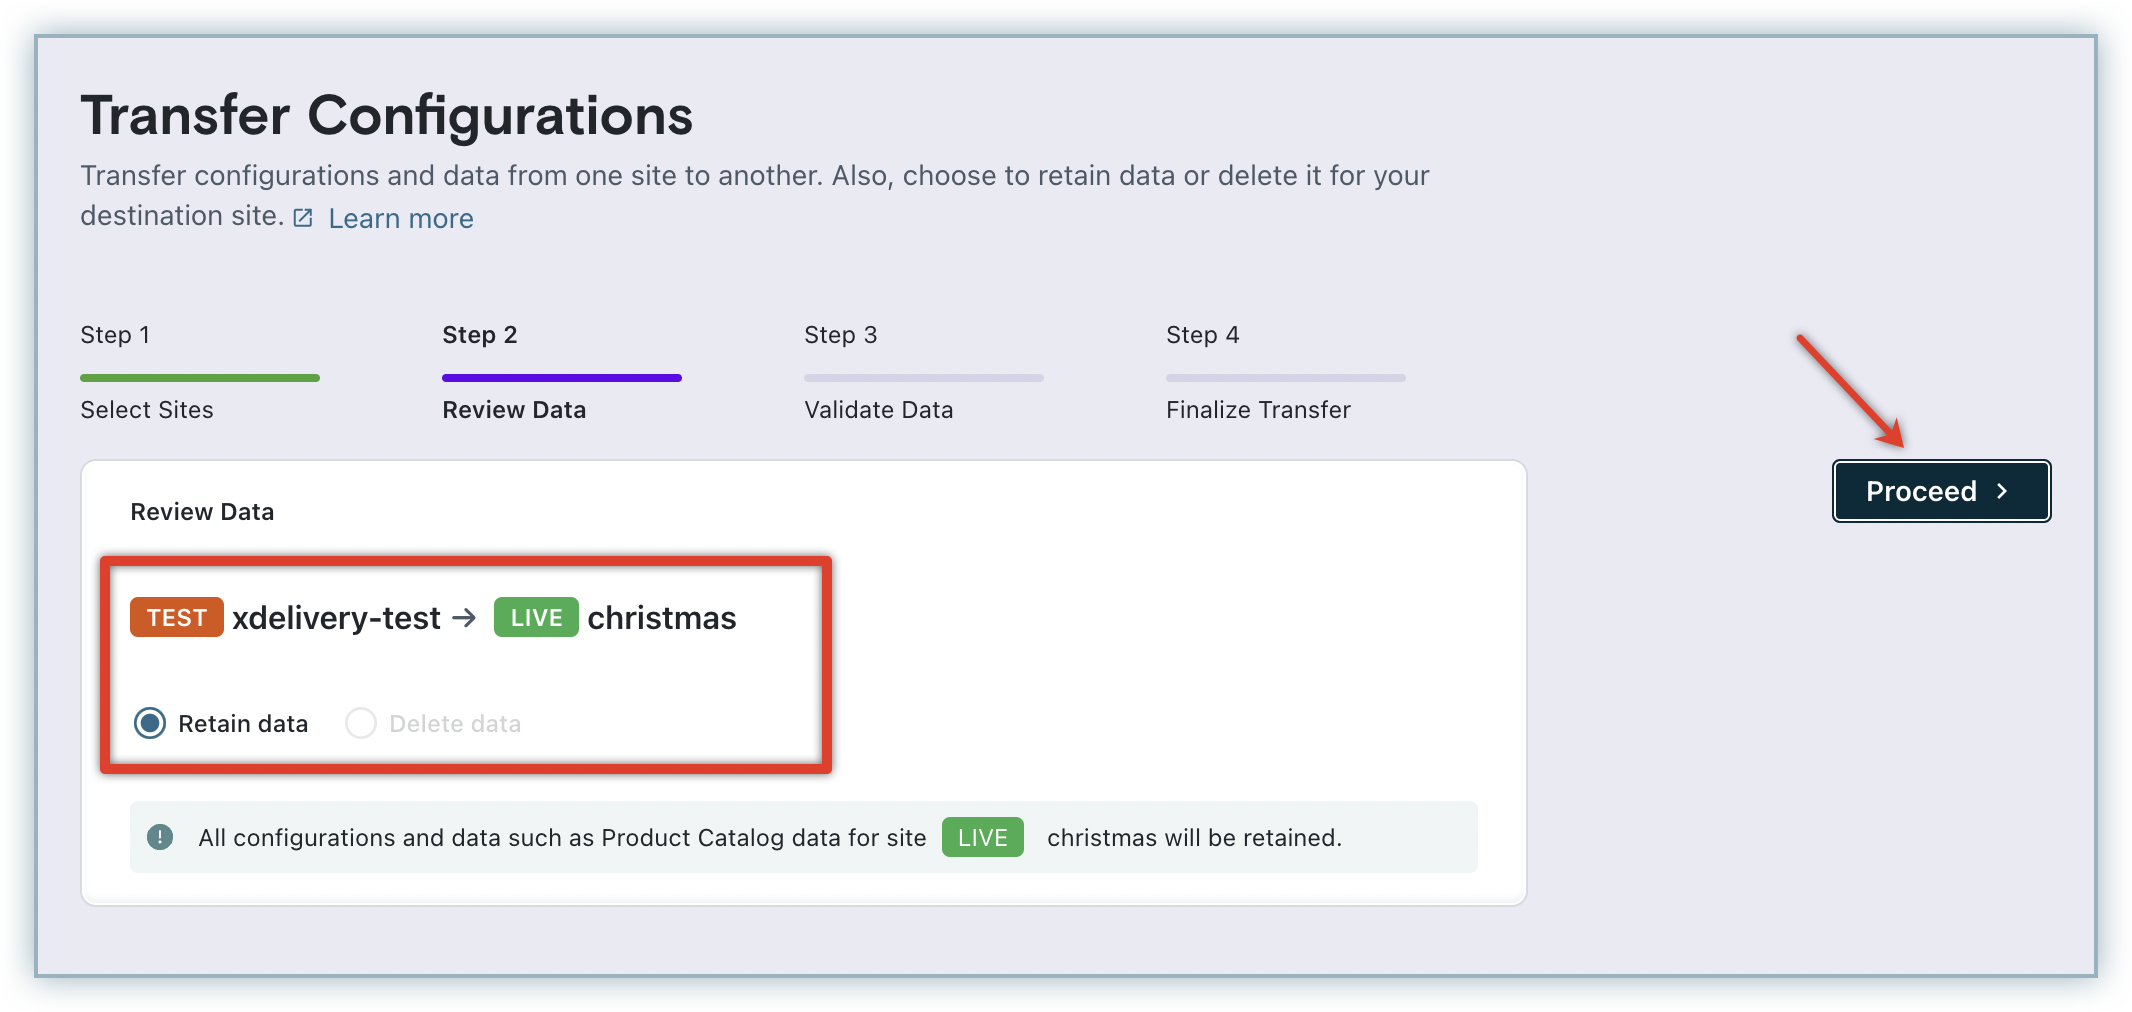
However, if you've selected a LIVE site as your destination, you will notice the Delete data option to be disabled. This is because you cannot delete data while transferring to the LIVE site.
On the Validate Data step, click Show All and select the configurations you want to copy using the check-boxes.
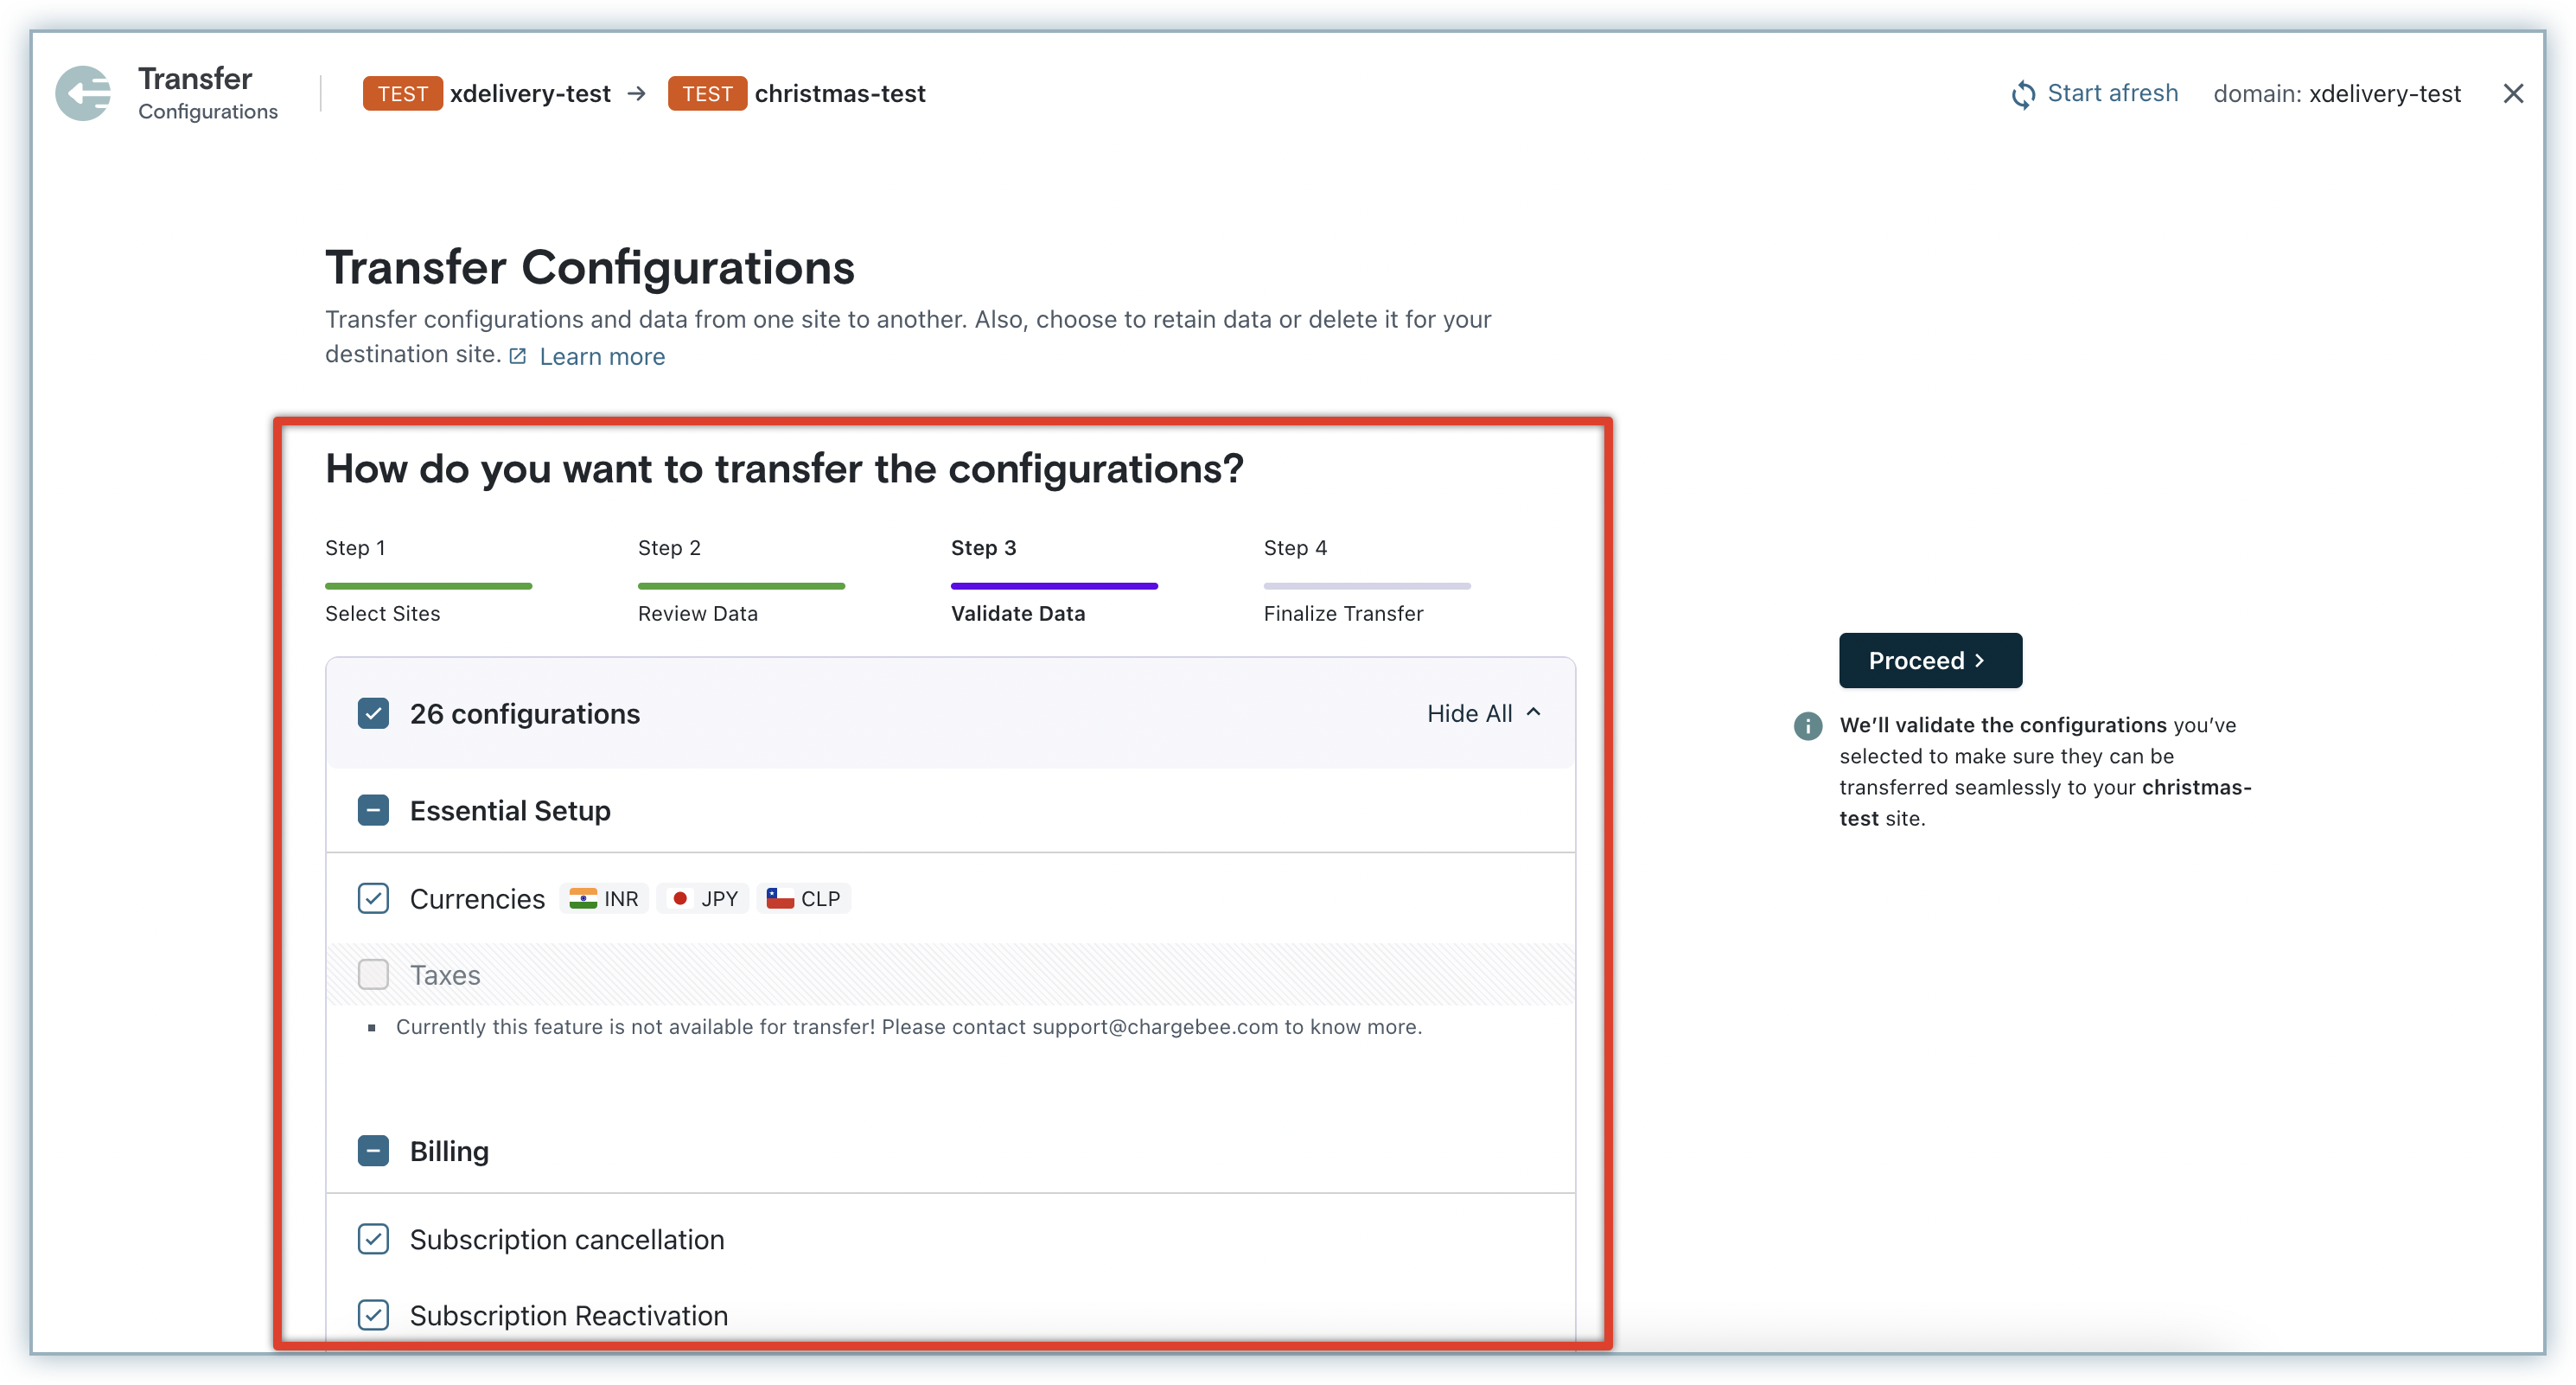
Some configurations that cannot be transferred are disabled. For instance, features like Calendar Billing, or Consolidated Invoicing are not supported for transfer and you need to contact support for more details. While some other features like Metered Billing or Manual Discounts need a manual intervention in either or both sites before transferring.
Click Proceed to start validation.
When you start the validation process, it runs as a background job. This means you can still click Transfer Configurations at the top and start another transfer while the validation process is running. This allows you to do multiple transfers at the same time.
Once the validation process is complete, you will either receive a message saying it was successful or if there was an error. If there are errors, you will see that the Validation failed with a Retry button. If it was successful, you will see a button to Resume with the transfer.
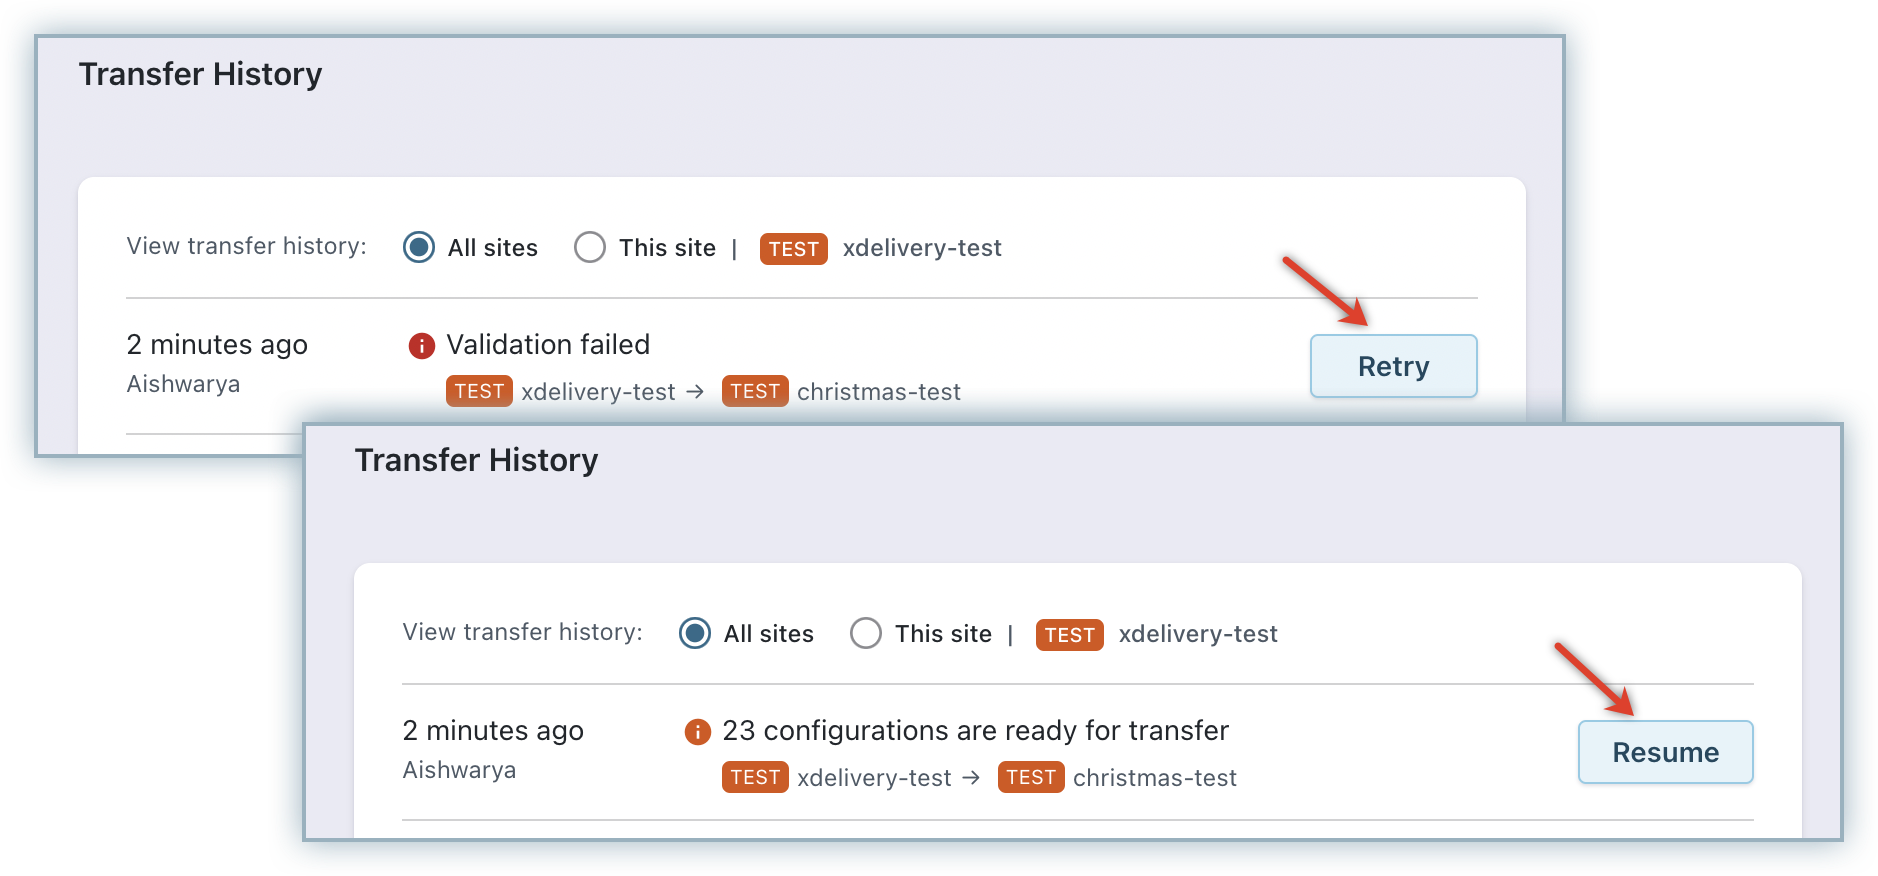
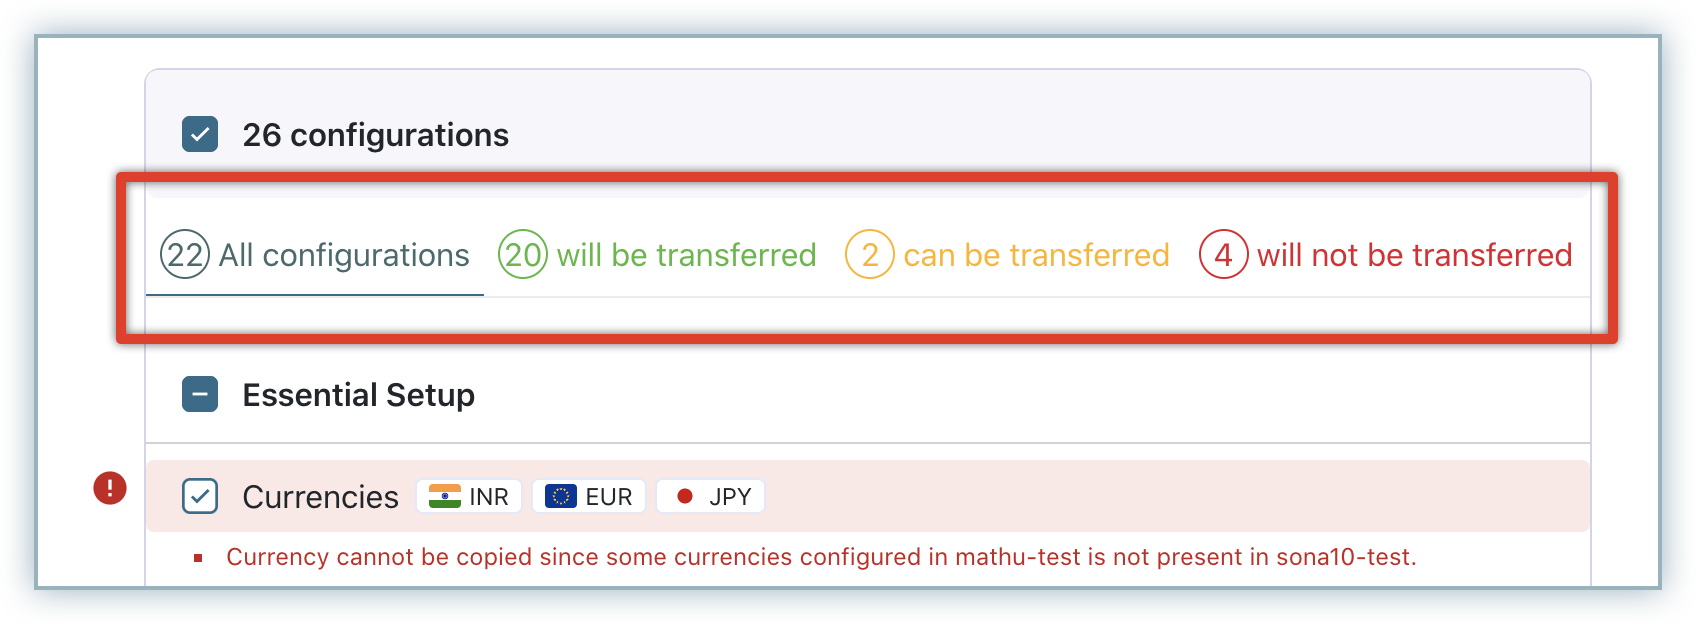
Click Resume or Retry and you will be redirected to the Validate Data step, where all your configurations are grouped in the following tabs based on their validation:
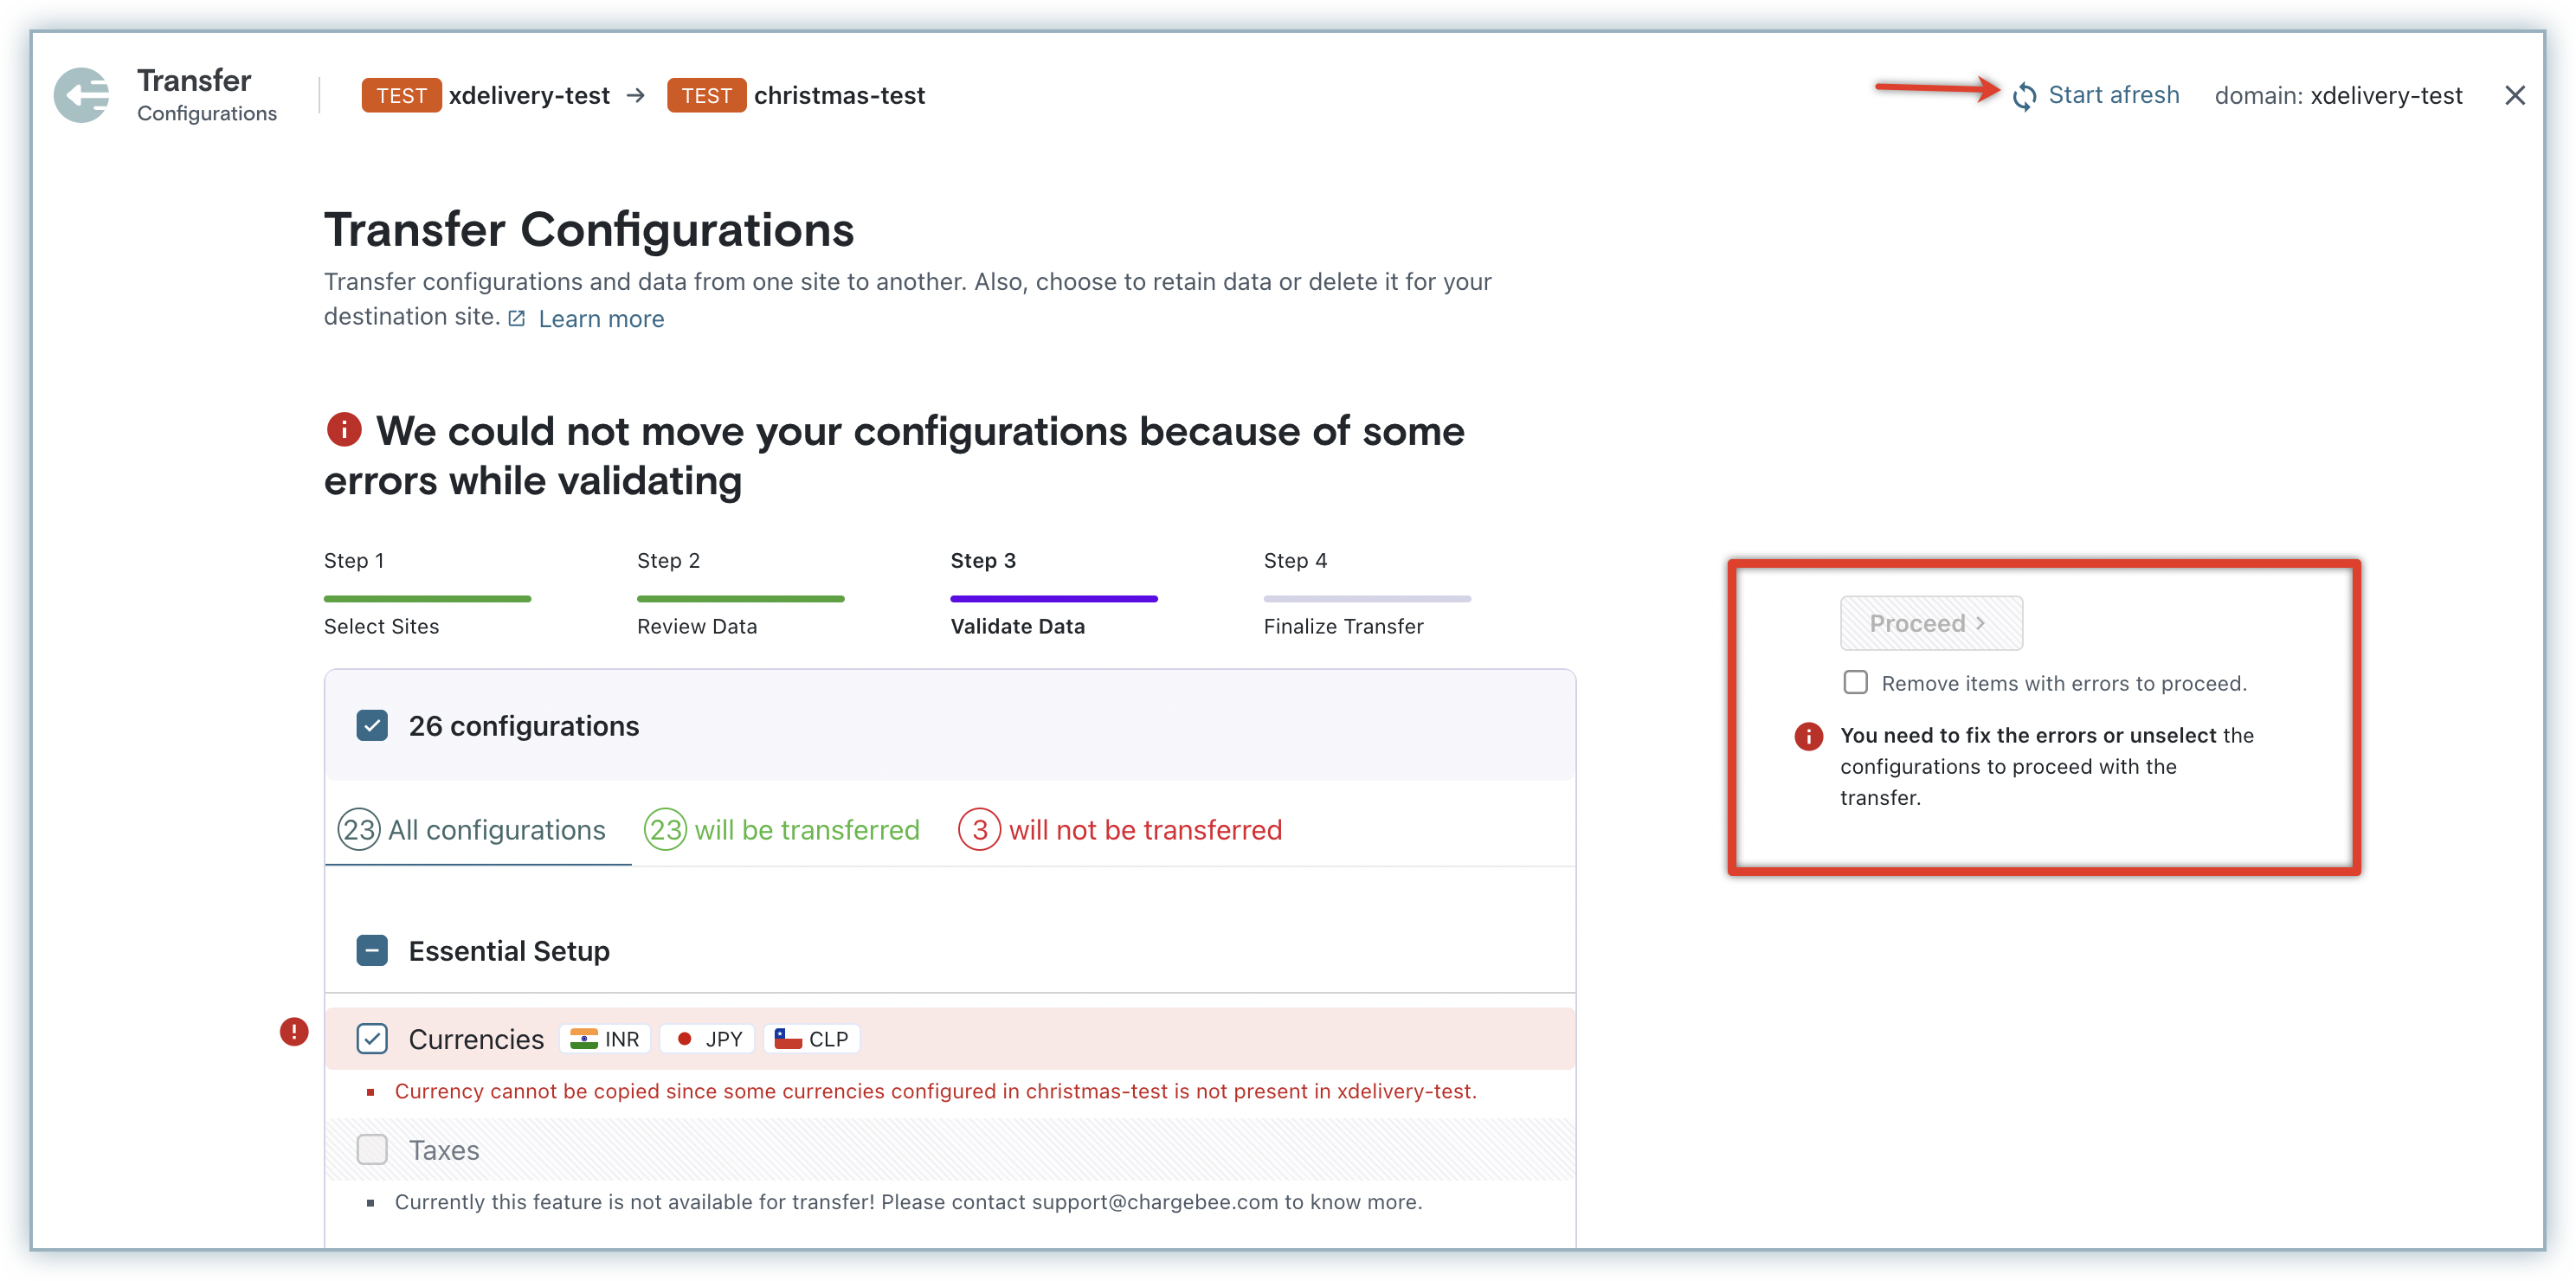
You can either resolve the errors listed and initiate the transfer again, or you can enable the Remove items with errors to proceed check-box, and click Proceed to continue with re-validation.
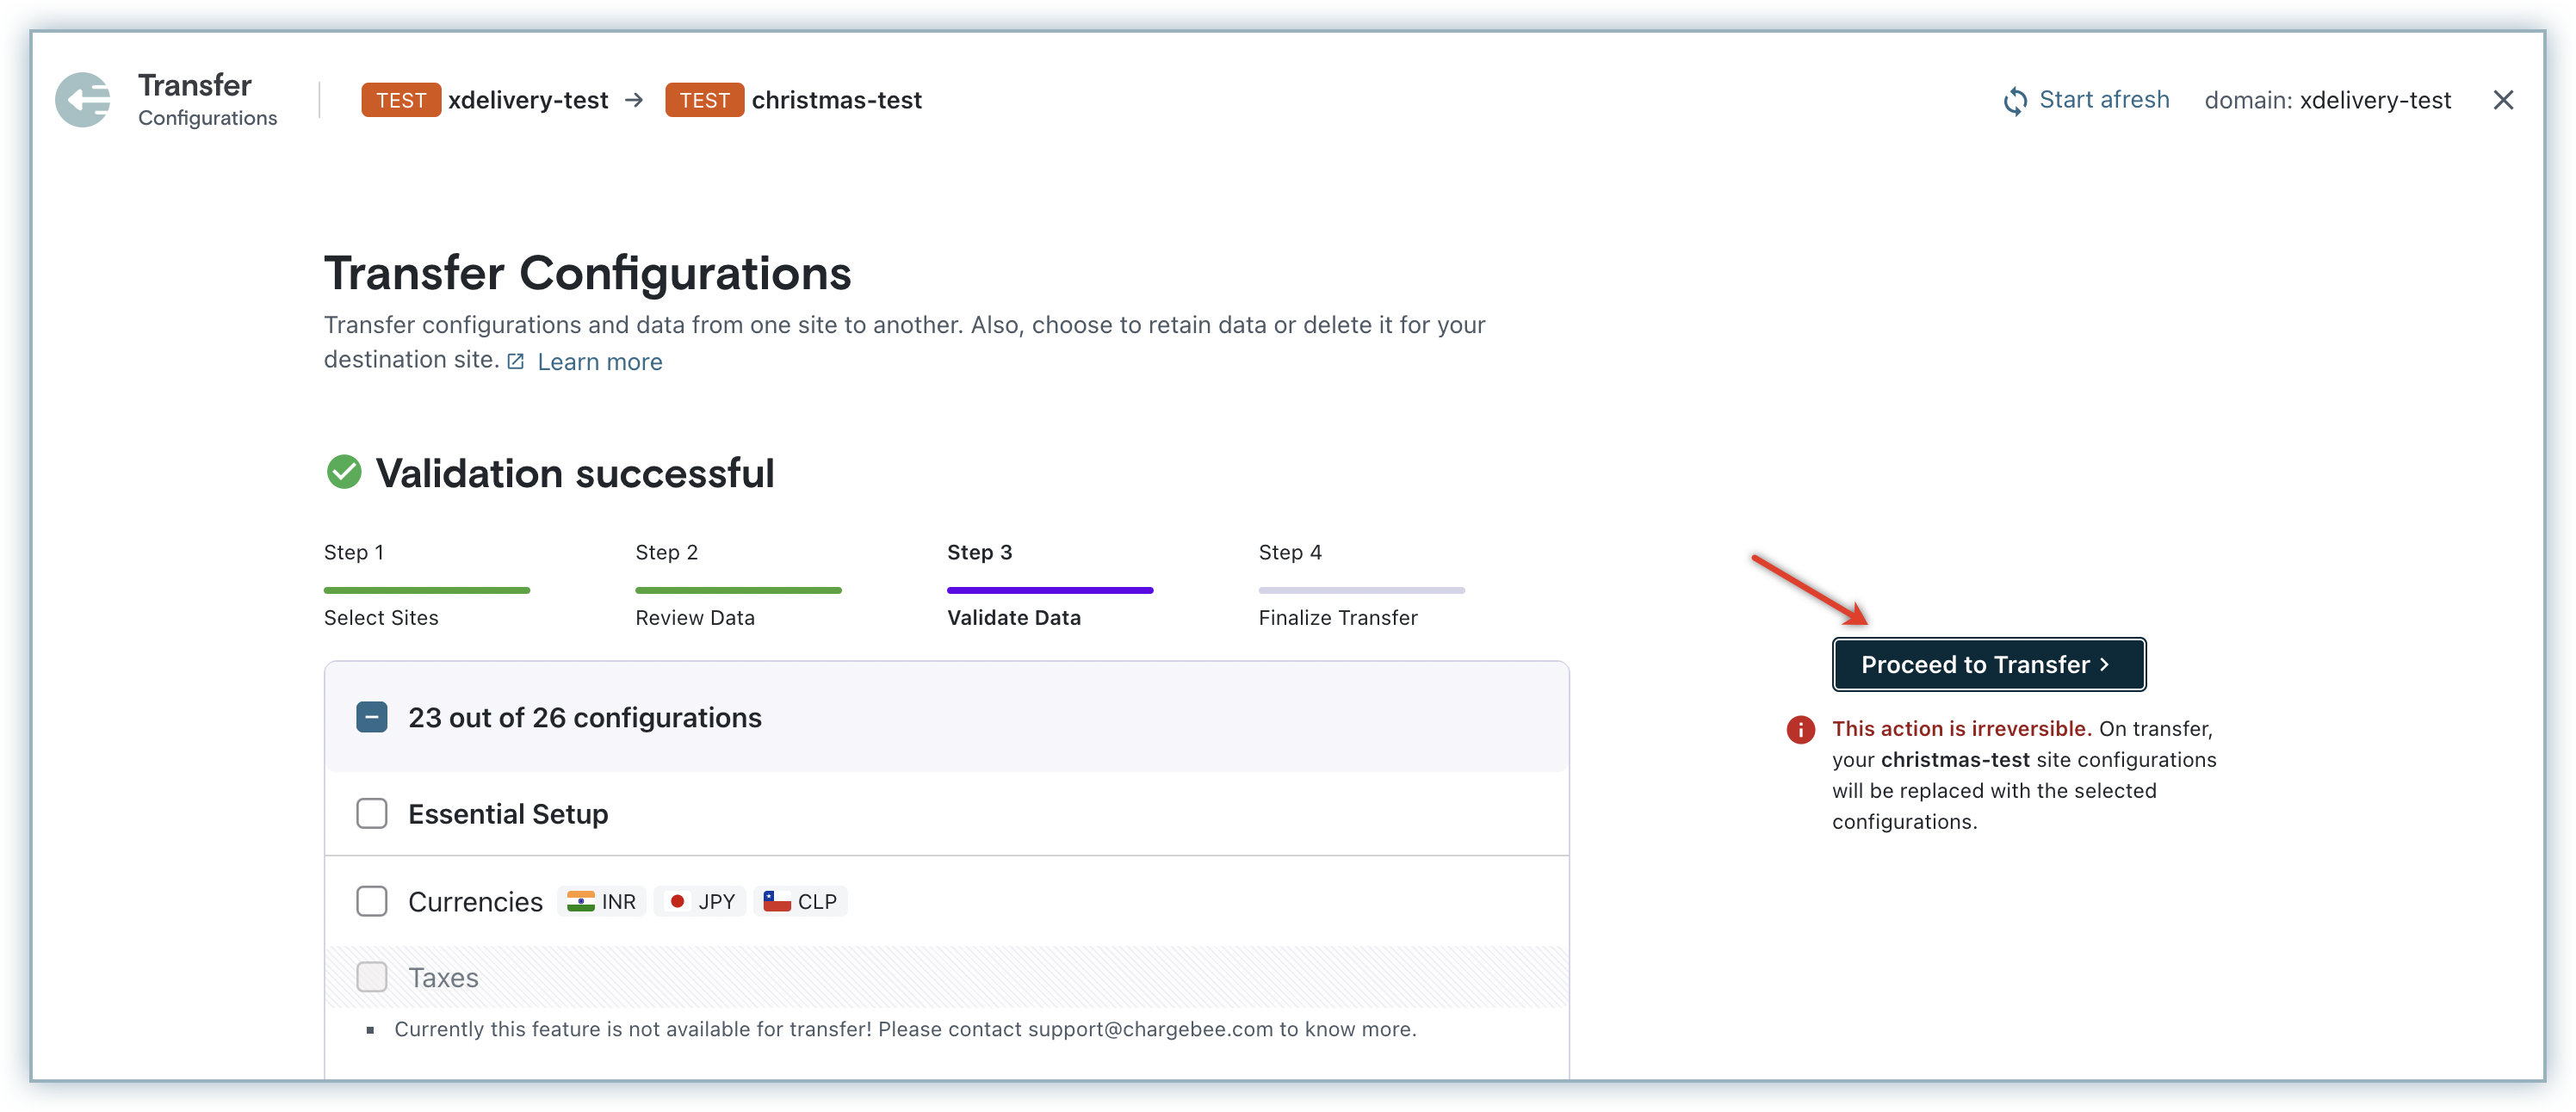
Click Proceed to Transfer to transfer configurations to your destination site.
Note: This action is irreversible.
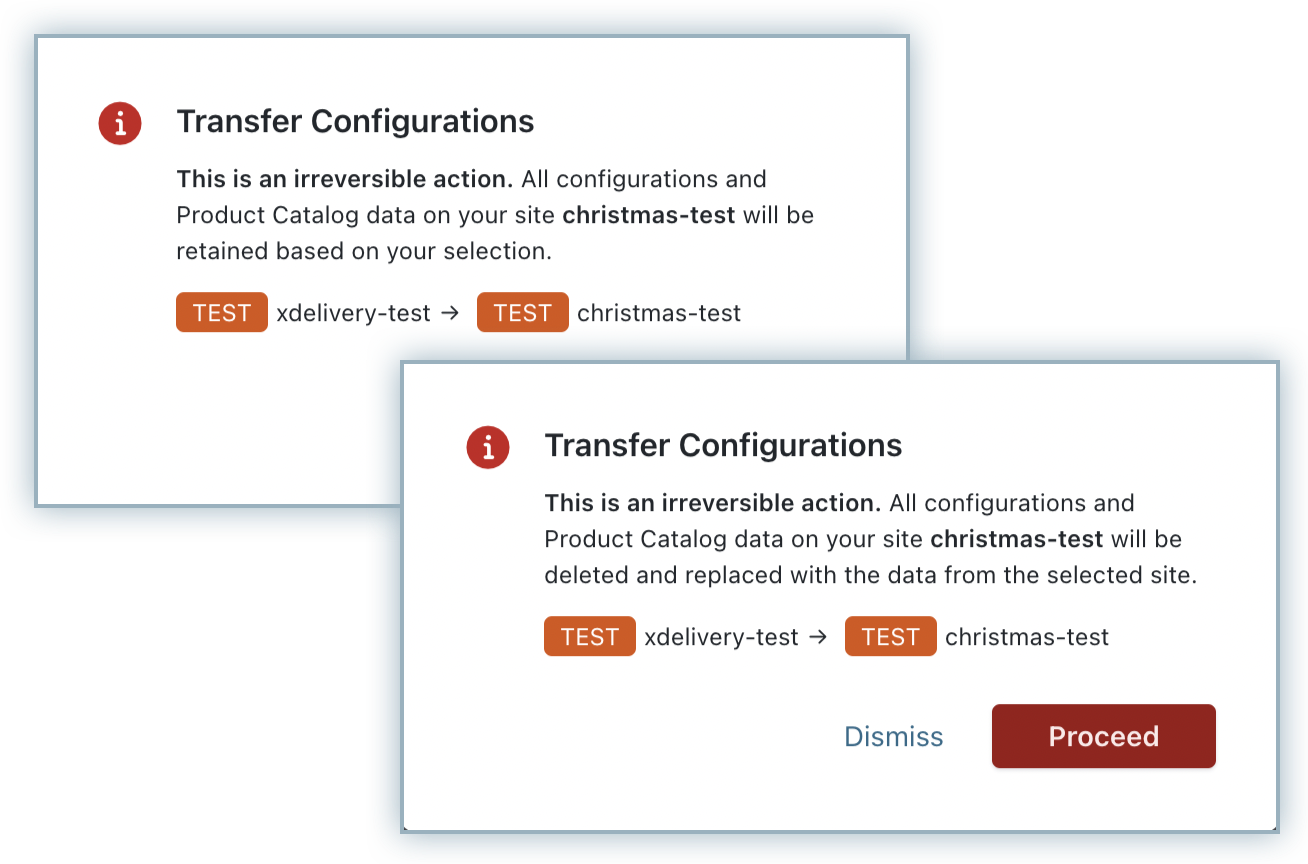
Based on your selection during the Review data step to retain or delete data, you will be notified with a confirmation pop-up with relevant messaging. Verify, click Proceed to confirm and begin the transfer.
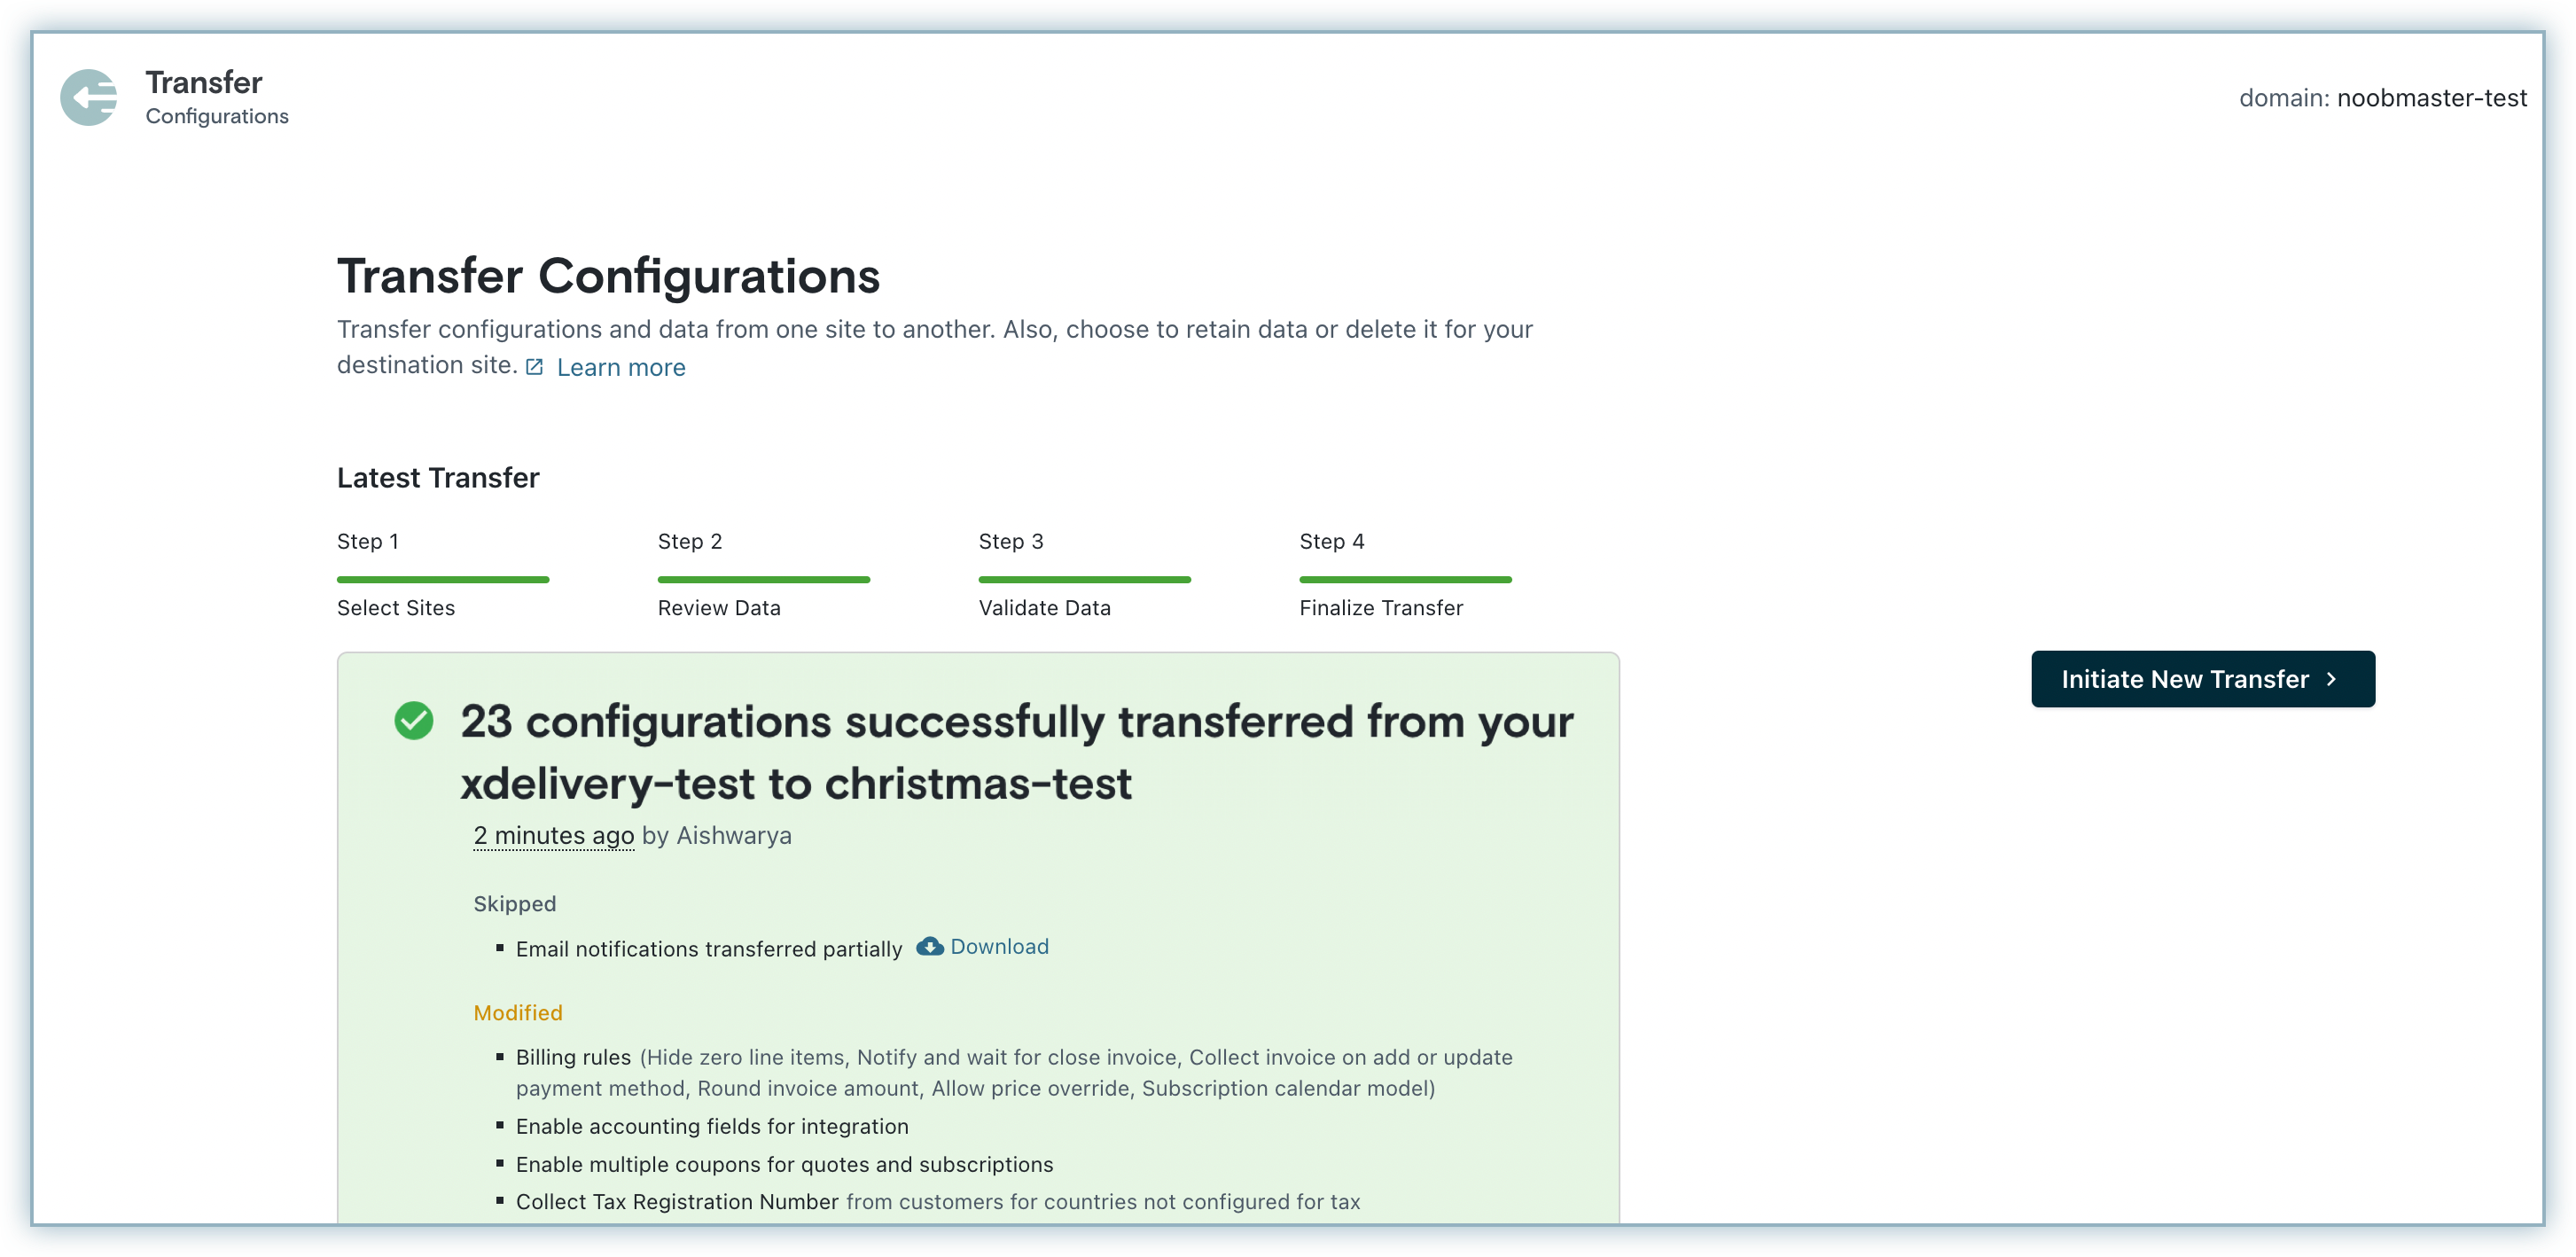
The transfer is under progress and may take a while. As this is an async operation, you can initiate a new transfer while the previous transfer gets completed.
Once the transfer is completed a message appears with the total number of configurations that are successfully transferred from source to destination site along with tags such as:
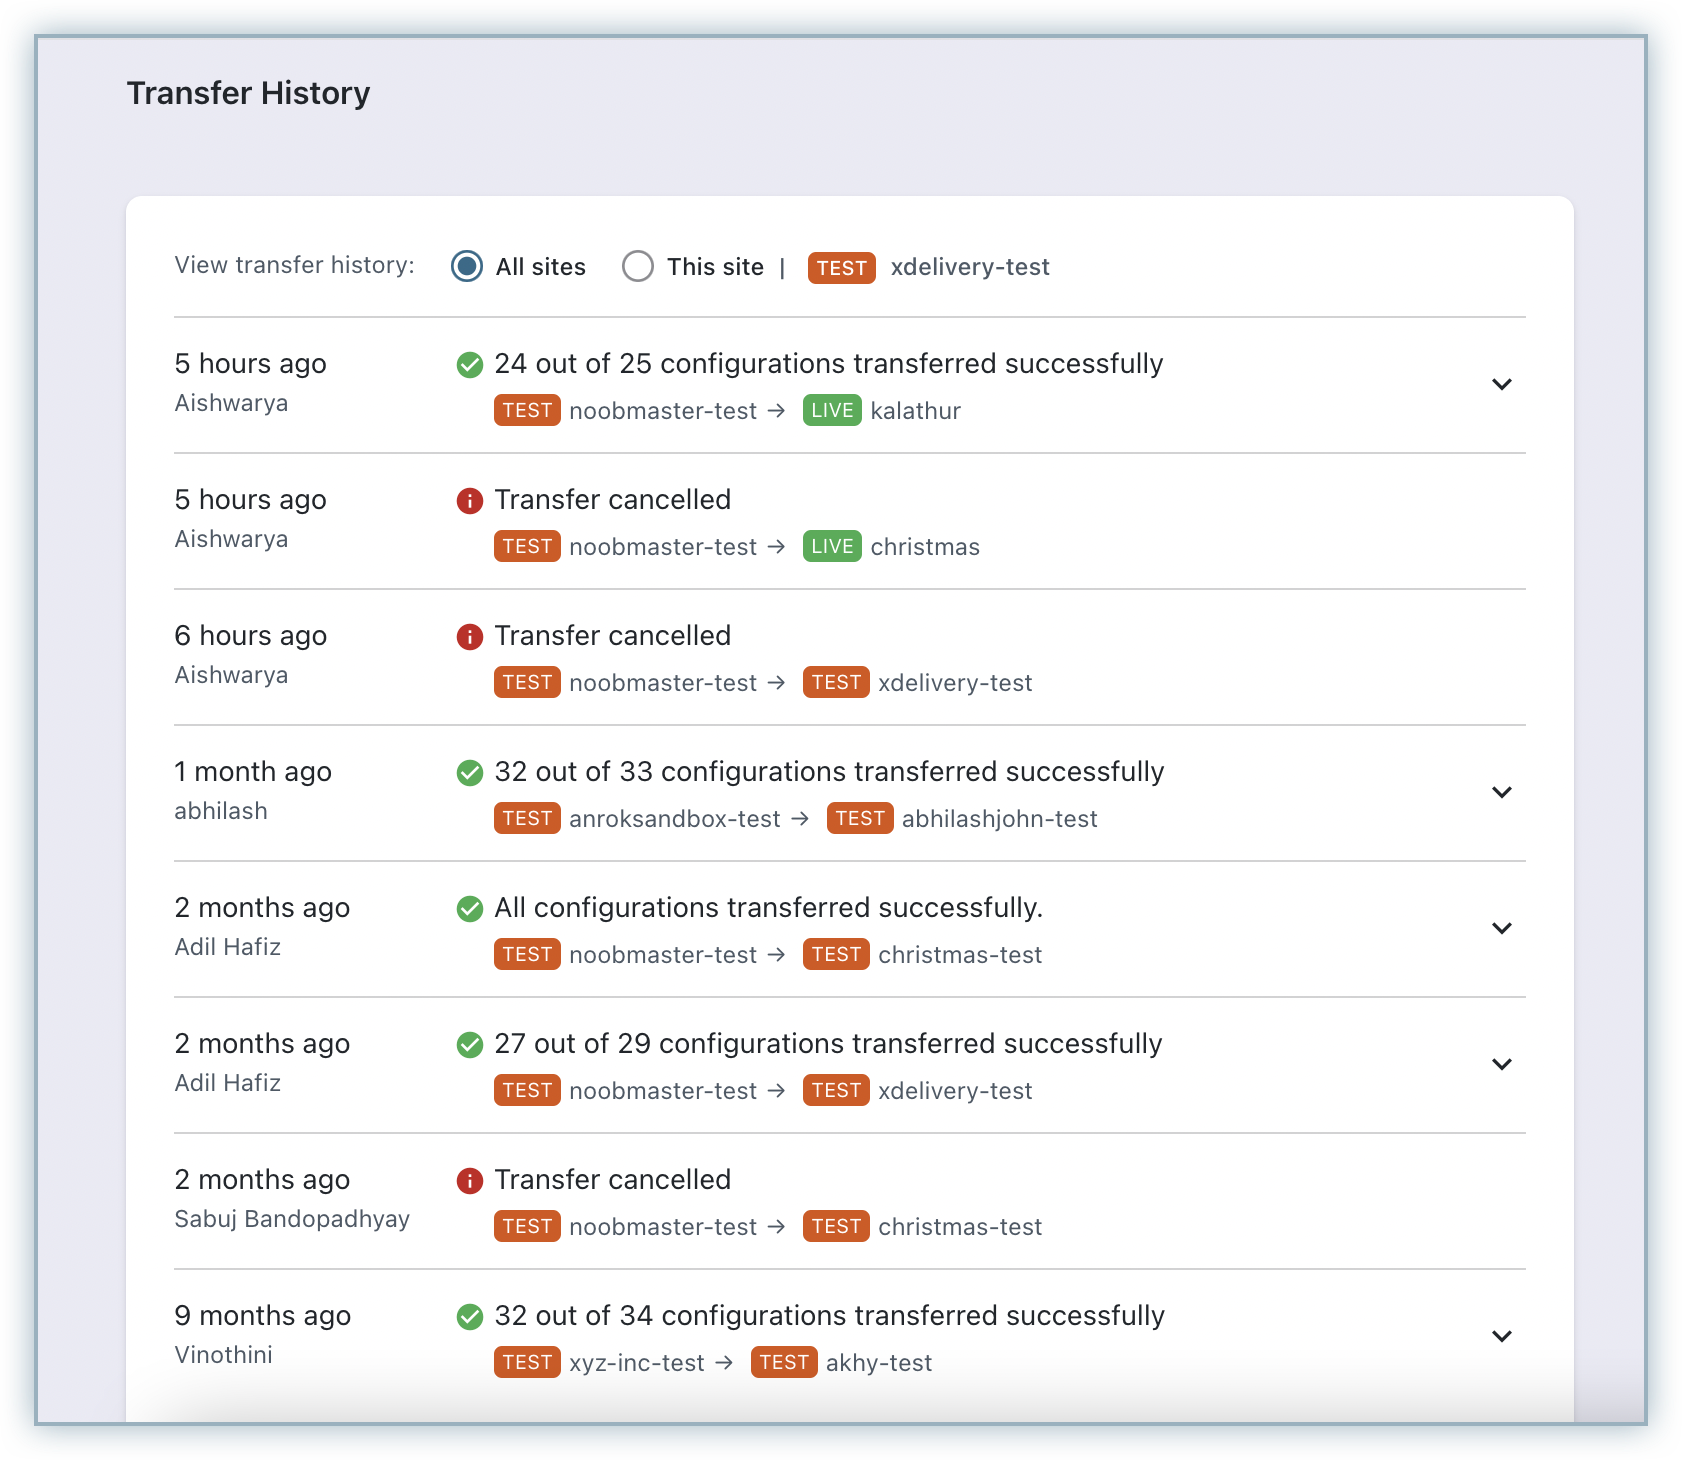
You can view the following Validation and Transfer statuses for all configurations under the Transfer History:
1. What are the configurations that cannot be transferred?
2. Is there any configuration that can be transferred but is not listed in the Transfer Configurations tool?
3. What happens to the configuration changes in draft state while transferring?
