Docs
System for Cross-Domain Identity Management (SCIM) is a standard protocol designed to facilitate the automation of user provisioning and management across various applications and services. SCIM allows organizations to manage user identities in a centralized manner, enabling seamless integration with identity providers and other systems.
With SCIM, organizations can automate the process of creating, updating, and deleting user accounts across multiple platforms, reducing the administrative burden associated with manual user management. This is particularly beneficial for businesses that utilize a variety of applications and need to ensure that user access is consistent and secure.
Key benefits of SCIM User Provisioning include:
This guide provides the steps required to how to obtain or configure the SCIM Provisioning on Chargebee, and includes the following topics:
The following Provisioning features are supported:
Import of Users or Groups from Chargebee to Okta is not supported.
To obtain the API Token value for configuring Provisioning in Chargebee, follow these steps:
Login to your Chargebee account using SAML.
Navigate to Settings > Team Members.
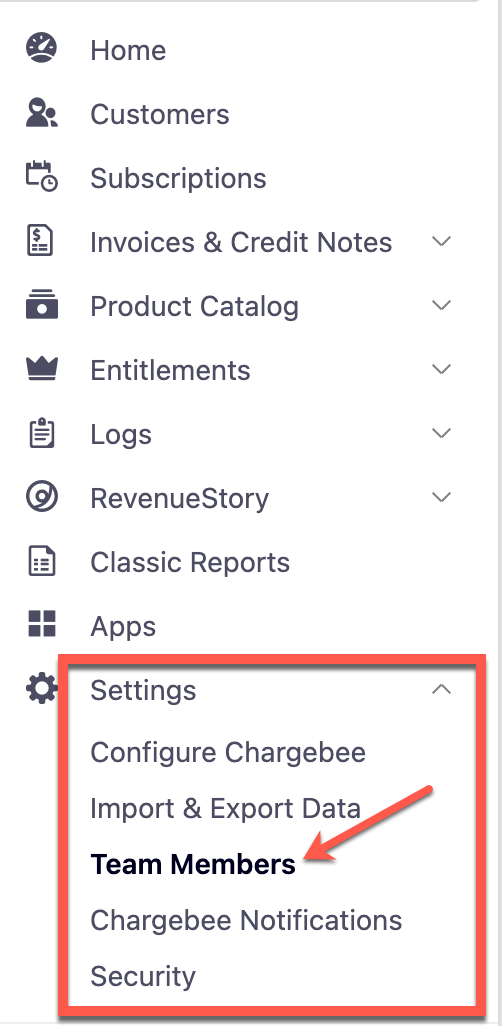
Click Get Started under User Identity Management.

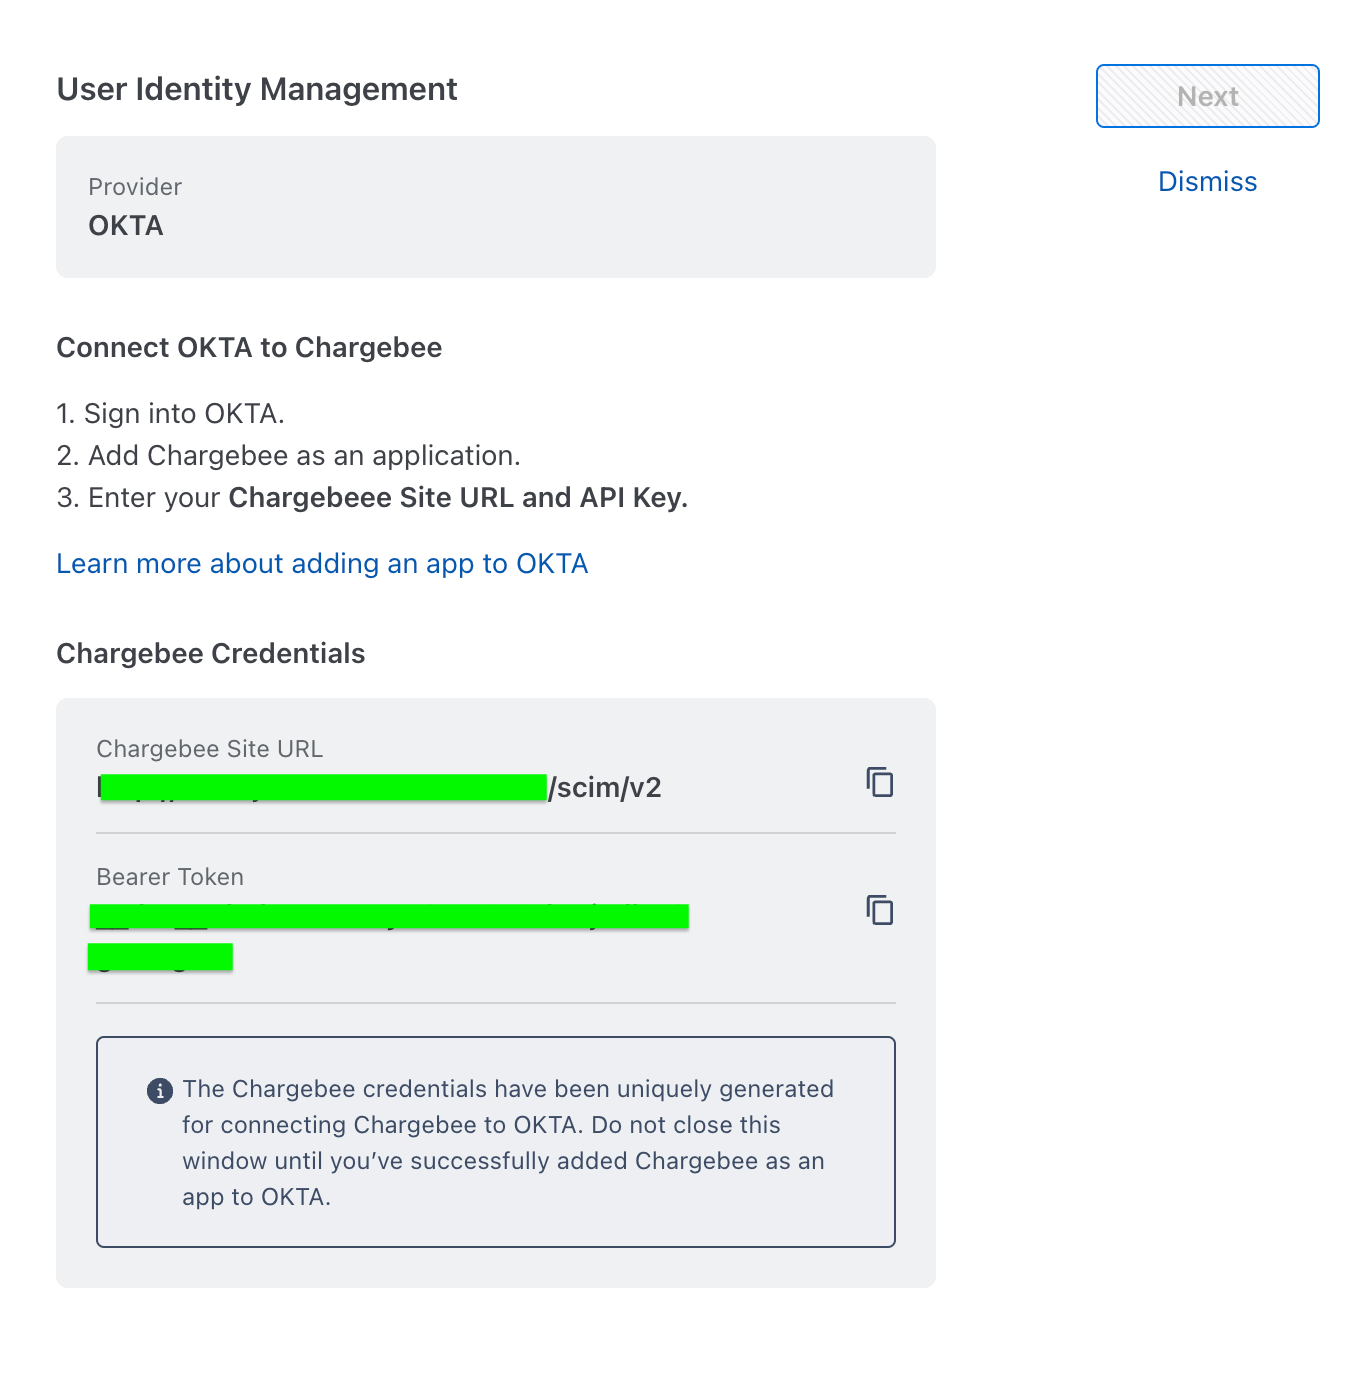
Follow the steps below
Under Chargebee Credentials, copy the values of the Chargebee Site URL and Bearer Token. Use these values to add SCIM connection at the Provisioning tab of the Chargebee Okta Application.
To configure your provisioning settings in the Okta Application, follow these steps:
Login to your Okta account and navigate to Okta admin console.
Select Applications from the left nav.
Select the Chargebee Okta application instance that is configured with SAML for the respective site. This is the instance created while enabling SAML for the site, as mentioned here.
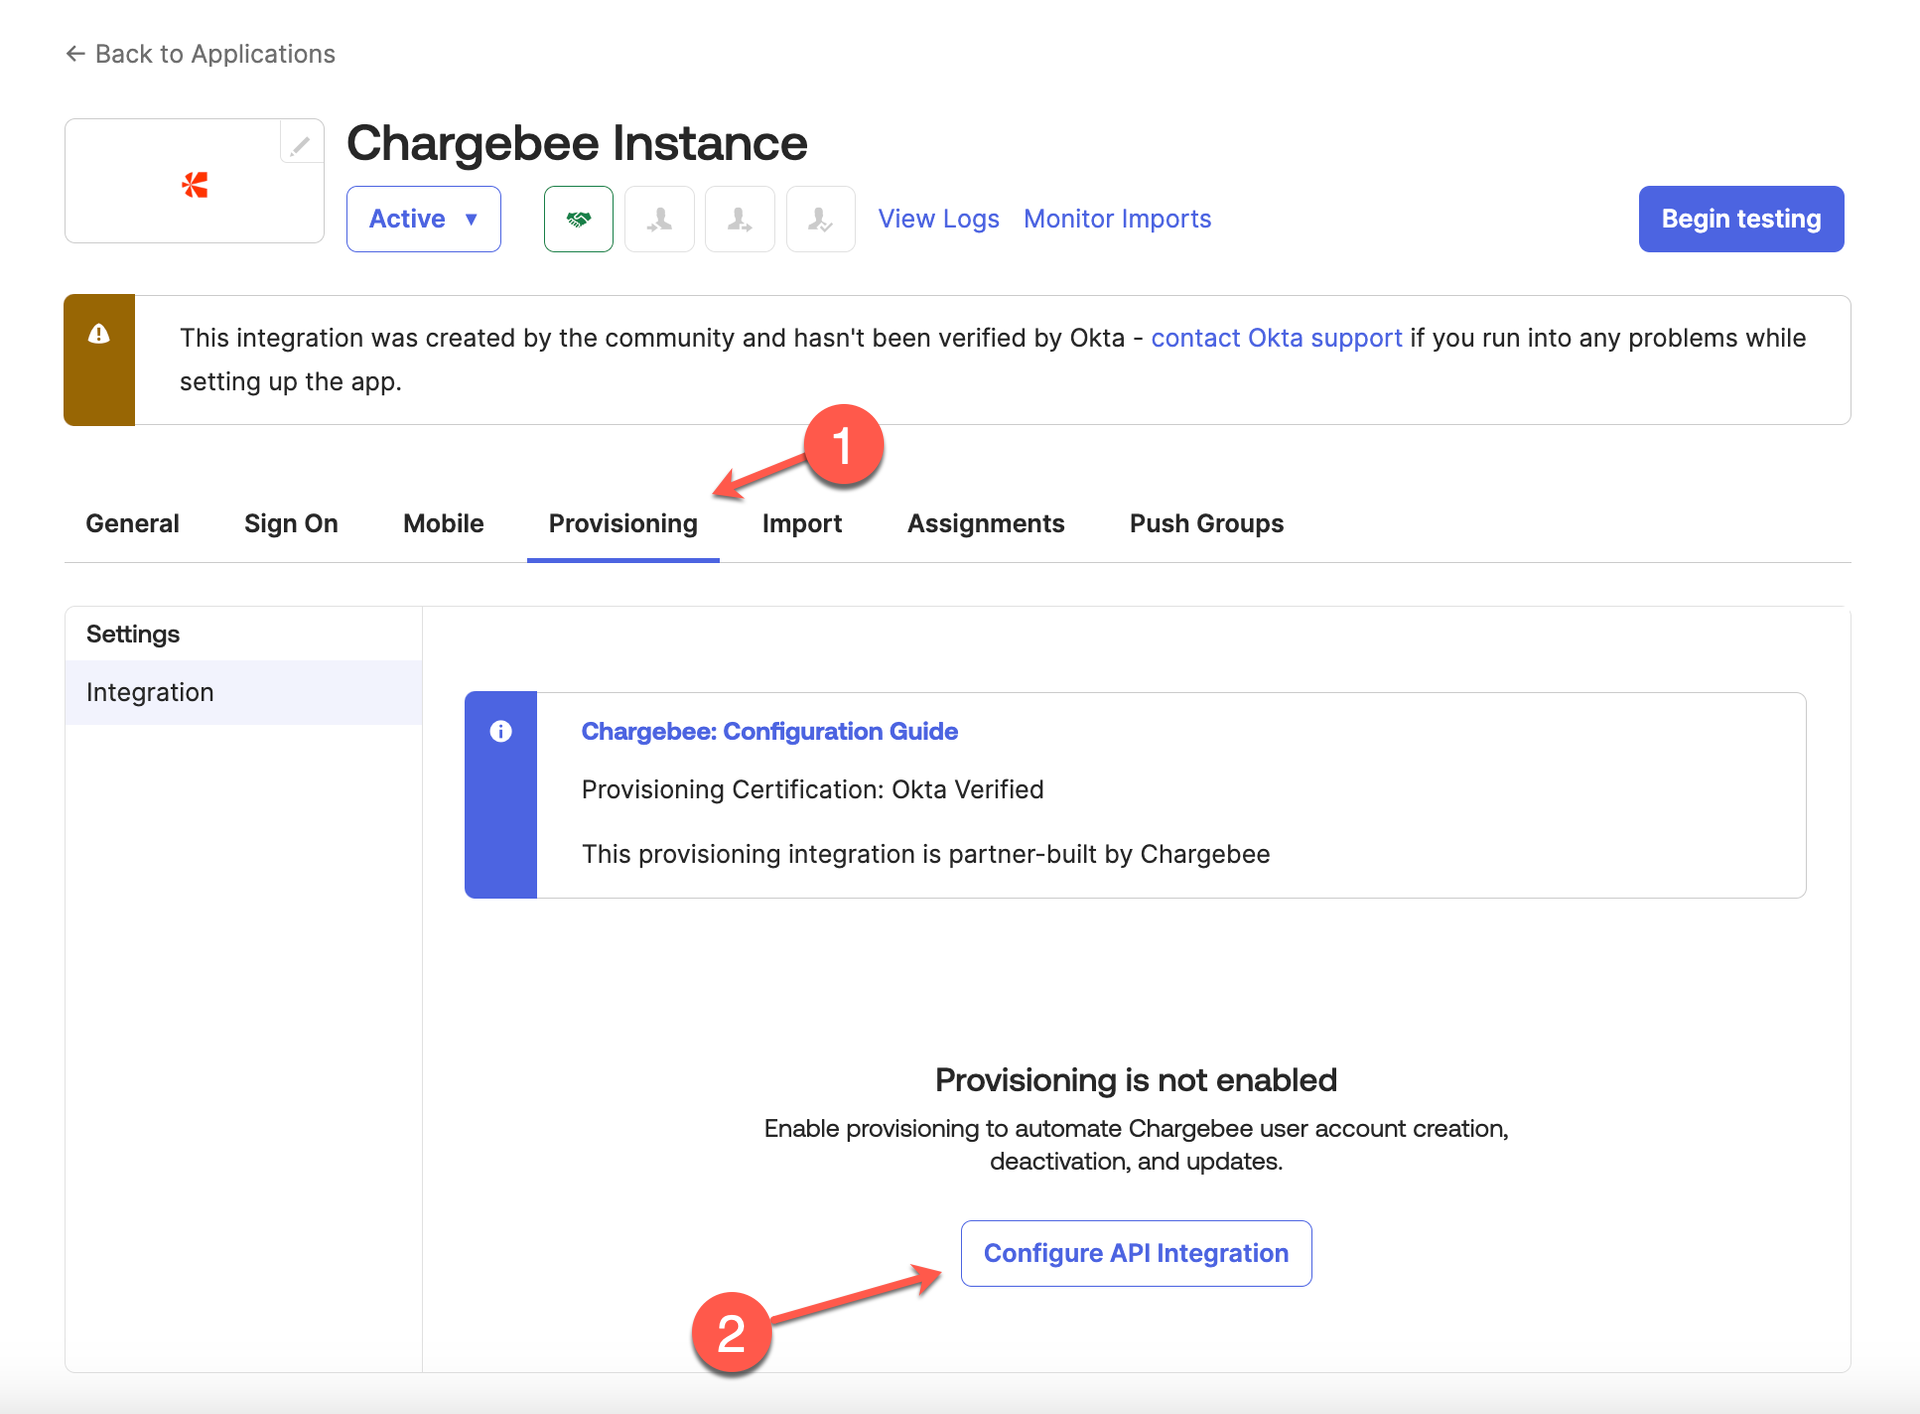
Navigate to Provisioning tab and click Configure API Integration.
Complete the following steps:
Select the Enable API Integration checkbox. Enter your Chargebee API Token from step 5 as mentioned above.
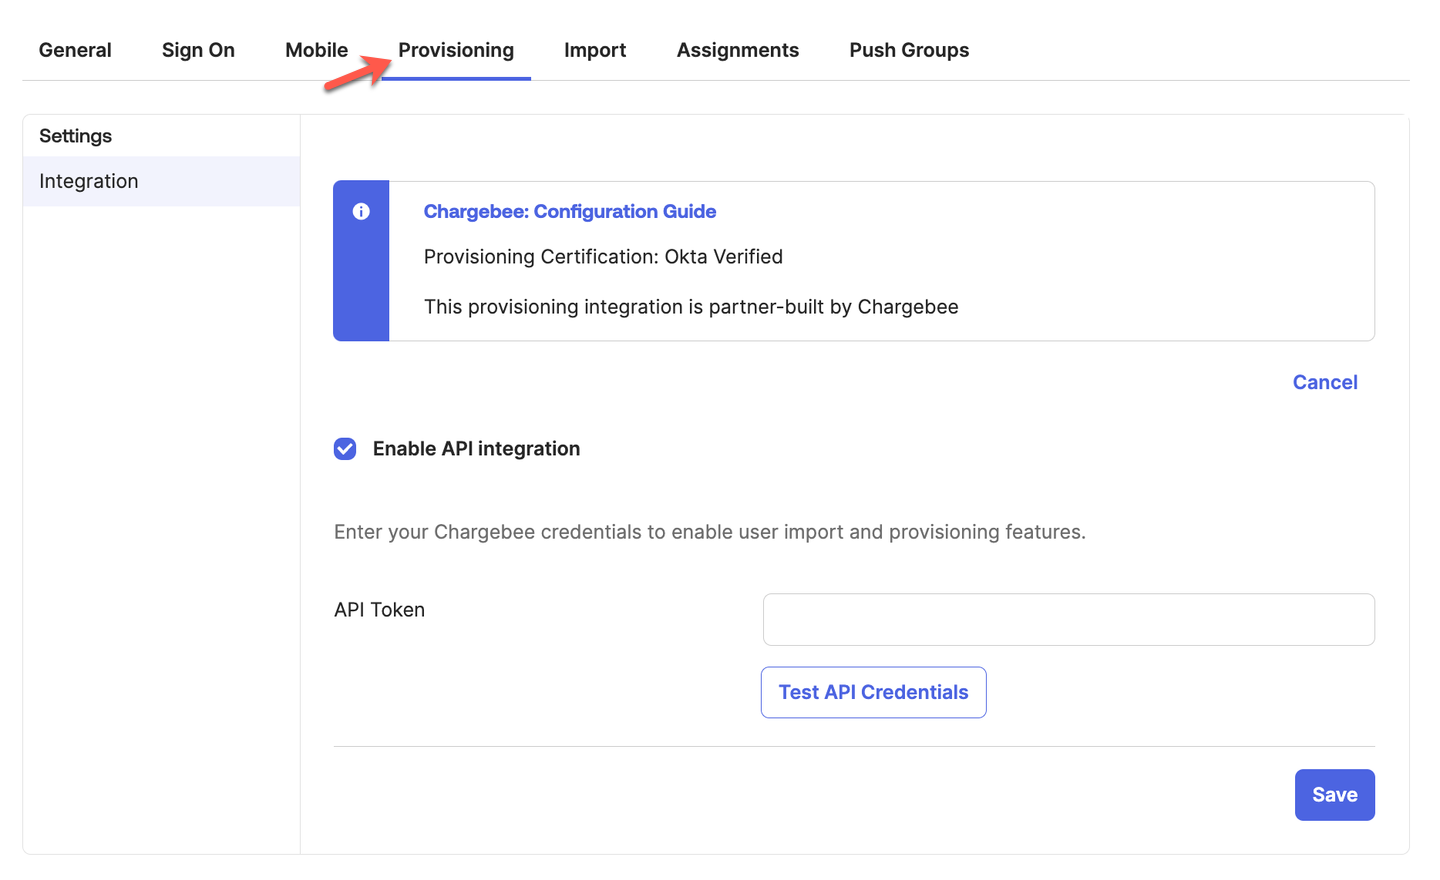
Click Test API Credentials for testing your credentials. This step is optional.
Click Save to apply the changes.
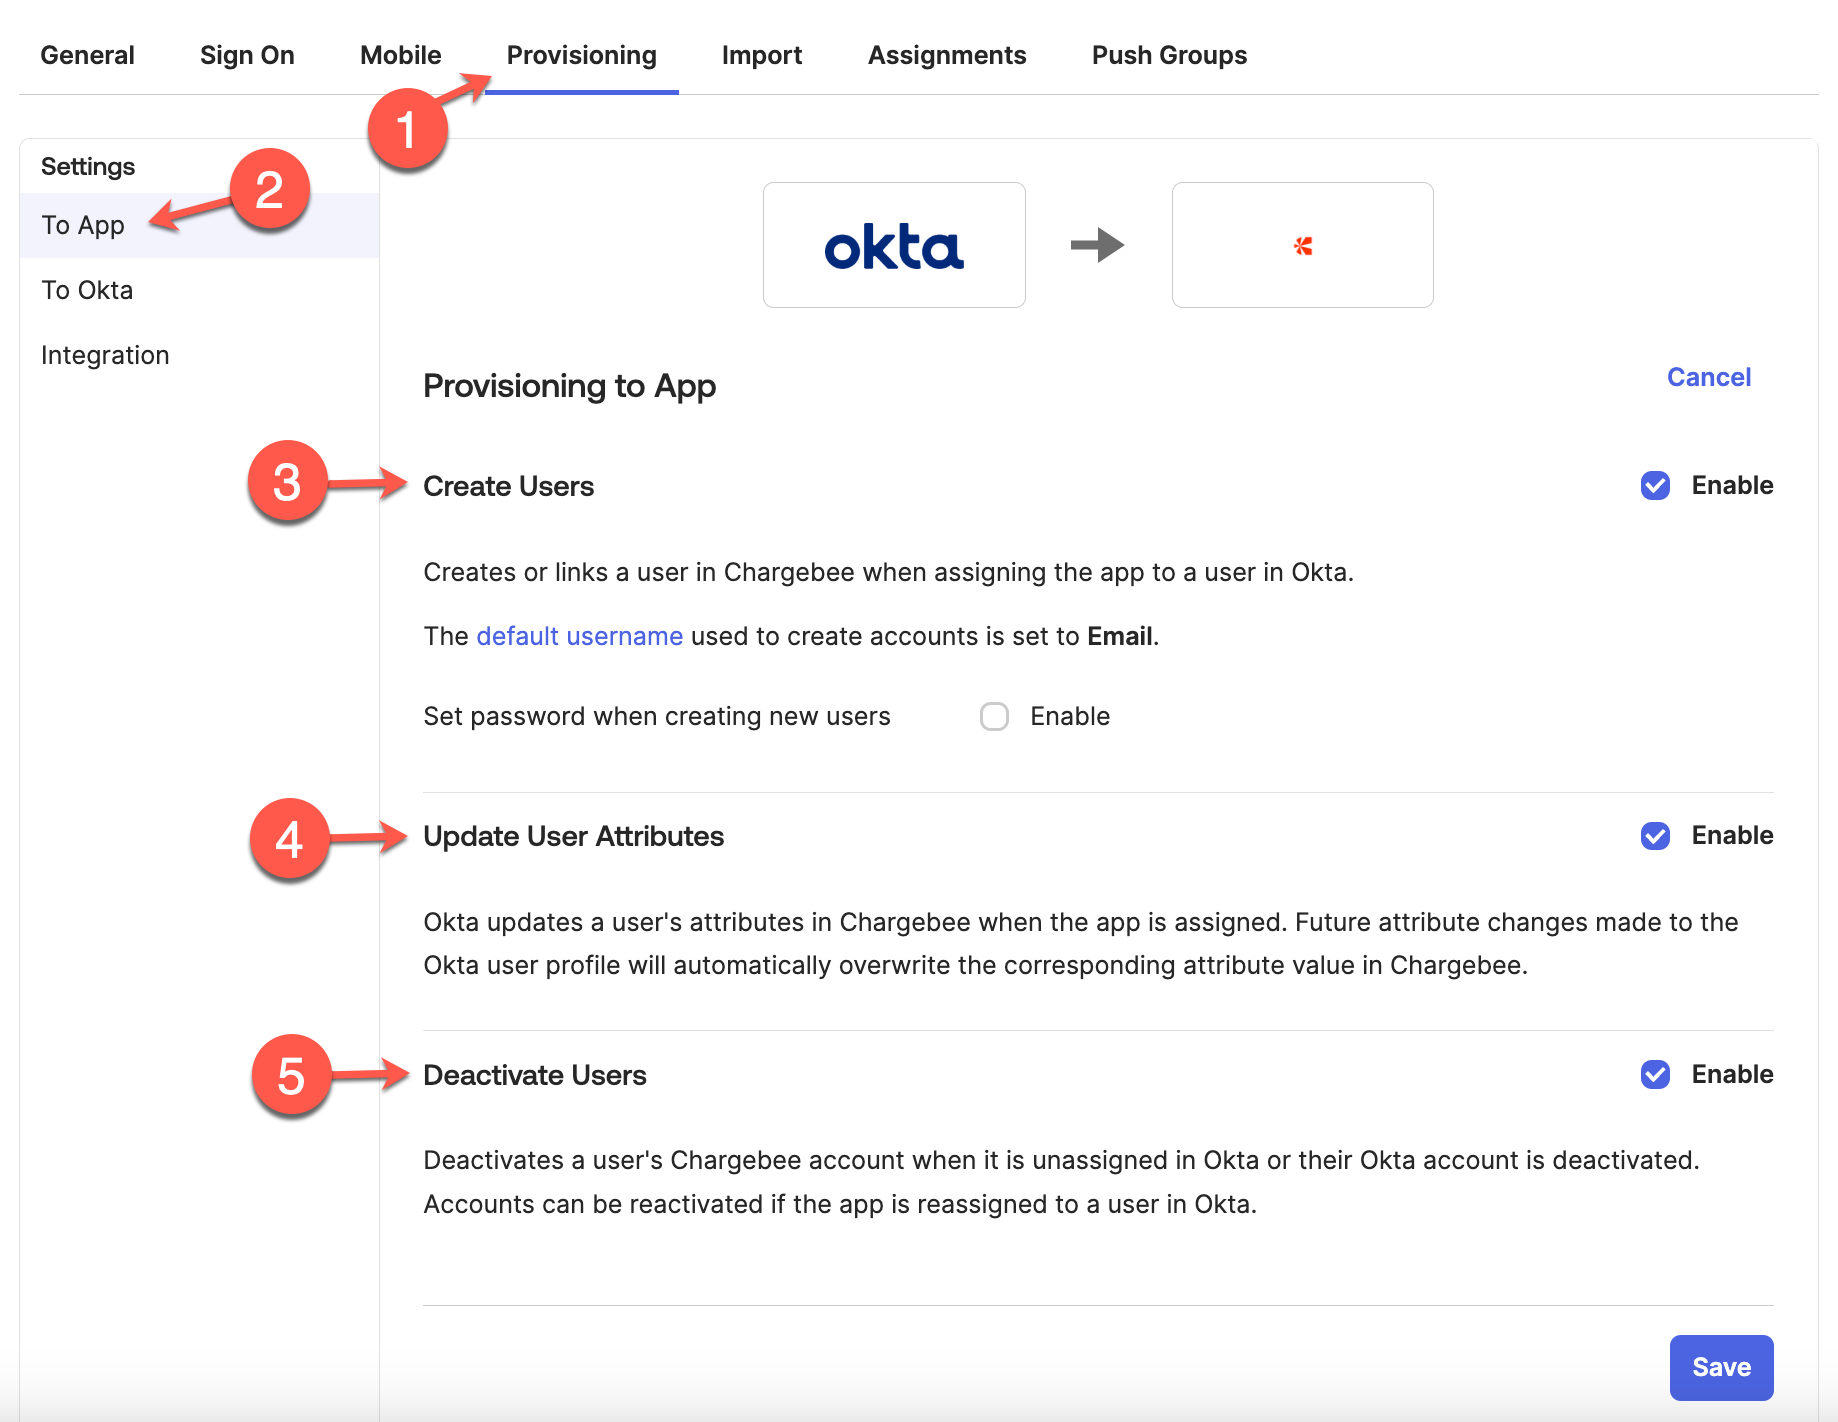
In Provisioning tab, select To App and click Edit to update the Provisioning to App section.
Select and save the following options:
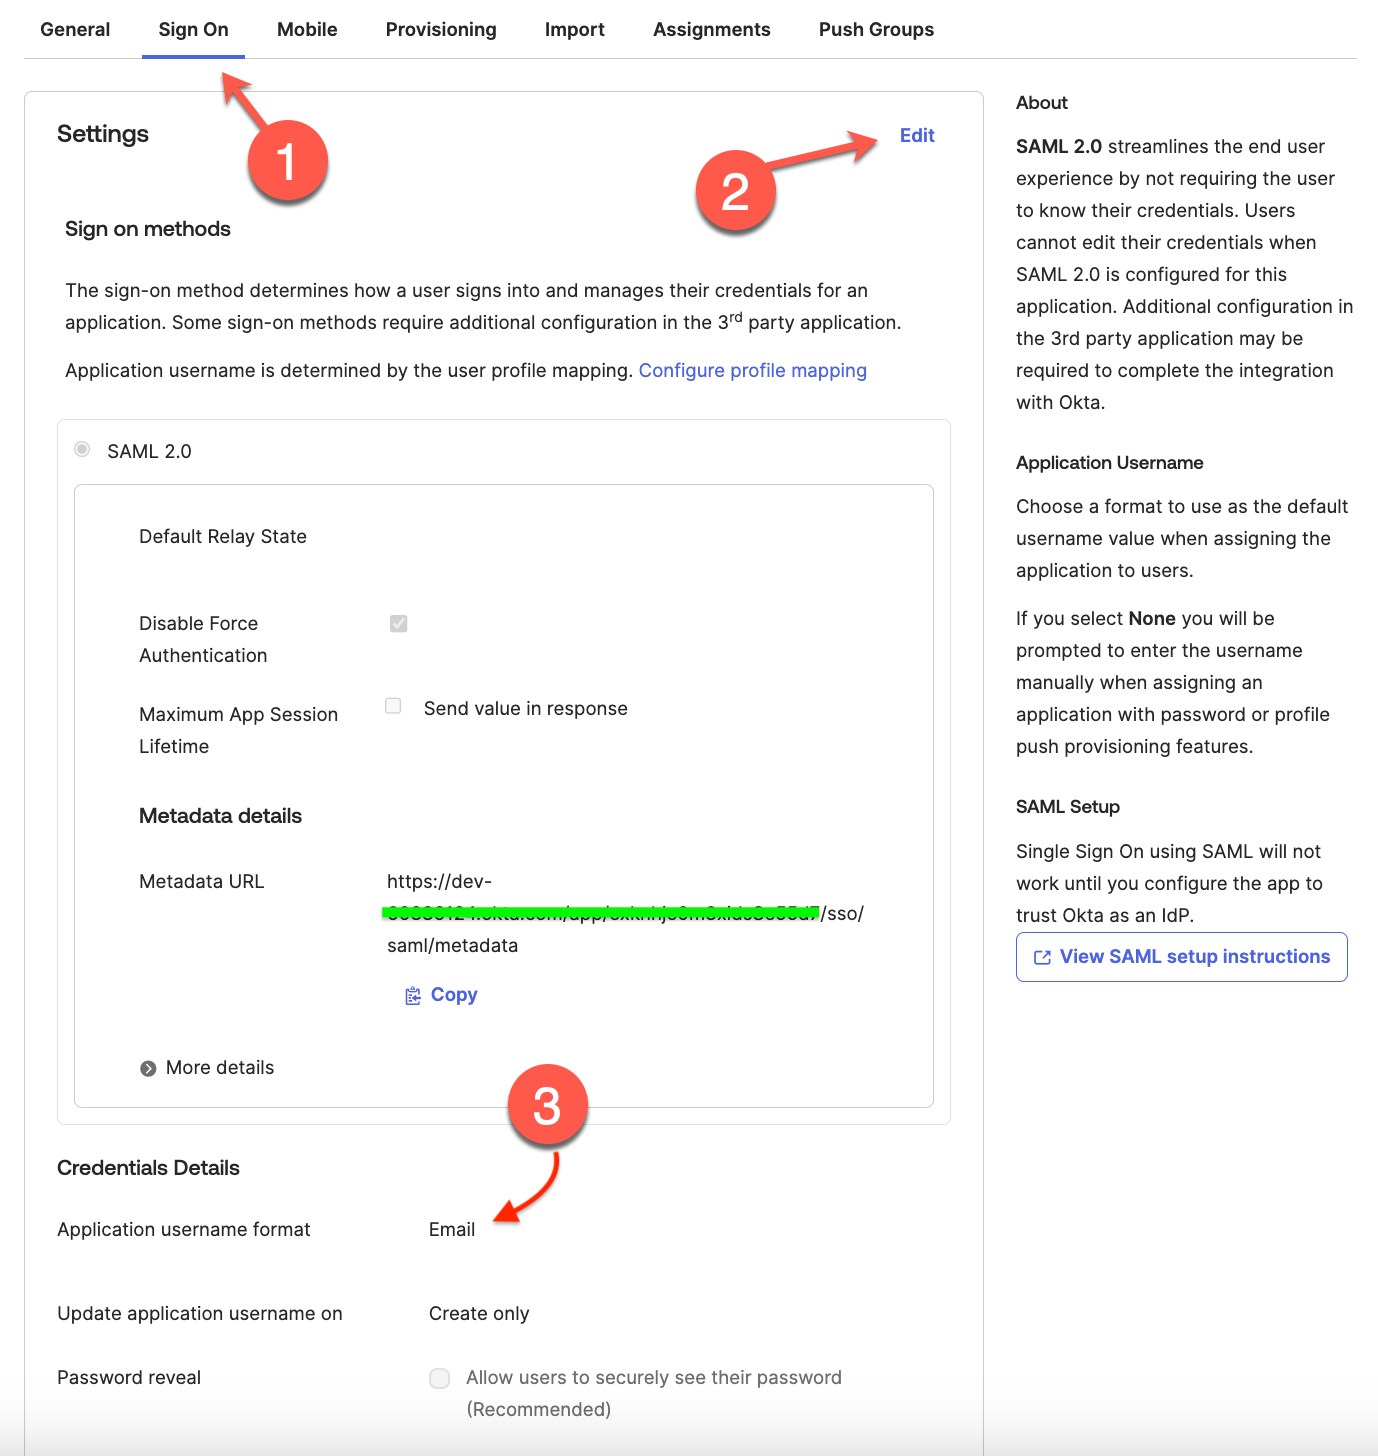
Navigate to the Sign on tab and click Edit to update the Settings section.
Save the application by setting Application username format to Email under Credential Details.
Chargebee requires the okta group name to be in the following format:
CB/<domain>/ROLE/<role_name>
CB is a standard prefix that will not change.domain is your domain name.ROLE is the standard prefix that will not change.role_name is the access role name. For example, Admin, Analyst, and more. Learn more about the access roles preasent in Chargebee.CB/<domain>/BE/<business_entity_name>.

 Articles & FAQ