setup, wordpress, plugin
How to setup Wordpress plugin?
Navigate to Wordpress dashboard > Plugins > Add new and click Upload Plugin.Upload the Chargebee pl
38989385
2021-06-27T16:57:43Z
2021-06-27T16:57:45Z
1887
0
1
251280
How to setup Wordpress plugin?
How to setup Wordpress plugin?
Setup Wordpress plugin
- Navigate to Wordpress dashboard > Plugins > Add new and click Upload Plugin.
- Upload the Chargebee plugin and click Activate Plugin.
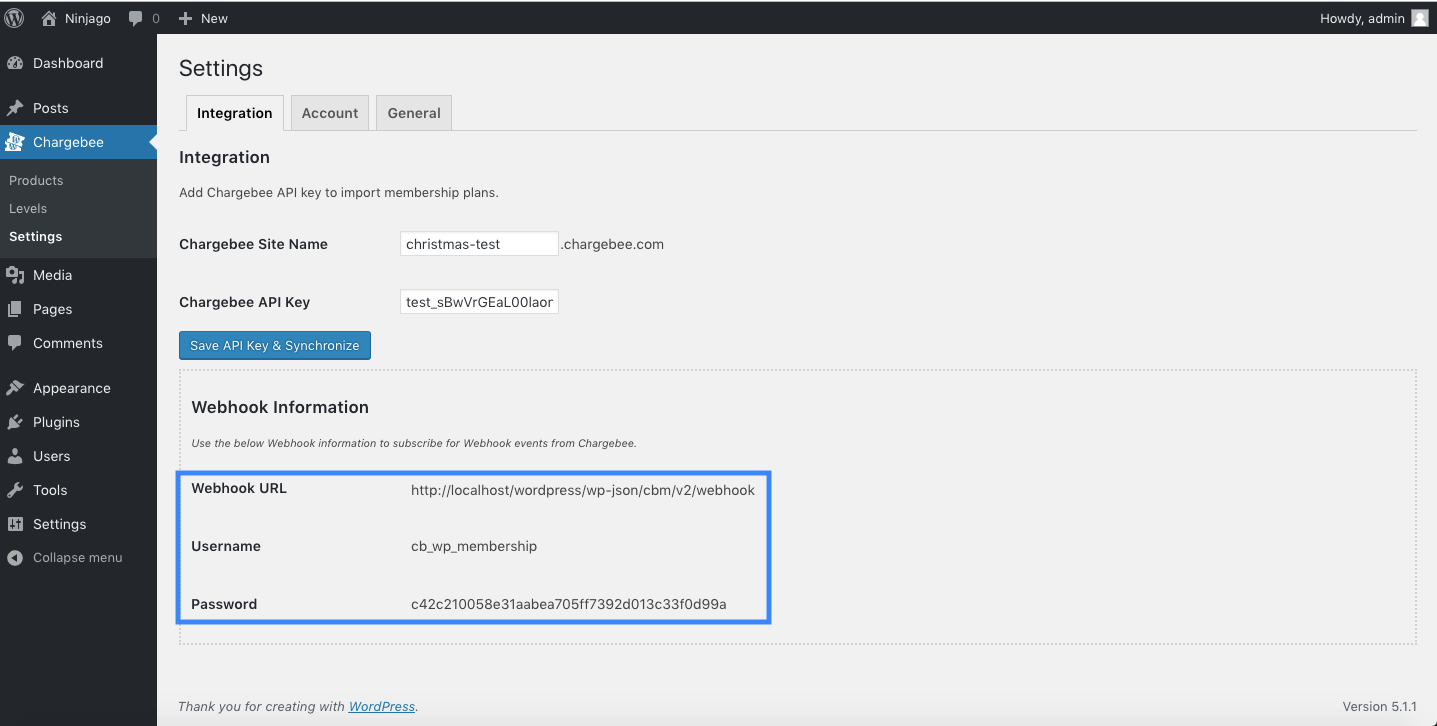
- Next, go to Chargebee tab > Settings > Integration settings, enter your Chargebee site name and API key. If your Chargebee site URL is https://acme.chargebee.com, the site name to be entered is “acme“.
- Click Save API Key and Synchronise. Plans from Chargebee can now be found under Wordpress dashboard > Chargebee tab > Products.
- Copy the Webhook URL, Username and Password from your Wordpress site.
- In your Chargebee User Interface, navigate to Settings > Configure Chargebee> API Keys and Webhooks and switch to the Webhooks tab. Click Add Webhook.
- Enable Protect webhook URL with basic authentication option and paste the Webhook URL, Username and Password in the respective fields. Click Create.
- In your Chargebee User Interface, navigate to Settings > Configure Chargebee > Checkout & Self-Serve Portal > Configuration > Portal and from the Self-serve portal access drop-down, choose via Single Sign On API.


 Articles & FAQ