Docs
As a merchant, you can configure fields and labels to collect required information from your customers.
To access the Fields
Sign in to the Chargebee site, navigate to Settings > Configure Chargebee > Checkout and Self Serve Portal > Fields.
Add product images to your product catalog items to display them on the checkout pages.
Turn on/off the toggle button to enable/disable a field.
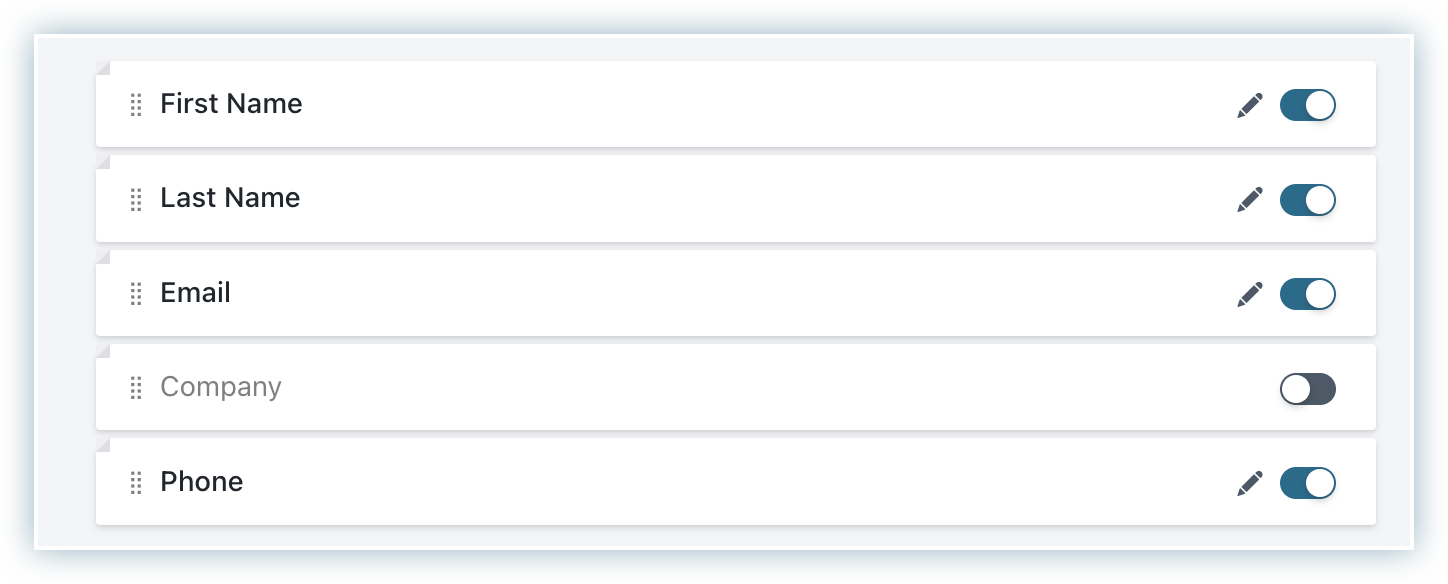
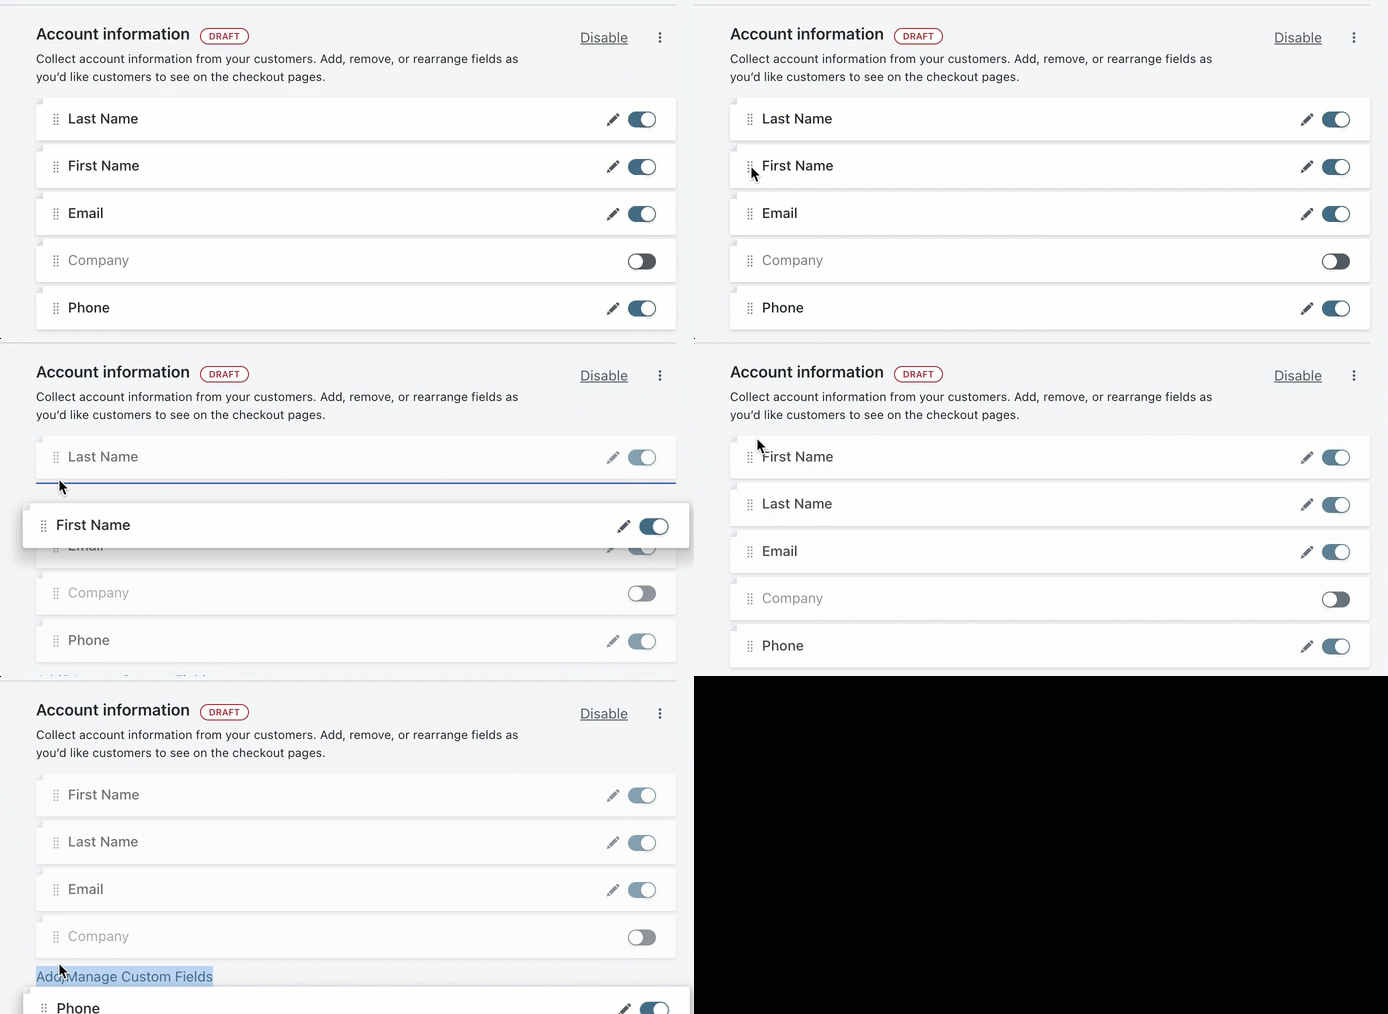
You can click and drag fields to change the order of the fields on the checkout page.
You can edit the name of a field and set different properties like mandatory, read-only, and show/hide for a field. The below screenshot list the properties you can set for a field. For example, set the email field as mandatory during checkout.
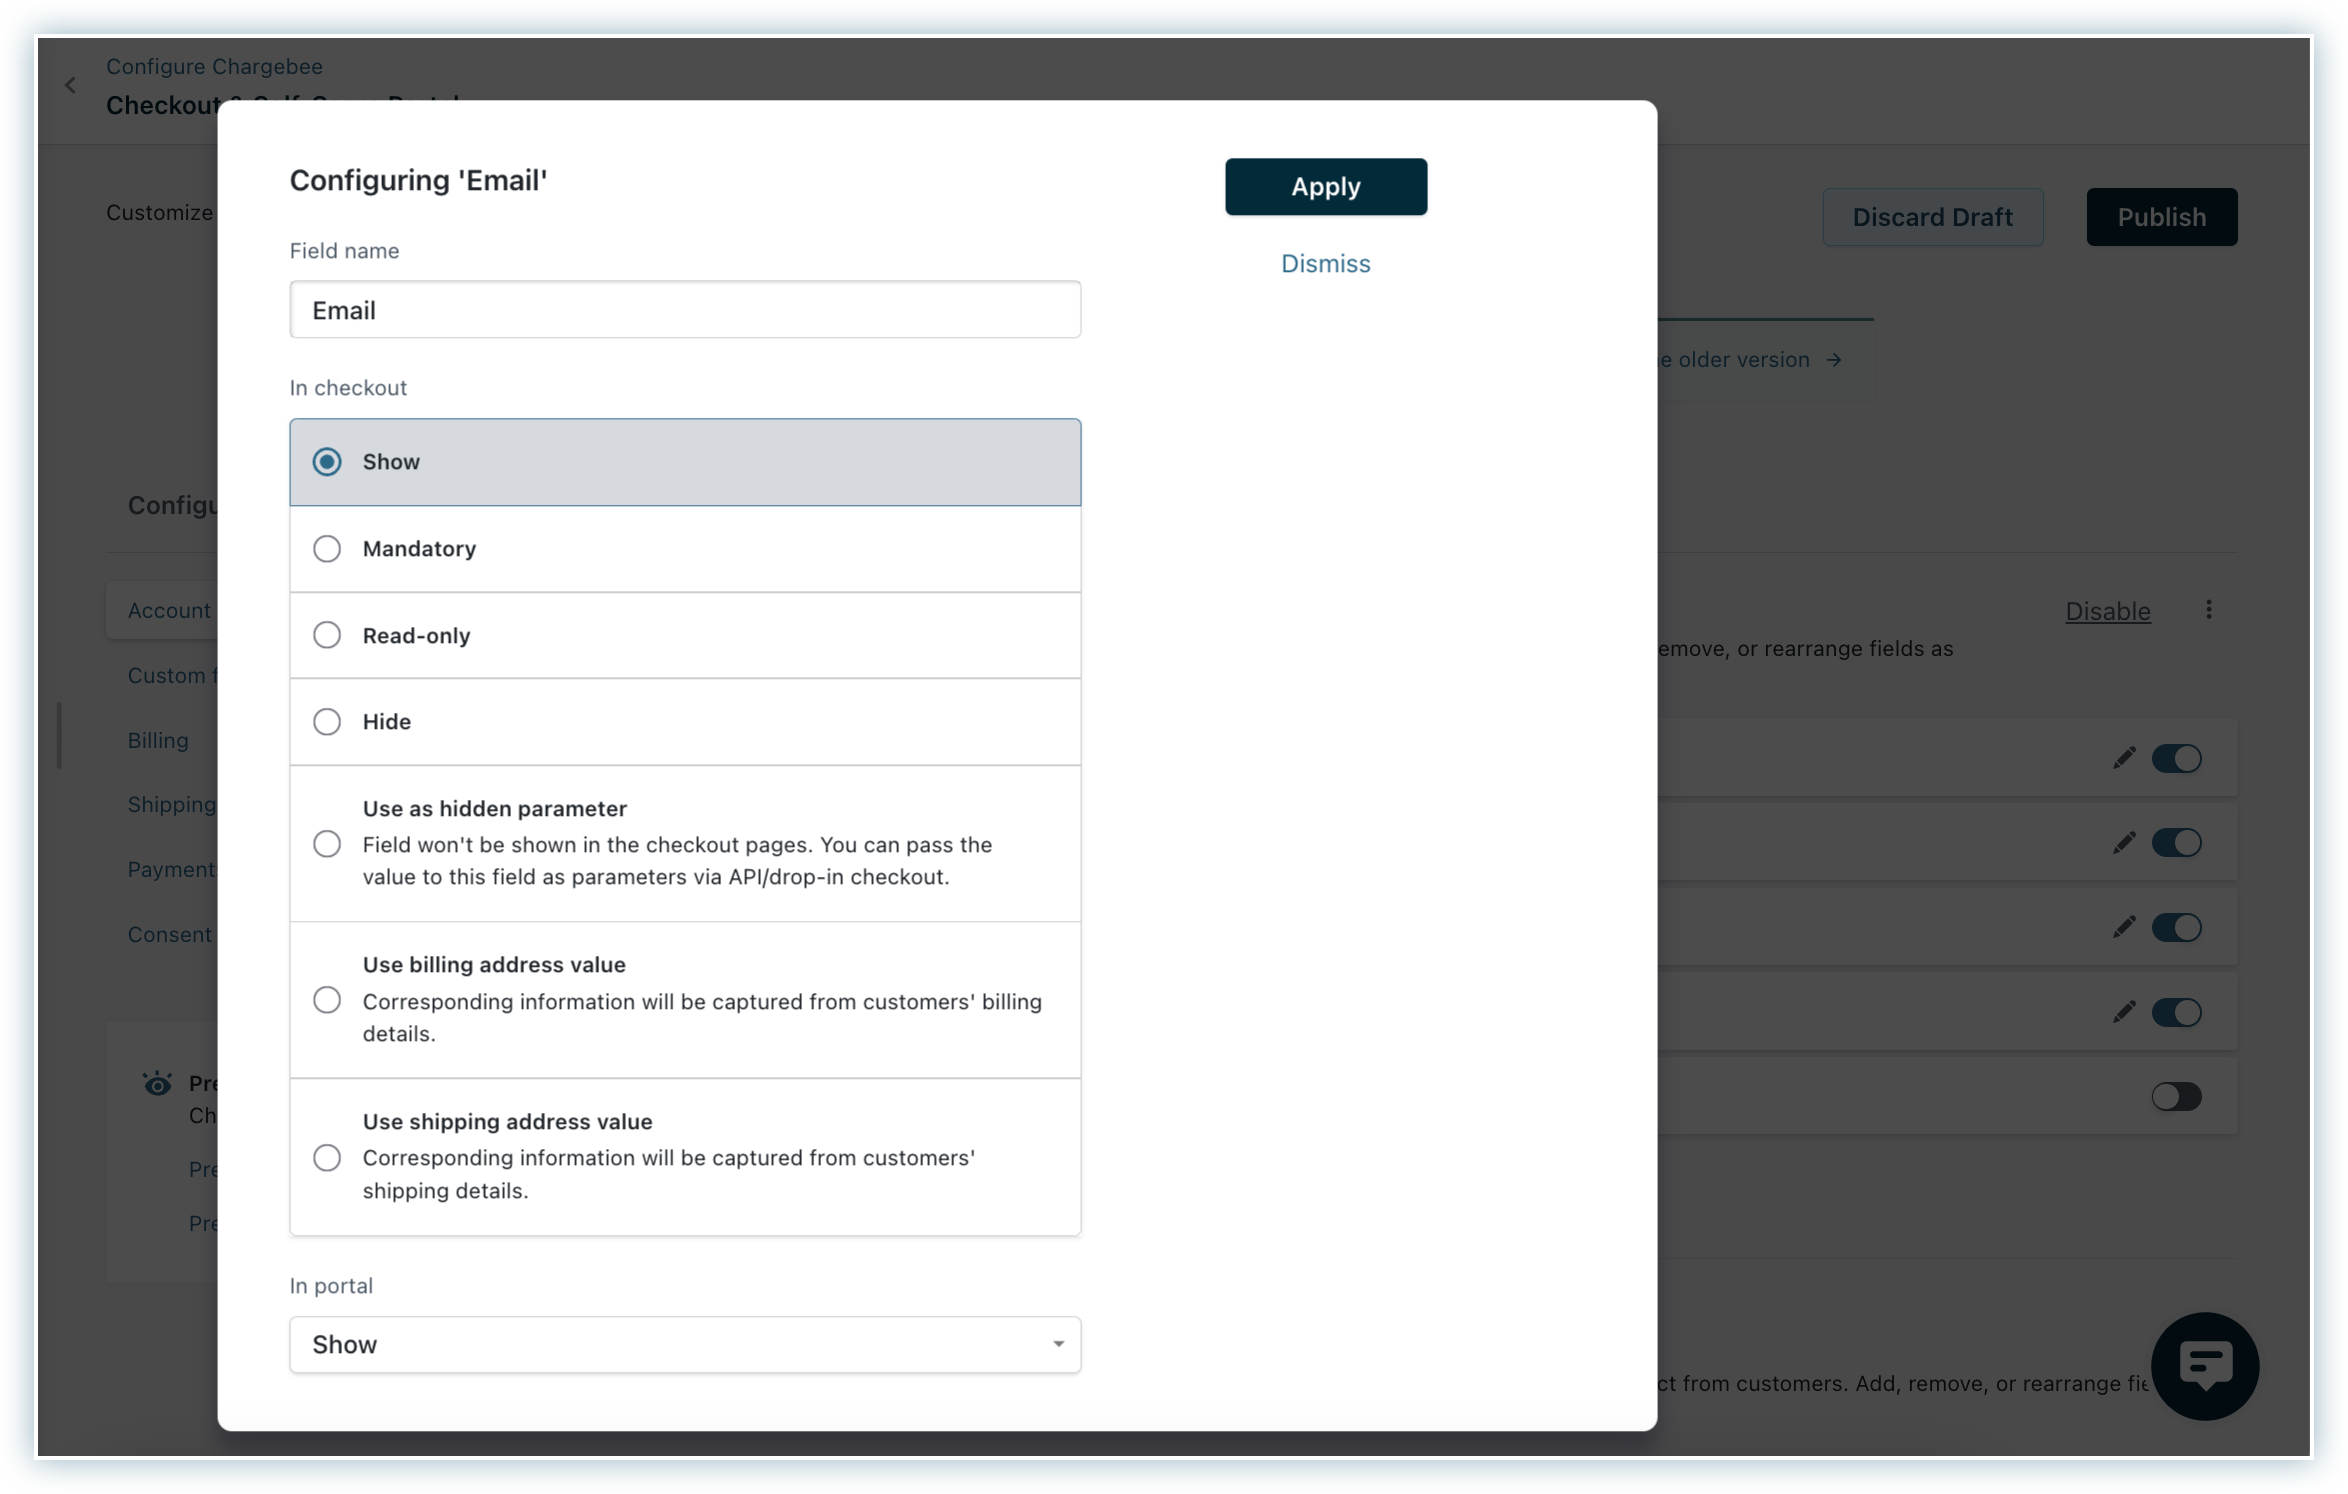
Depending on the field, a subset of the properties will be available.
You can configure the fields for the following sections.
Configure account fields to collect your customer information like name, email, company, and phone from the checkout page by enabling them here. You can also add/manage custom fields.
You must set at least one field under Account information to Show or Mandatory when setting field properties. Otherwise, the account information page is skipped during checkout. However, the account information still appears as read-only on the final checkout page.
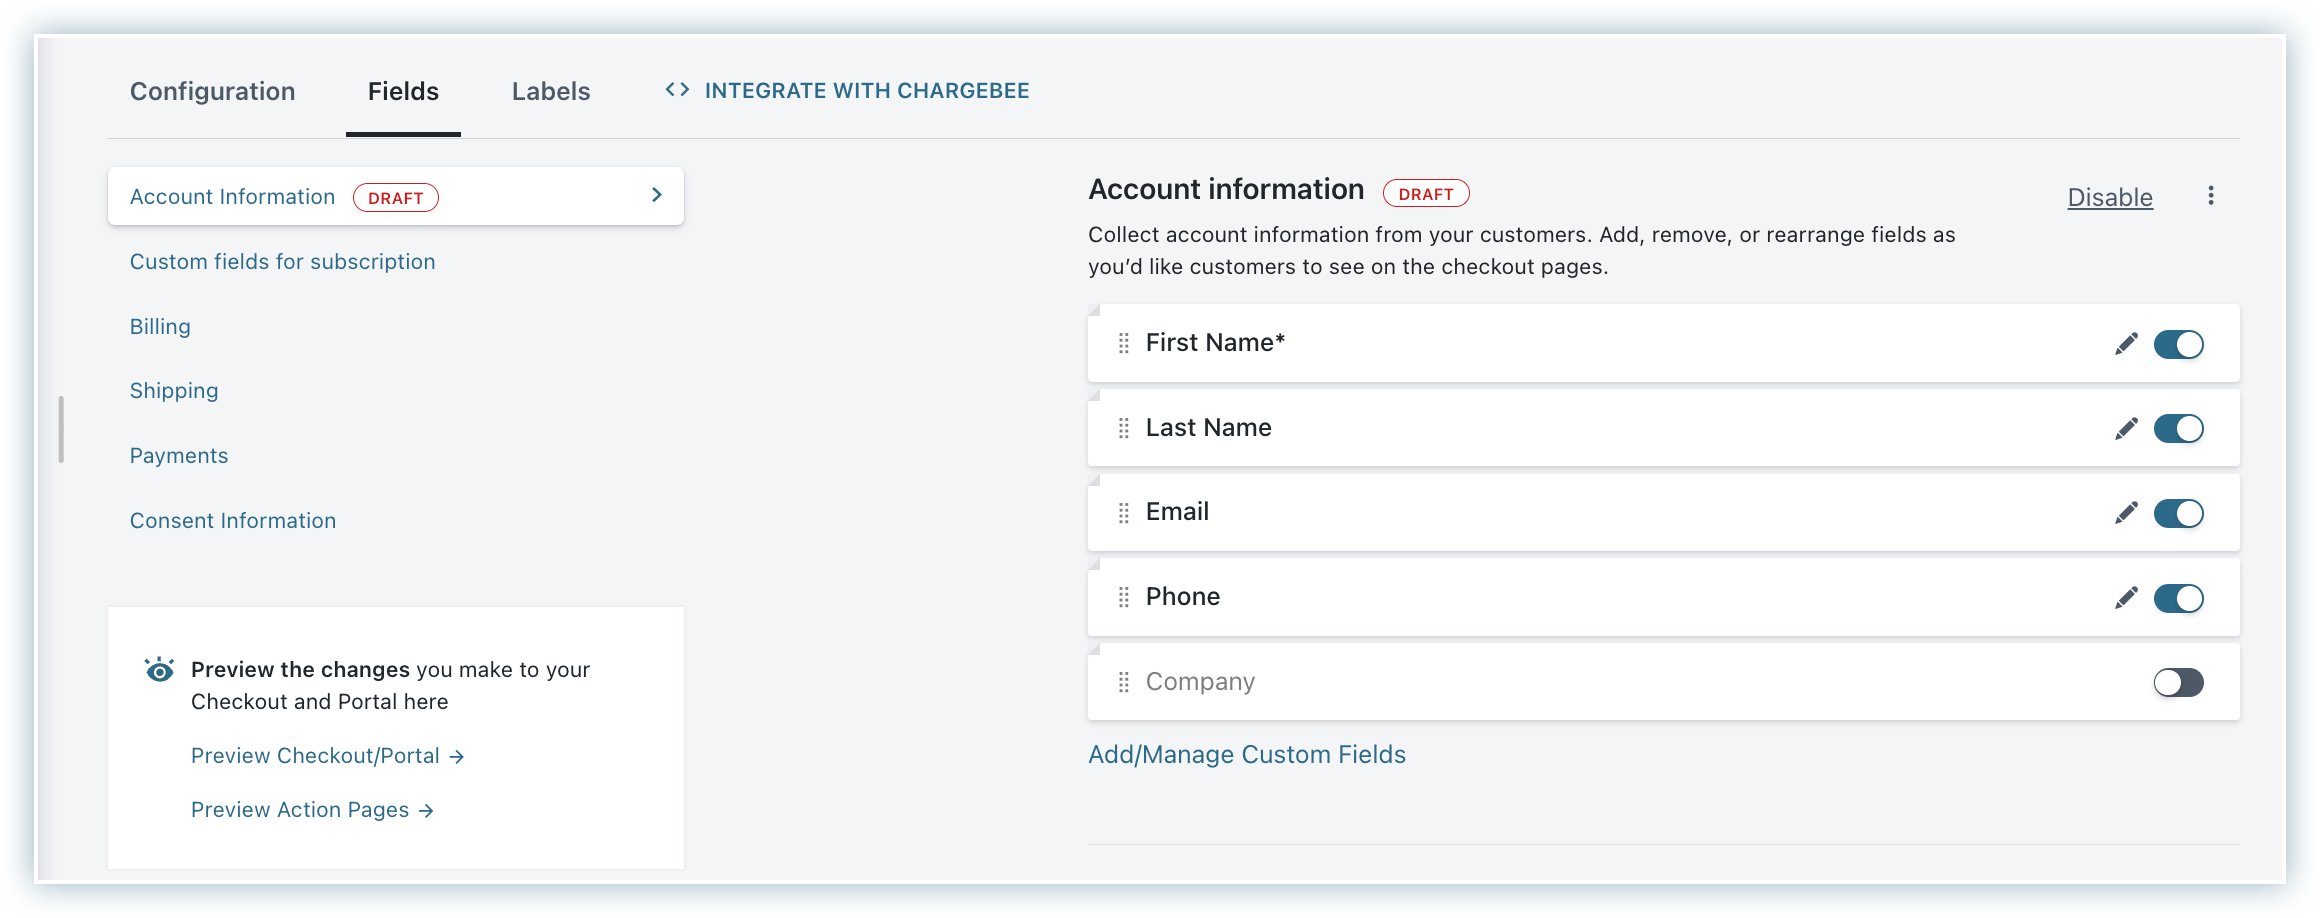
Configure custom fields to collect subscription-related information from your customers.
Configure billing fields to collect your customer's billing information such as an address, phone number, name, VAT number, and more.
To configure tax details such as VAT or GST, you must set billing country as mandatory in your tax settings.Furthermore, you can select to display the addresses on the checkout page, self-serve portal, or both.
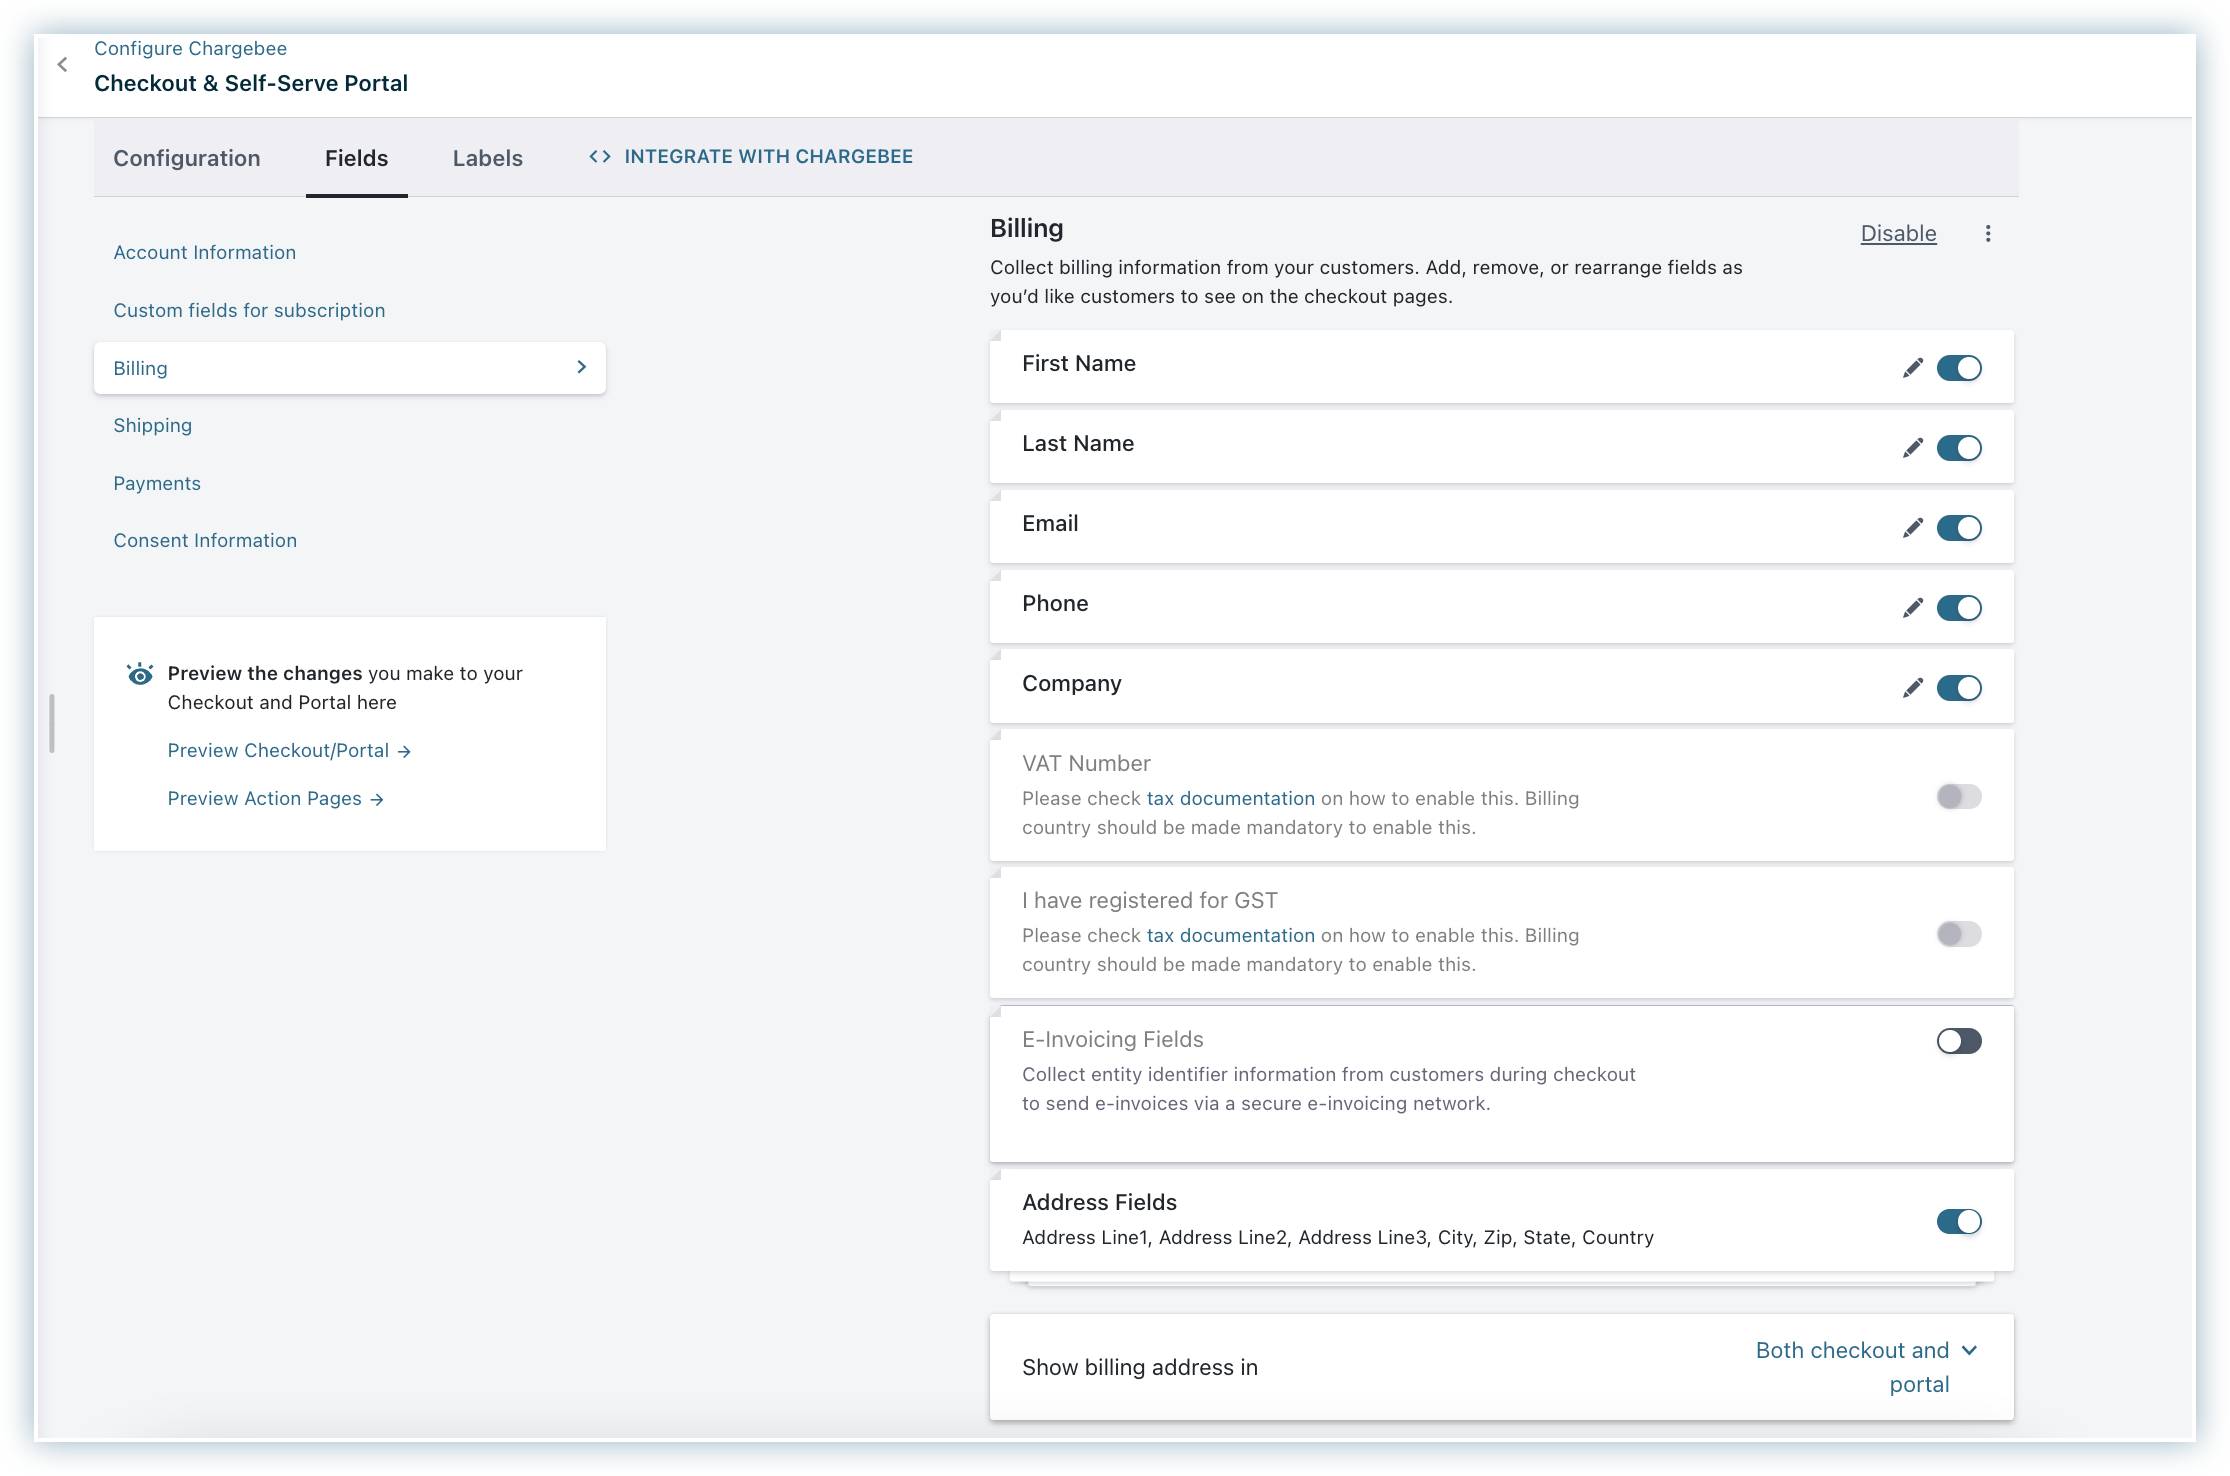
Configure shipping fields to collect your customer's shipping information, such as shipping address, name, phone number, and more.
The Ship to my billing address option does not appear in the In-App layout for Checkout when the Checkout is created via API for an existing customer who already has one or more billing address fields in Chargebee.

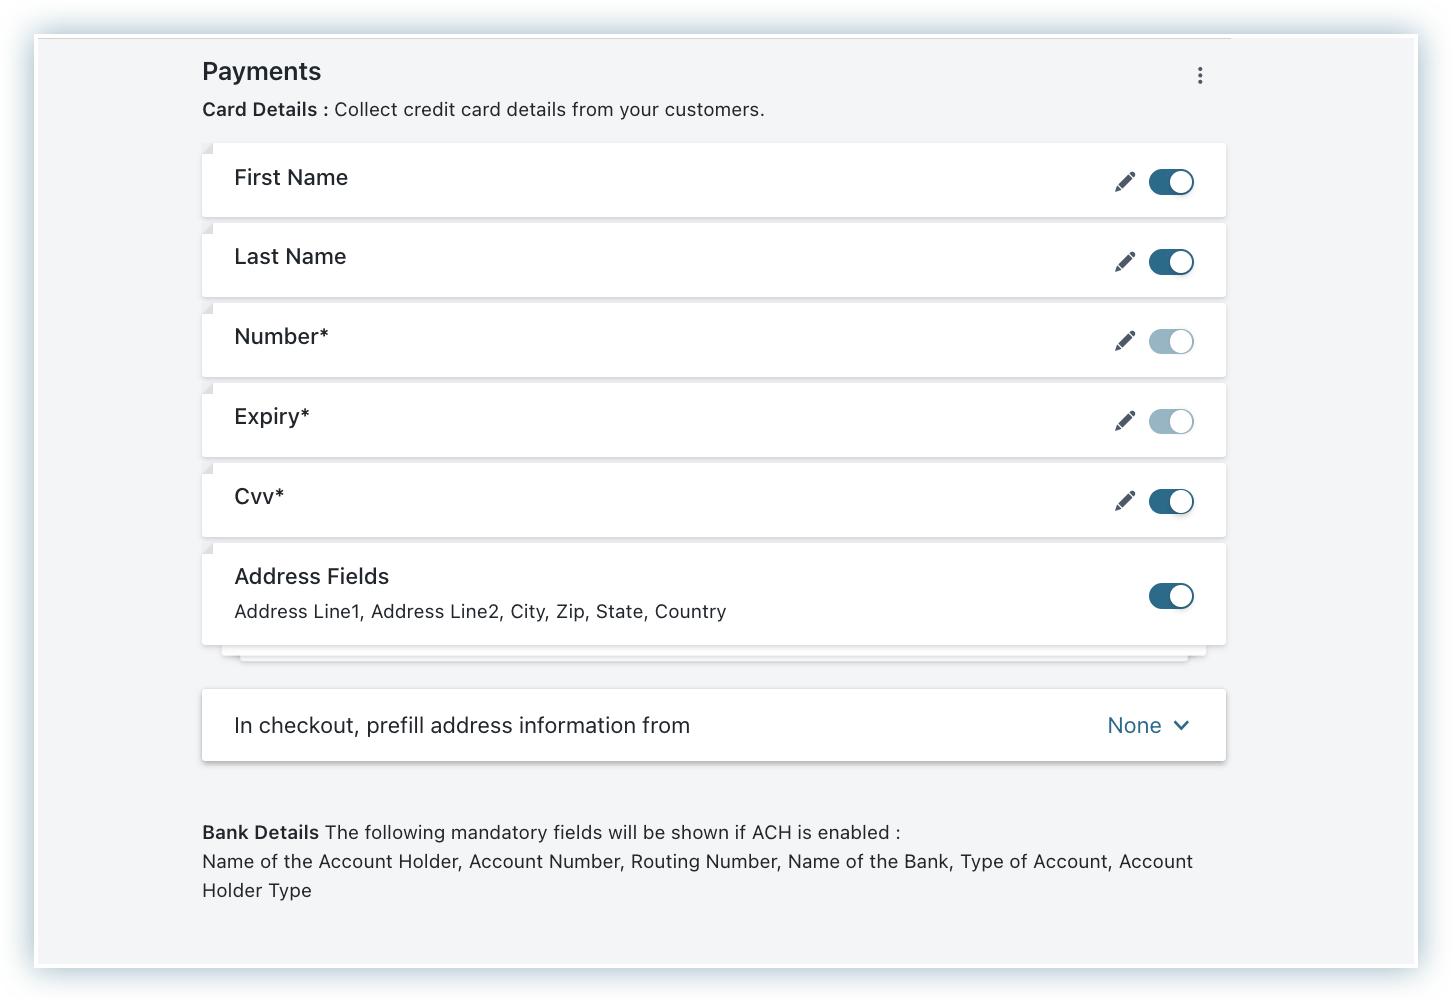
Configure payment fields to collect your customer's payment-related information such as card number, expiry, and Cvv. Card Number and Expiry will be collected by default and stored in your payment gateway.
Configure this field to collect consent from your customers during checkout. You can add consent, agreement labels and set up consent checkboxes for the checkout and Self-Serve portal.

You can customize the field labels and messages displayed in the Checkout Pages and Self-Serve Portal.
To access the labels

The available checkout labels to configure are based on the layout selected on the Layout tab.
To add a label, perform these steps.
Click +Add more copy/text.
Search the required labels in the search box.
Click Add.

Click Apply.

Click Publish.

The label changes are now visible to your customers.
Here is an example of how the Checkout labels work.
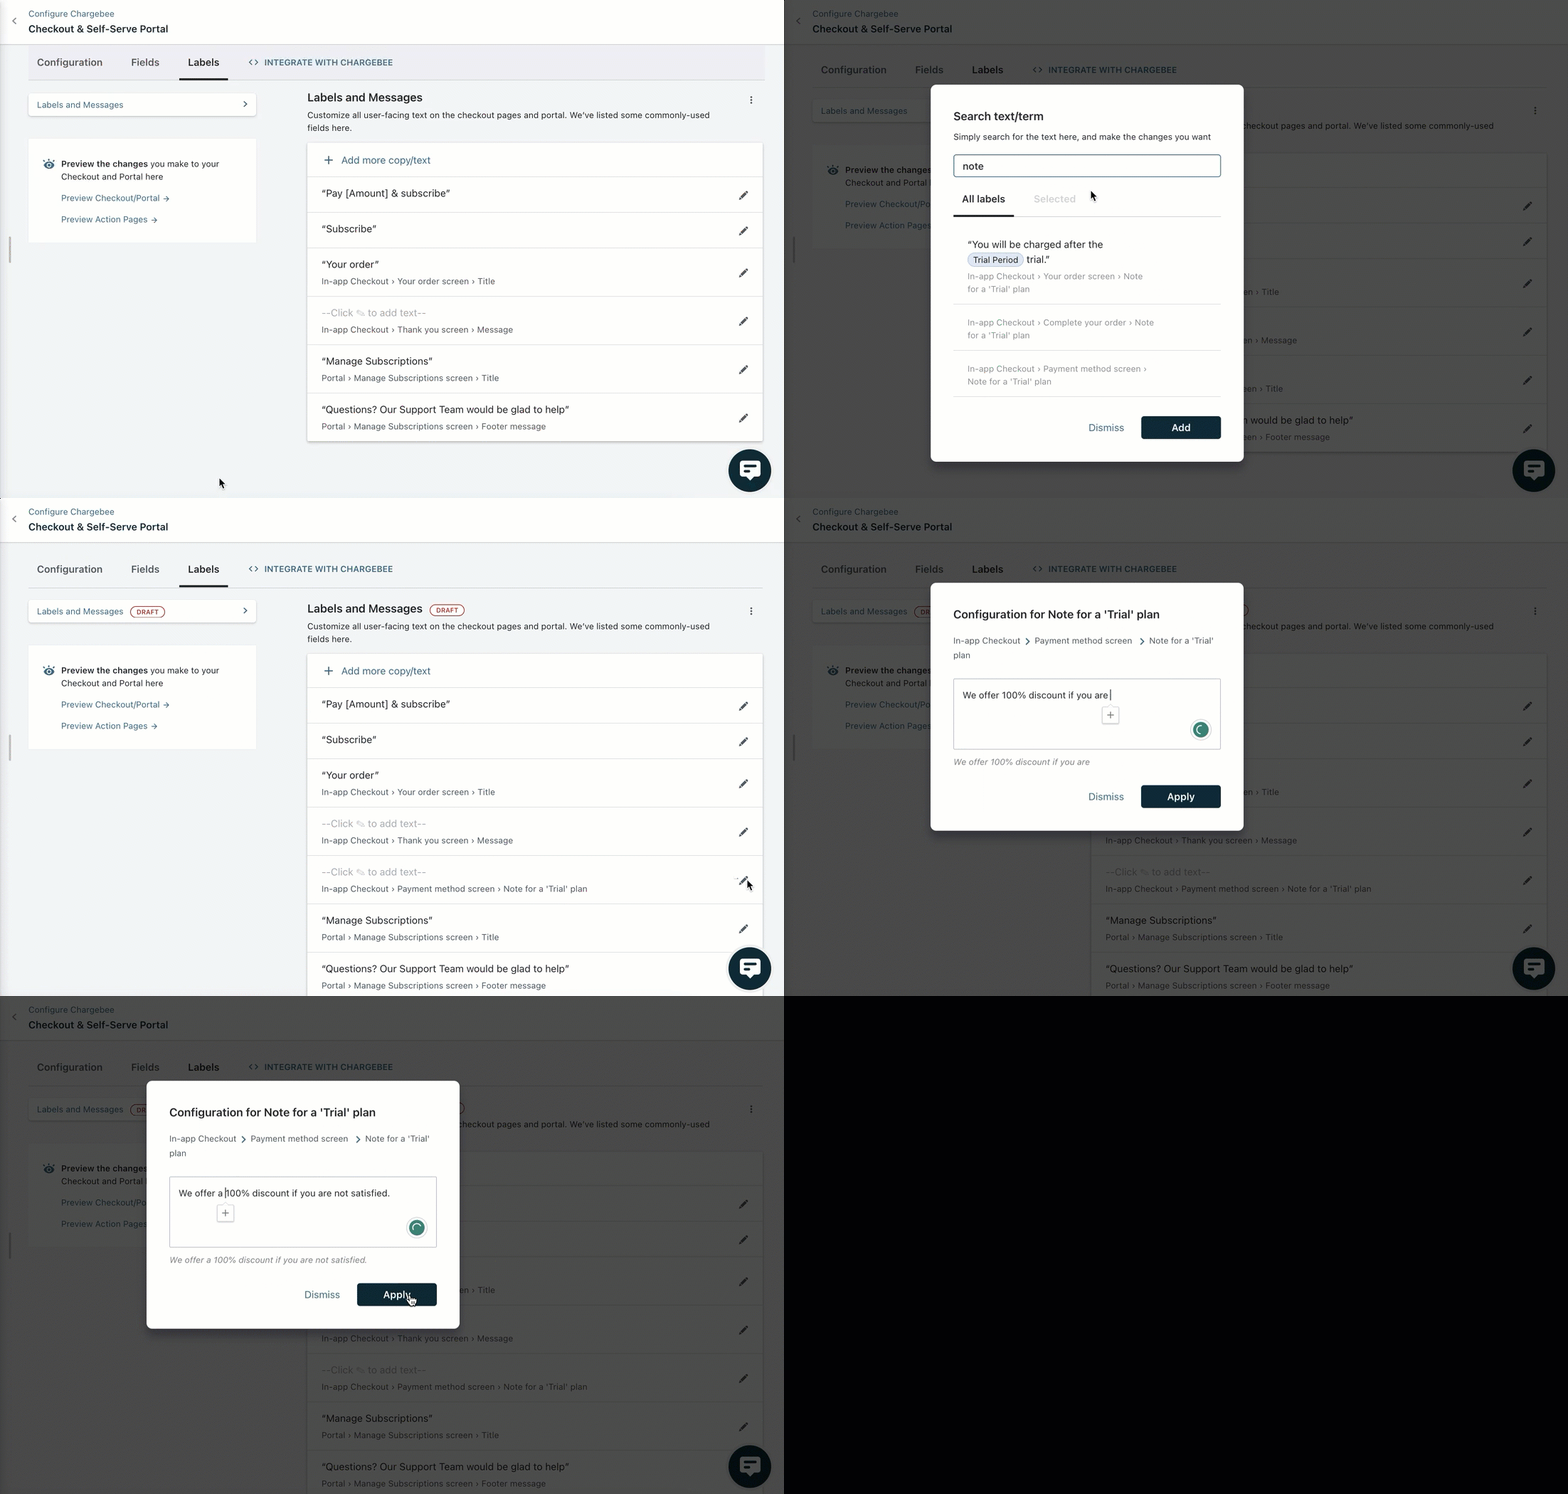
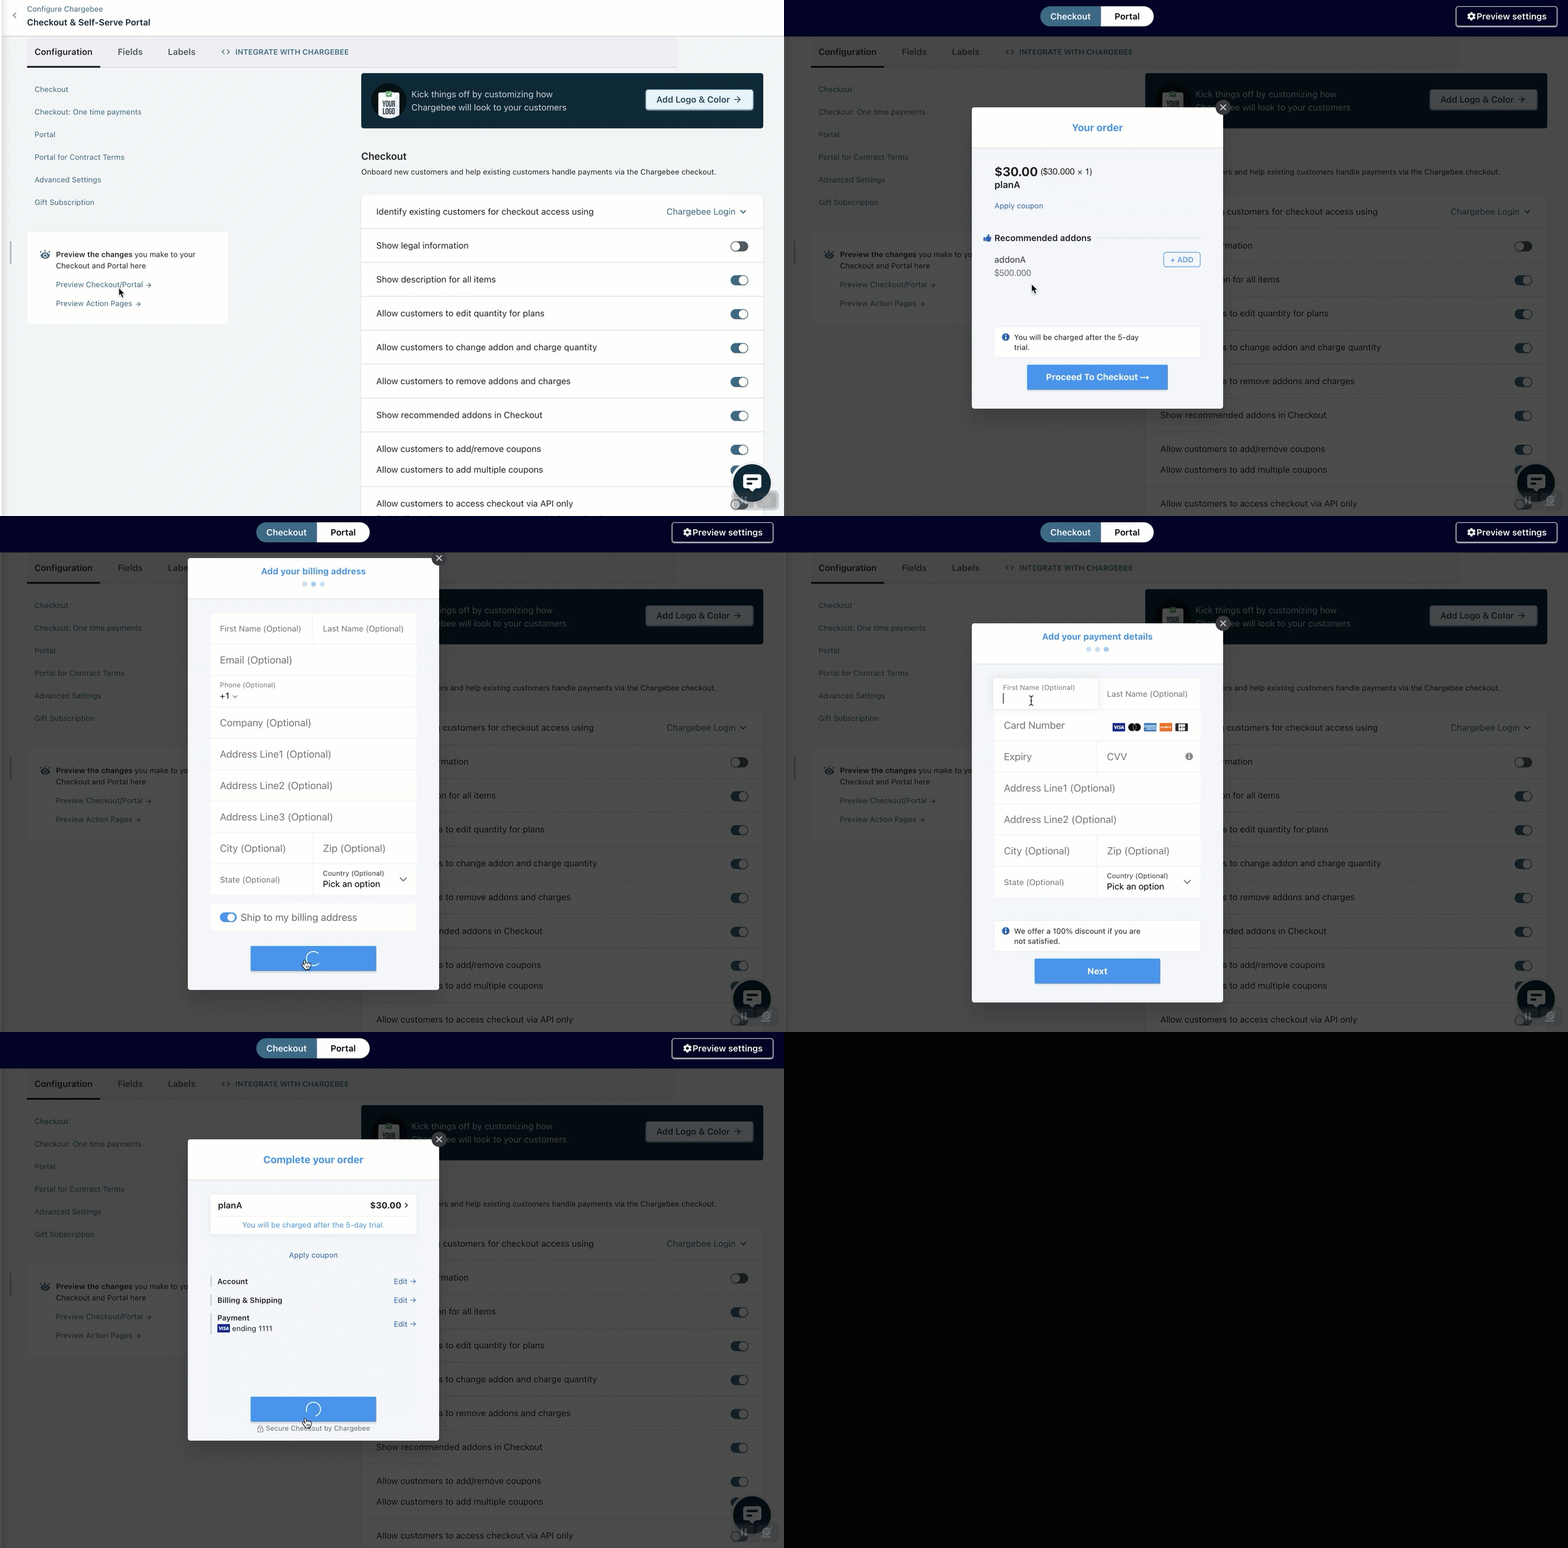
The following illustration describes adding a note to the payment method screen during checkout. This note will be displayed for all the users on the Payment method screen during checkout.
During checkout, the note will appear as shown below:
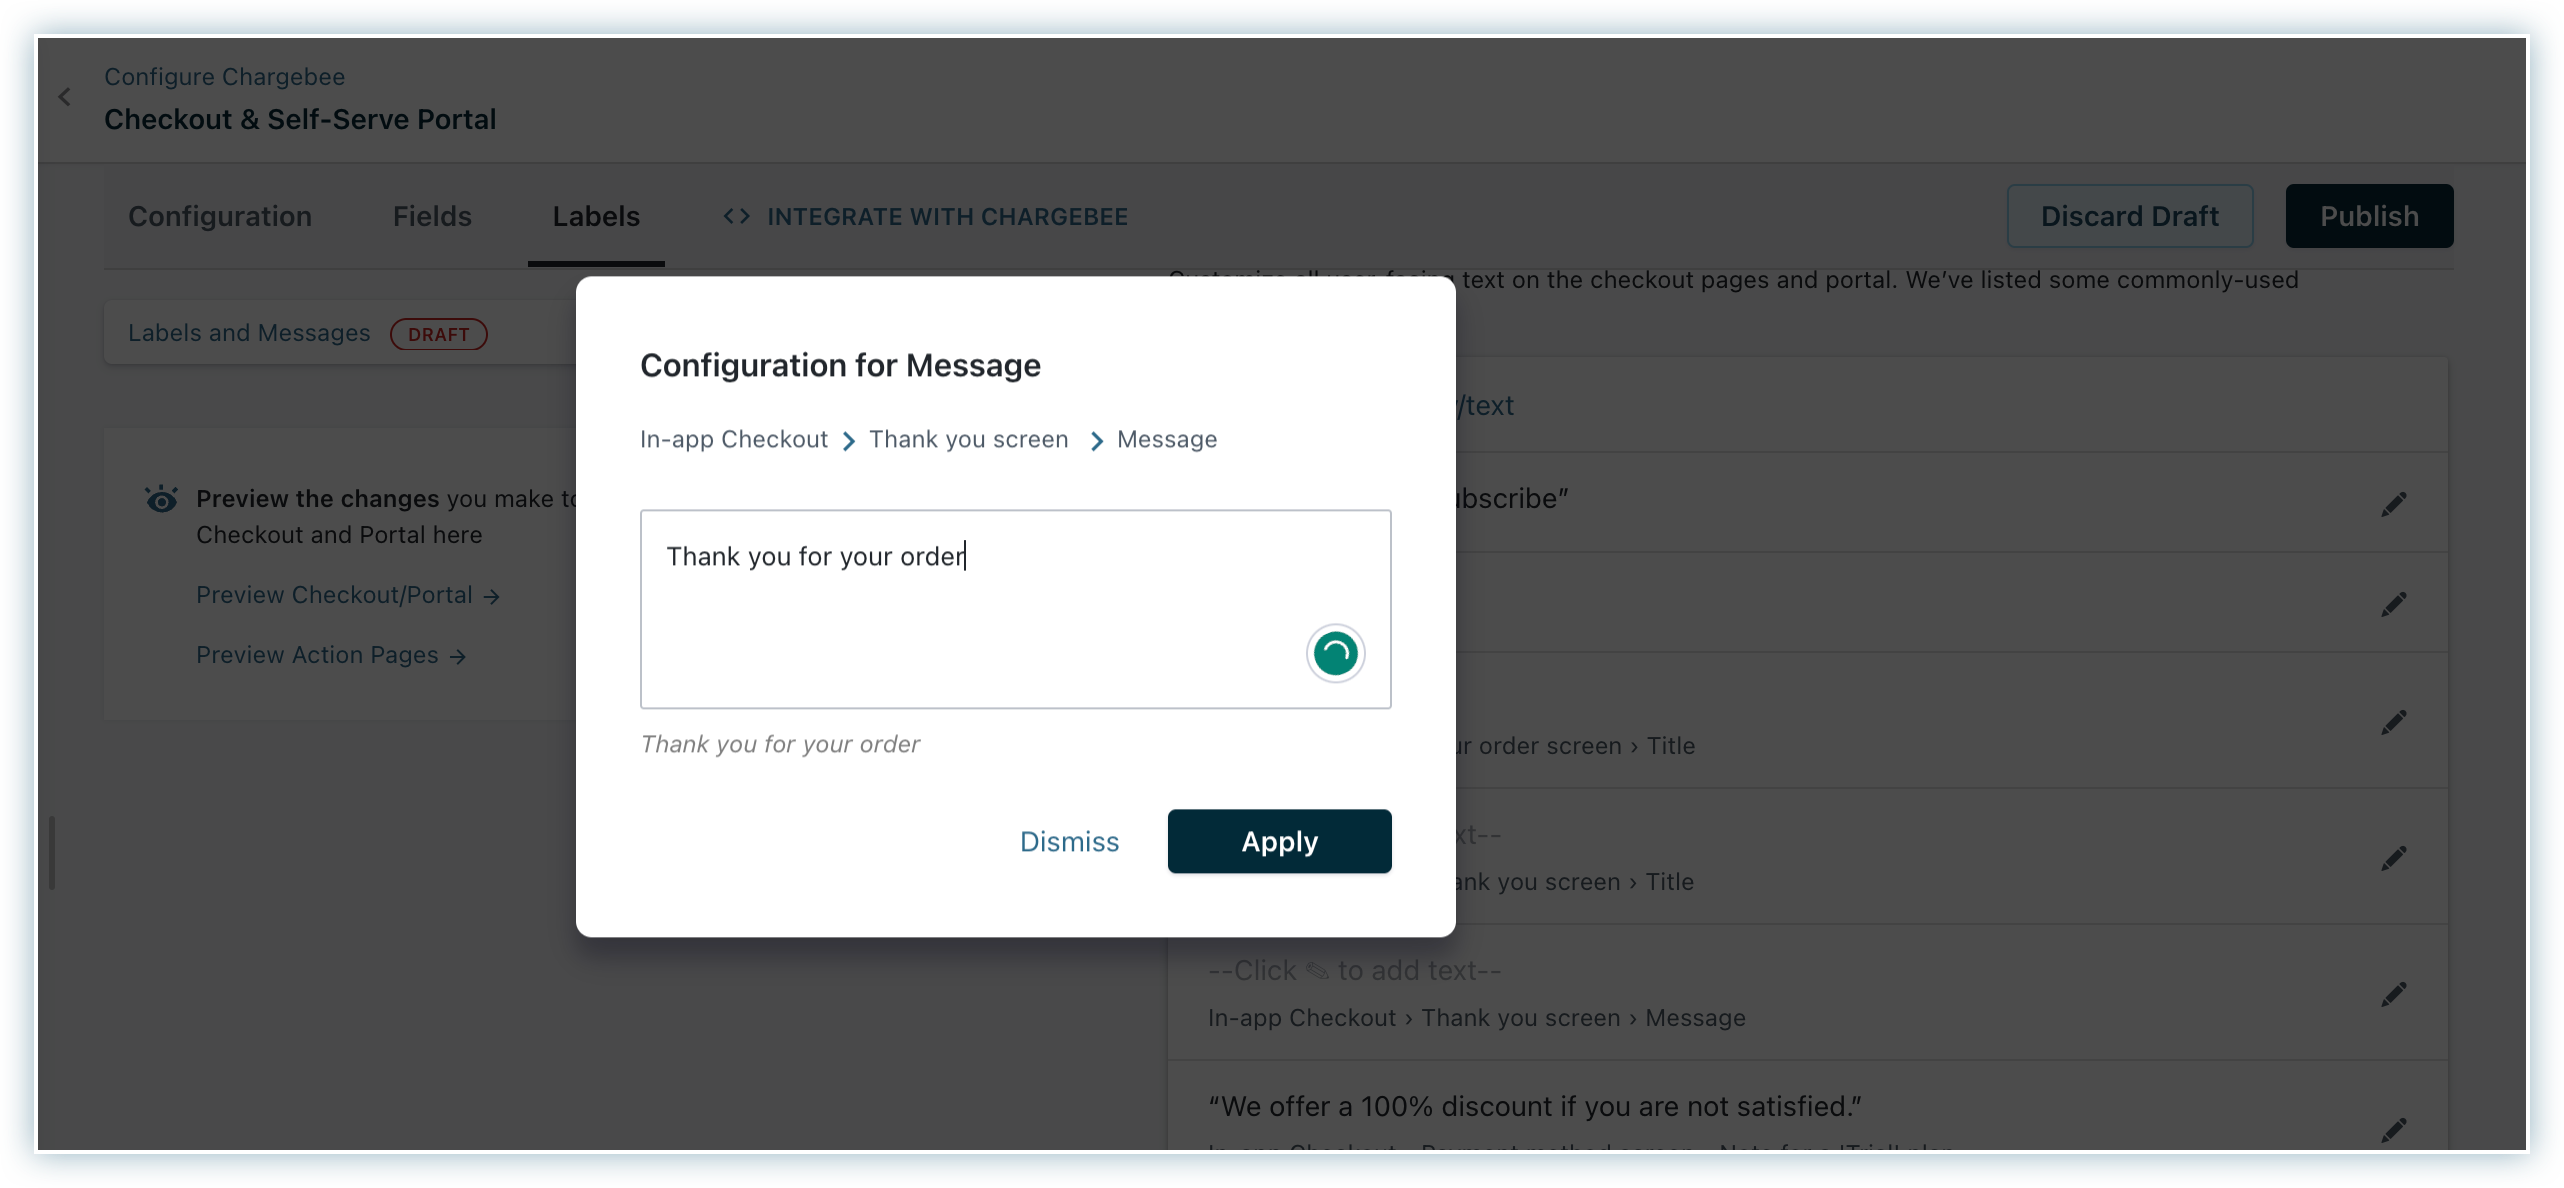
You can set up messages that will appear to your customers after they checkout. Full page checkout Thank you page supports both, Thank you title and Thank you message labels.
To add a Thank you message or title, perform these steps:
