Docs
How to send an announcement to a specific group of customers based on criteria?
How to send manual emails to customers?
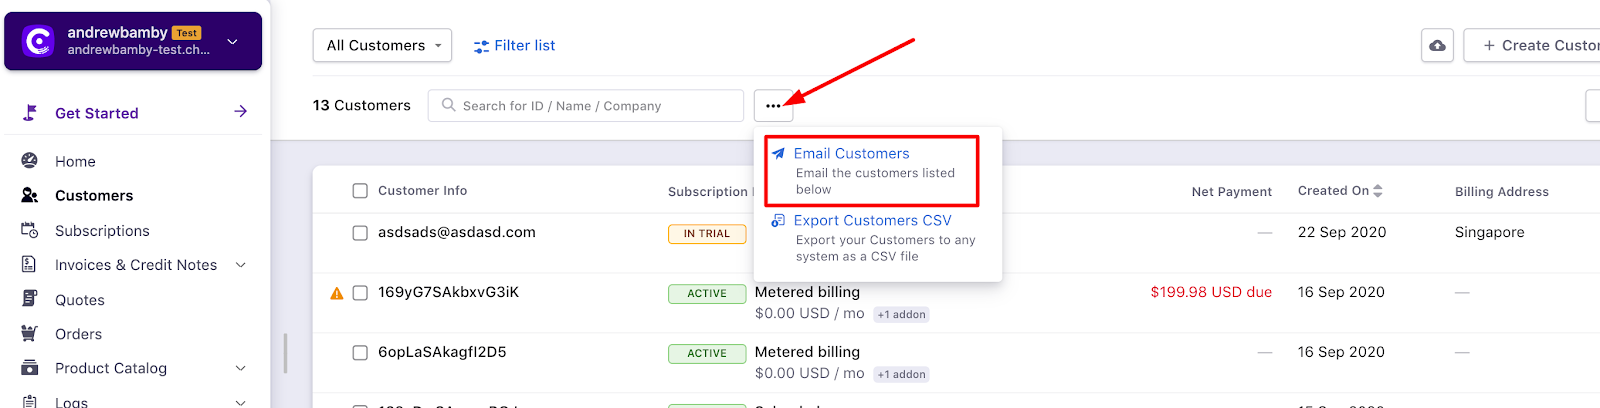
Where to find the option to send manual emails in Leap UI?
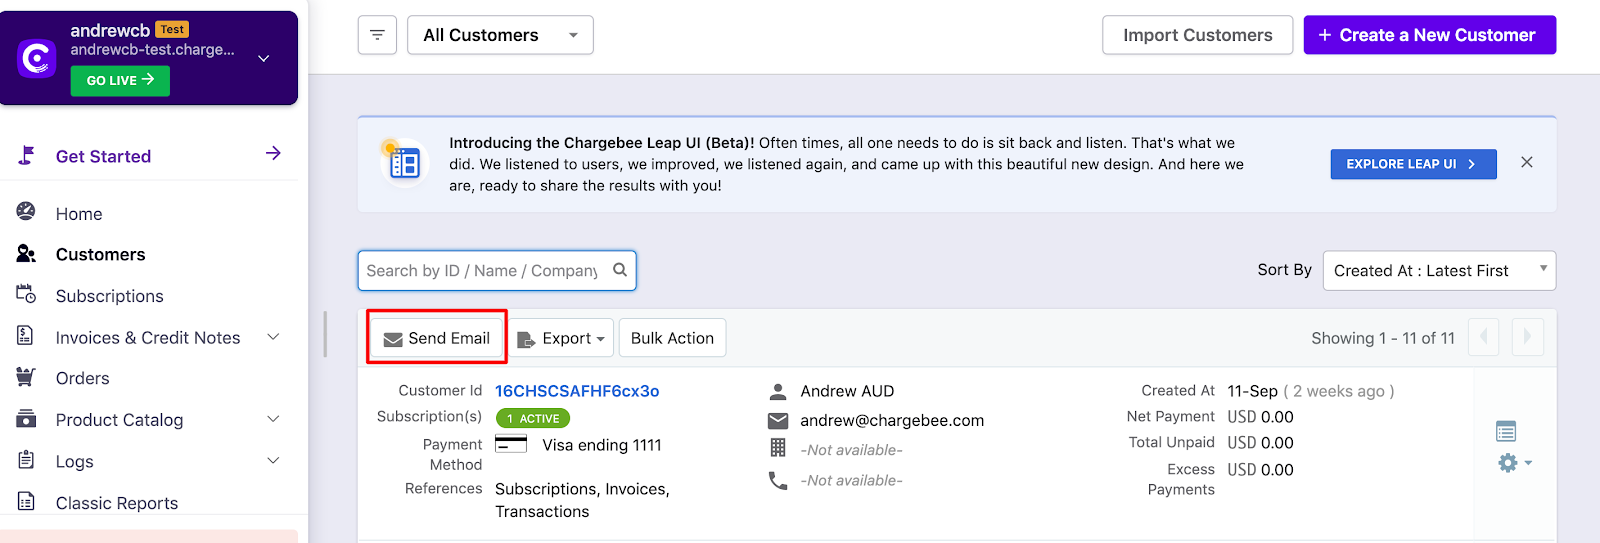
Where to find the option to send manual emails in Classic UI?
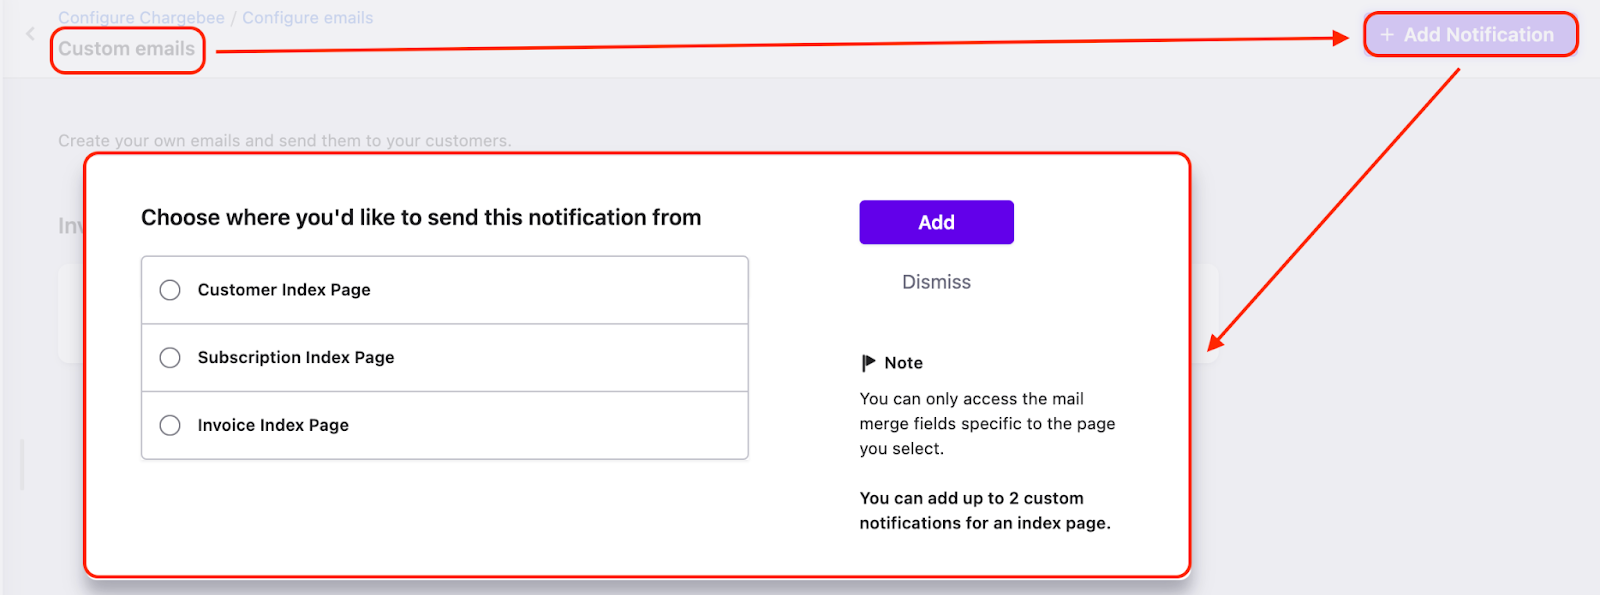
How to create Manual emails?
Summary
Chargebee allows you to create, and edit email notifications to customers apart from the automated email notifications in the Chargebee app, these emails are categorized as Custom Emails. To make things easier, each of the major sections in Chargebee such as the Customer, Subscription, and the Invoice page will display these Custom emails that can be manually triggered from that particular page.
You can add the custom email by navigating to Settings > Configure Chargebee > Email notifications > Custom emails.
Solution
You can configure custom emails for the following pages.
Customer Index Page
Subscription Index Page
Invoice Index Page
You can add email content using Smart Section, Mail Merge Usage, and Import HTML. Kindly refer to this link Add Notification for more details.
Once you have configured these emails, they can be accessed on the respective index page.
Where to find the option in the Classic UI.
Where to find the option in the Leap UI.
Note: On the recent UI enhancement you can now scroll the index pages - Customers, Subscriptions, Invoices, and Credit Notes vertically. Earlier, the pages will be paginated which may prolong your search however with the new enhancement as you scroll down the list it will load all other data in a single page as highlighted below on the screenshot. Refer to this link for more information.
You could use the pre-saved segments or just use the filters on the page to shortlist the customers you wish to send the email.
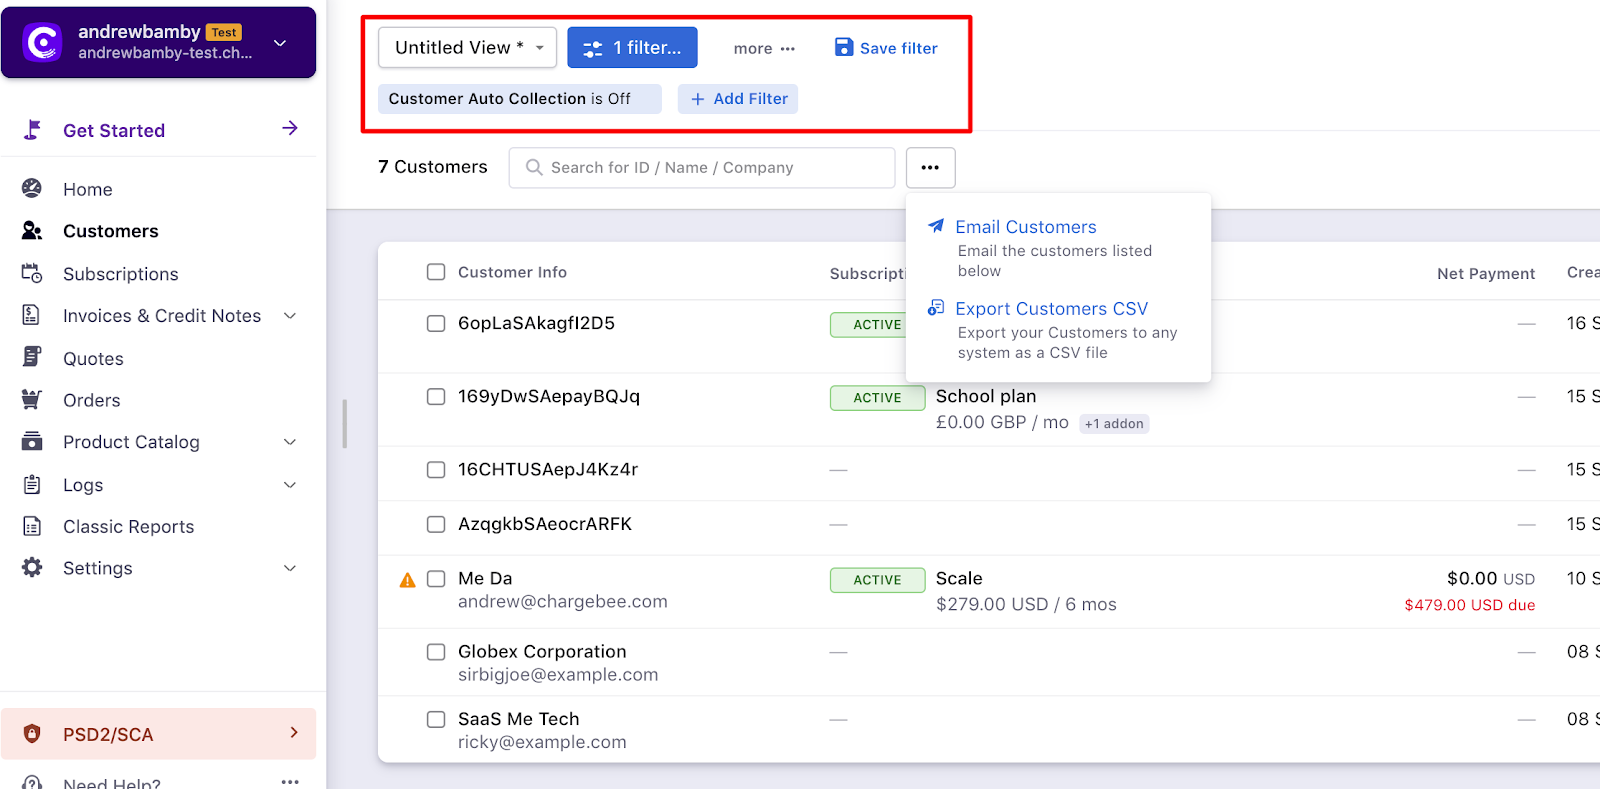
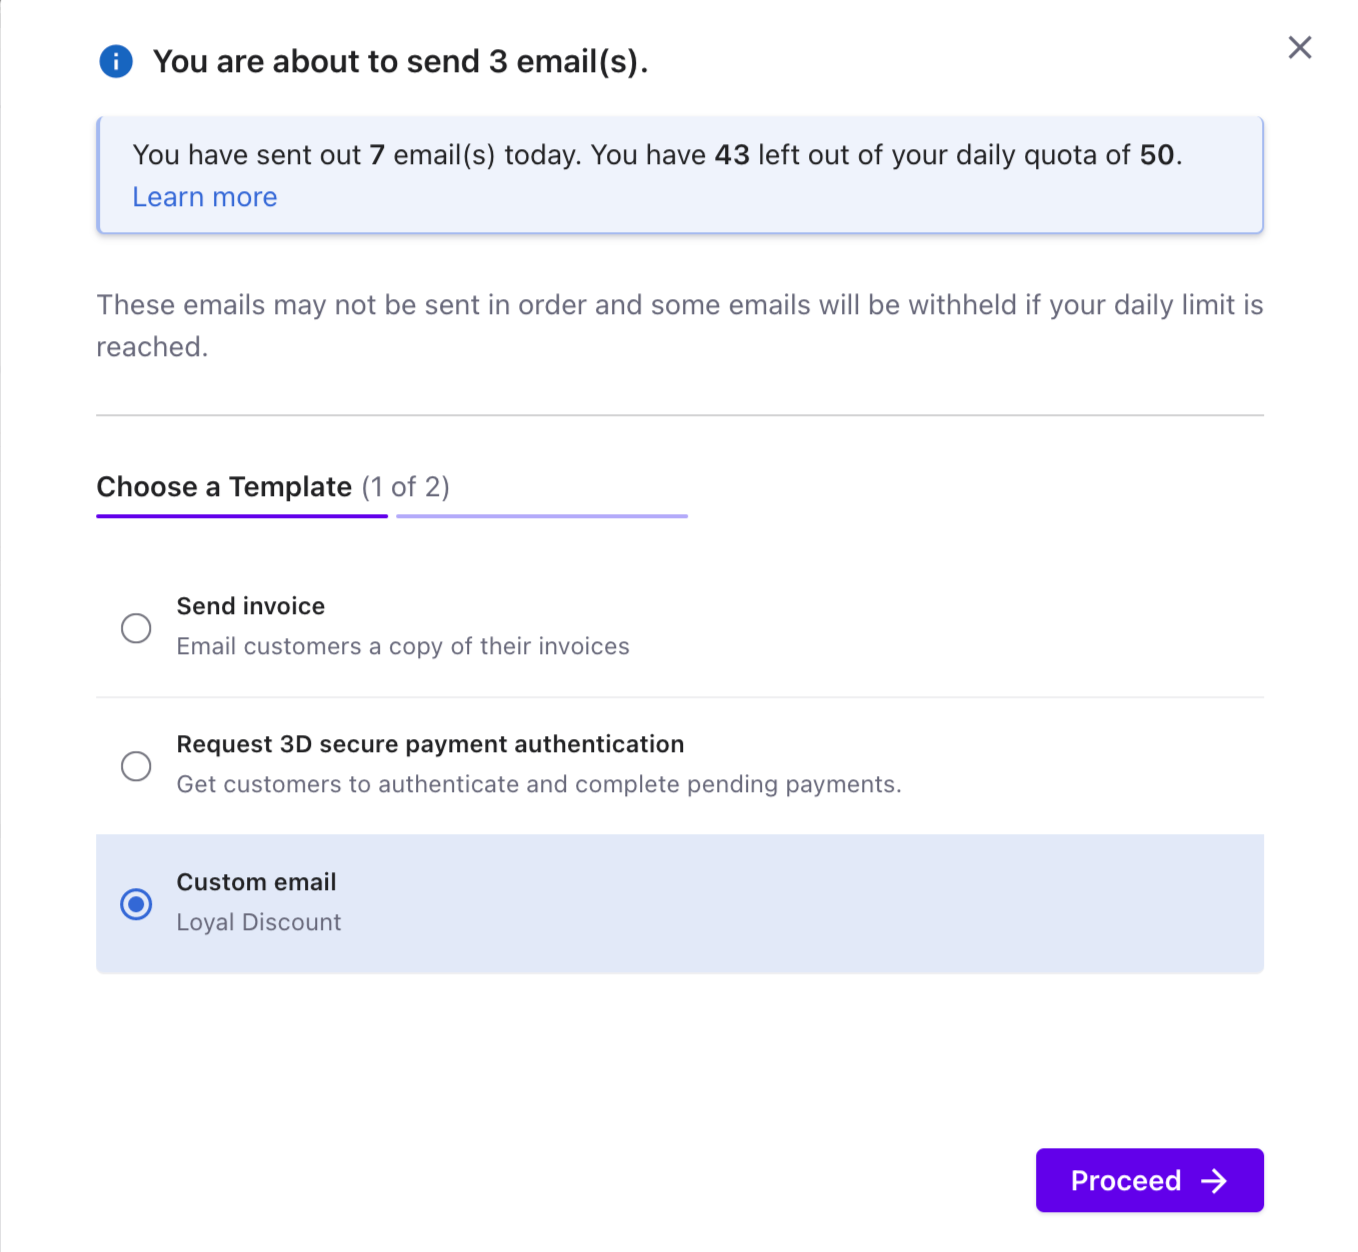
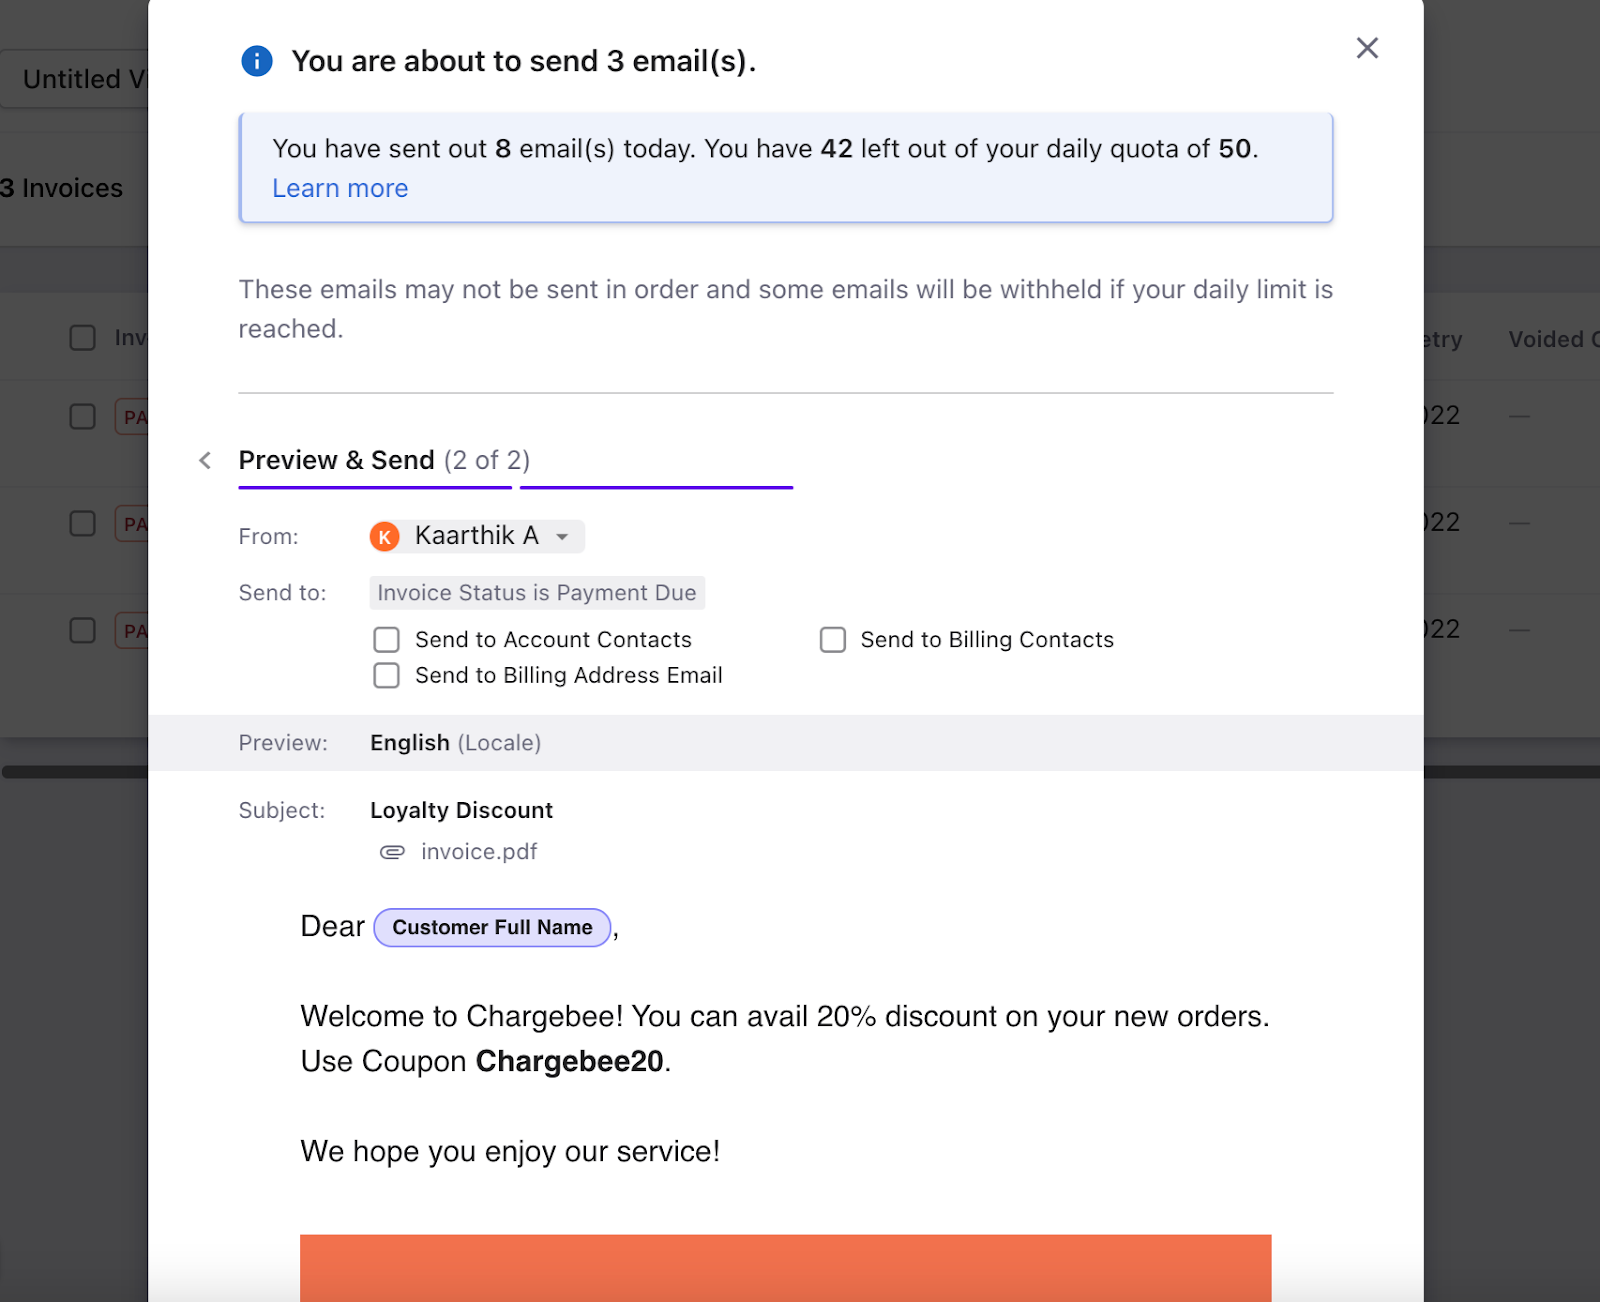
Further, you will be re-directed to the Custom Email Edit Index Page. (referred to the screenshot below)
Note: You can have a maximum of only 2 custom emails at a given time


 Articles & FAQ