Docs
This document will guide you on how to select, edit, and use canned automation templates for streamlined customer communication. You???ll learn how to choose the right template, customize it to fit your requirements, and automate it for efficient interactions, helping you save time and maintain consistency across all communications.
Selecting an automation cycle template card creates email automation, including rules and multi-lingual email templates. You can modify these rules and templates on the following screen before activating them.
Reminders will only be sent to target customers after the automation has been published.
Follow these steps to select a canned automation template:
Login to your Chargebee Receivables site.
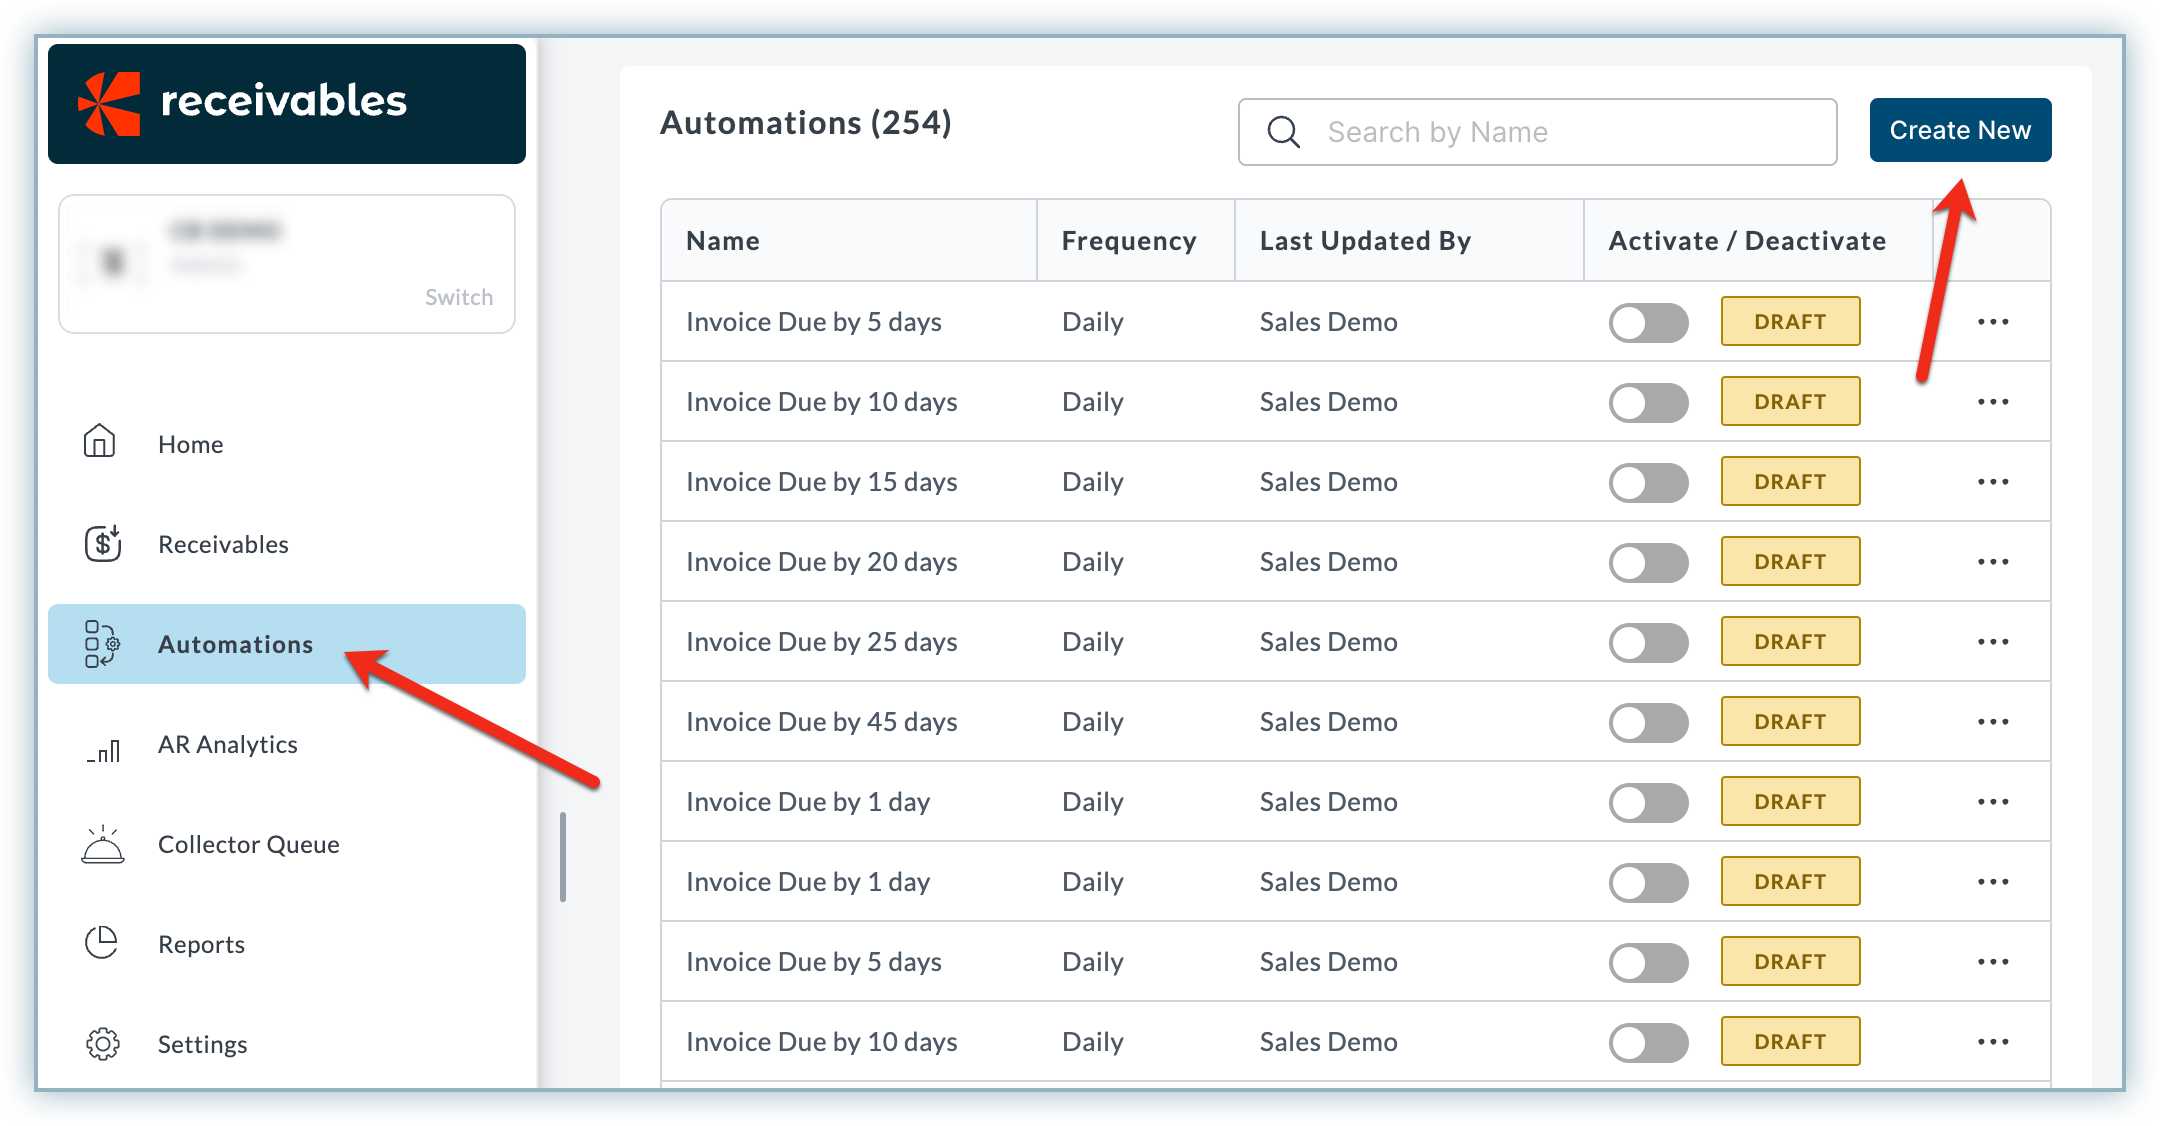
Select Automations from the left navigation and click Create New.
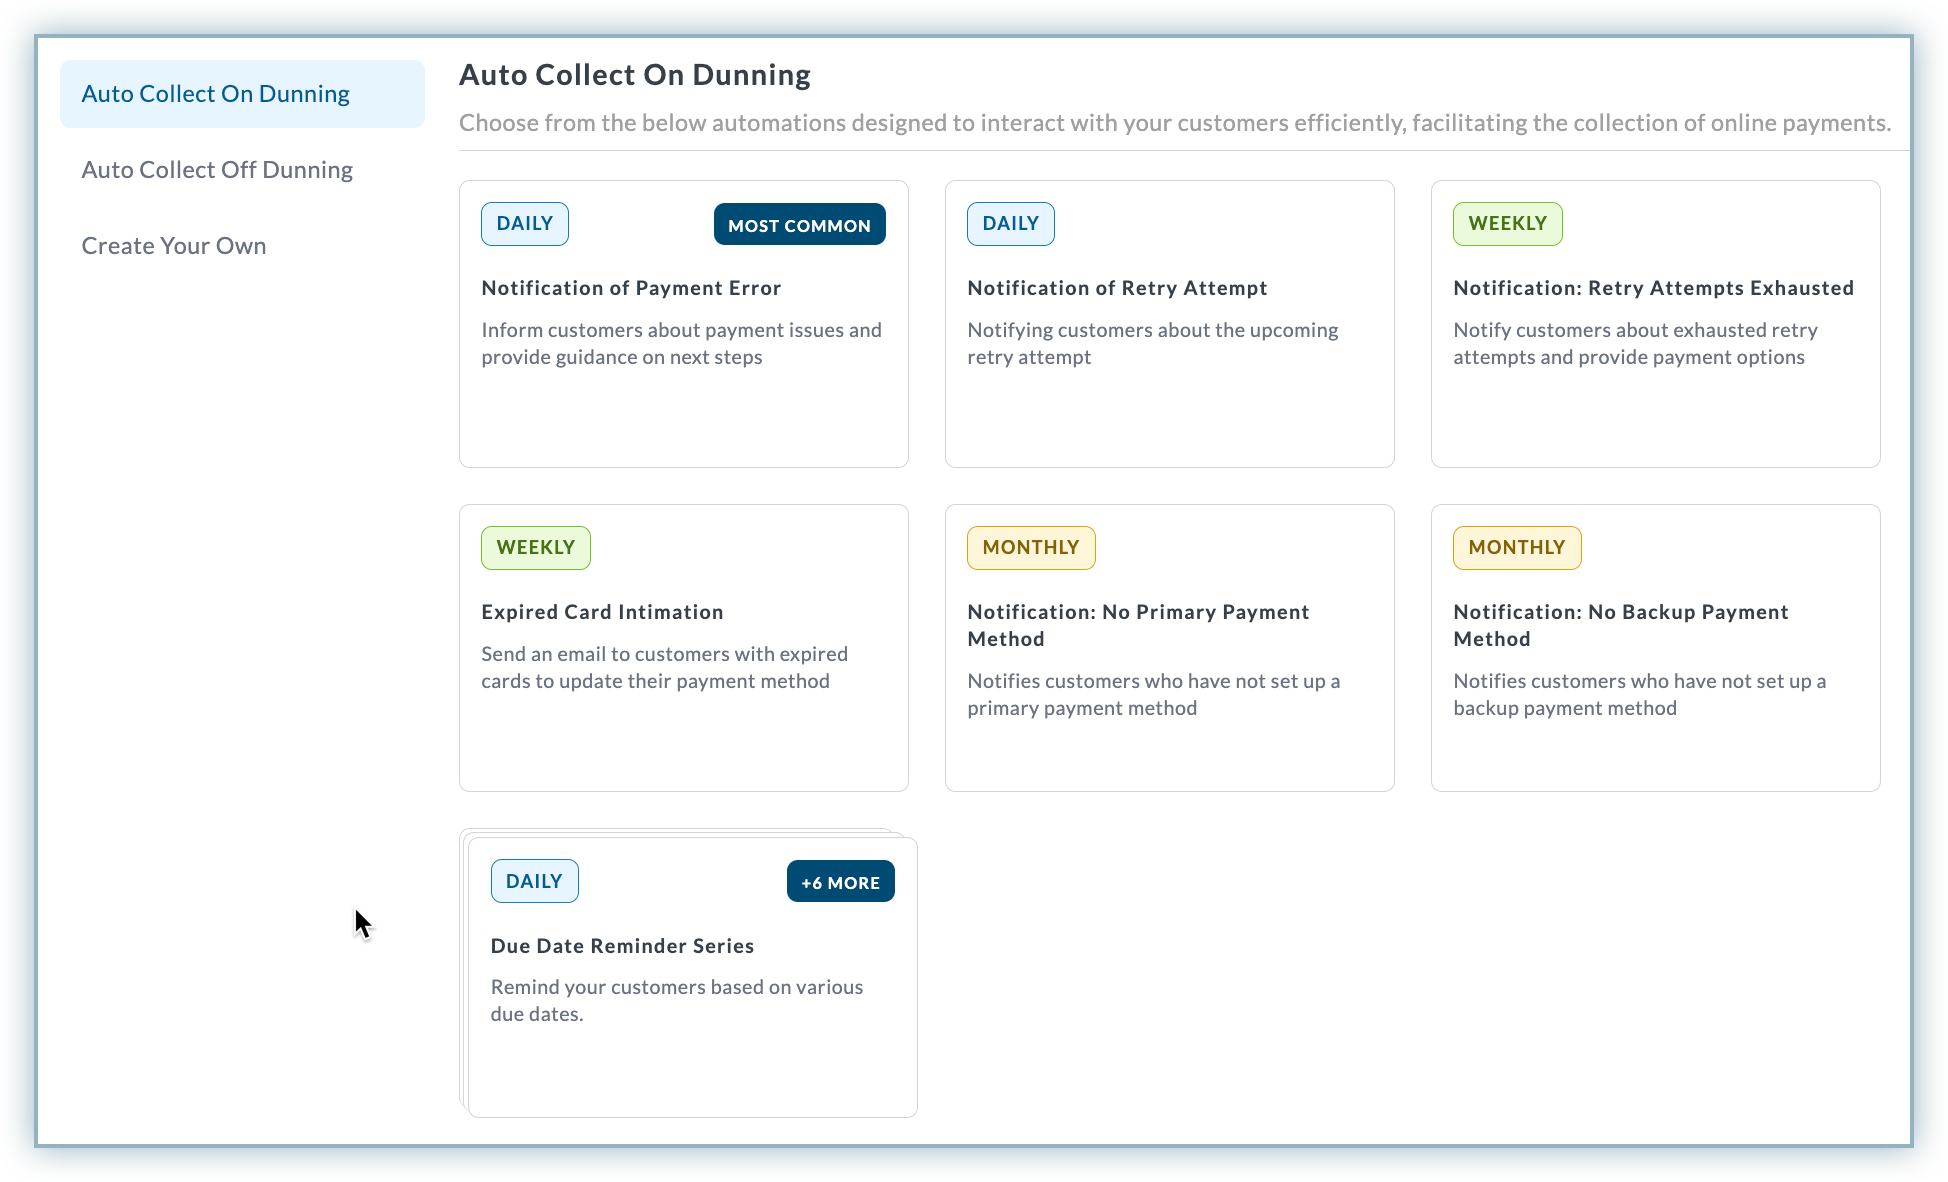
The Auto Collect On Dunning tab is opened by default. Here, you can find the canned automation templates to select from. Click on the desired automation card.
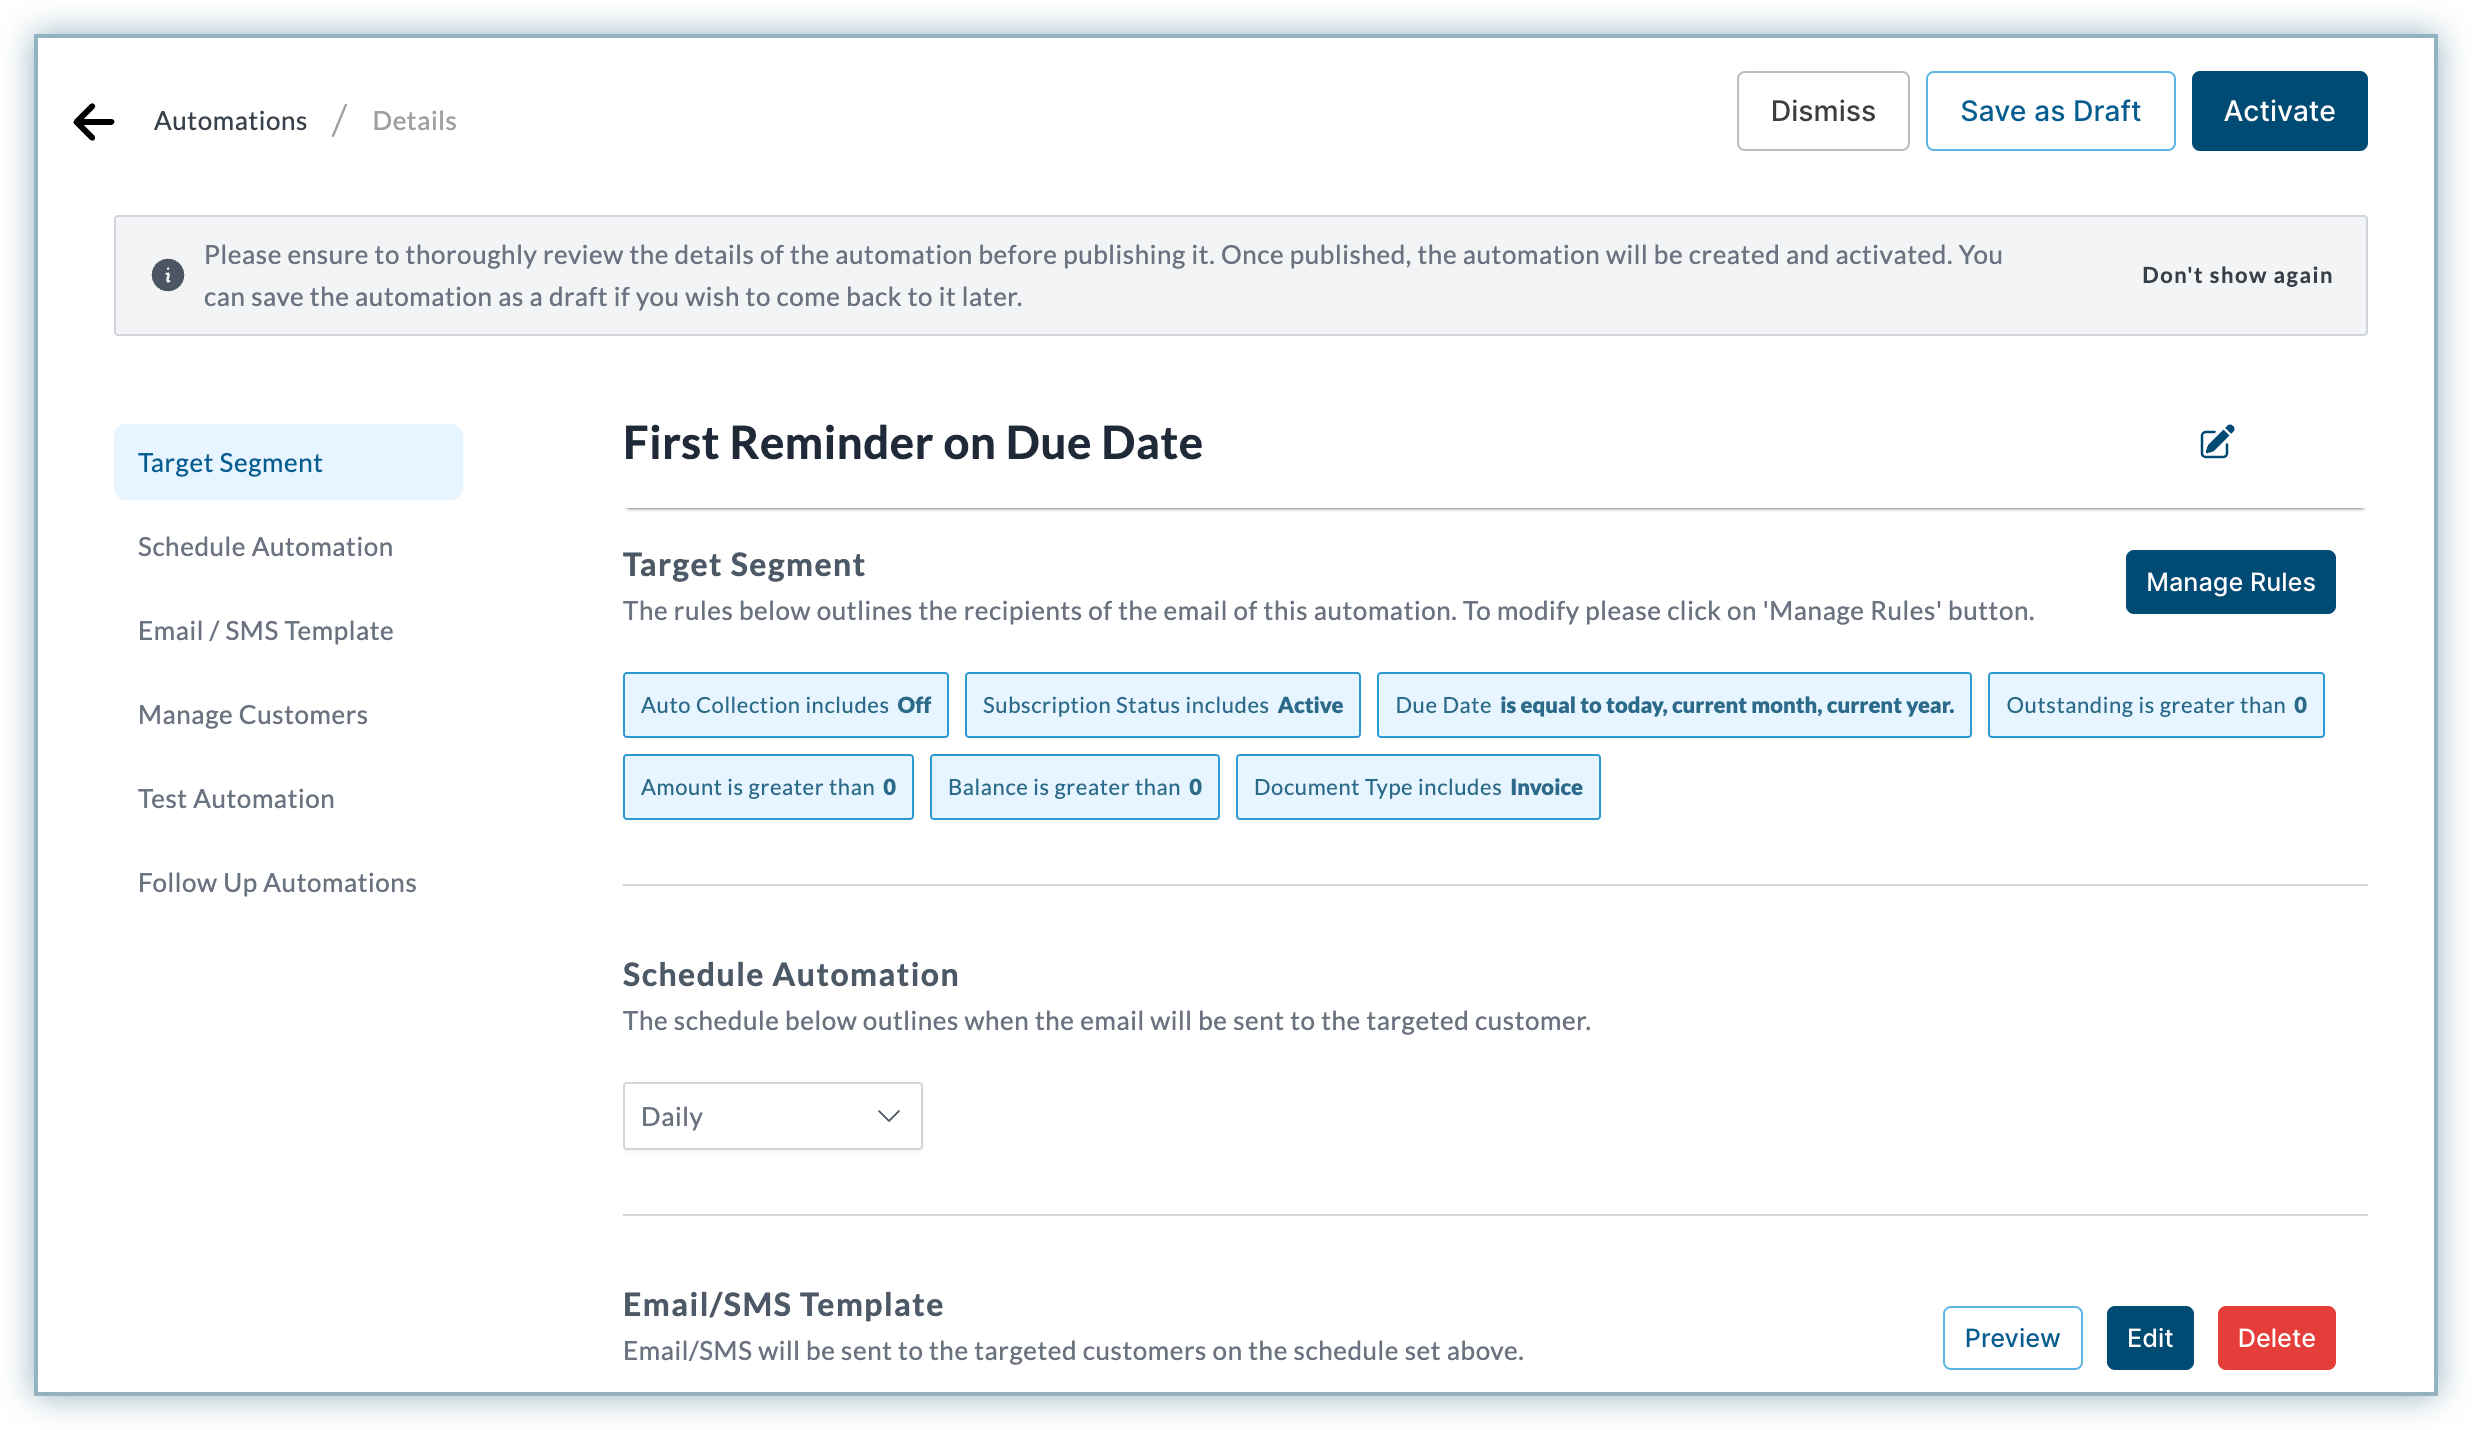
The Details page appears for the selected automation cycle. Scroll through the page and modify your template as required (explained in the next section).
Click Activate to activate the automation or Save as Draft to save it and edit it later.
You can customize and modify any canned automation as per your requirements. The following sections can be modified in an automation cycle:
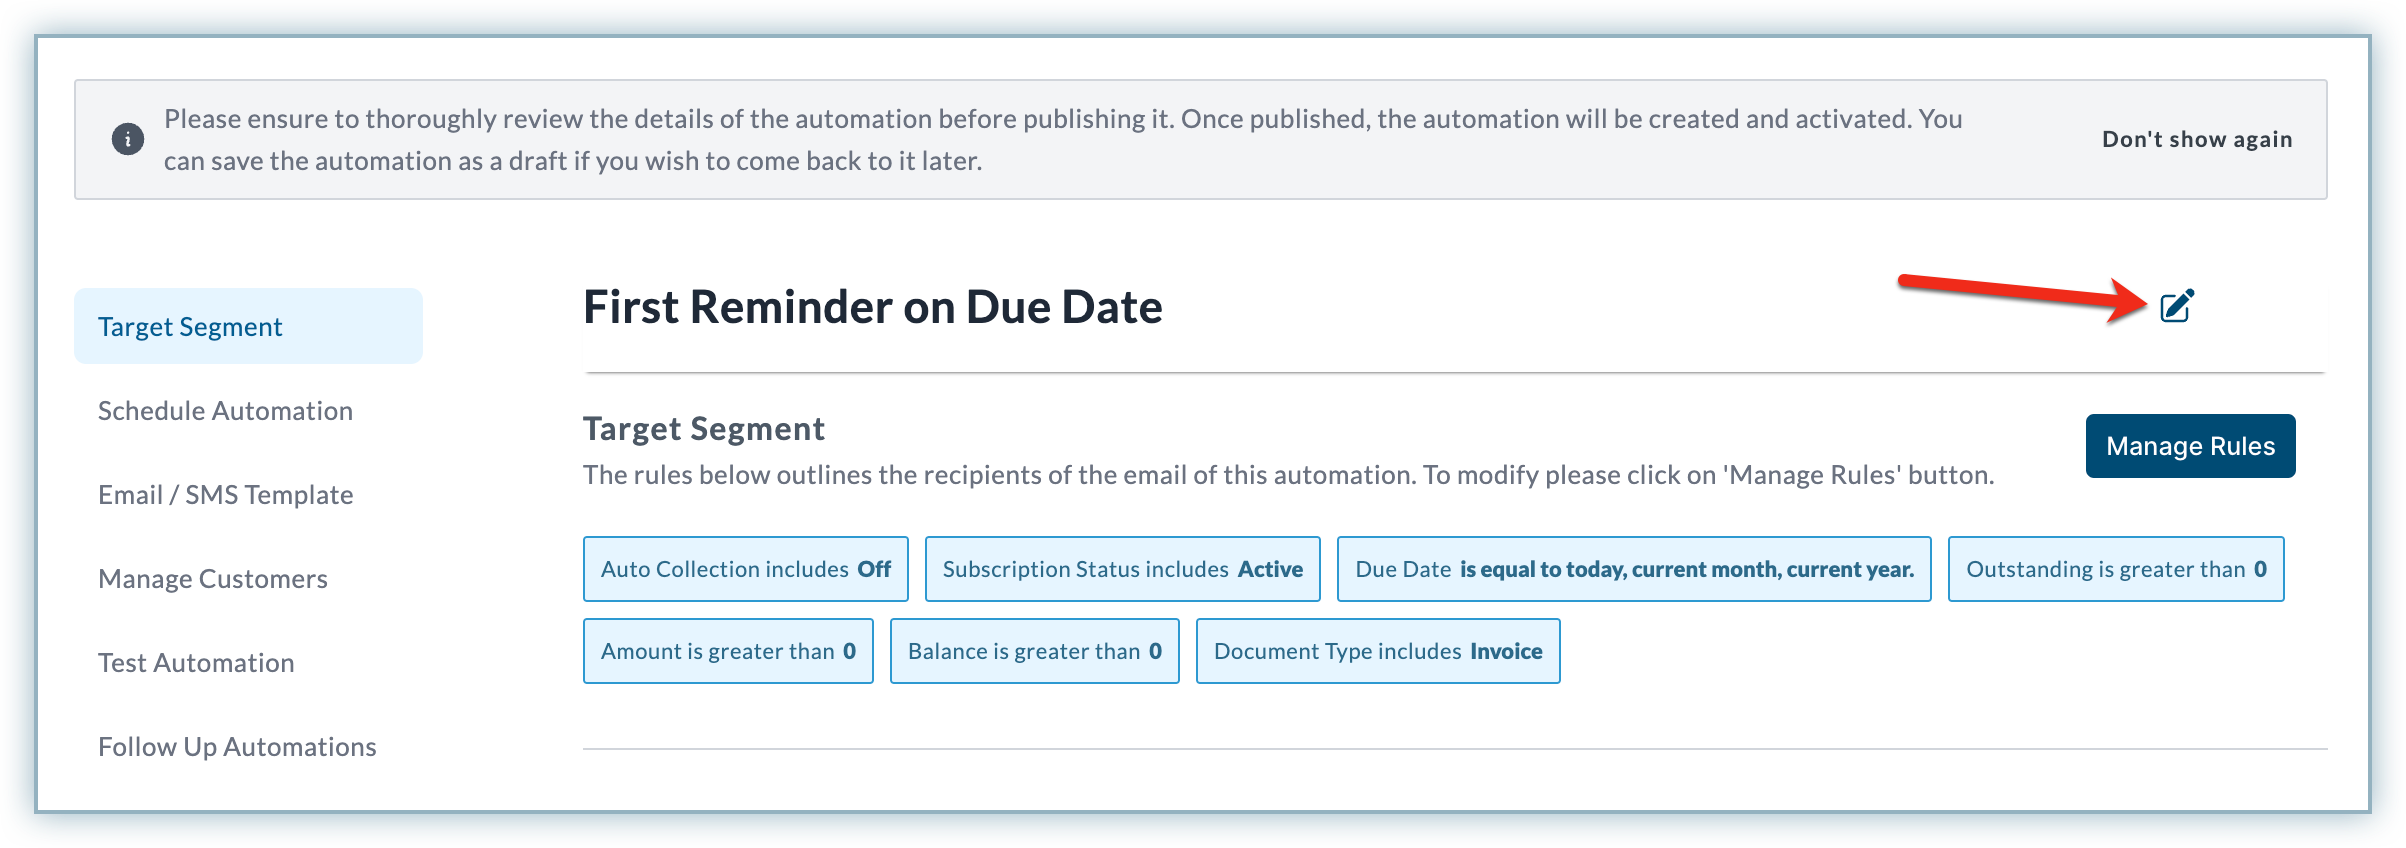
You can change the canned automation if you have one that better fits your use case. On the Details page, click the Edit button to modify the name, and click the green check button.
Target Segment refers to the set of rules added to an automation cycle to target the right set of customers that fall under the set criteria. Follow these steps to modify these rules:
On the Details page of a canned automation, click Target Segment > Manage Rules.

Modify the Rules Added or add preset Cohort templates. Learn more about automation cycle rules.
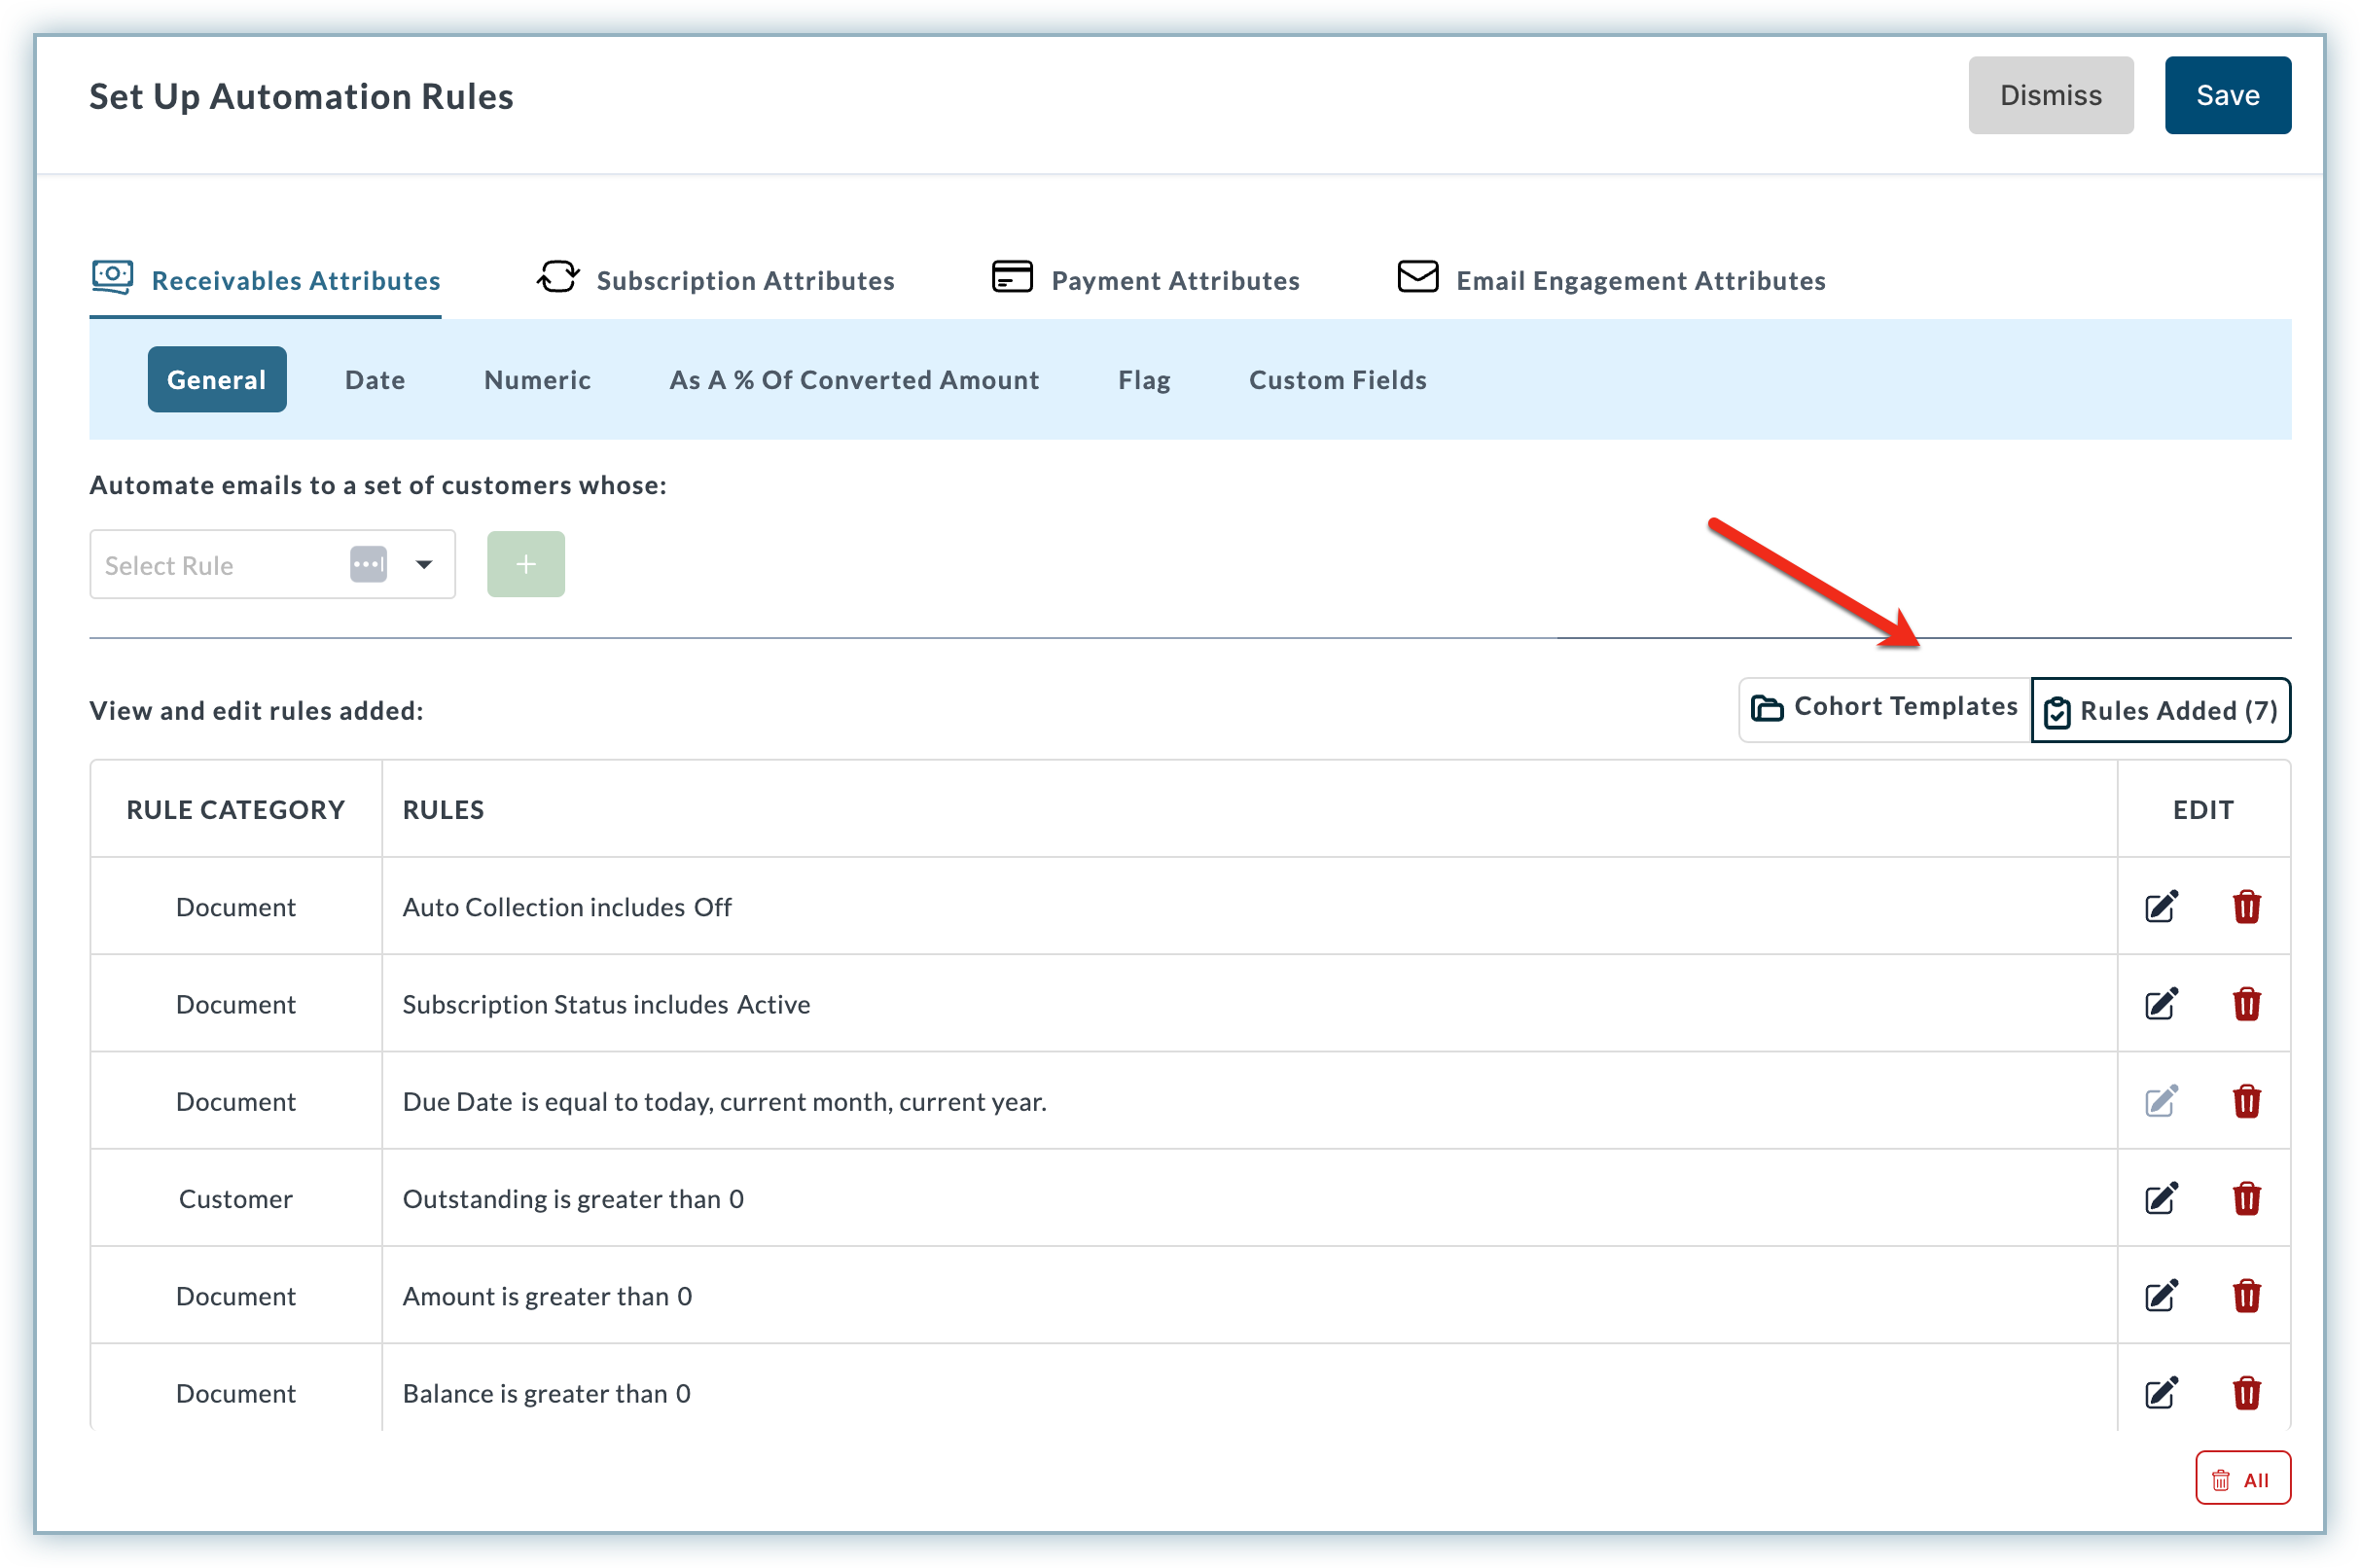
Click Save.
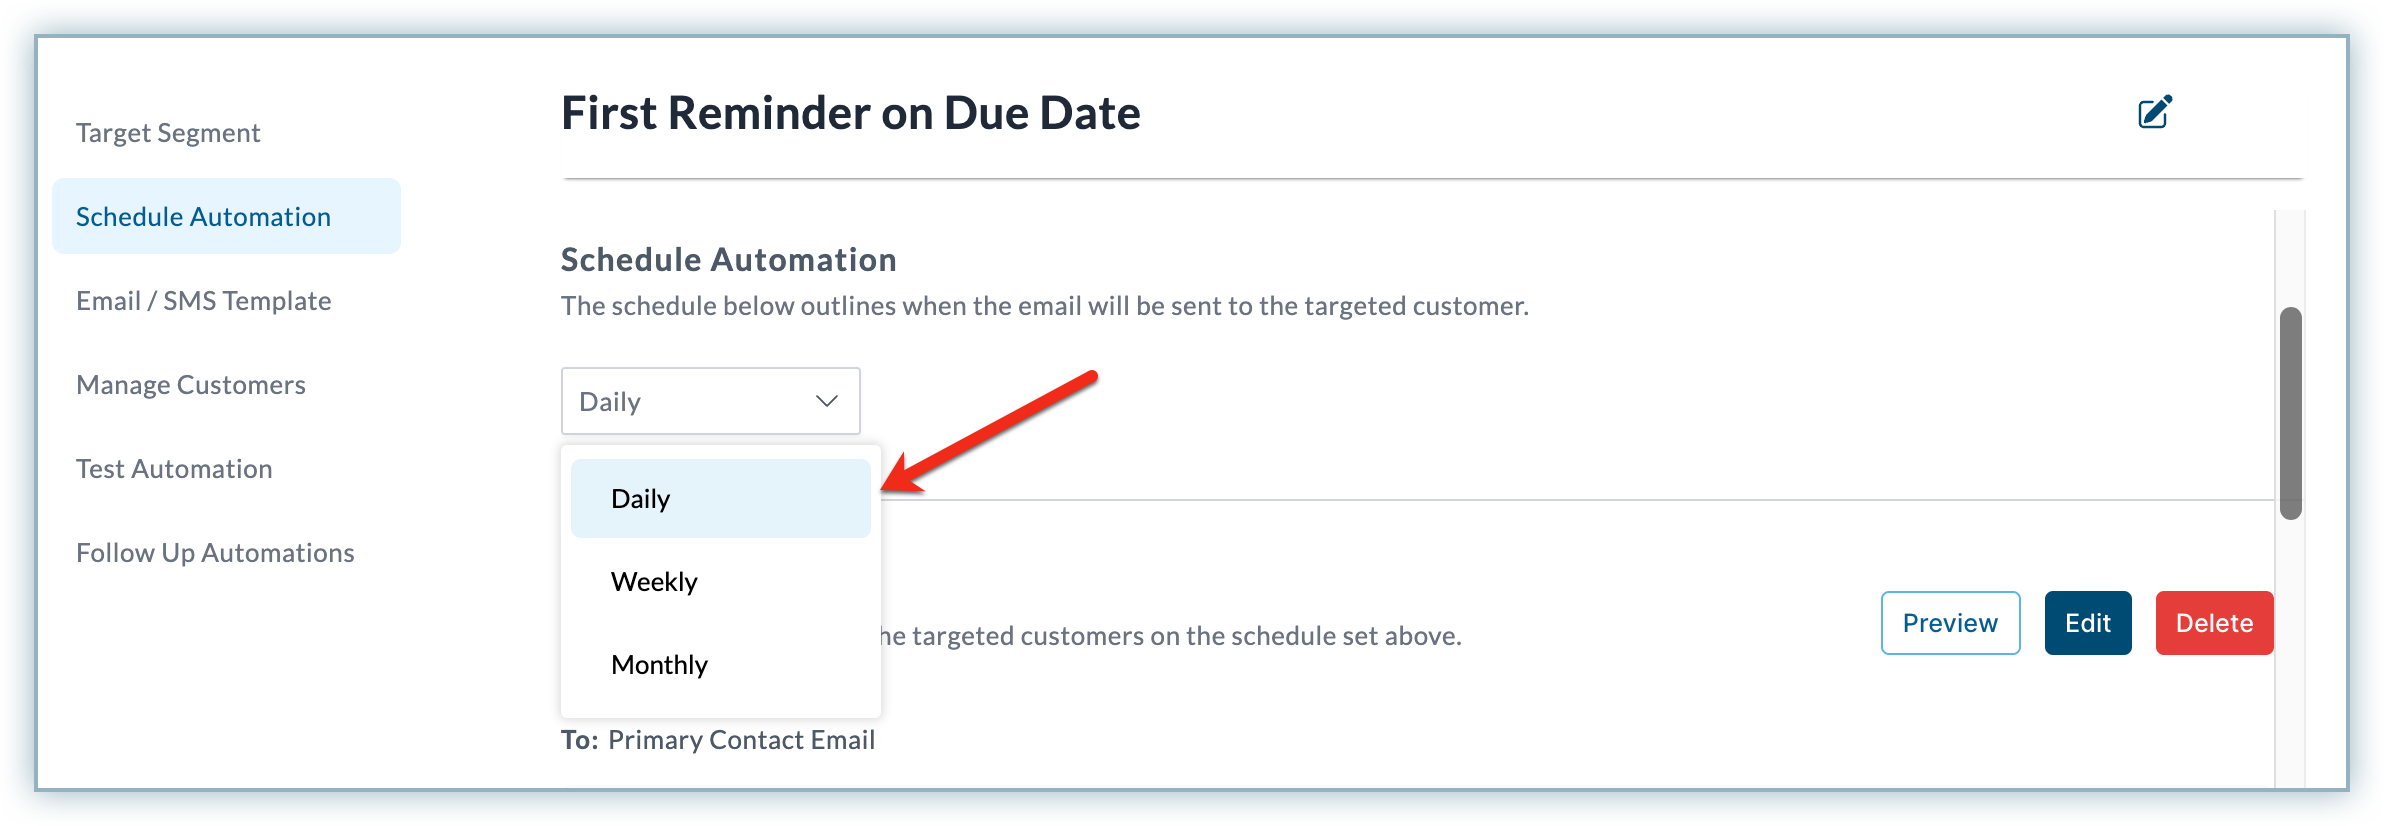
The Schedule Automation section deals with setting the frequency of the automation cycle to Daily, Weekly, or Monthly. Follow the steps below:
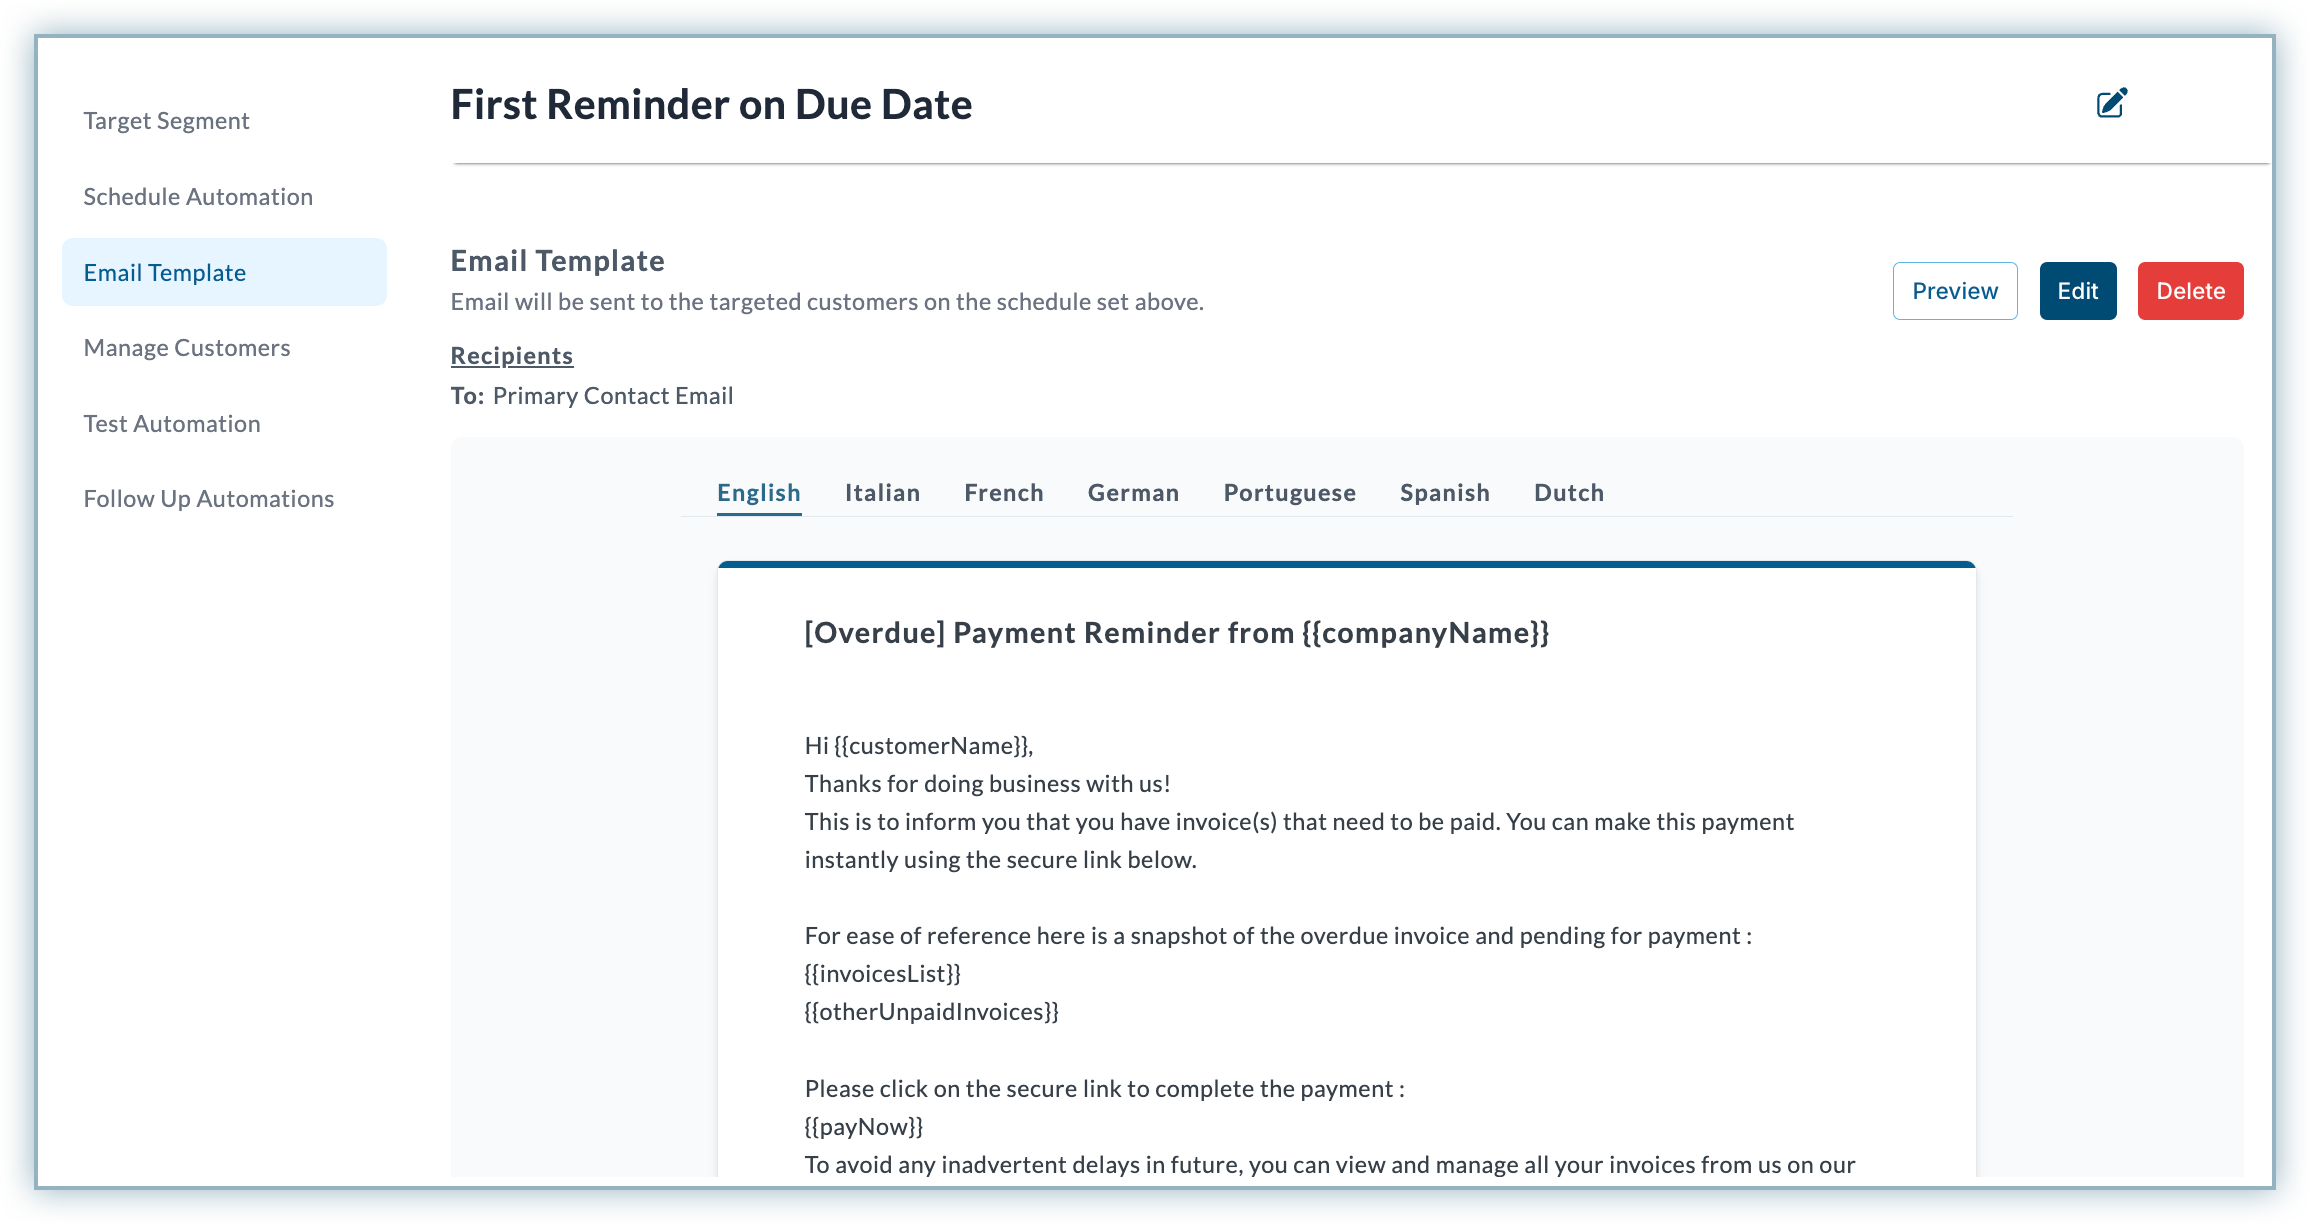
The Email Template section allows you to modify and preview the template. You can also choose to delete it. Click the Edit button to edit the template, Preview button to preview it and the Delete button to delete it.
You can also select the desired language from the available options to view the emails in that locale. Emails will be sent to the targetted customers in their preferred locale.
The Manage Customers section allows you to upload an Excel file with the list of customers that you want to Include or Exclude from the targeted customers. Follow these steps.

This option can only be used if the automation is either activated or saved as a draft.
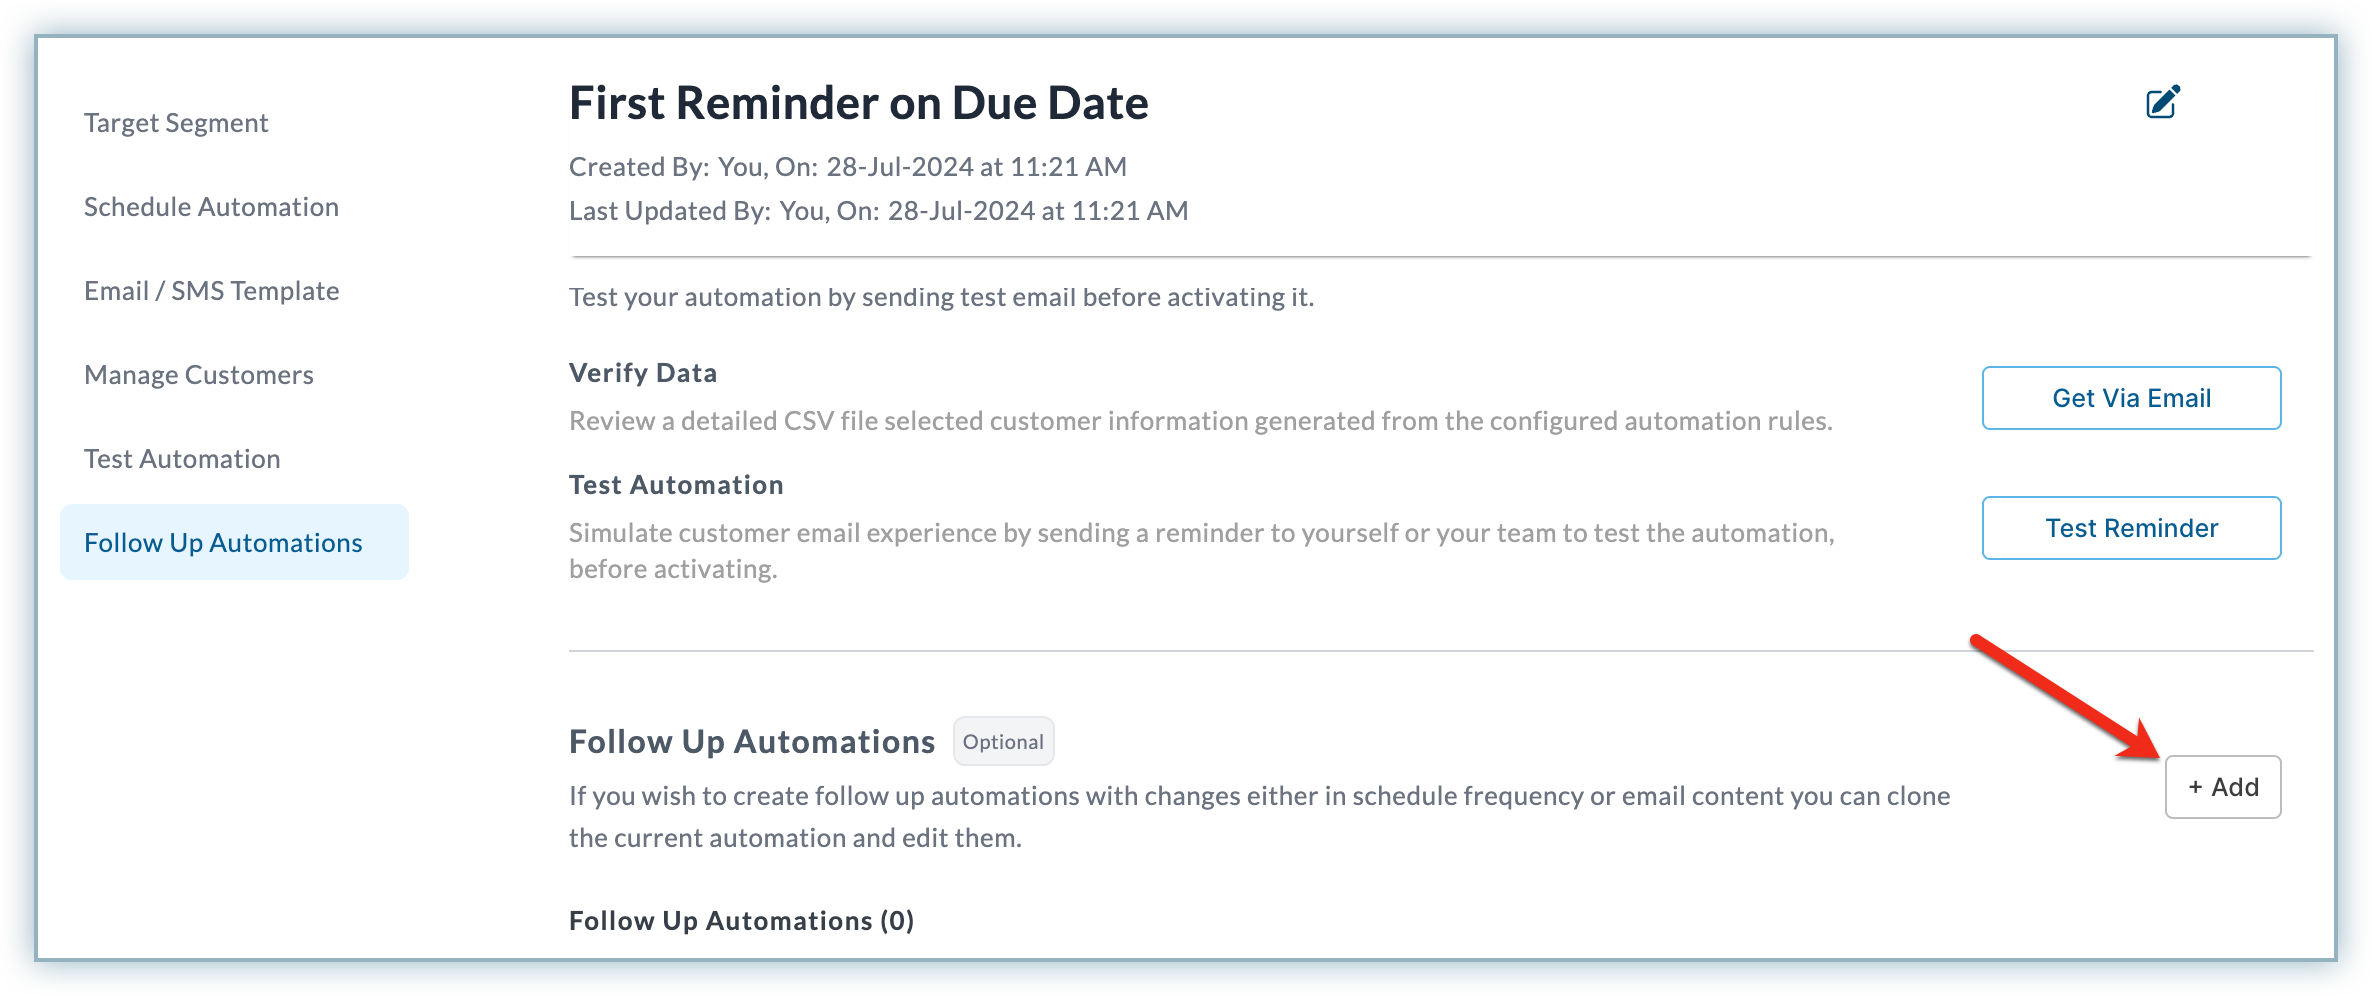
In the Test Automation section, you can test the automation before activating it. You can choose to either Verify Data or Test Automation. Let us discuss these in detail:

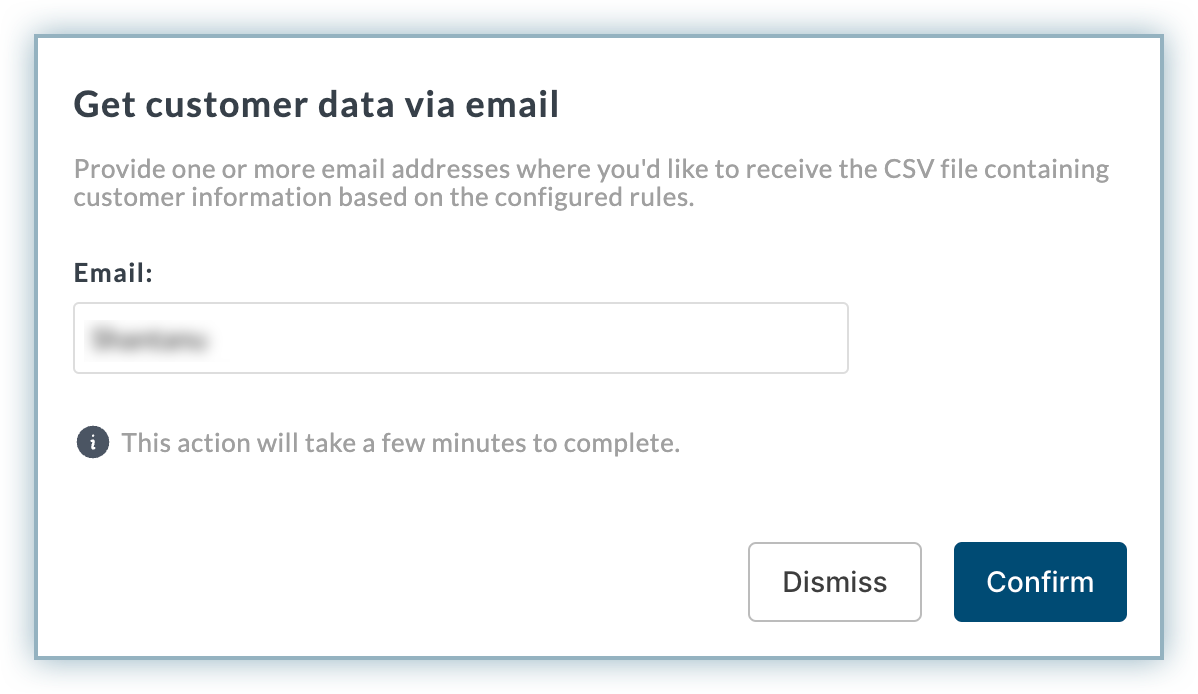
Verify Data: Using this option, you can receive a CSV file with the list of customers being targeted using the configured automation rules. This helps you to verify if the target segment is accurate before activating the automation. Follow these steps to verify the customer data:
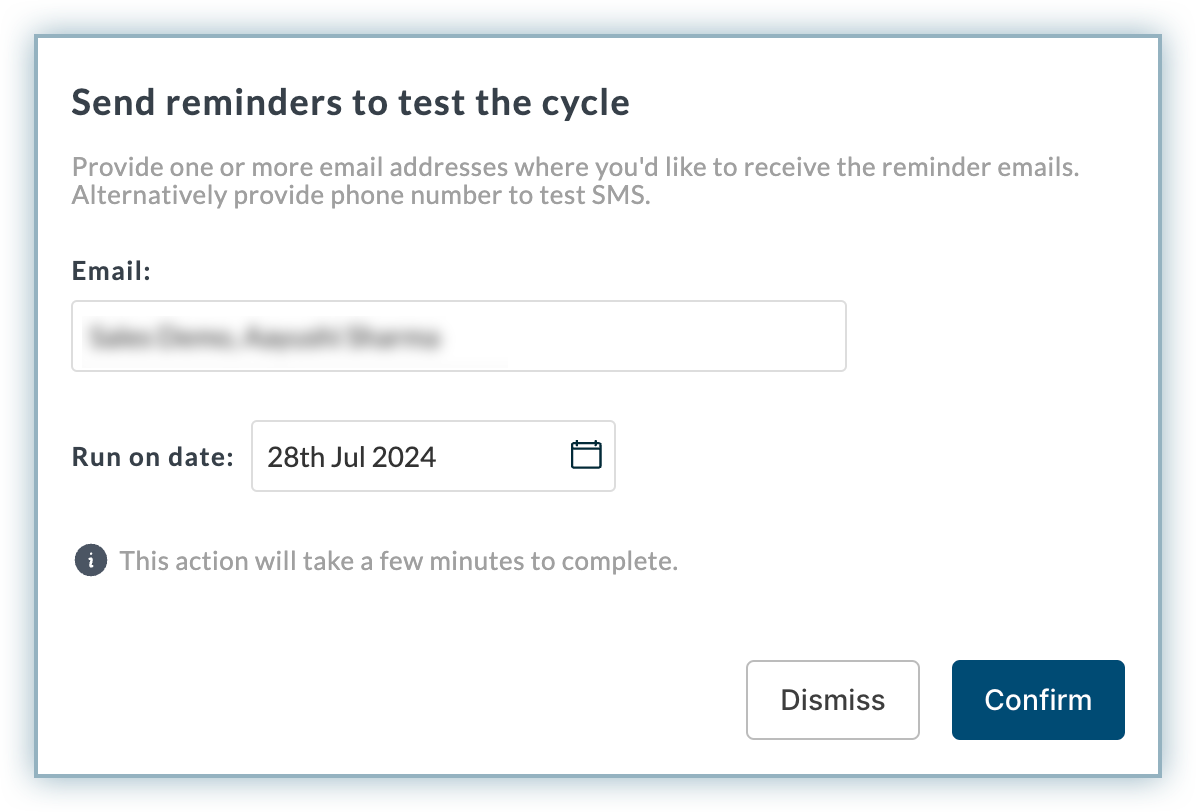
Test Automation: Using this option, you can receive an email similar to what your customers will receive once you activate the automation. This helps you to simulate the customer email experience before activating the automation. Follow these steps to test the automation:
This option can only be used if the automation is either activated or saved as a draft.
The Follow Up Automations section allows you to create an automation cycle by cloning the current automation cycle to follow up with the same set of customers as required.
Follow the steps below to create a Follow-Up Automation:
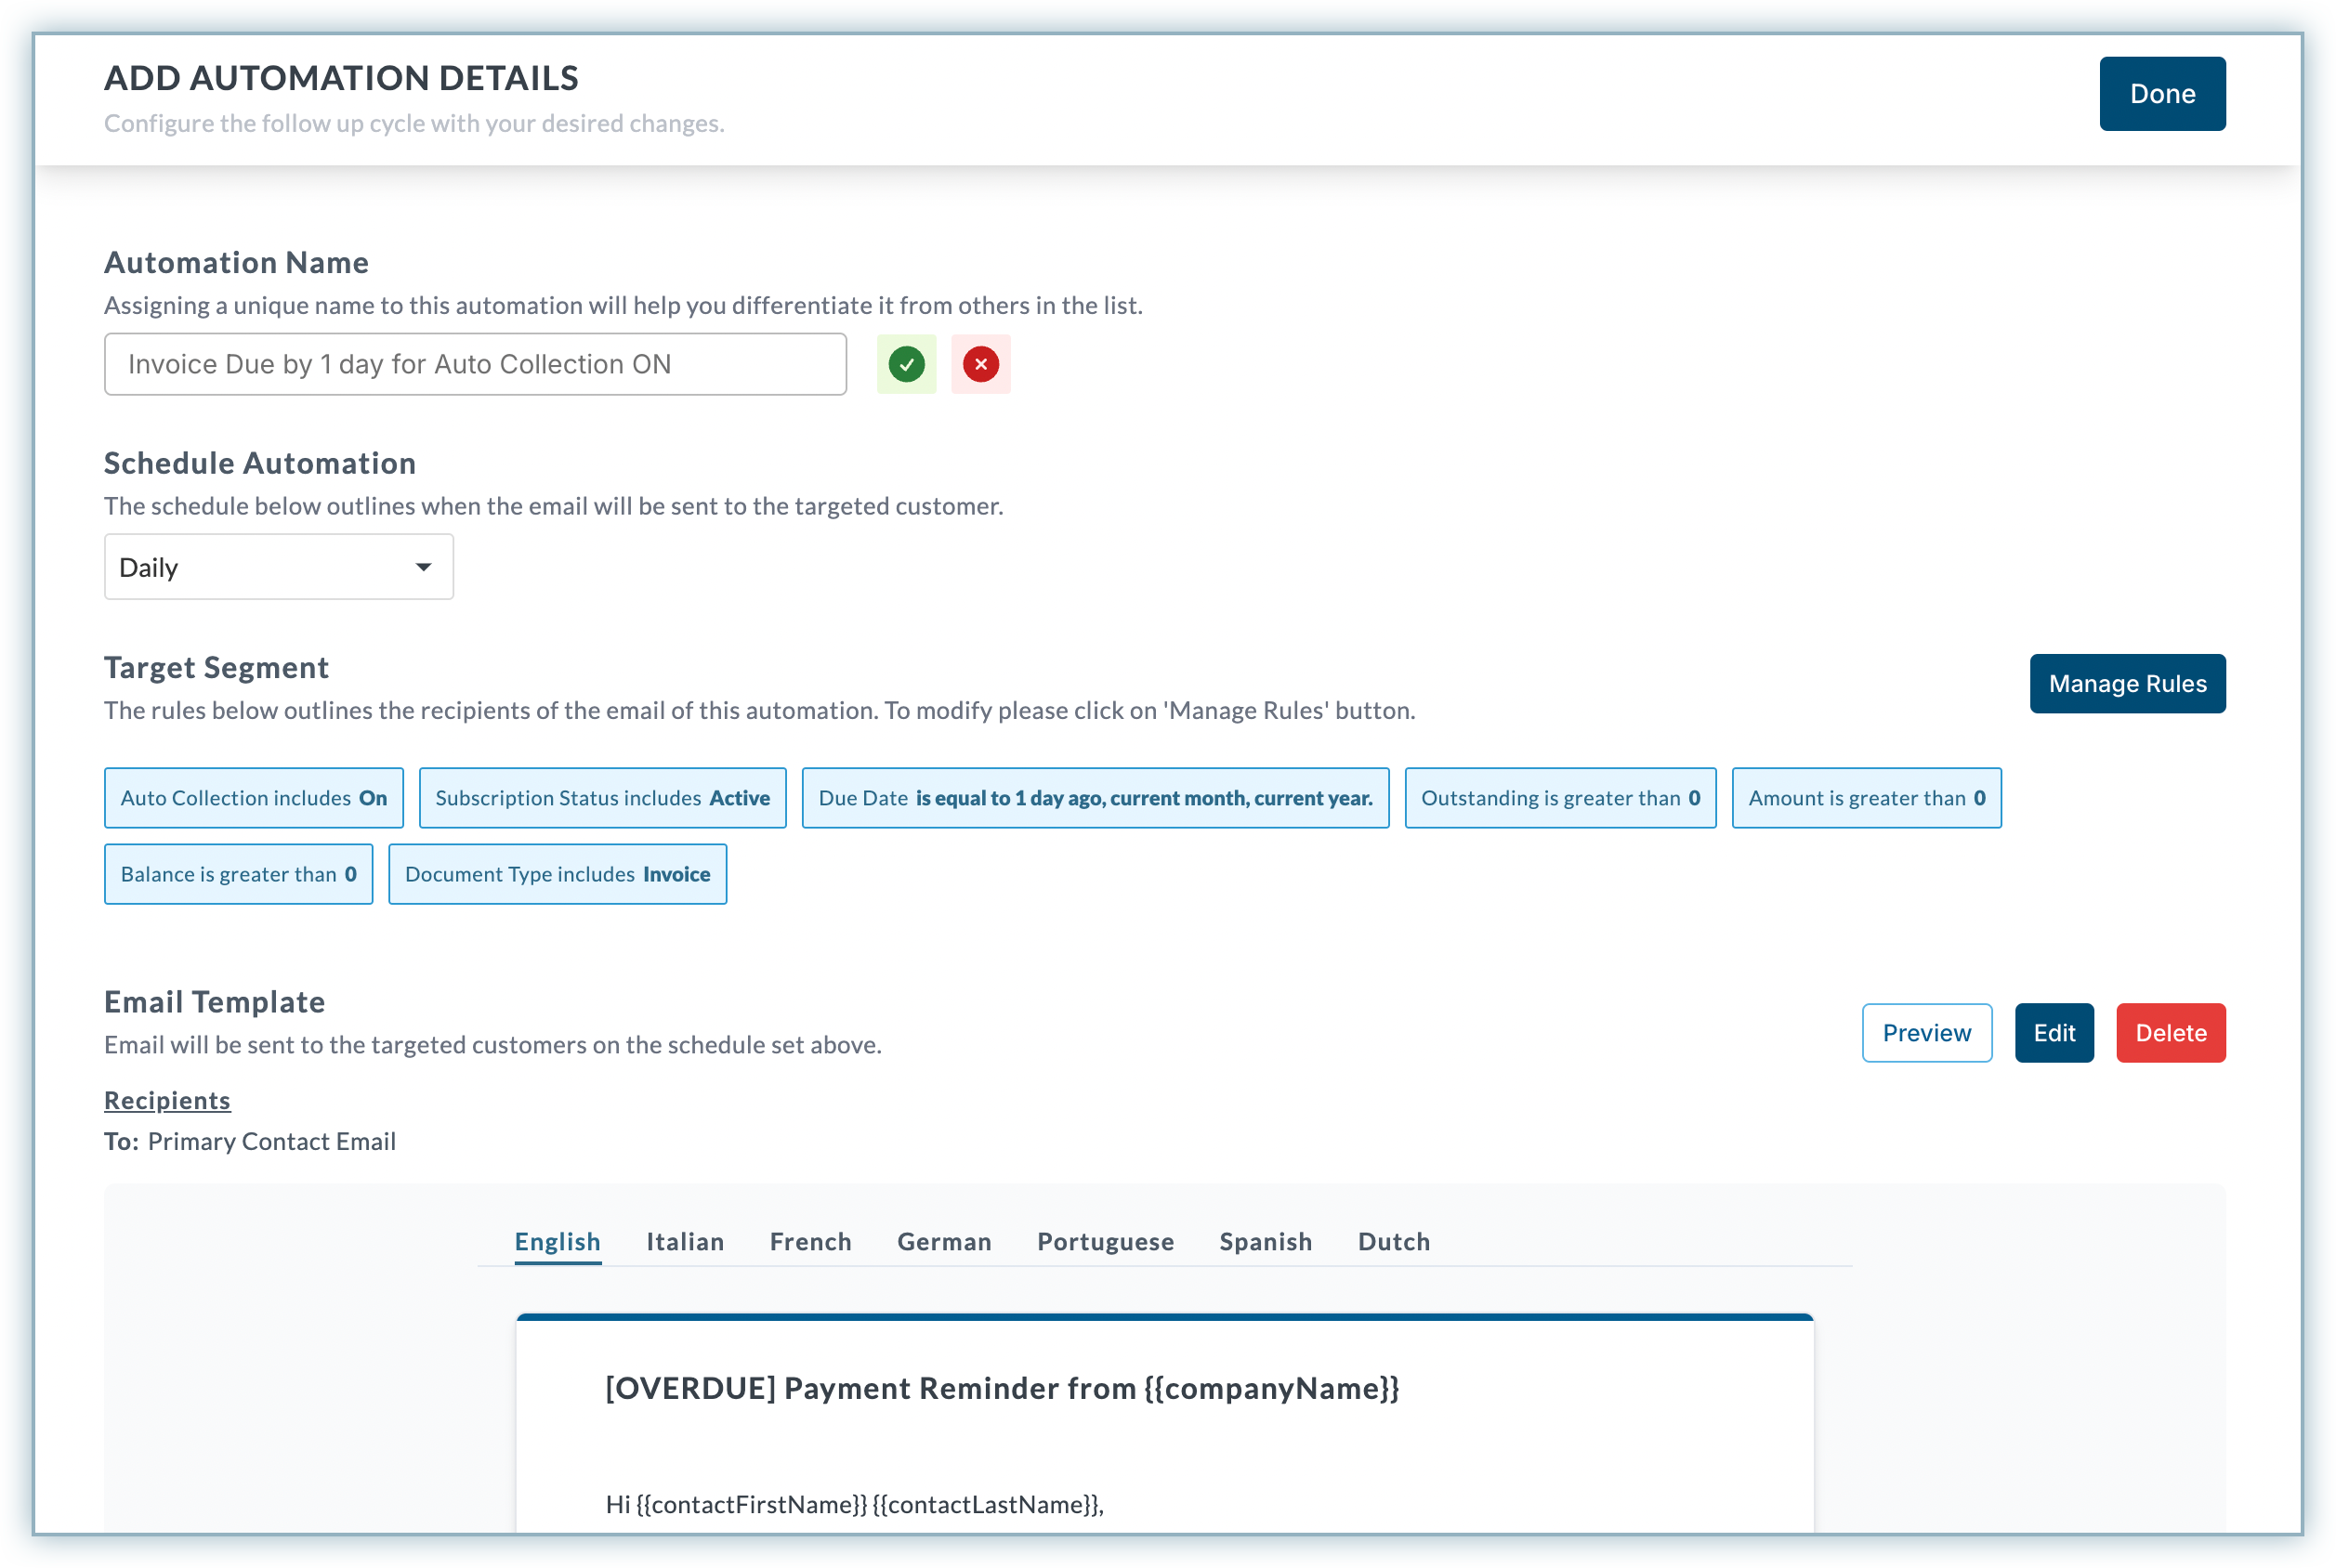
Click +Add.
Modify the rules for the cloned automation cycle and click Done.
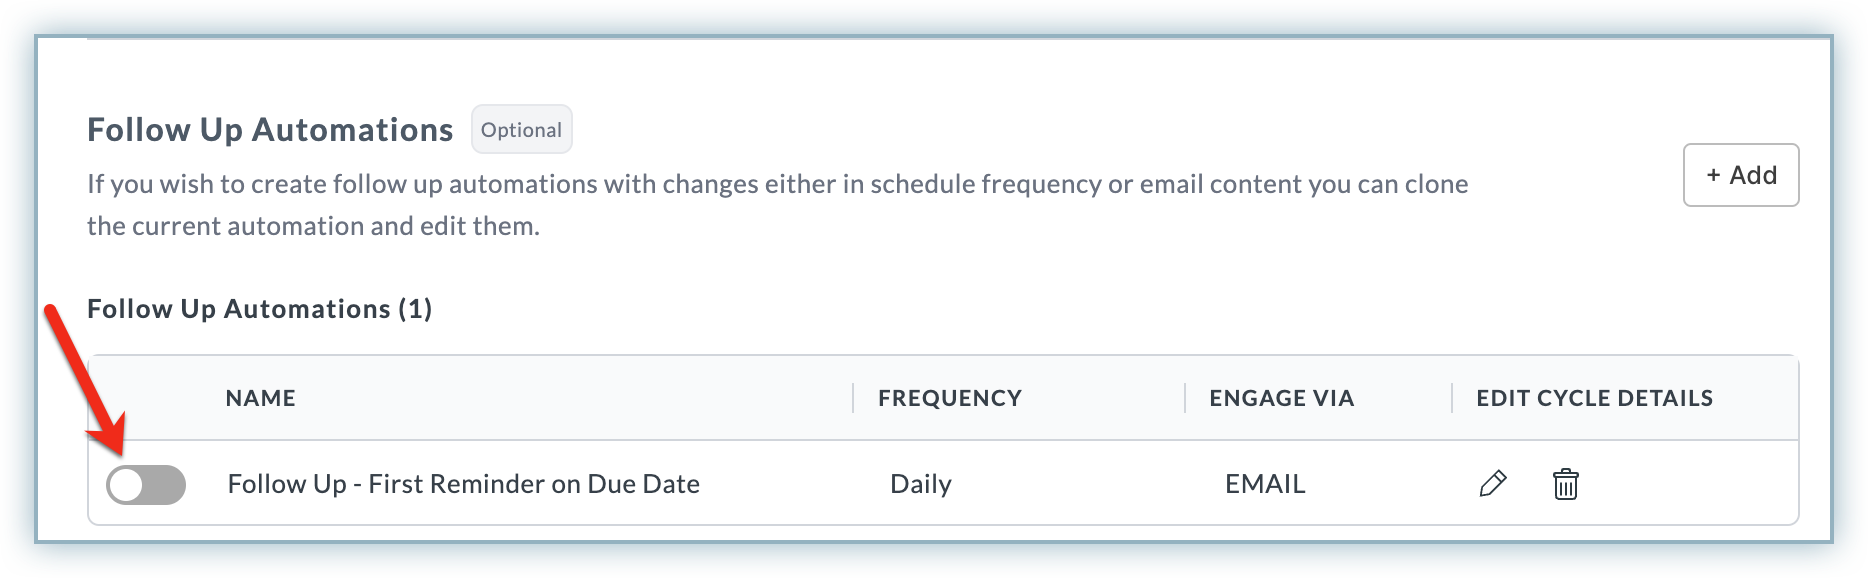
The newly created follow-up automation appears under the Follow Up Automation section of the main automation.
Enable the automation. You can also choose to edit or delete the automation if required.
This option can only be used if the primary automation is either activated or saved as a draft.
