Docs
This upgrade will transform your Chargebee site from product catalog version 1.0 to the latest product catalog version 2.0.
Some of the benefits of the upgrade include:
The Self-Serve Tool can be utilized by businesses that have the following Chargebee setup:
Please contact support to raise an upgrade request if your Chargebee site does not have the above eligibilities and you still want to upgrade to product catalog version 2.0.
To initiate the product catalog version 2.0 upgrade, follow these steps:
All Plan Groups and Product Families will be saved as drafts until you are ready to resume and continue with step 6.
To use the Self-Serve Tool, follow these steps:

The tool is accessible only on specific sites that ensure all the above eligibilities.
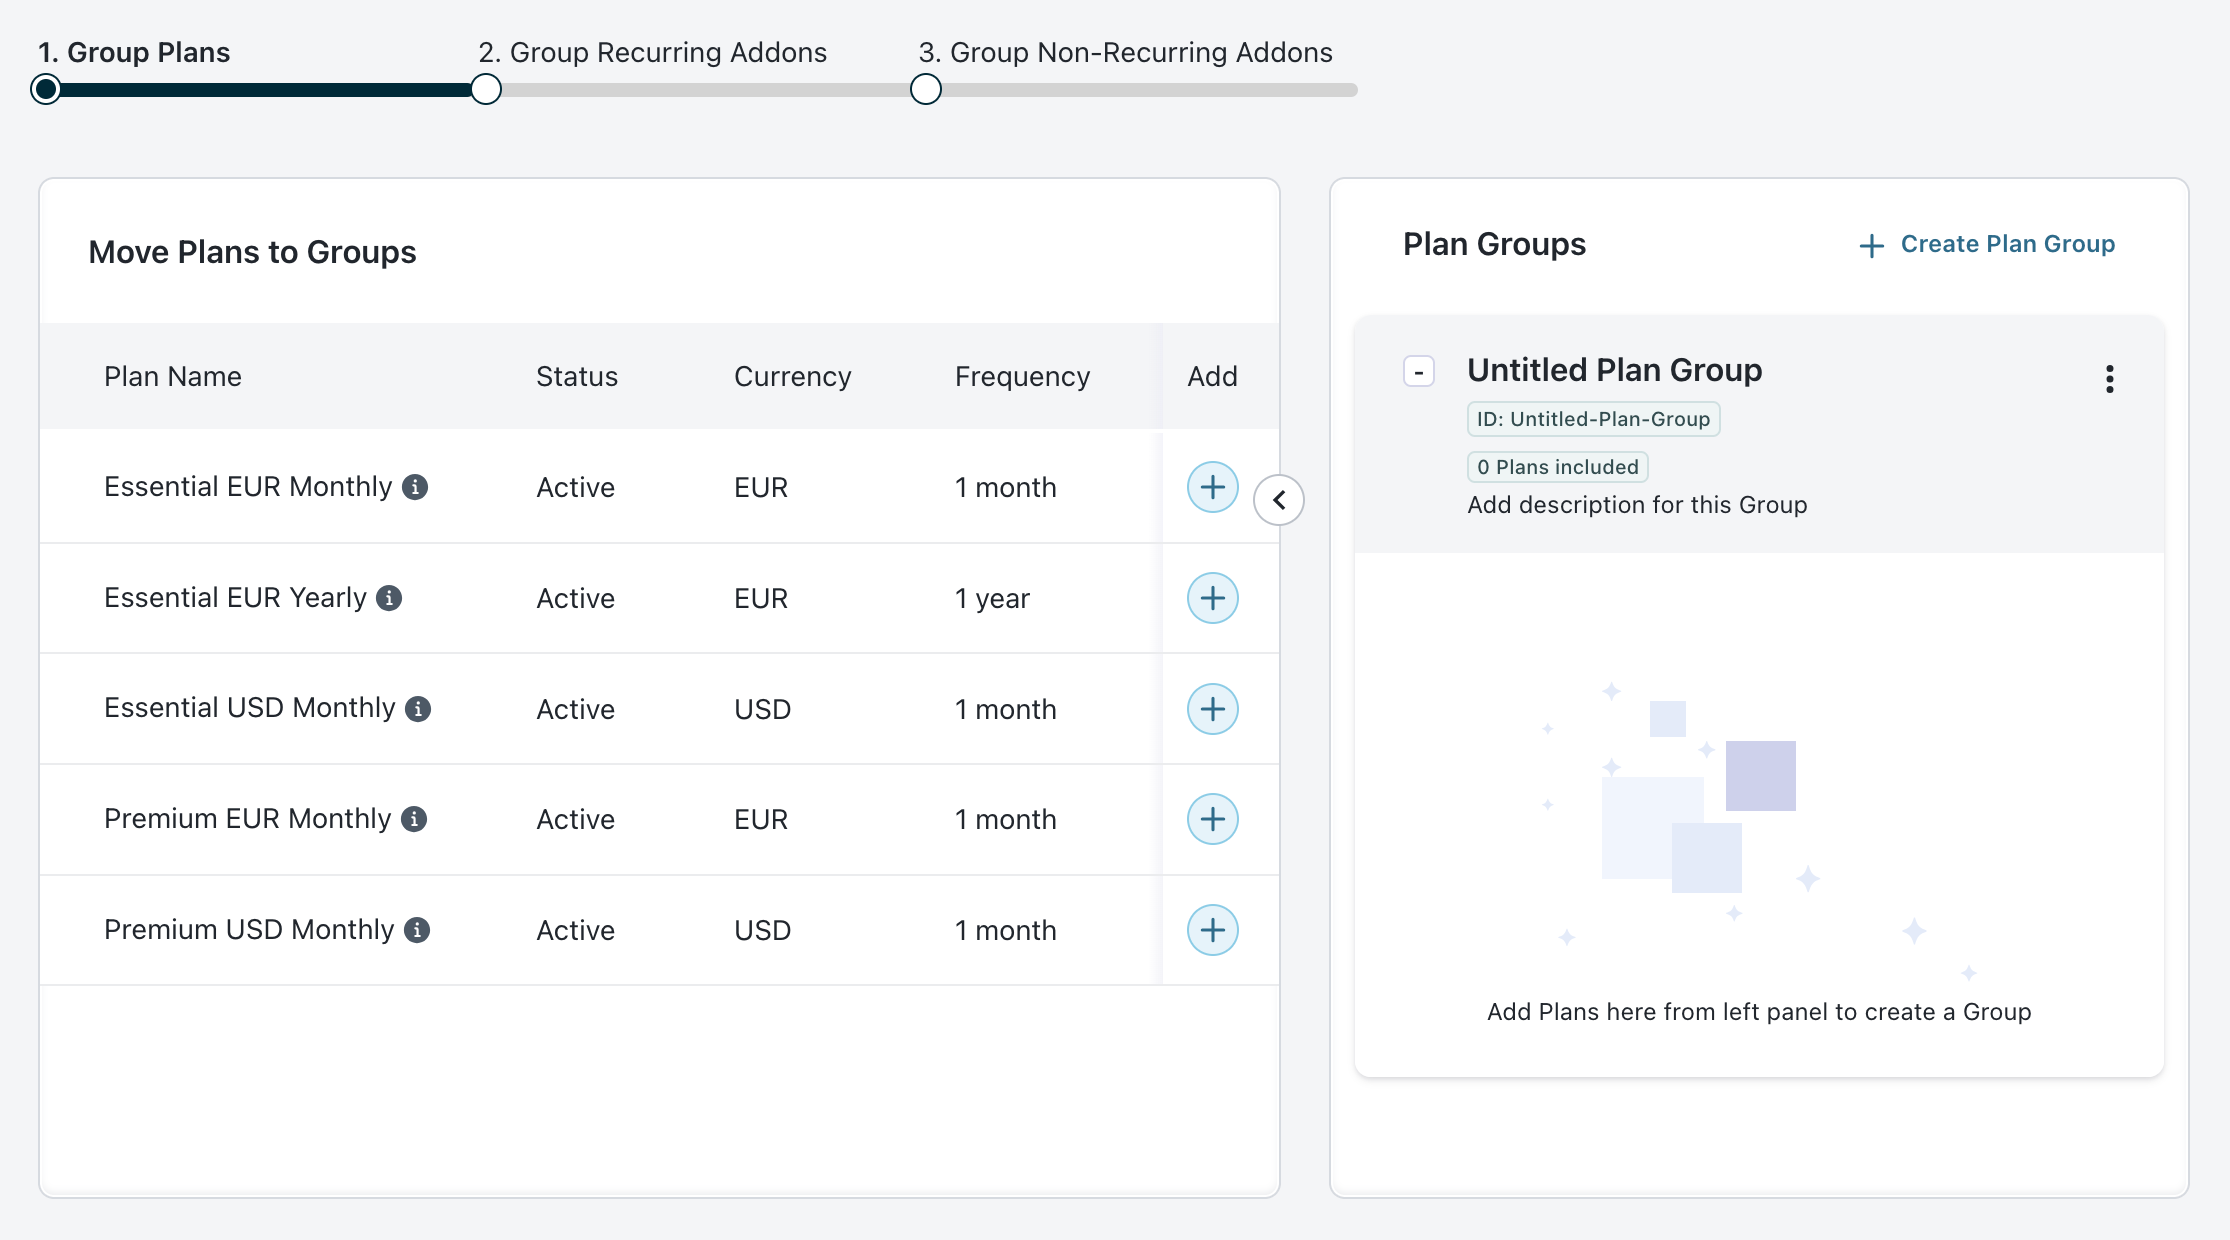
Group your plans and addons across currencies and billing frequencies to optimize your product catalog setup.
Consider the following example where five plans were created on product catalog version 1.0 with the currencies USD & EUR, and billing frequencies Monthly & Yearly.
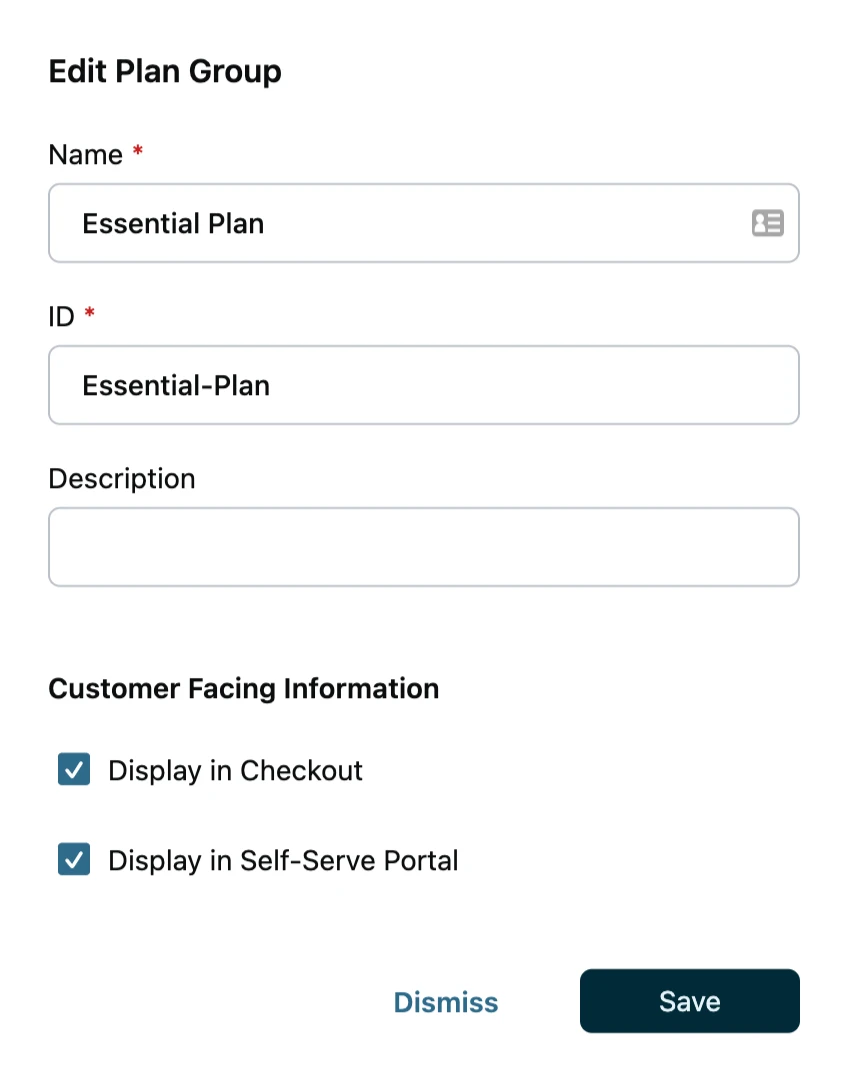
In the Untitled Plan Group, click the vertical ellipse ⋮ icon to edit the default group.
Enter the name of your plan group. For example, the name could be Essential Plan, as shown in the image. A single plan group can have multiple price points based on the currency and billing frequency in which you want to offer them.
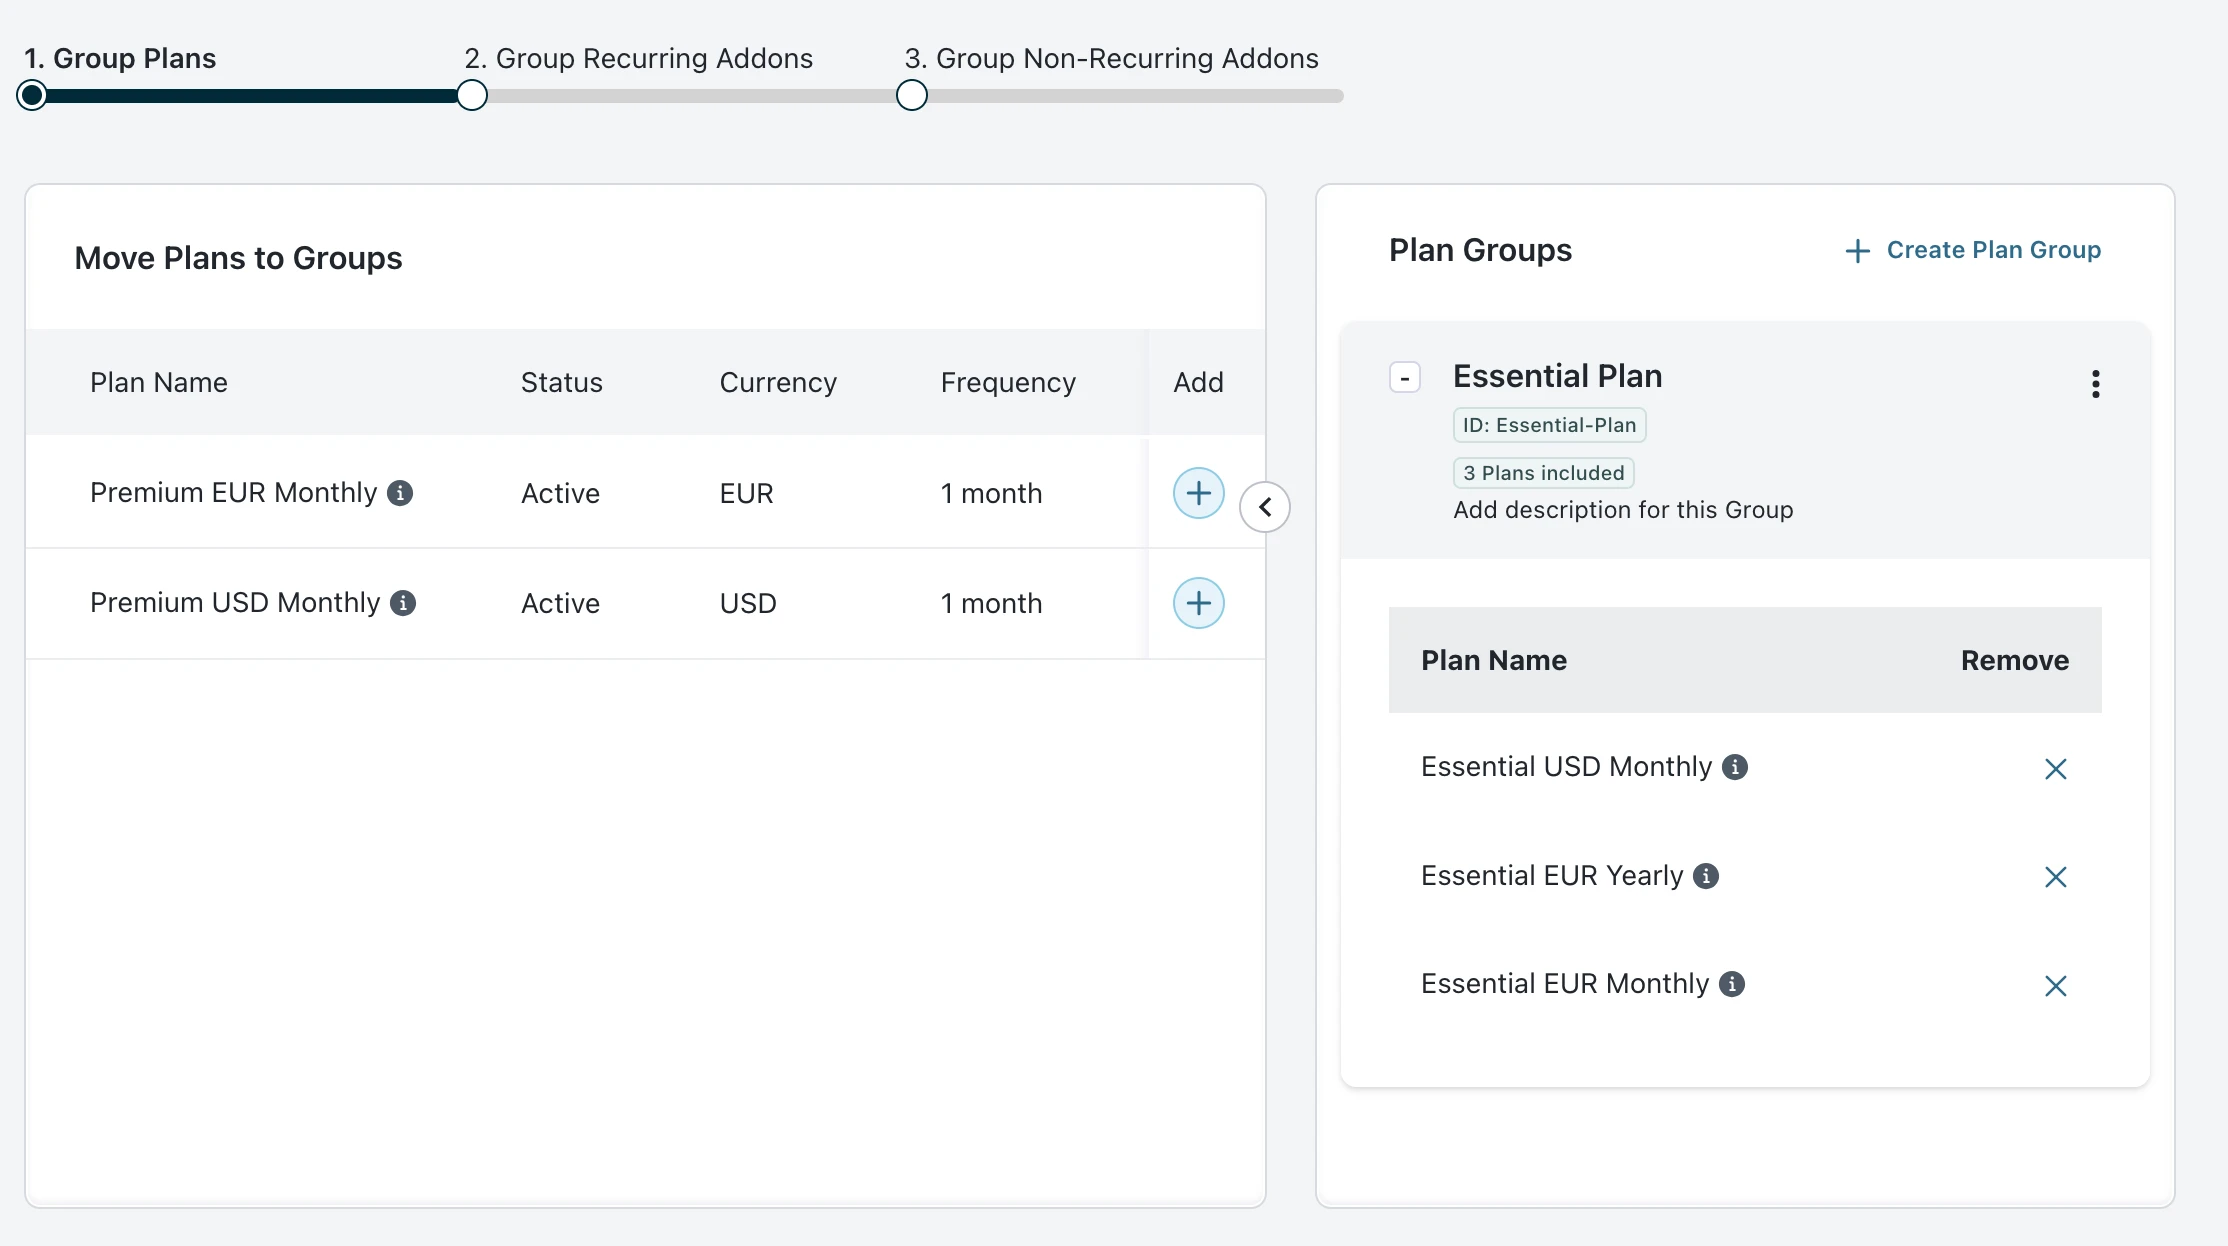
In the Move Plans to Group section, click the + icon to select individual plans that can be grouped based on their currency and frequency and add them to a Plan Group.
Note: Plans with the same currency and billing frequency cannot be added to a single Plan Group.
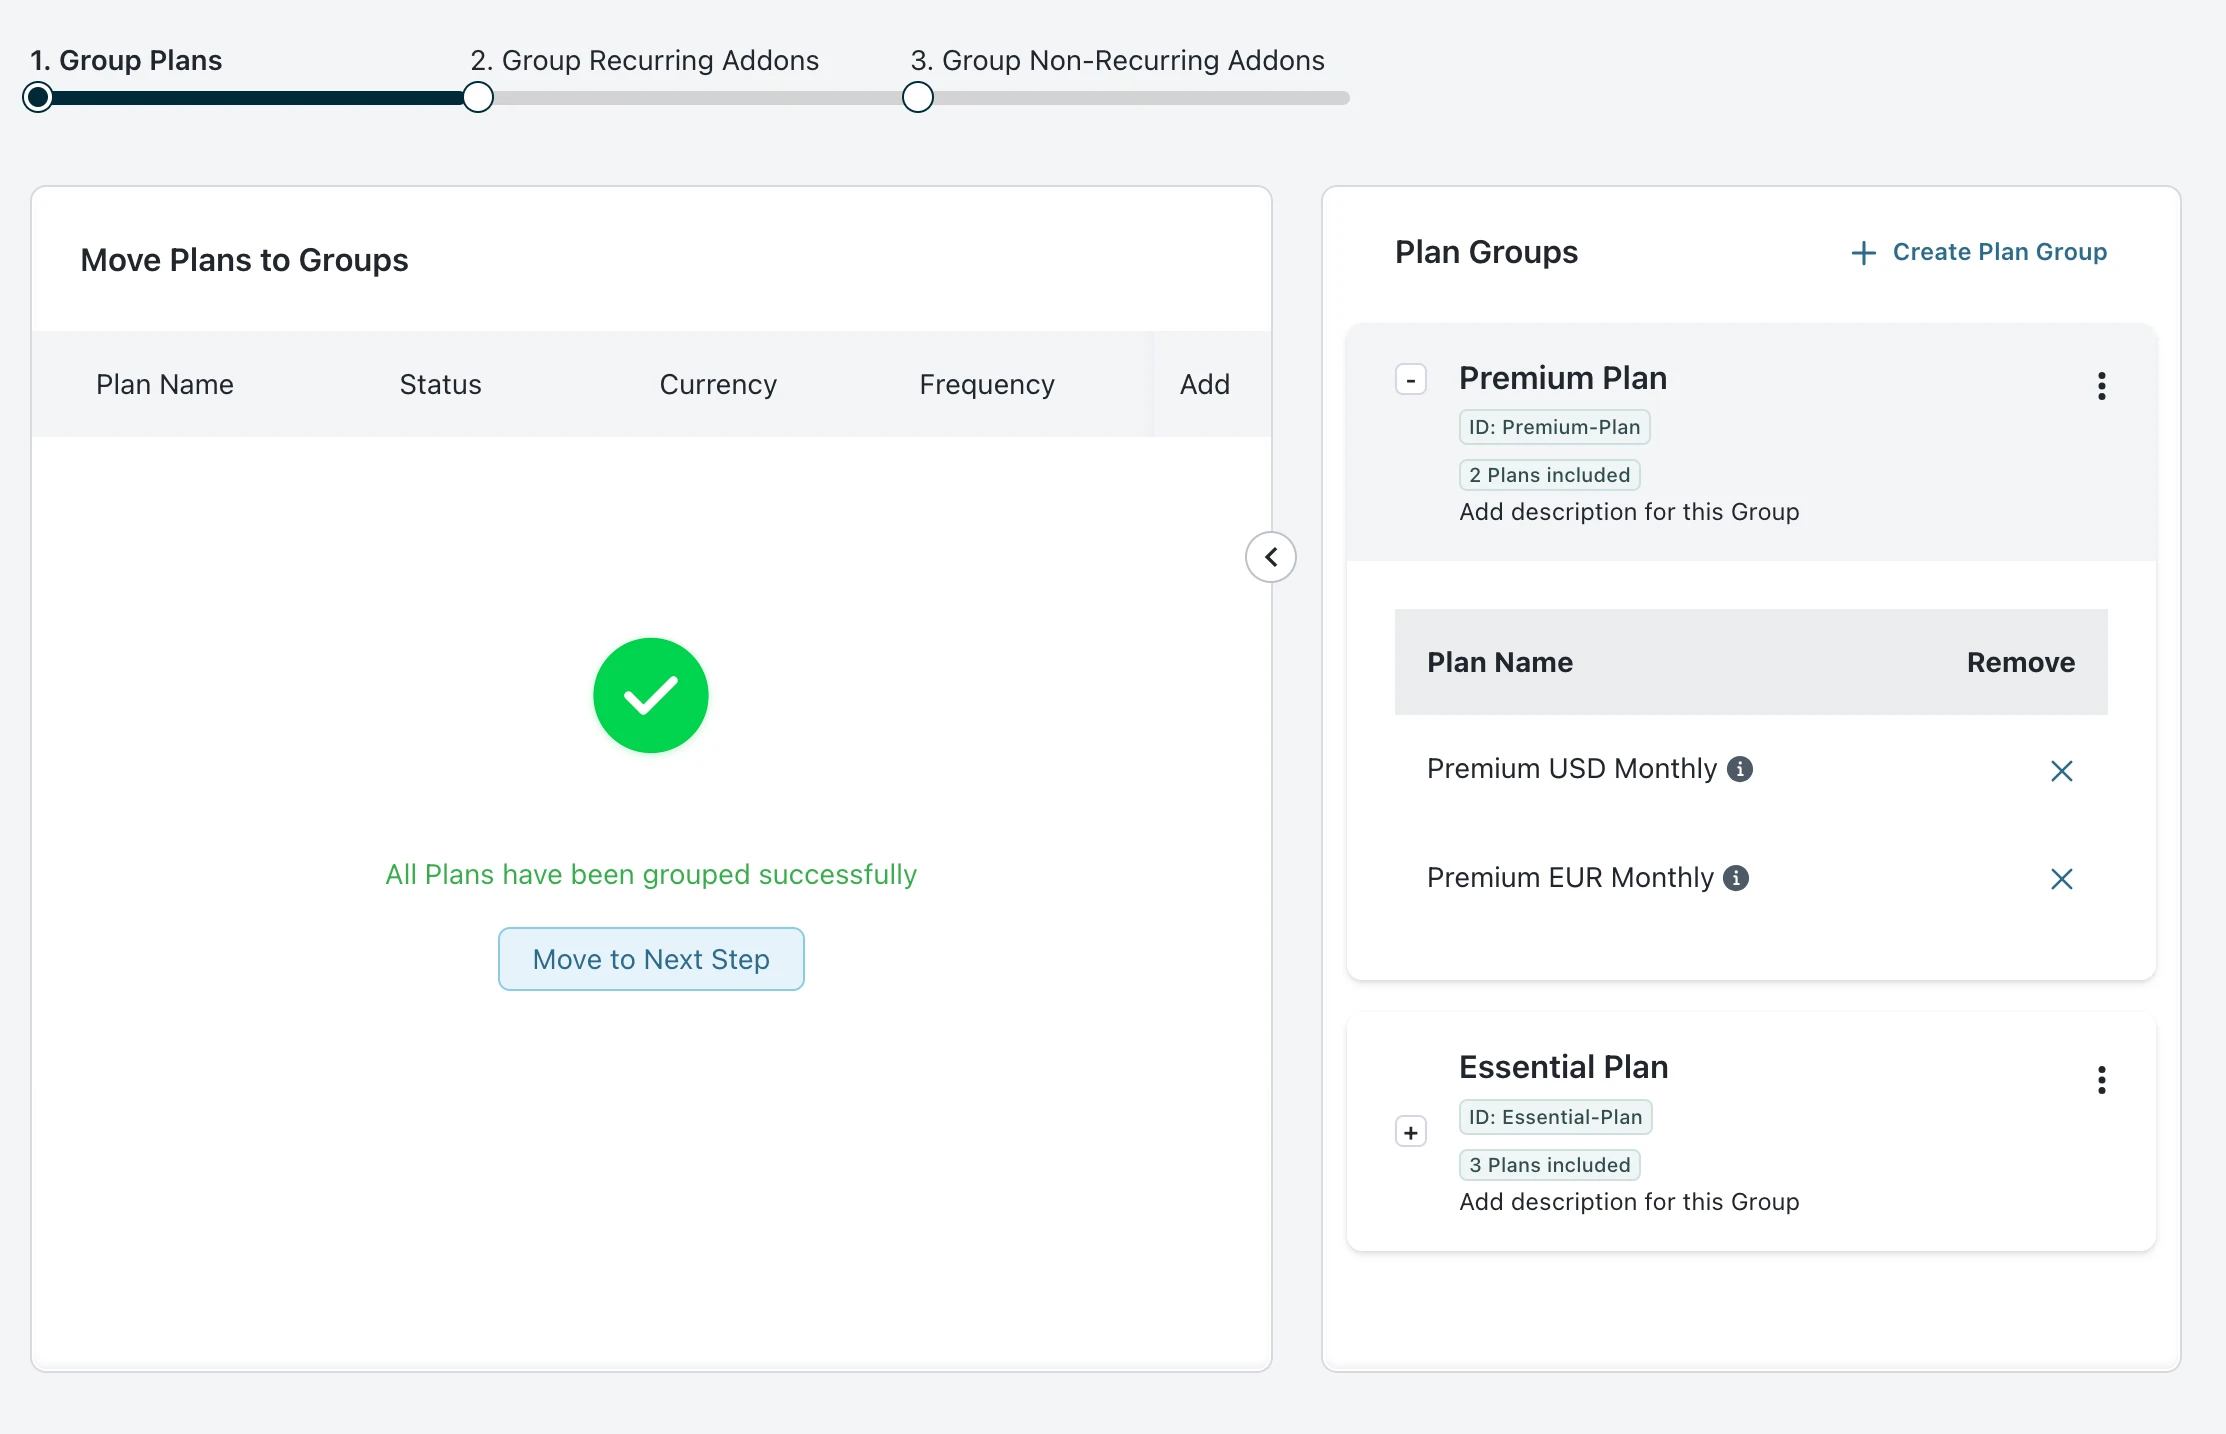
Click + Create Plan Group to create a new group.
Note: Only one Plan Group can be active and open at any time in the accordion view.
Click Move to Next Step when all the plans are grouped successfully.
Repeat the same steps for Group Recurring Addons and Group Non-Recurring Addons.
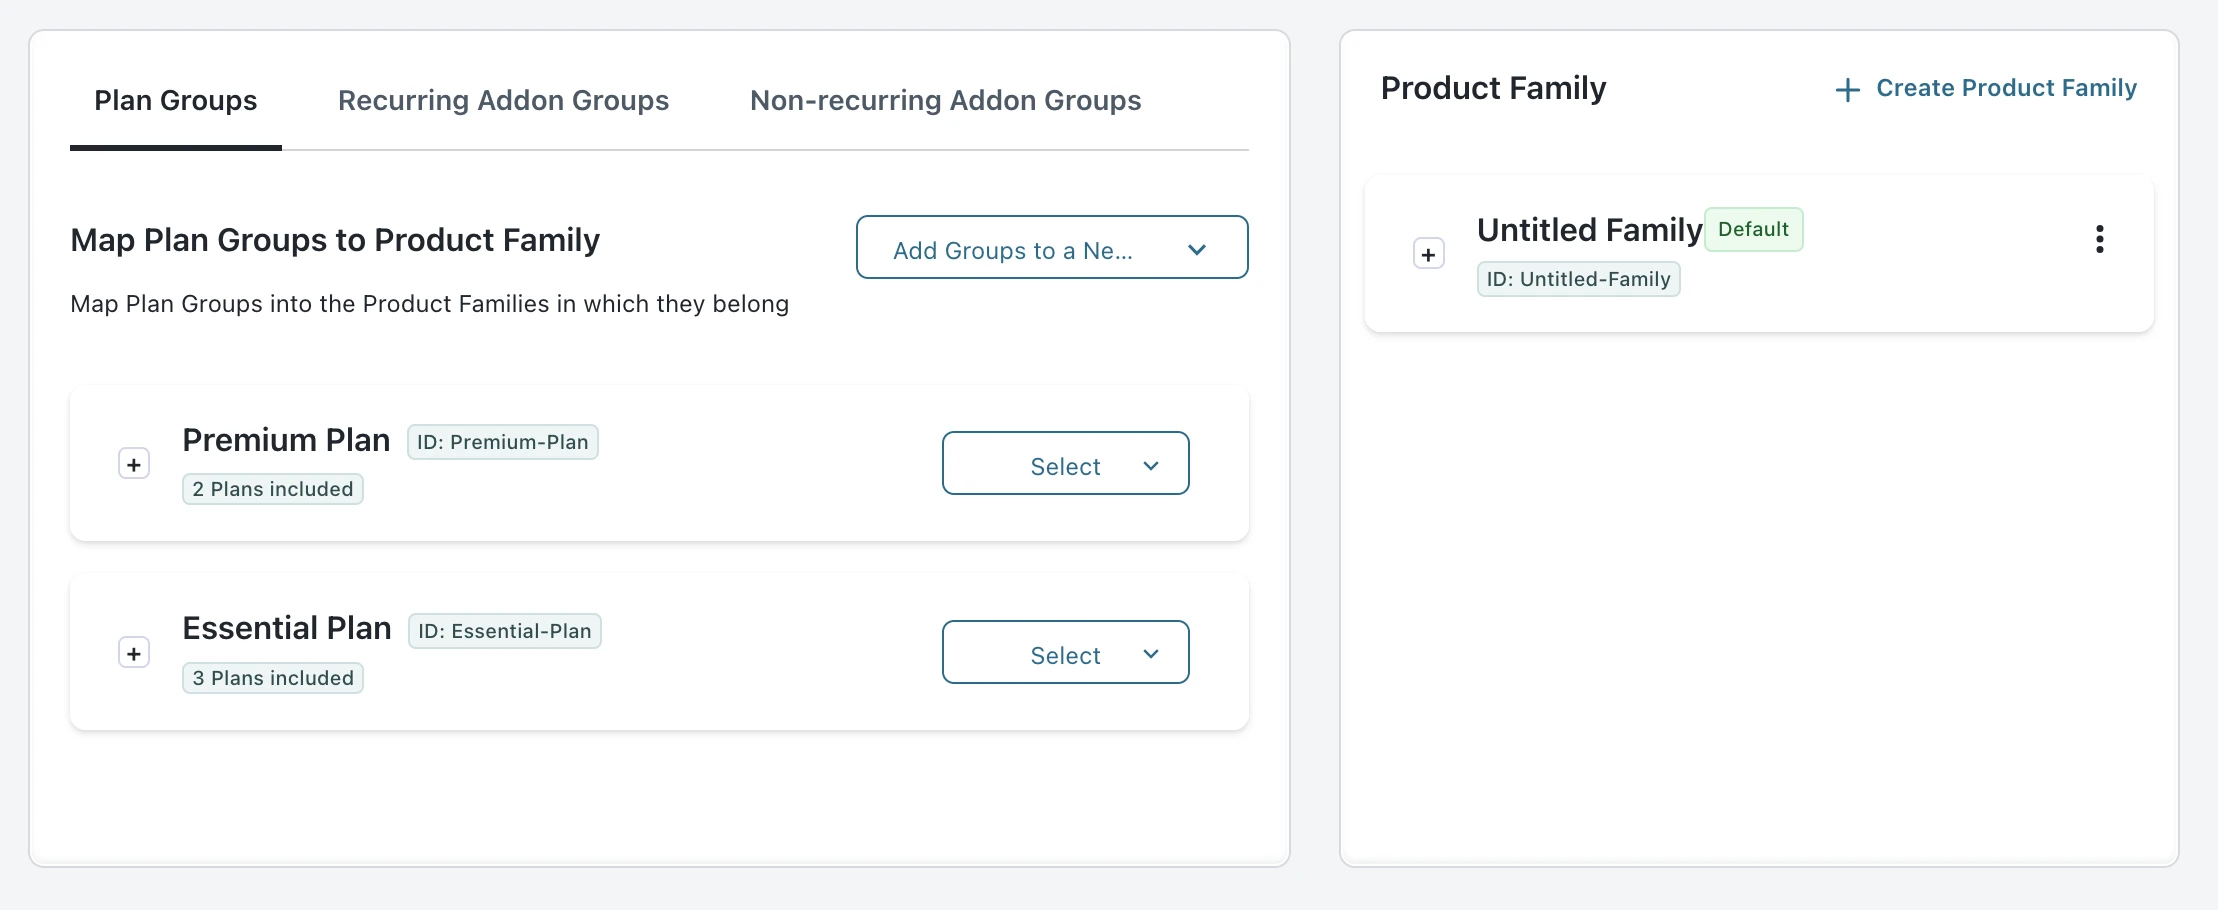
A product family corresponds to a product or service offering that can have multiple plans, addons, and charges. Based on your business requirements, you can either choose to create a single product family or manage multiple product families.
Let's consider the following example where two Plan Groups are present.
In the Untitled Family, click the vertical ellipse ⋮ icon to edit the default group.
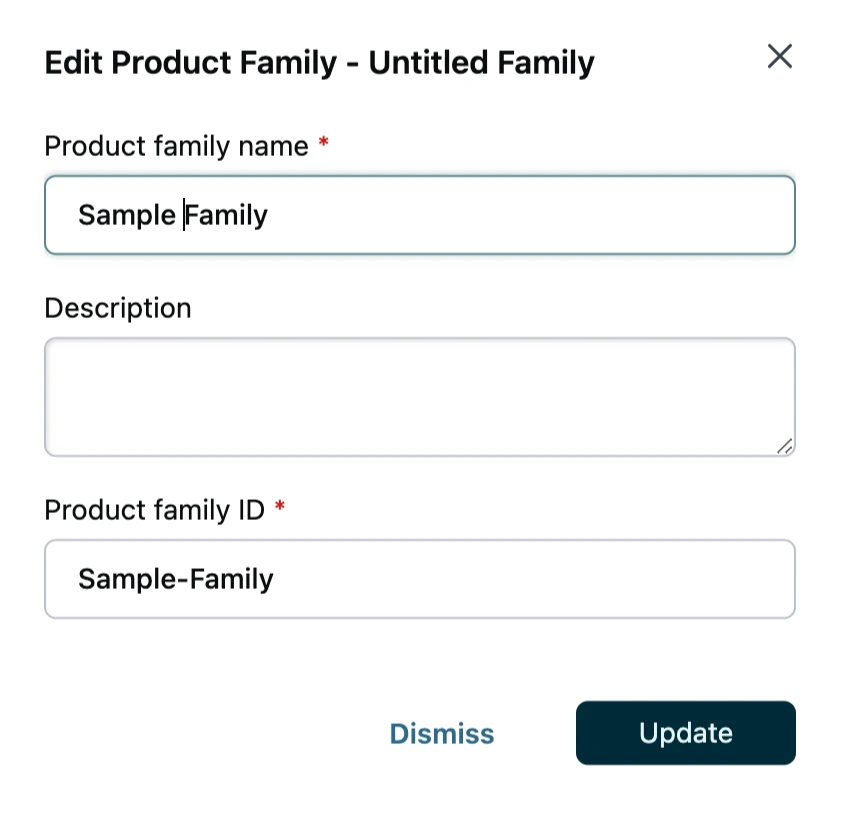
Enter the name of your product family. For example, the name could be Sample Family, as shown in the image.
Note: You can only add Plans and Addons from the same Product Family to a Subscription.
In the Map Plan Groups to Product Family section, select Map to default Product Family from the dropdown to map all the Plan Groups to a single product family.
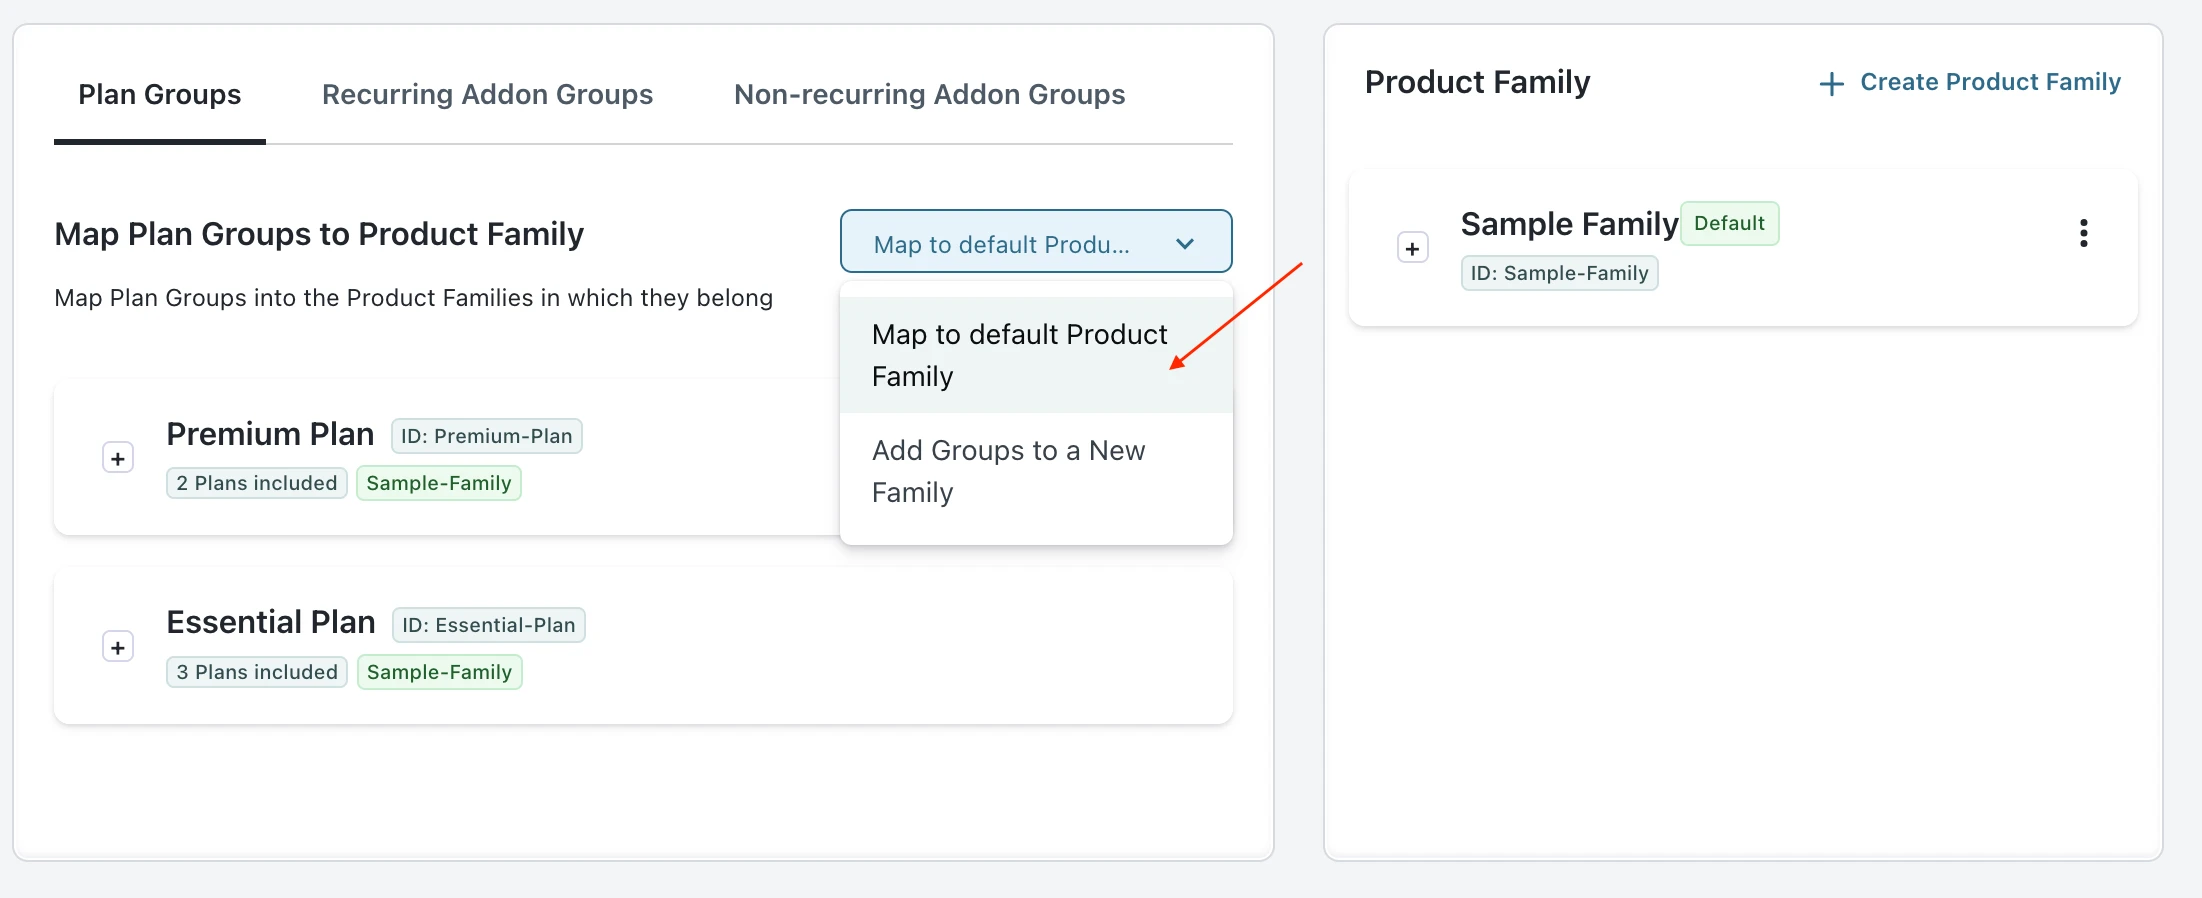
Select Add Groups to a New Family from the dropdown to map each Plan Group to a separate Product Family when you have multiple product families.
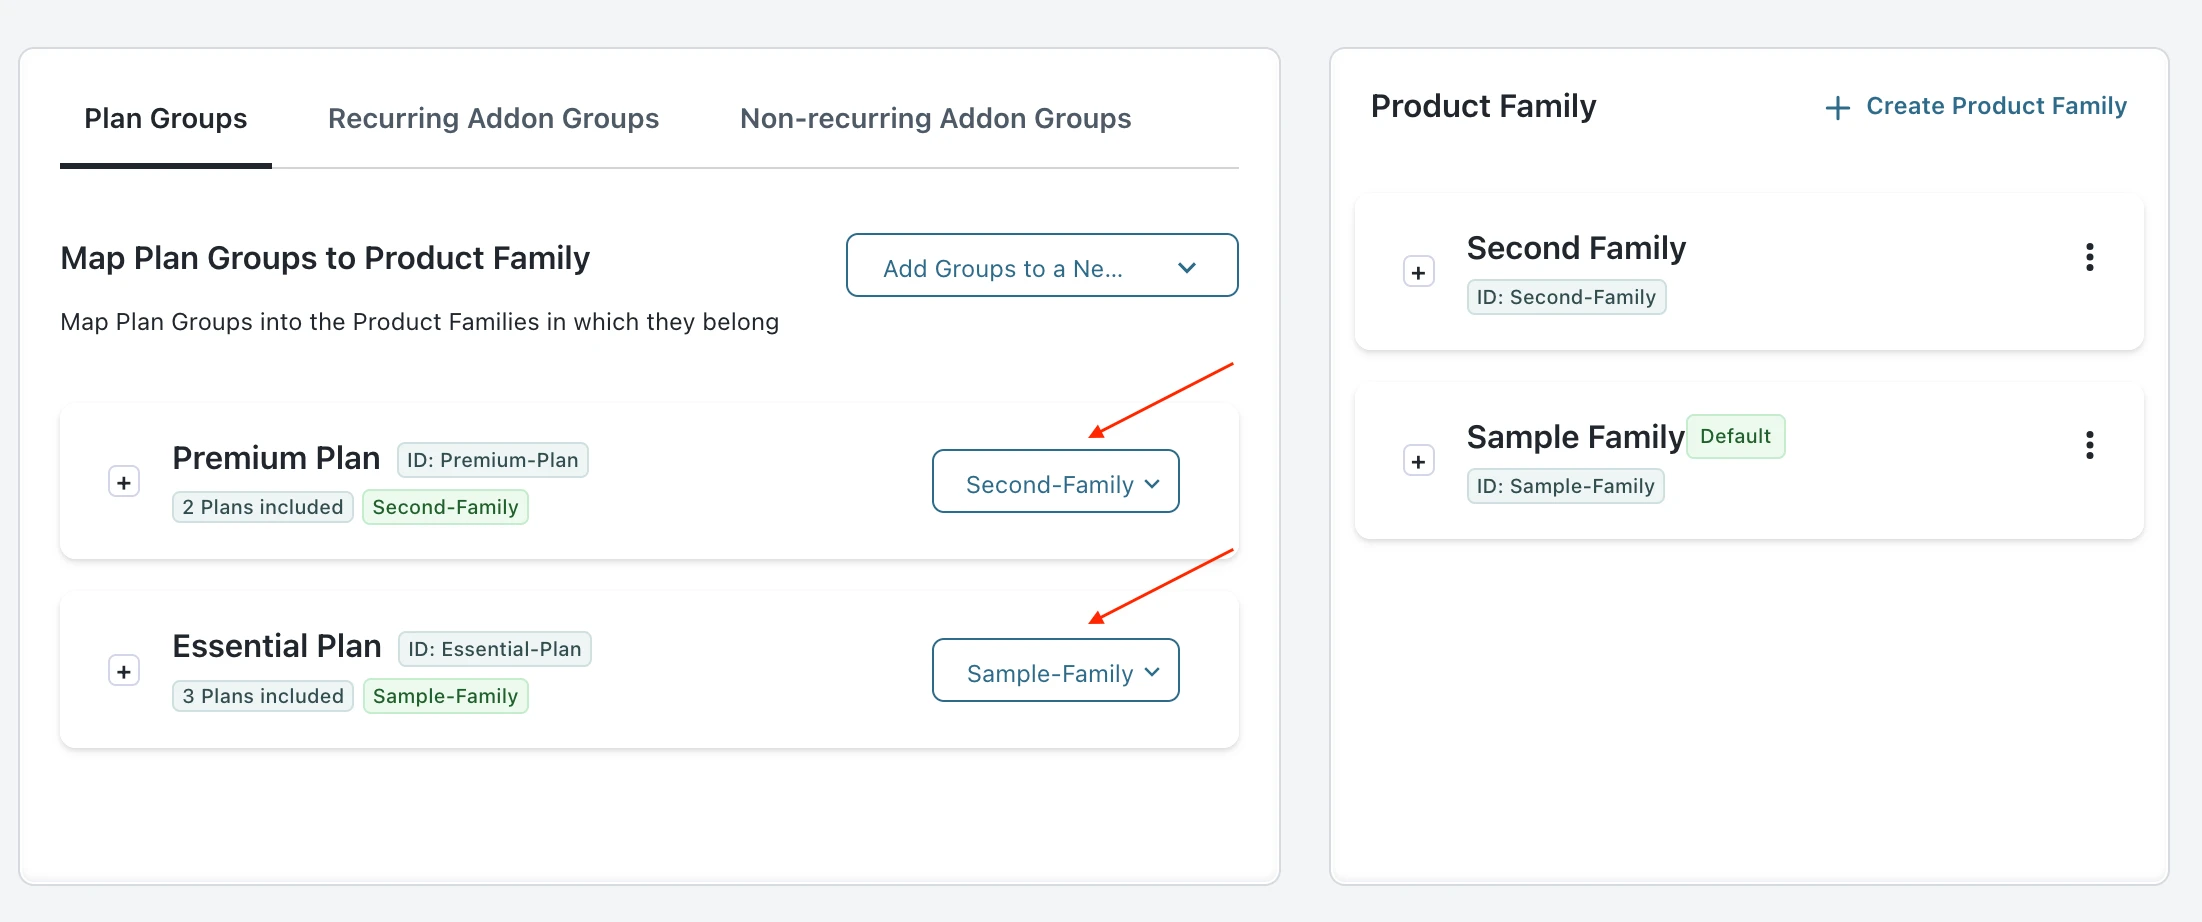
Repeat the same steps for Recurring Addon Groups and Non-recurring Addon Groups.
Click Proceed to Next Step.
To delete a Product Family, ensure that it is not the Default Product Family and that no Plan Groups are mapped to it.
This is an optional step that appears if one or more plans have attached addons.
Recurring Addons: All recurring addons of plans mapped to a single Plan Group will be automatically associated with the Plan Group. You can preview it in the following image.
You cannot make any changes to this association.

Non-Recurring Addons: All non-recurring addons of plans mapped to a single Plan Group will be automatically associated with the Plan Group. Select a primary plan using the dropdown, you can identify these plans in each Plan Group with a Primary tag associated with it. You can retain the Event Type for all non-recurring add-ons that are associated with the primary plan. For the other plans, the Event Type will be set to On Demand.
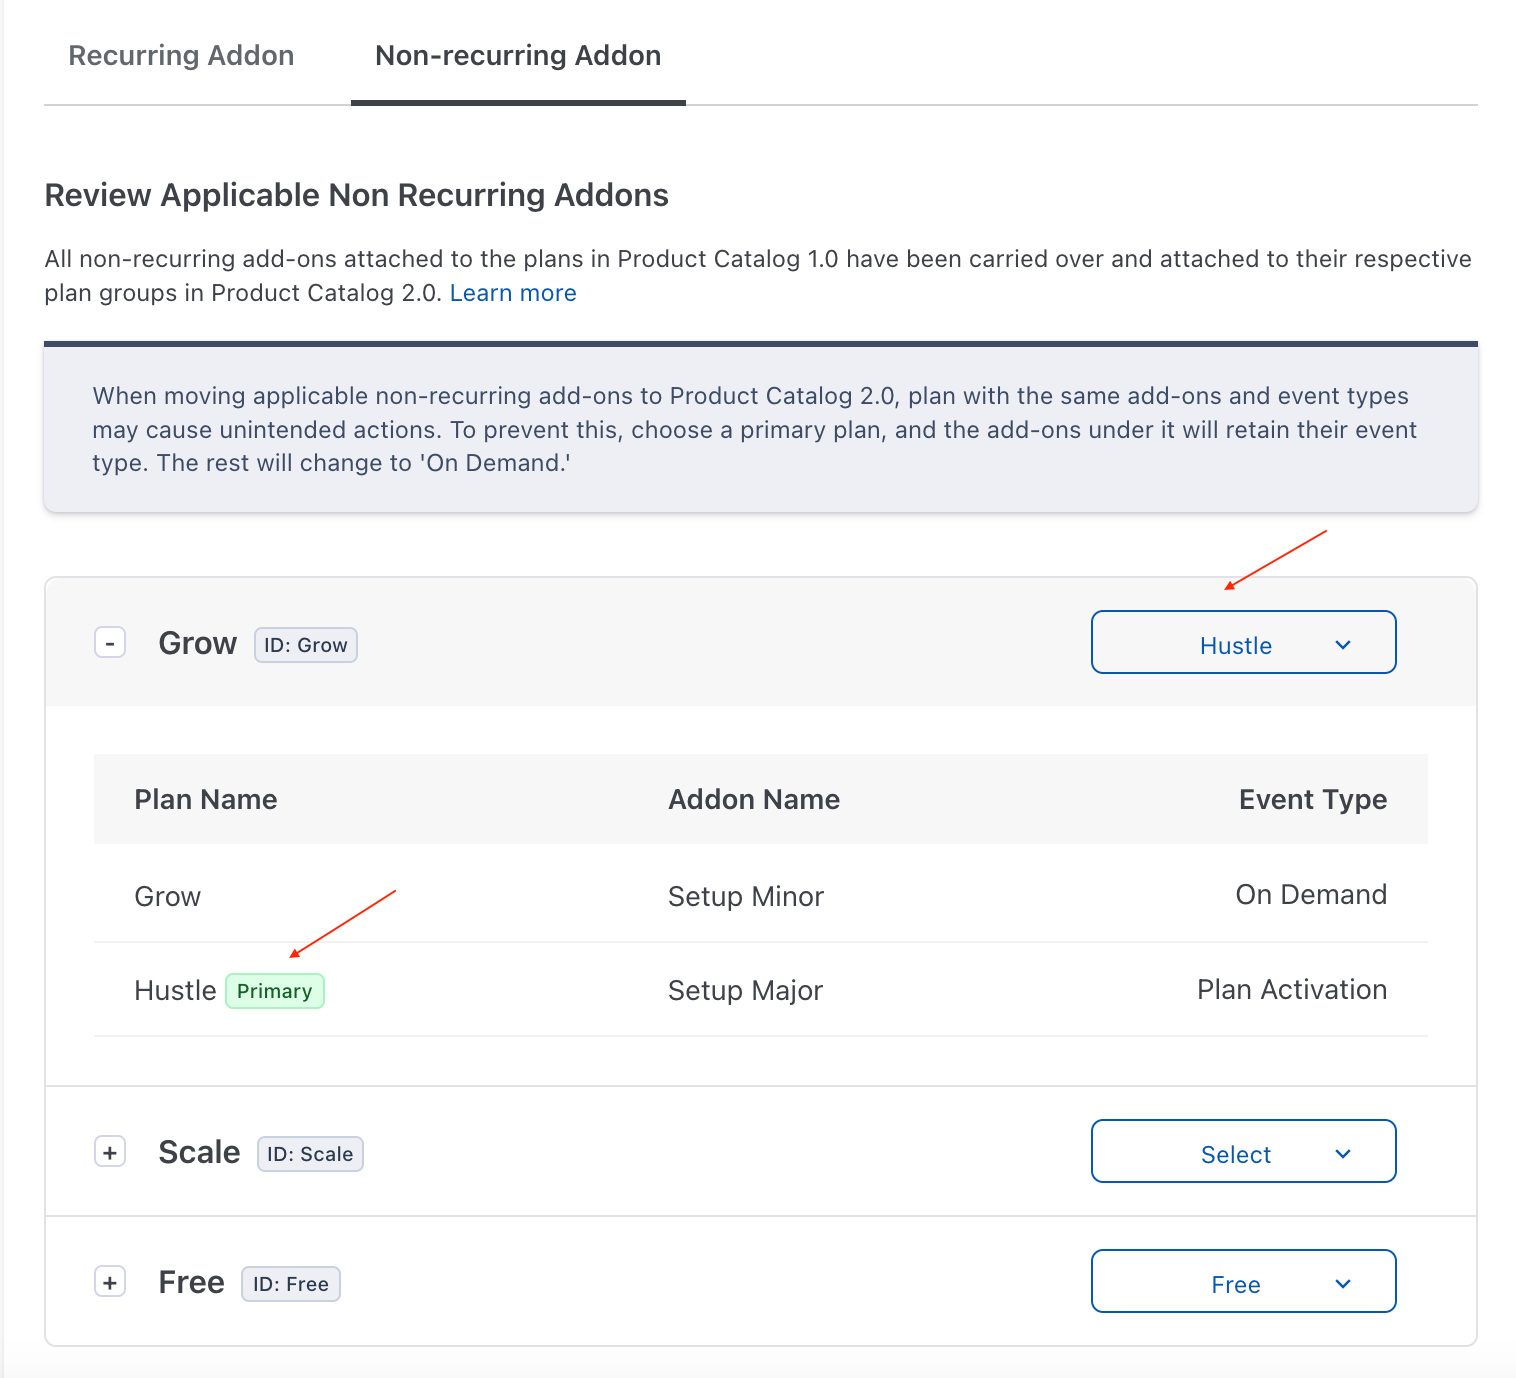
This step is important to avoid confusion when multiple plans in a single Plan Group are associated with the same non-recurring addon but different event types.
This is an optional step that shows up in the following two cases:
Let's consider the following example where the Plan ID contains an unsupported special character.
Select the Checkbox to accept the suggested ID or key in an ID of your choice.
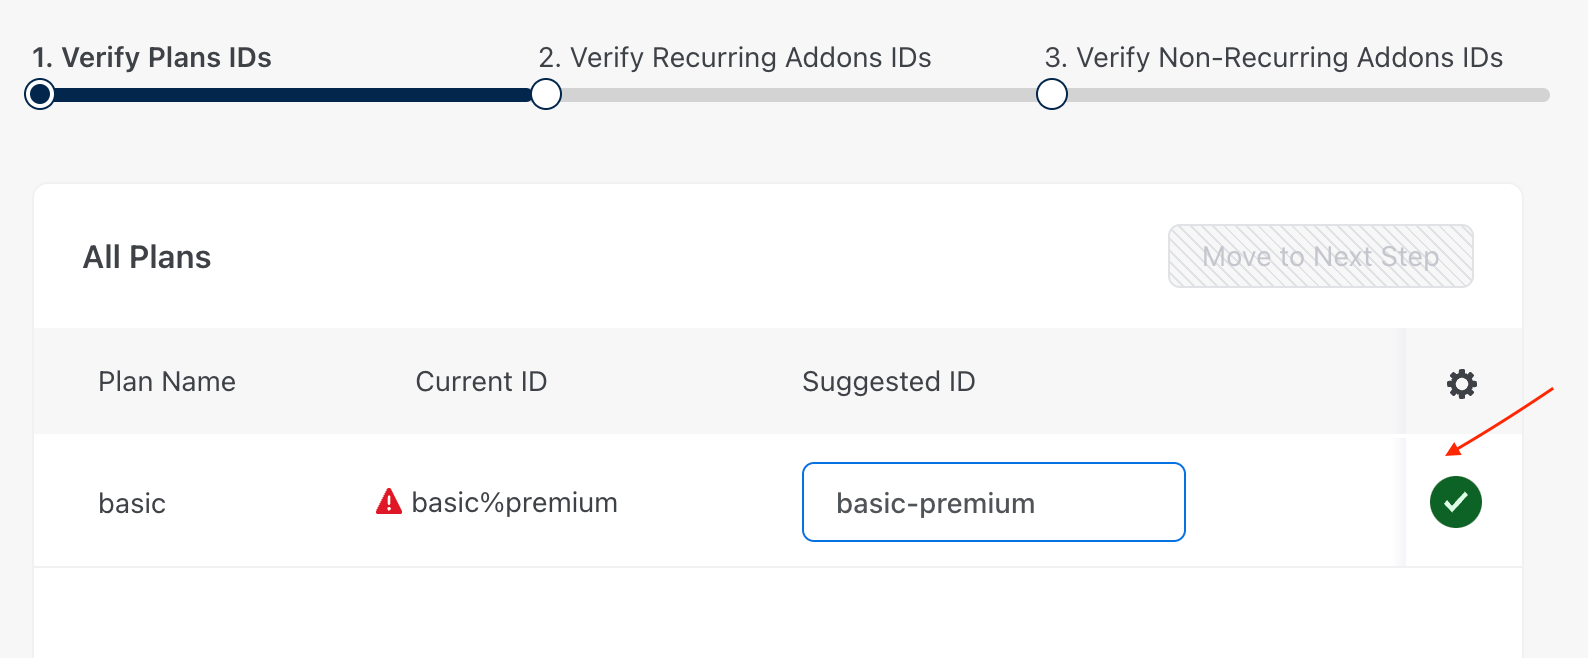
Click Move to Next Step.
Repeat the same steps for Recurring Addon IDs and Non-recurring Addon IDs.
The new plan or addon IDs will be updated automatically in the Chargebee application once the upgrade is completed. If the ID is used outside of Chargebee, please ensure that these IDs are updated at your end.
Read through the information provided in the popup below and click Upgrade.
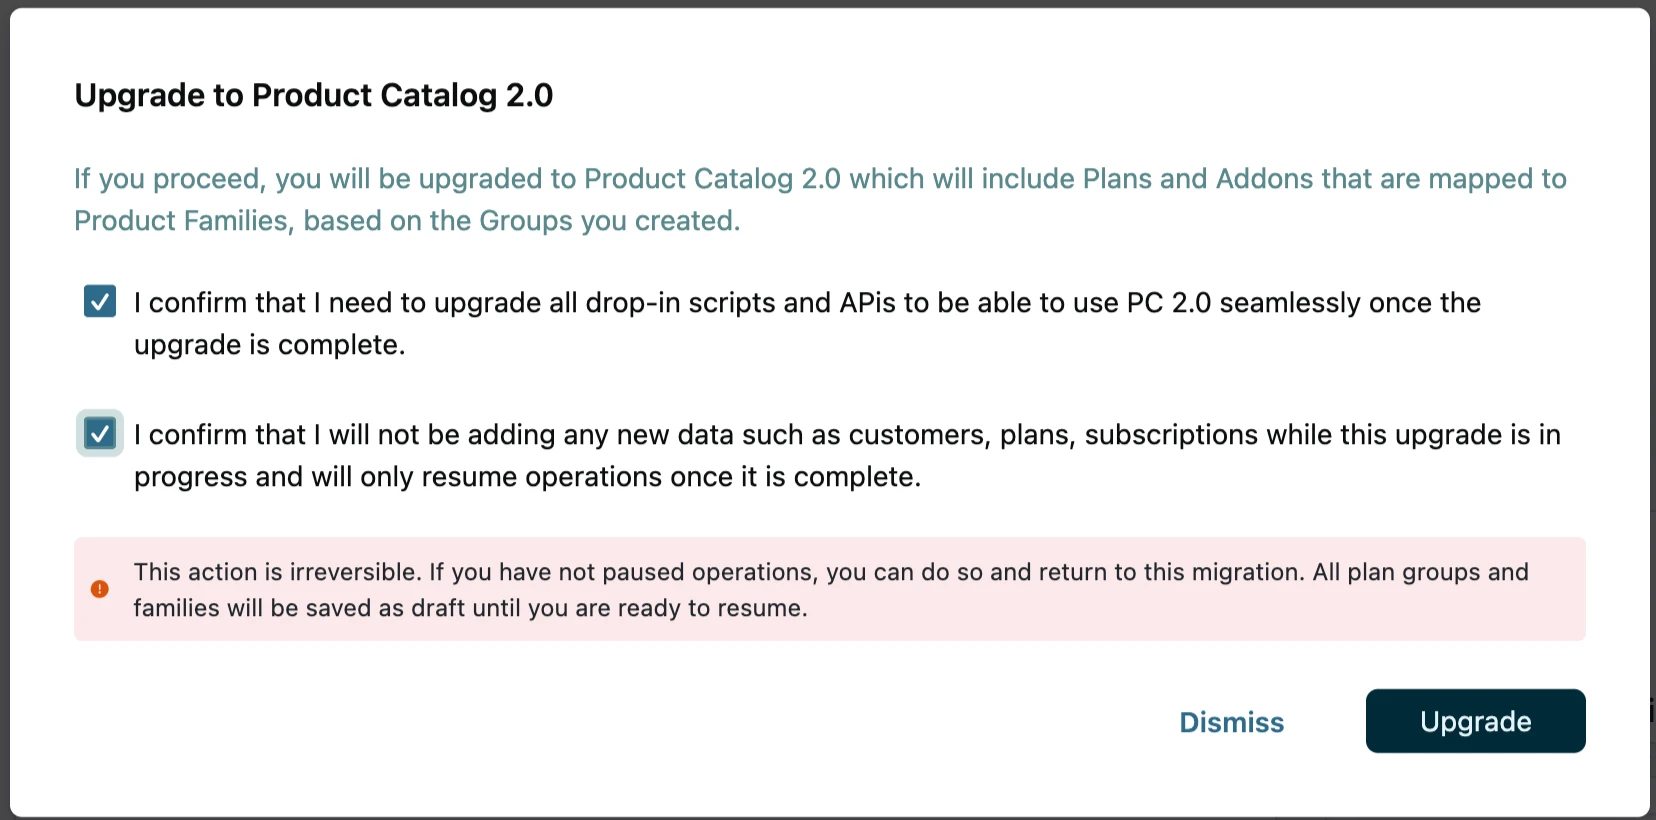
The upgrade can take an estimated time between 30 minutes to one hour to complete depending on the size of your product catalog. An email notification will be sent to all Admins and Owners of the site once the upgrade is completed.


 Articles & FAQ