Send Events to Amazon EventBridge
Enhance your business workflows by integrating Chargebee events with Amazon EventBridge, using AWS native infrastructure. This integration simplifies your event-handling process and enables scalable, event-driven automation.
About Amazon EventBridge
Amazon EventBridge is a serverless event bus that connects application components using events. It helps you build and manage event-driven applications more efficiently.
By streaming Chargebee events directly to your AWS account via EventBridge, you can reduce the effort of handling webhook-based event delivery. EventBridge can route events to supported targets, enabling you to trigger workflows and automation seamlessly.
Sending events from Chargebee to Amazon EventBridge
Prerequisites
Before you begin, ensure you have the following:
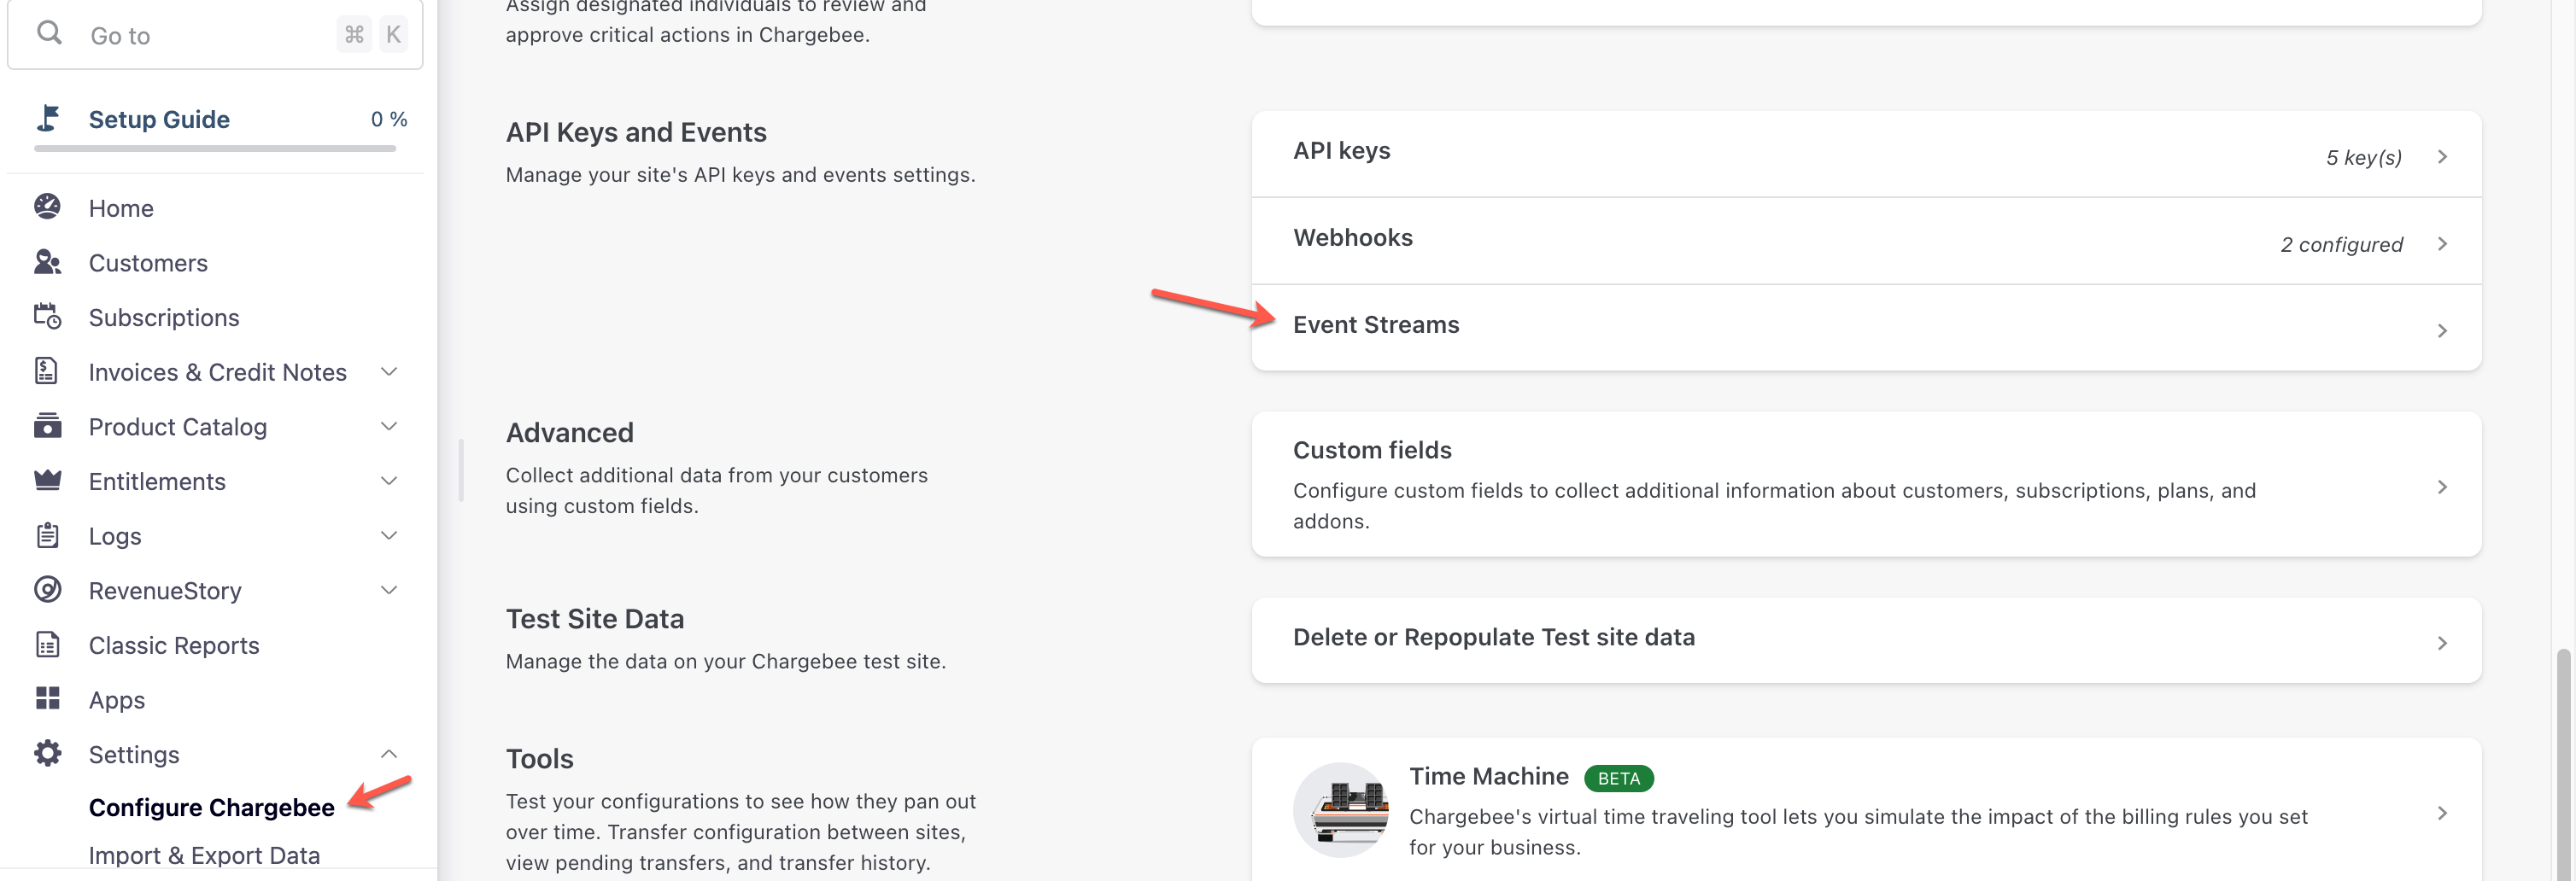
Log in to your Chargebee account.
Navigate to Settings > Configure Chargebee > API Keys and Events > Event Streams.
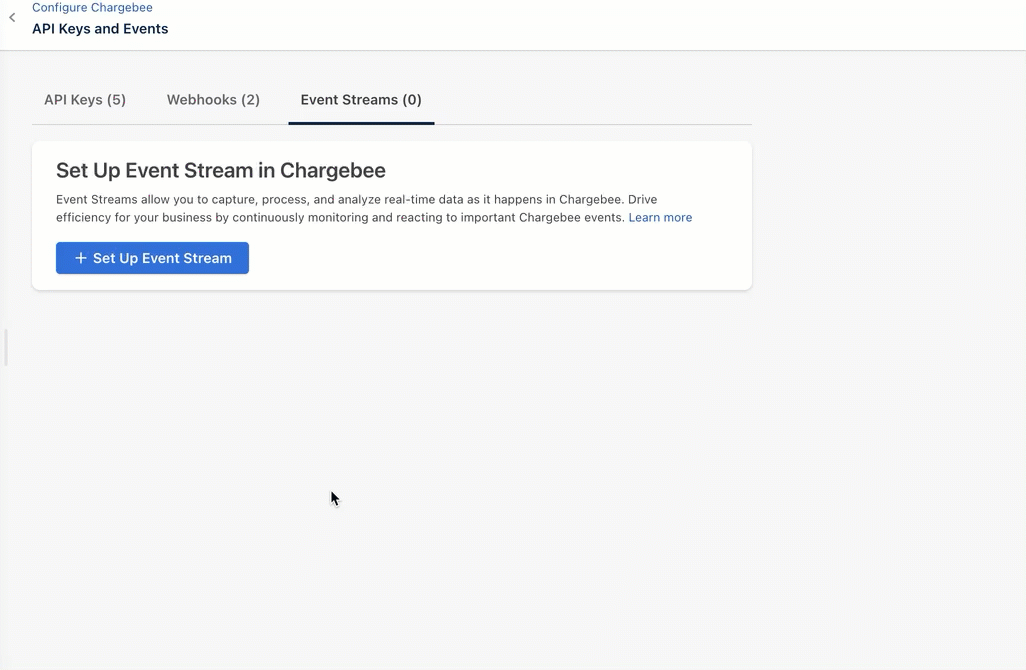
Click Set Up Event Stream to configure the event stream.
Enter the following details:
- Ensure that the Stream Name follows this format -
<sitename_eventstream>. For example, if your stream name is acme.chargebee.com then the event stream name will be acme_eventstream.
- AWS EventBridge is selected by default as a Service.
- Under the AWS Account Number field, enter your AWS Account ID where events are supposed to be received and the EventBridge is currently hosted.
- Under AWS Region, select the region where their AWS account is currently hosted.
Note: If the region where your AWS account is hosted is not on the list, please contact Chargebee support to add your region.
Once all the mandatory fields, such as Stream Name, AWS Account Number, and AWS Region, are entered, click Next.
Set up API version and ability to mask card information
- Chargebee supports multiple API versions. The Select API Version field provides the option to select the API version based on which the event content is structured. While processing events, ensure that the API version is the same as the API version used as part of your calls to Chargebee.
- Enable Send card information to include card information in the event stream. Click Next to navigate to the section to select the events that you want to send.
Use the dropdown menu to select the Chargebee events that will be sent via this webhook. All Events are selected by default. However, select just the intended set of events in this list to enable your systems to handle the volume of events triggered. Click Activate to complete the setup of Amazon EventBridge from the Chargebee.
Click Finish to complete the setup.
Step 2: Set Up the Event Bus in Amazon EventBridge
- Sign in to your AWS account and complete the process by setting up EventBridge configuration in the Amazon Management console.
- Navigate to the Amazon EventBridge > Integrations > Partner event sources.
- Select the button next to the partner event source and then choose Associate with event bus. Grant the required permissions. Learn more about event buses.
- After the event bus is associated, the status of the event source changes from Pending to Active in Chargebee under the Event Streams tab and the name of the event bus updates to match the partner event source name. You can now start creating rules that match events from the partner event source.
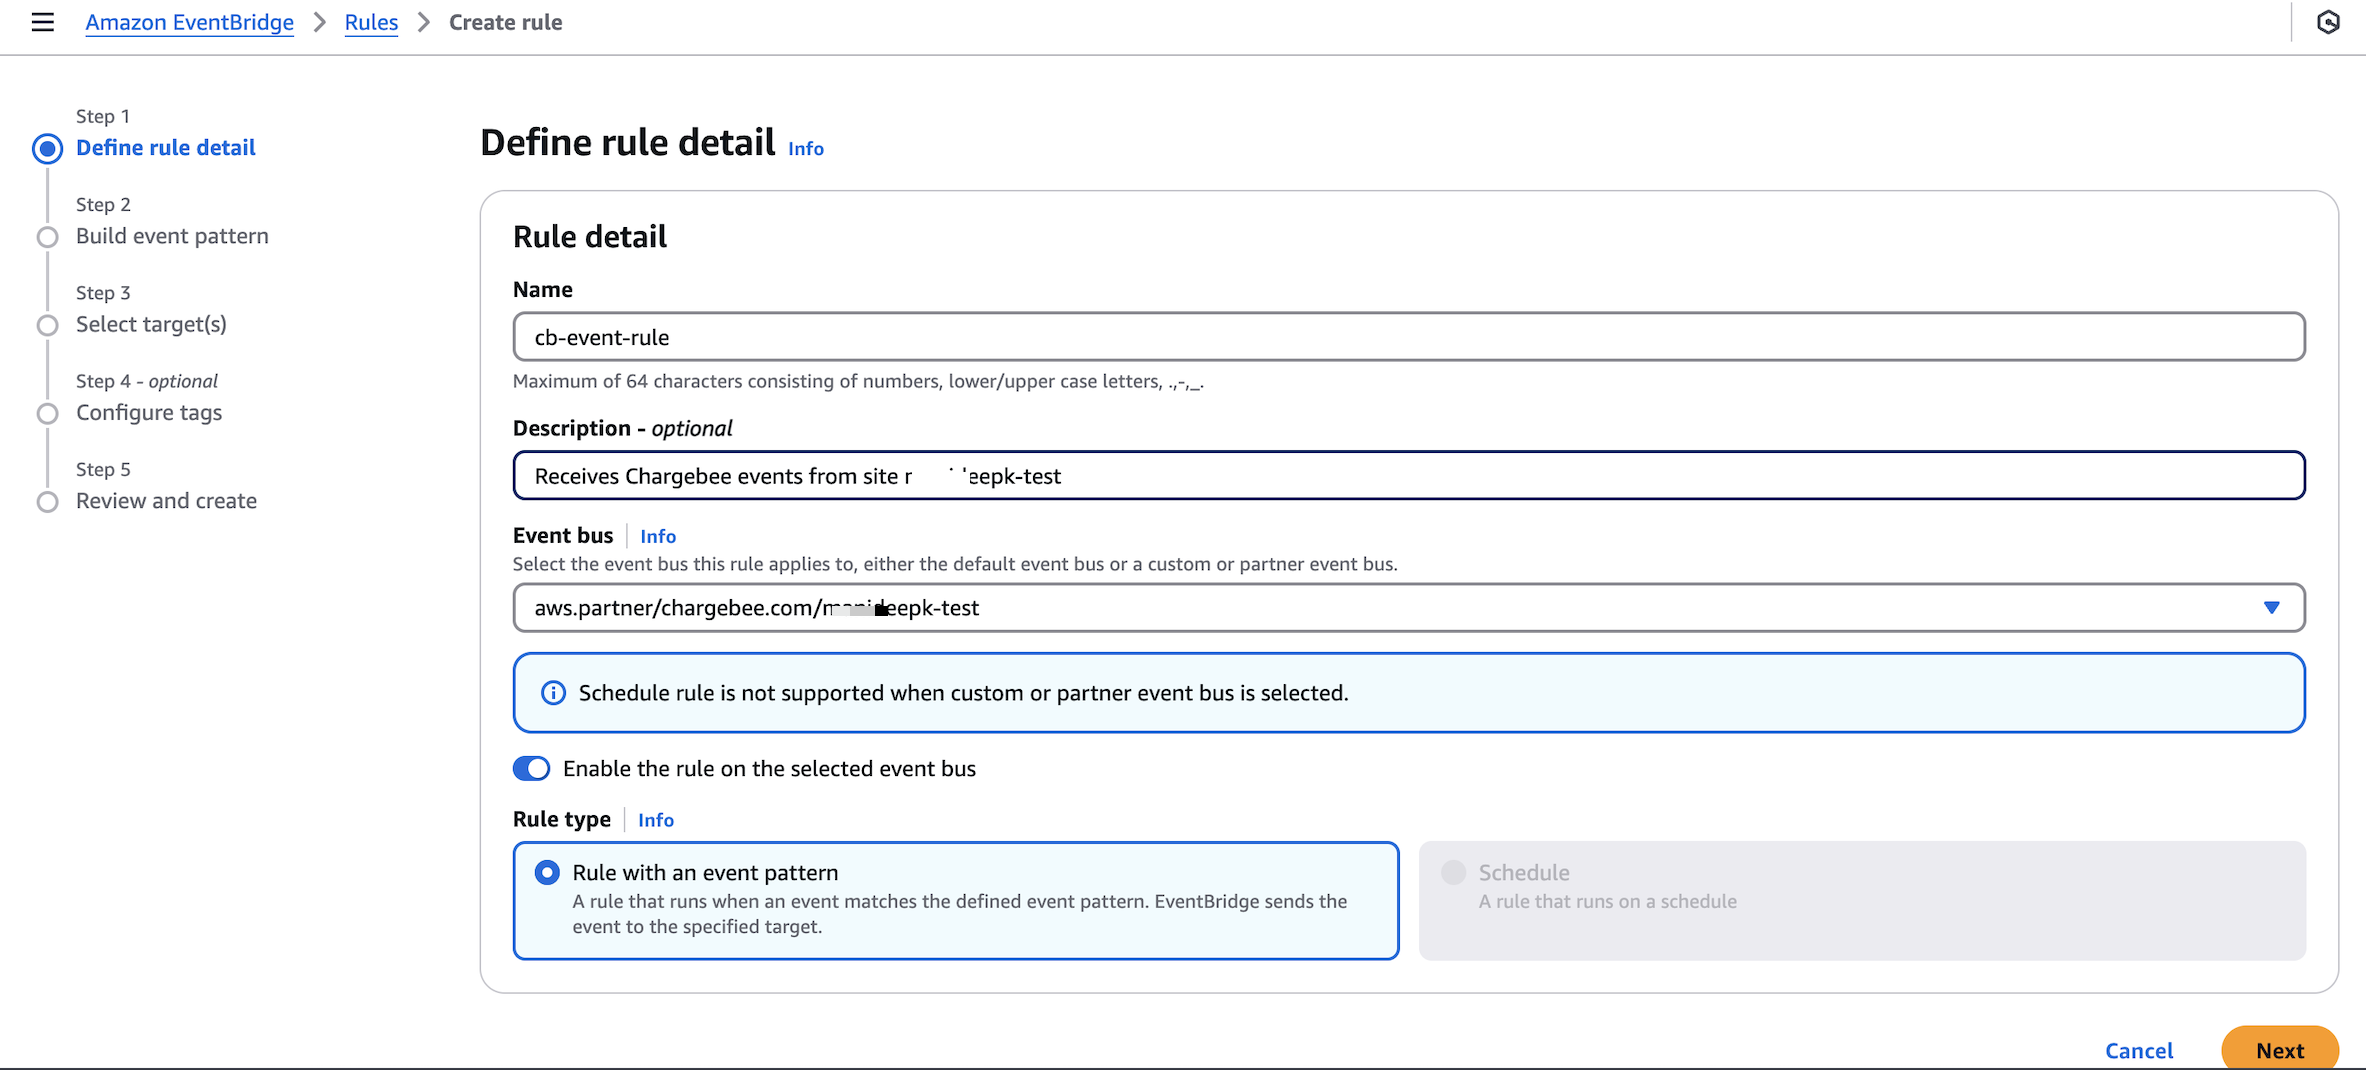
Creating Event Routing Rules
Event routing is based on rules you define in EventBridge. After you associate a partner event source with an event bus, you must configure rules to determine how events are handled.
You can create multiple rules to route different types of events to specific targets as needed.
To create a rule:
- Define the rule
- Build the event pattern
- Select targets
- Configure tags and review rule
Step 3: Test the Event Streaming Setup Between Chargebee and Amazon EventBridge
You can test the event streaming setup to ensure that events from Chargebee are received successfully in Amazon EventBridge.
- Trigger an event in Chargebee: Perform an action in Chargebee that corresponds to a subscribed event—for example, create a new subscription.
- Check event reception in EventBridge: Open the EventBridge console and navigate to the configured event bus or the target destination (such as CloudWatch Logs).
- Verify event details: Select the received event to view its details and ensure that it contains the expected information.
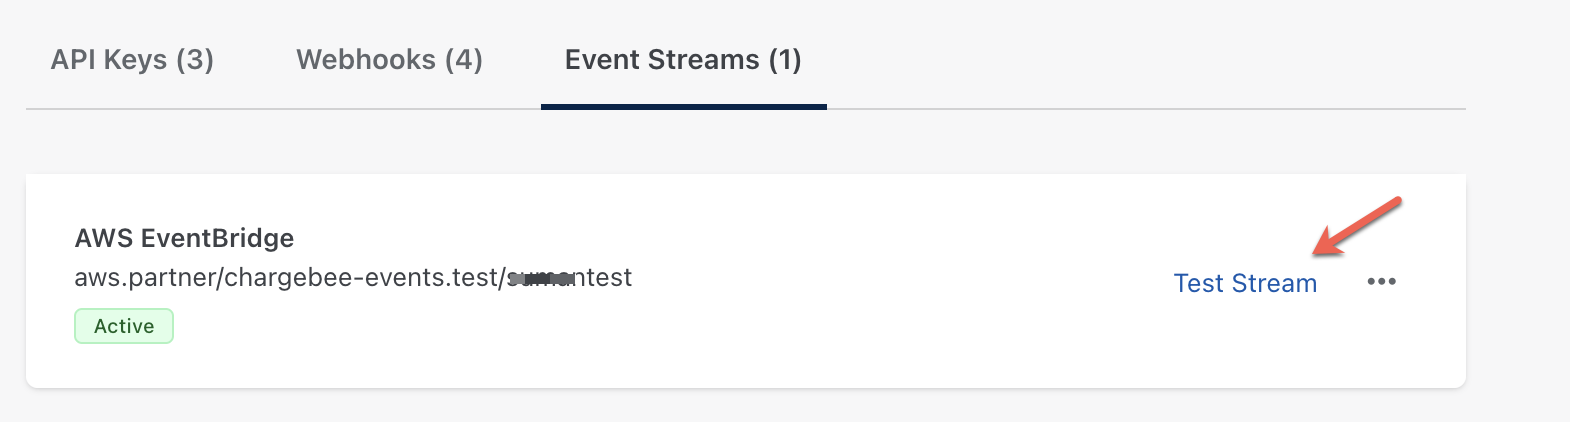
- Use the Test Stream option (optional): Alternatively, go to the Event Streams tab in Chargebee and select Test Stream to simulate event delivery and verify the setup.
Limitations
- Payload size restriction: Amazon EventBridge supports a maximum payload size of 256 KB. If your payload exceeds this limit, contact Chargebee Support for assistance with alternative setup options.
- Event delivery order: Amazon EventBridge does not guarantee the order of event delivery. This behavior is similar to how webhook delivery works today.
- Event source provisioning window: After you initiate the creation of an event source, Amazon EventBridge retains the provisioning for 7 days. You must associate the event bus with the partner event source within this period.
- Retry handling: Event retry mechanisms are fully managed by Amazon EventBridge. Chargebee delivers events to the EventBridge ecosystem, after which your systems are responsible for retrieving and processing those events according to your business requirements.


 Articles & FAQ