Docs
Scope
How to enable ACH payments via Braintree gateway?
What are the prerequisites using ACH payments in Braintree Gateway?
What are the integration option that supports ACH payments via Braintree?
Types of bank account verification method for ACH payments on Braintree
What are fields required for ACH payments via Braintree?
Summary
ACH is a US-based payment method available for processing recurring or one-time payments. Chargebee allows you to configure ACH (Direct Debit) payments using Braintree. This document helps you to set up ACH payments via Braintree in your Chargebee account.
This feature is a Private Beta Release. Contact support to enable ACH via Braintree for your Test and Live site.
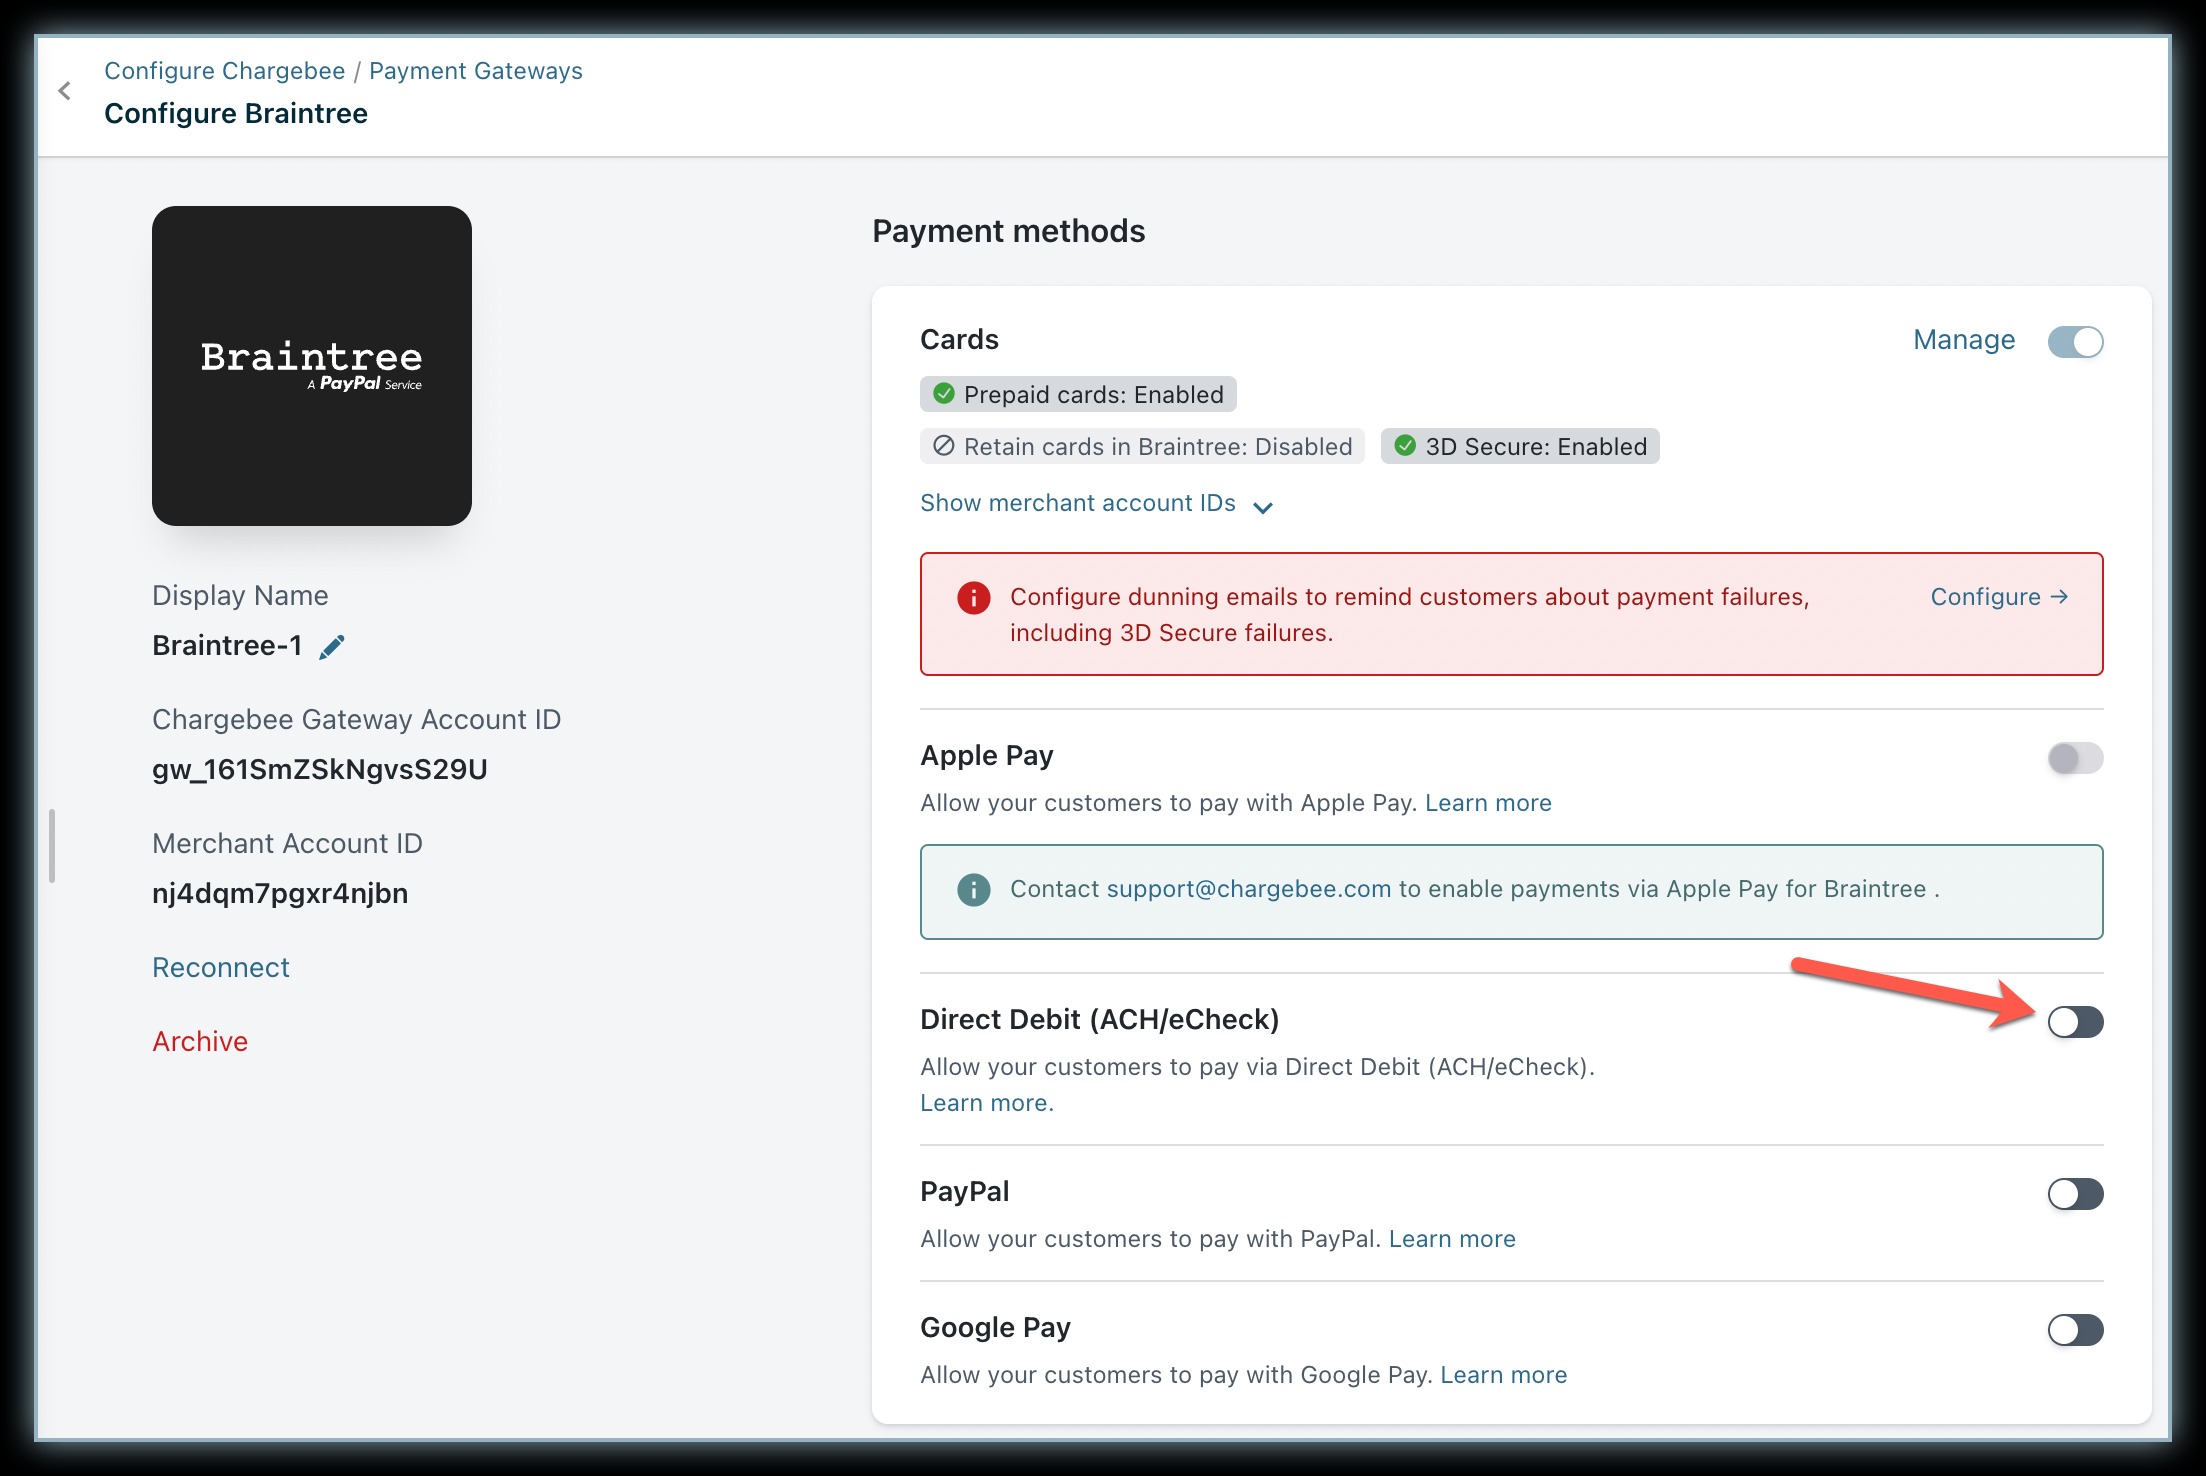
Once enabled, Go to Settings > Configure Chargebee > Payment Gateways > Braintree > Enable Direct Debit (ACH/eCheck).
Solution
To accept ACH payments using Chargebee, you must:
Once enabled, Go to Settings > Configure Chargebee > Payment Gateways > Braintree > Enable Direct Debit (ACH/eCheck).
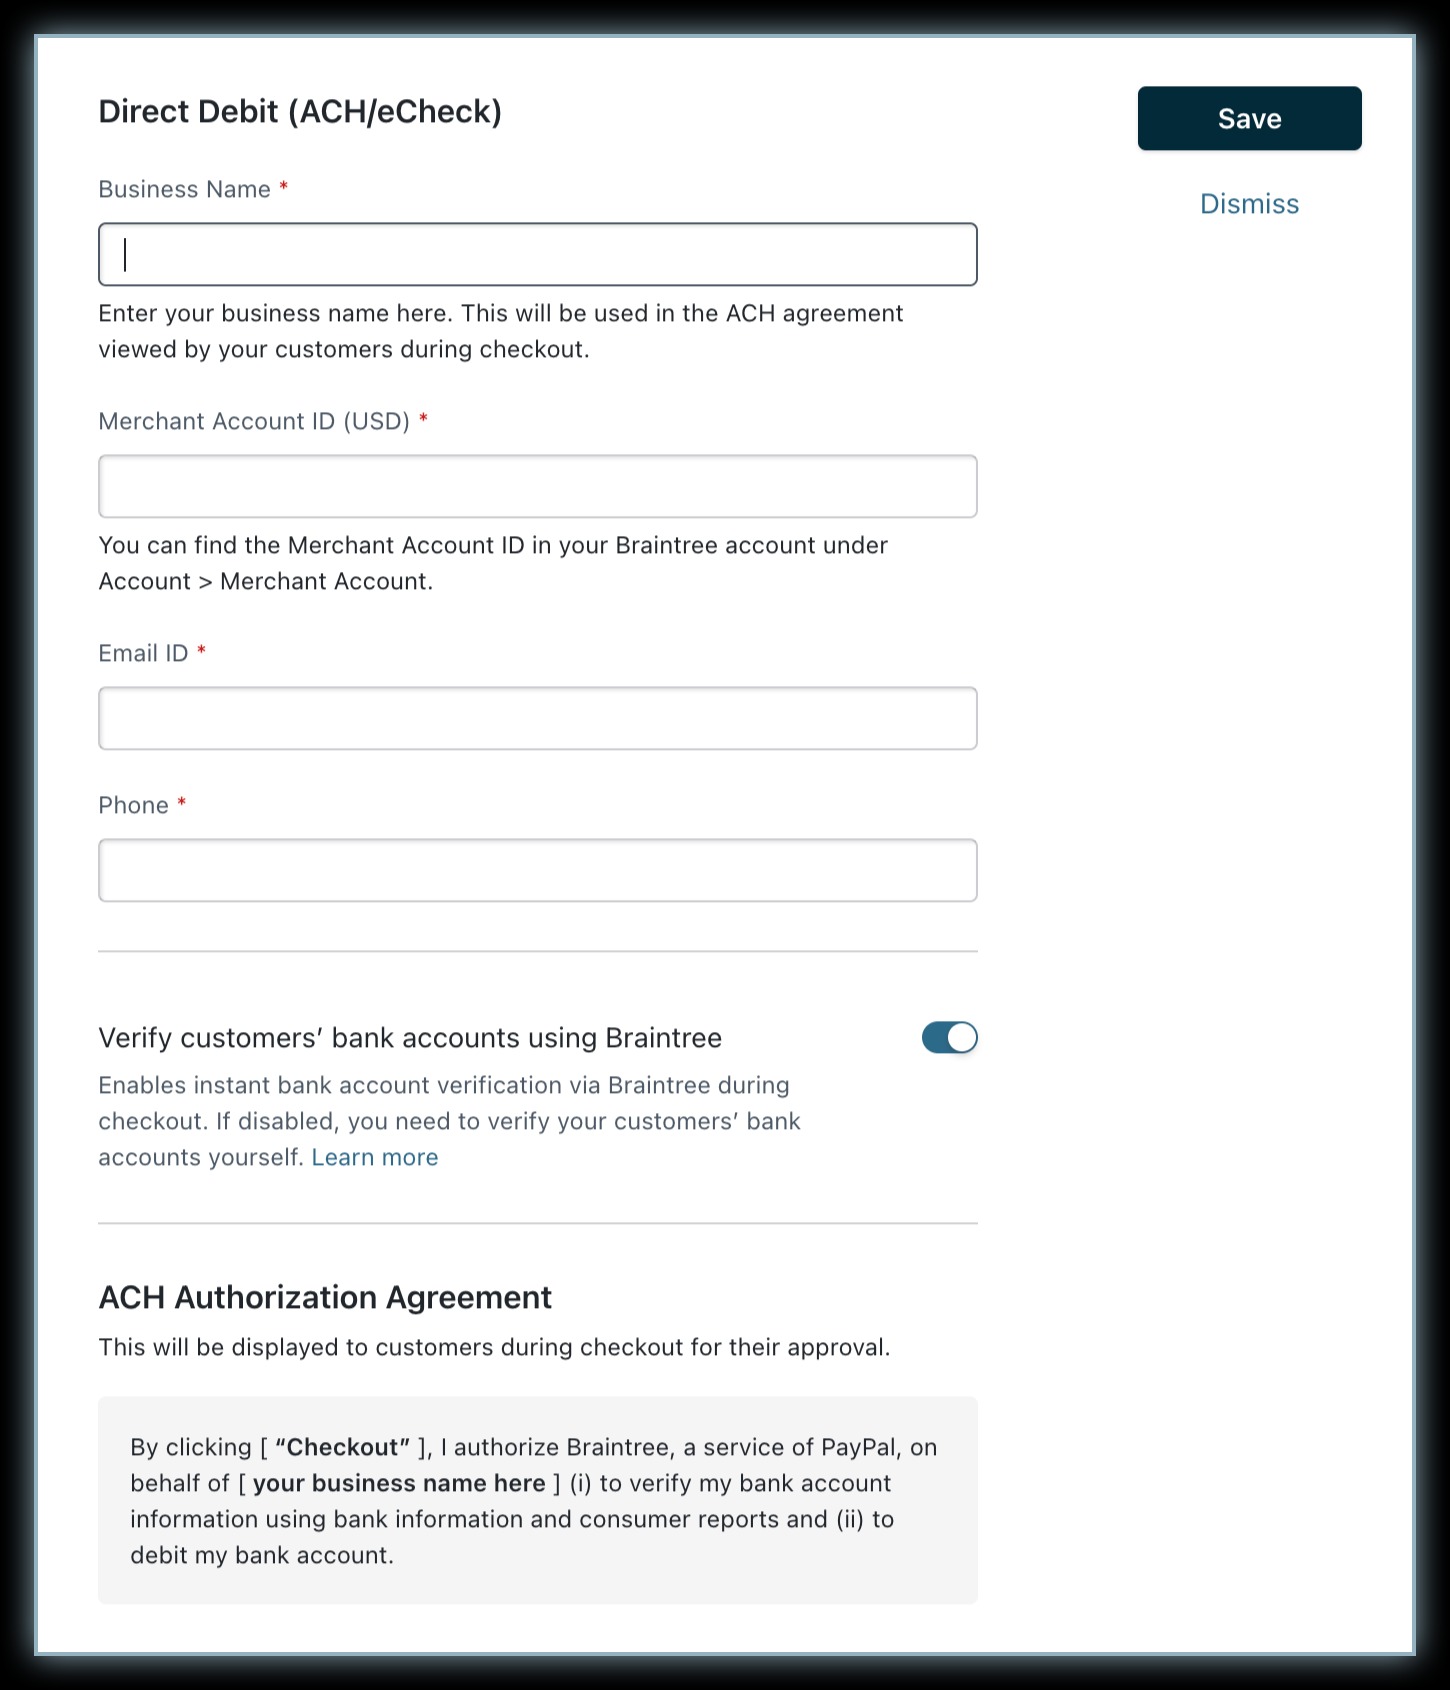
Enter your Business Name, Merchant Account ID, Email, and Phone. The Business Name field value is used in the ACH authorization agreement.
Braintree offers bank account verification via the following three methods:
Chargebee recommends selecting Network Check as the verification mode as it is quick and the most accurate.
While setting up Direct Debit (ACH/eCheck), you can choose if you want Braintree to perform verification or if you want to do it independently by enabling or disabling the Verify customers' bank accounts using Braintree toggle button.
If enabled, your customer's bank accounts will be verified via Network Check during checkout. If disabled, you need to verify the accounts via Independent Check.

Click Save.
If you intend to use Chargebee's Hosted Pages for your integration, some fields must be configured as mandatory in Chargebee's checkout settings.
Follow the steps below to complete this:
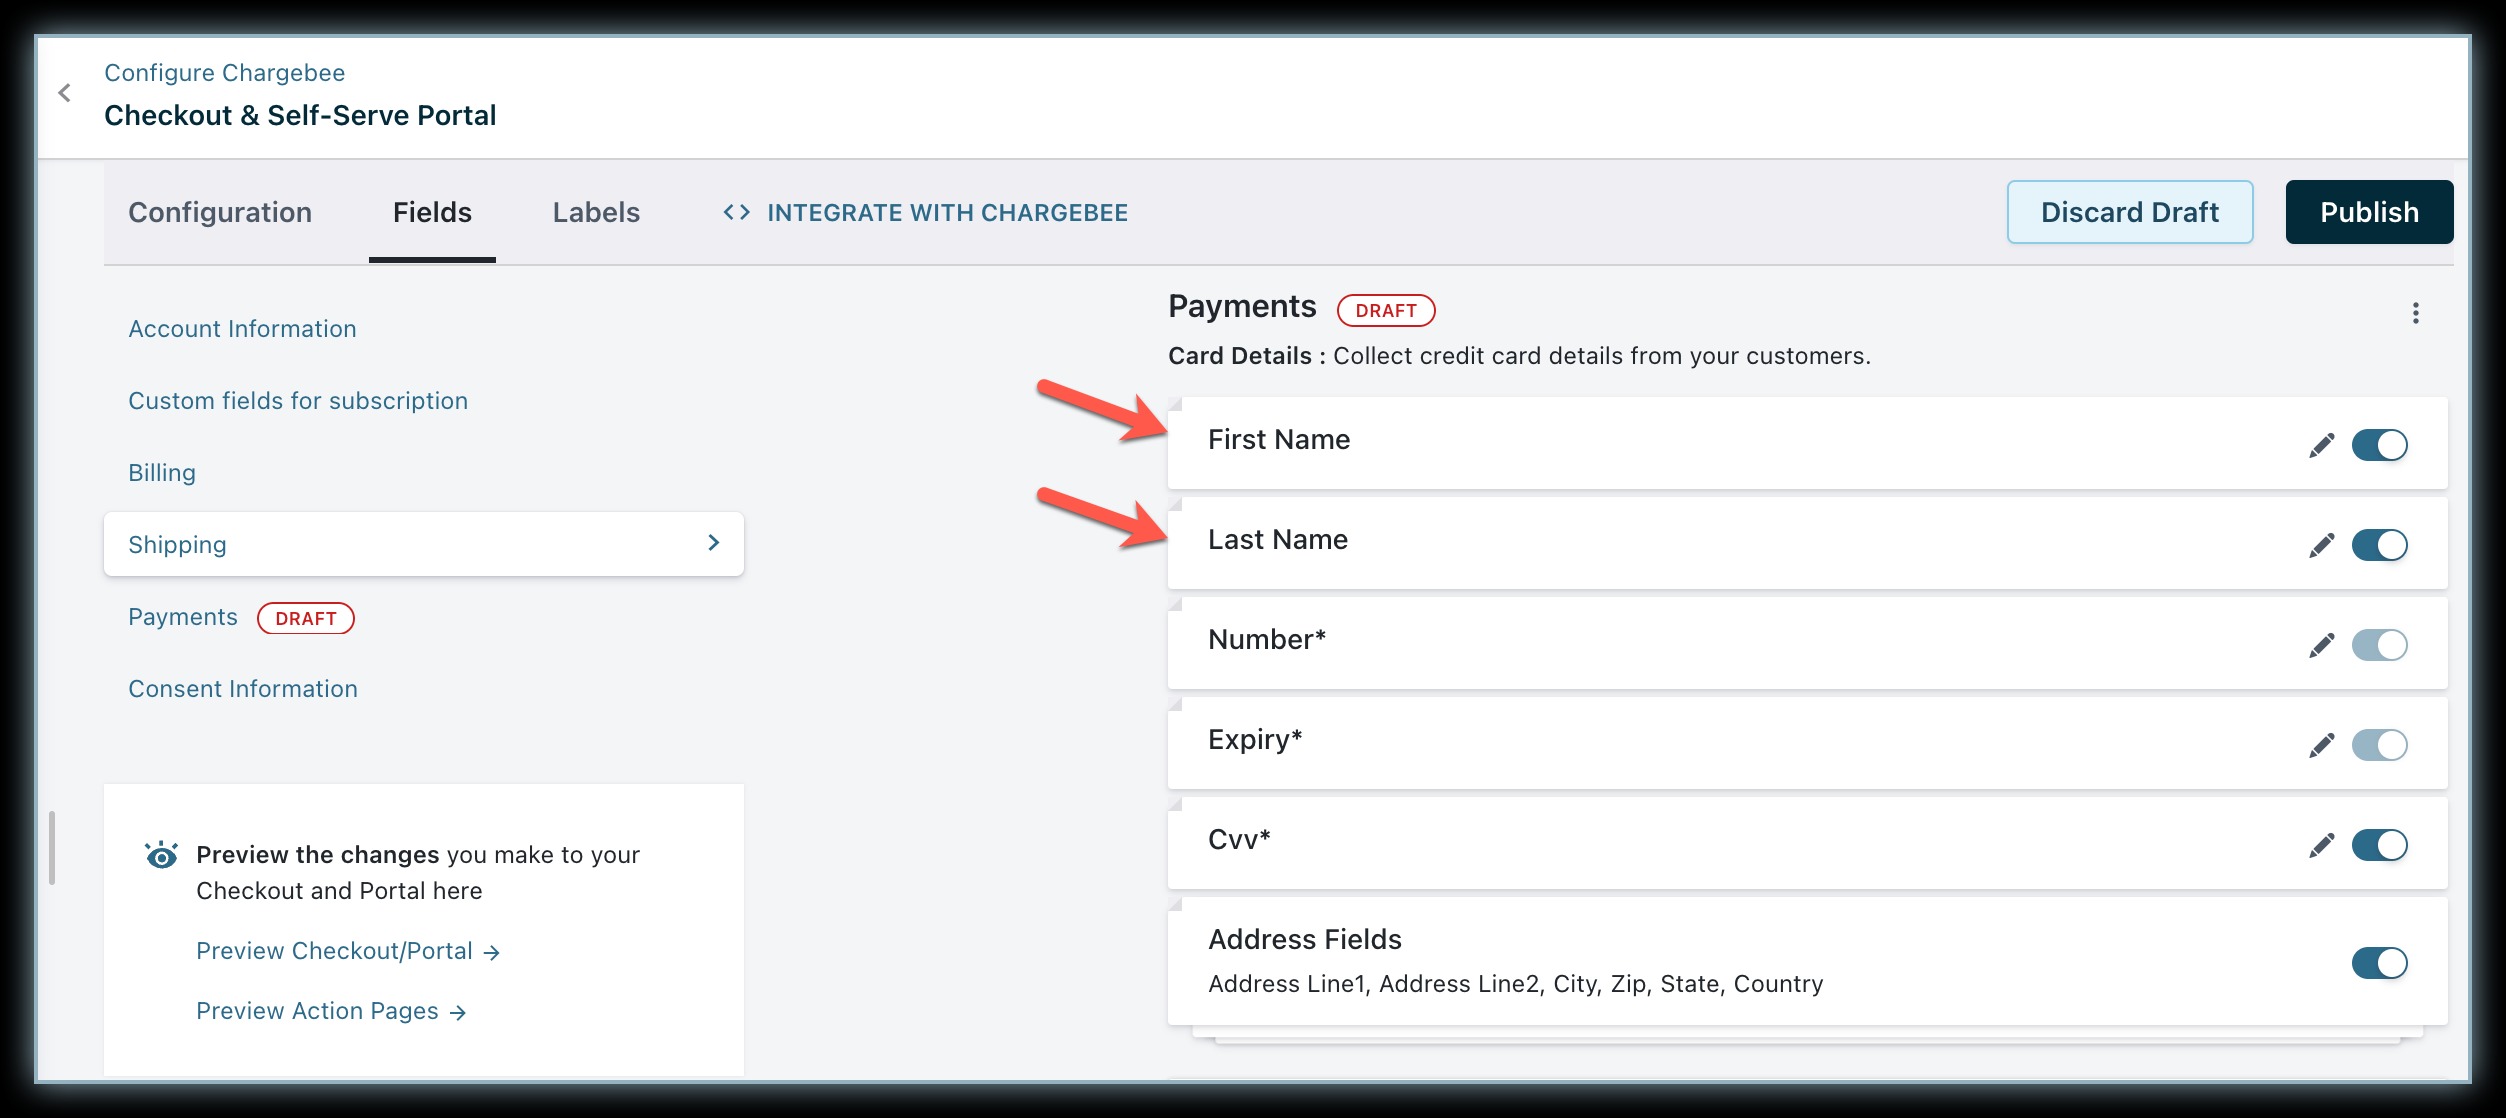
Click Settings > Configure Chargebee > Checkout & Self-Serve Portal > Fields > Payments.
Enable First Name and Last Name within the Fields settings.
Enable Address Fields.
Click the Edit icon and confirm Address Line 1, Address Line 2, City, Zip, State, and Country are listed as Show from the drop-down list.
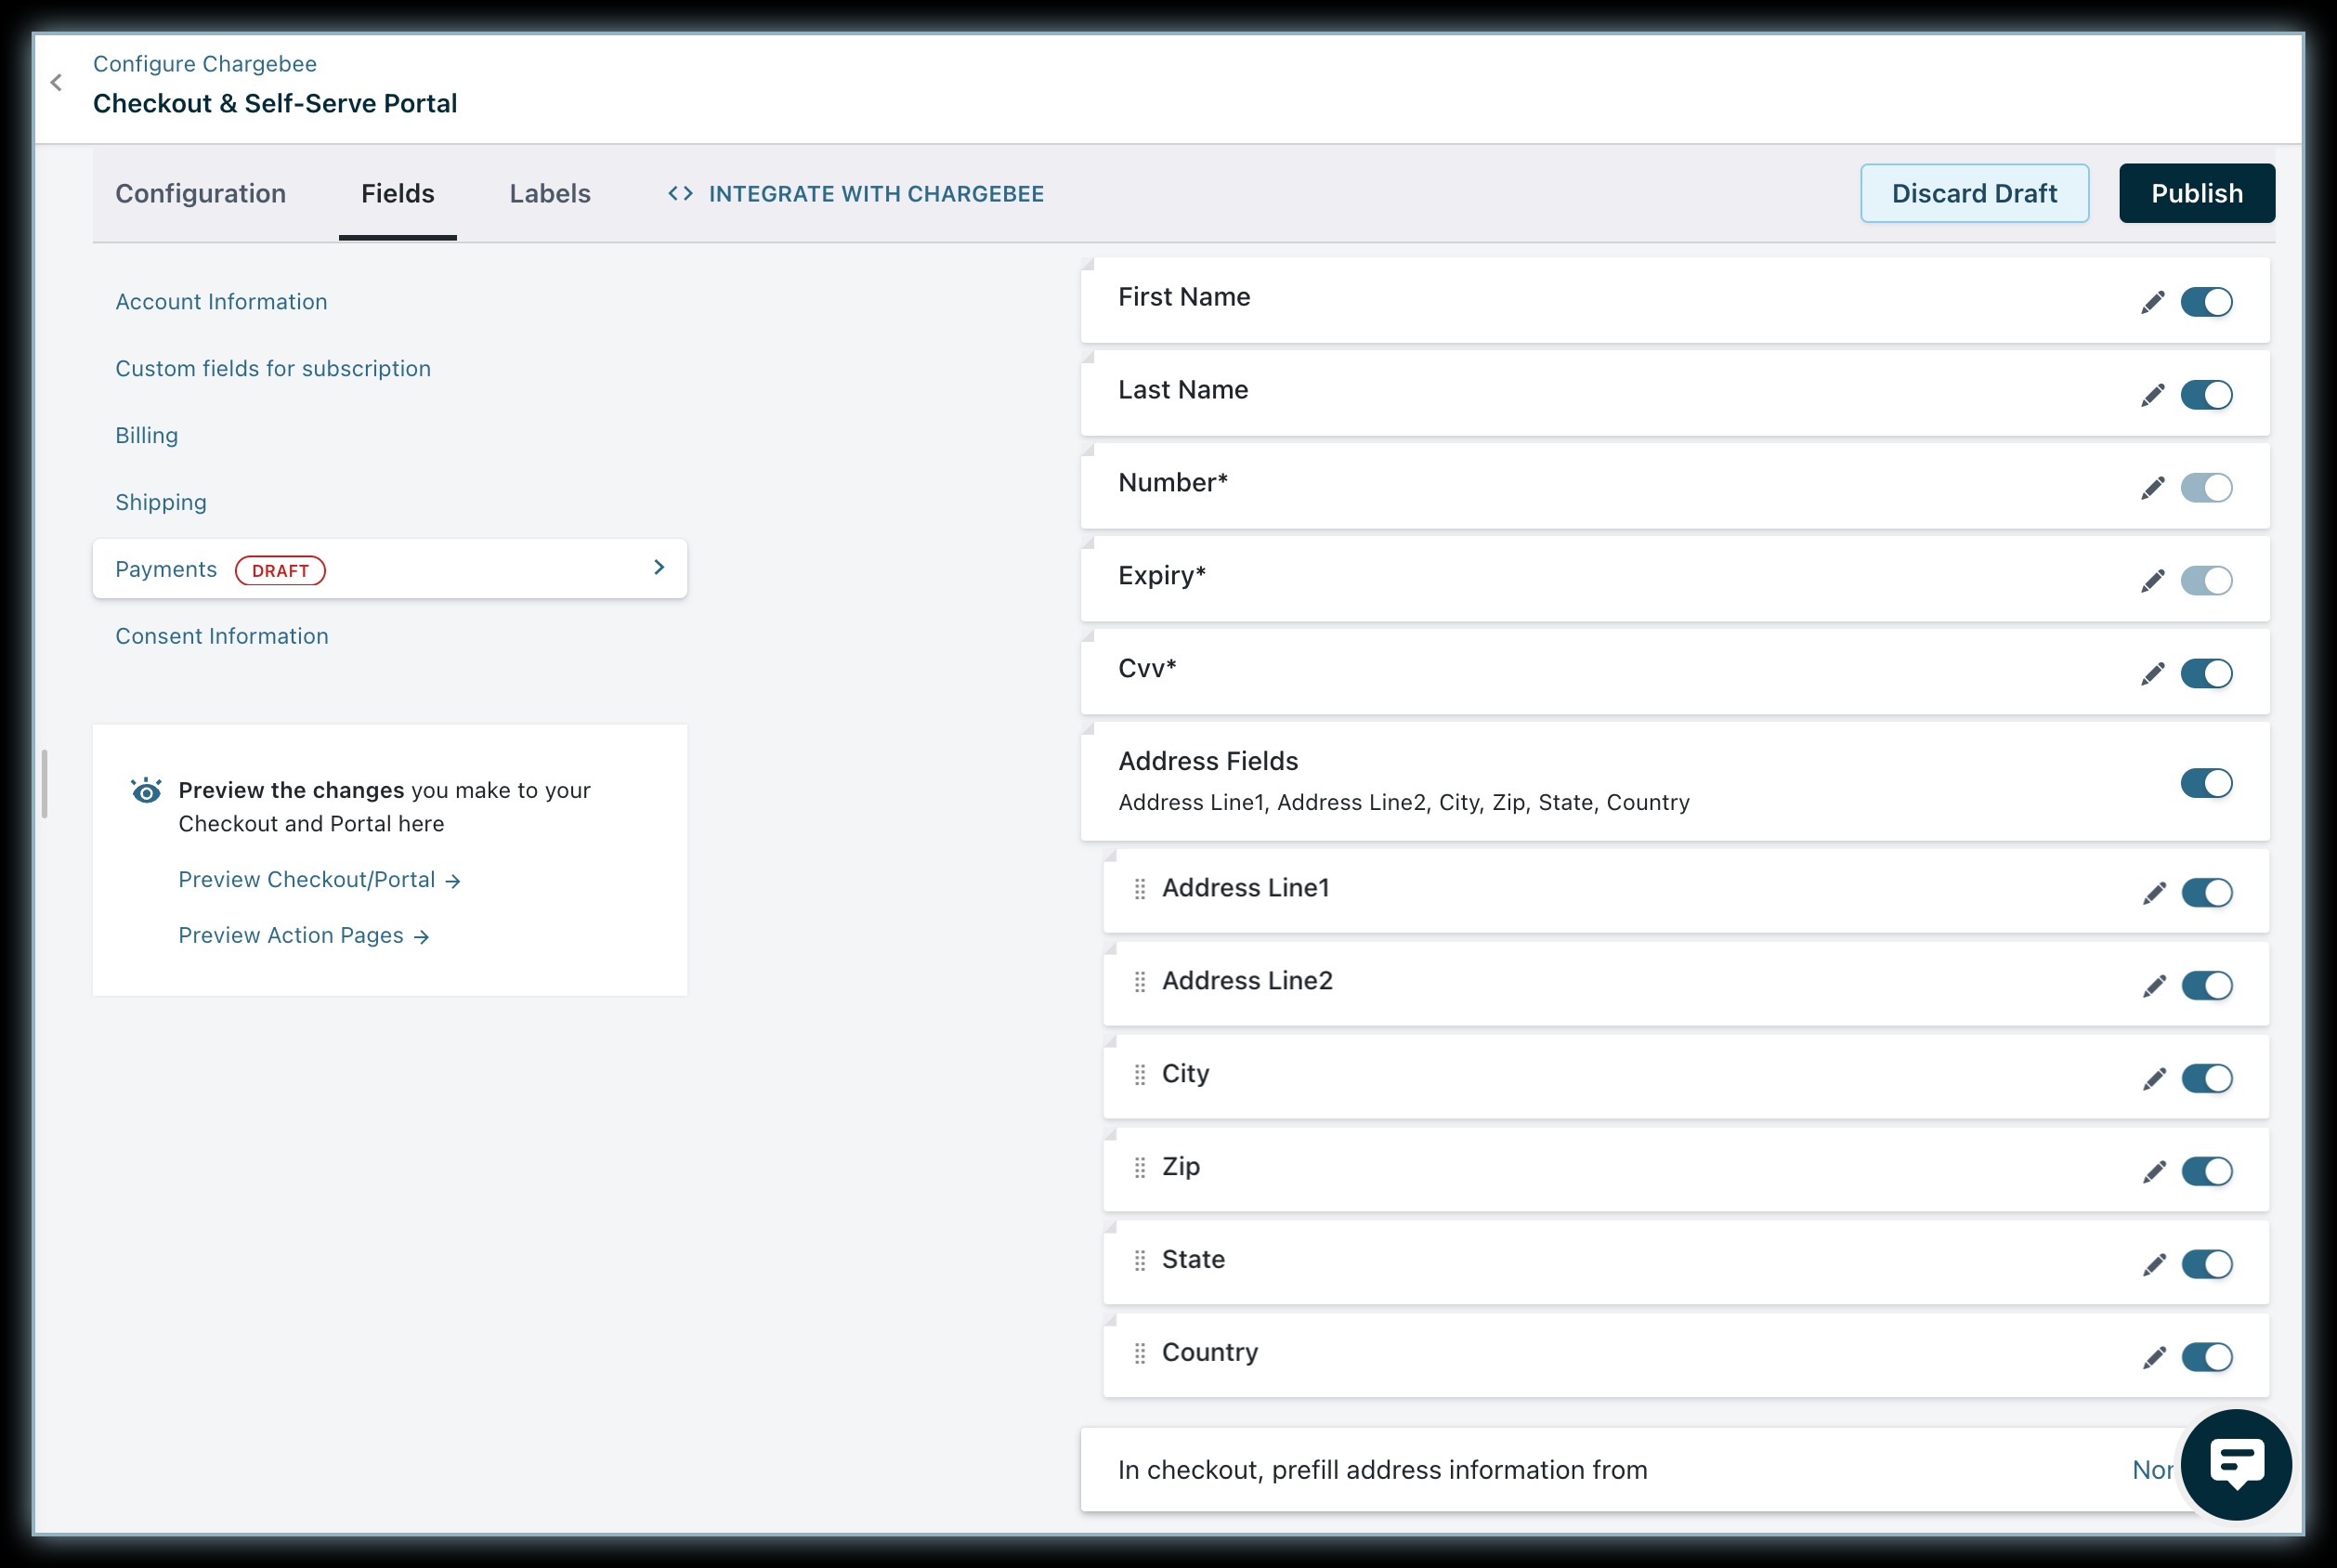
Click Publish.
Note: Make sure you enable the Address Fields without fail to ensure successful tokenization at Braintree's end. If these fields are not enabled or if an invalid value in entered by the customer, it can result in tokenization failure.
The method used for verification depends on the merchant's configuration. Let us see the possible scenarios and the suitable verification methods:


 Articles & FAQ