Docs
This is a Private Beta Release and is available only to users of Chargebee Hosted Pages using the In-App Checkout layout. To enable Verification Controls for your test and live sites , please contact Chargebee Support .
Verification Controls provide a centralized way to manage payment flows within Chargebee, independent of any payment gateway. They help optimize your payment workflow by allowing you to filter out specific card payment methods that may not be ideal for recurring transactions or reject high-cost card types before they reach the payment gateway. By enforcing these verifications at the Chargebee level, you can prevent unnecessary processing costs.
Since this feature operates at Chargebee and is gateway-agnostic, it takes priority over any overlapping rules (such as smart routing rules) set at the gateway level for Chargebee checkout flows.
This feature helps optimize revenue by reducing transaction failures, minimizing processing costs, and improving overall payment efficiency. Here's how:
Currently, this feature supports card-based payments. We plan to expand more supported payment methods in future.
The following are the variables supported for controlling verification for your payments:
Looking out for other variables?
Please raise a request for them here . We will consider them in our next iteration.
While Verification Controls provide significant benefits, there are some current limitations:
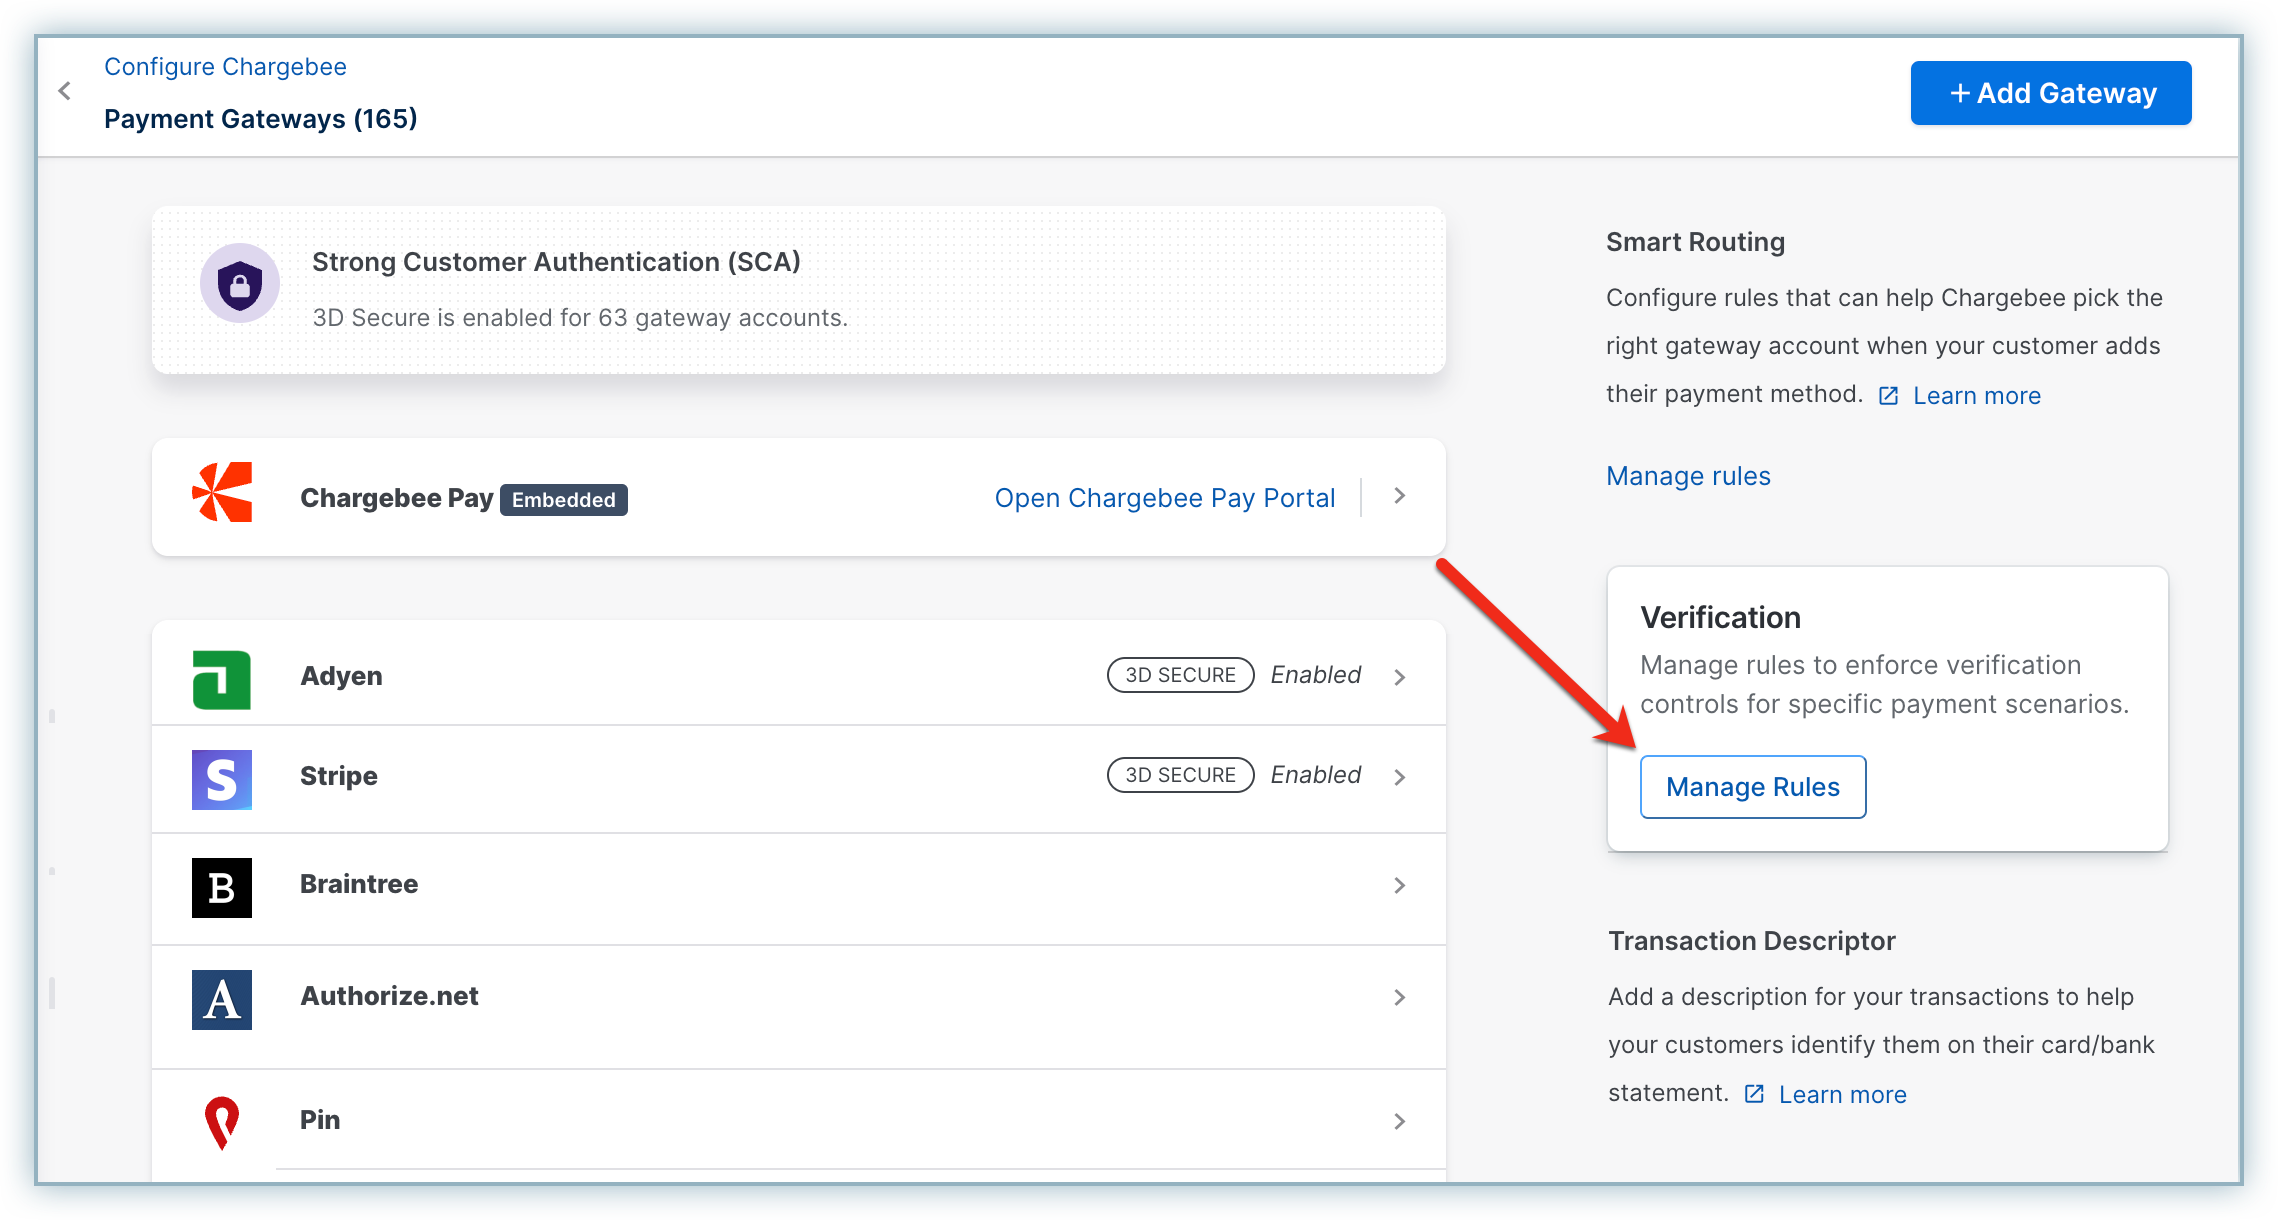
Verification Controls enable you to create rules that determine which payments to decline or take other actions on. To get to the Verification page, follow these steps:
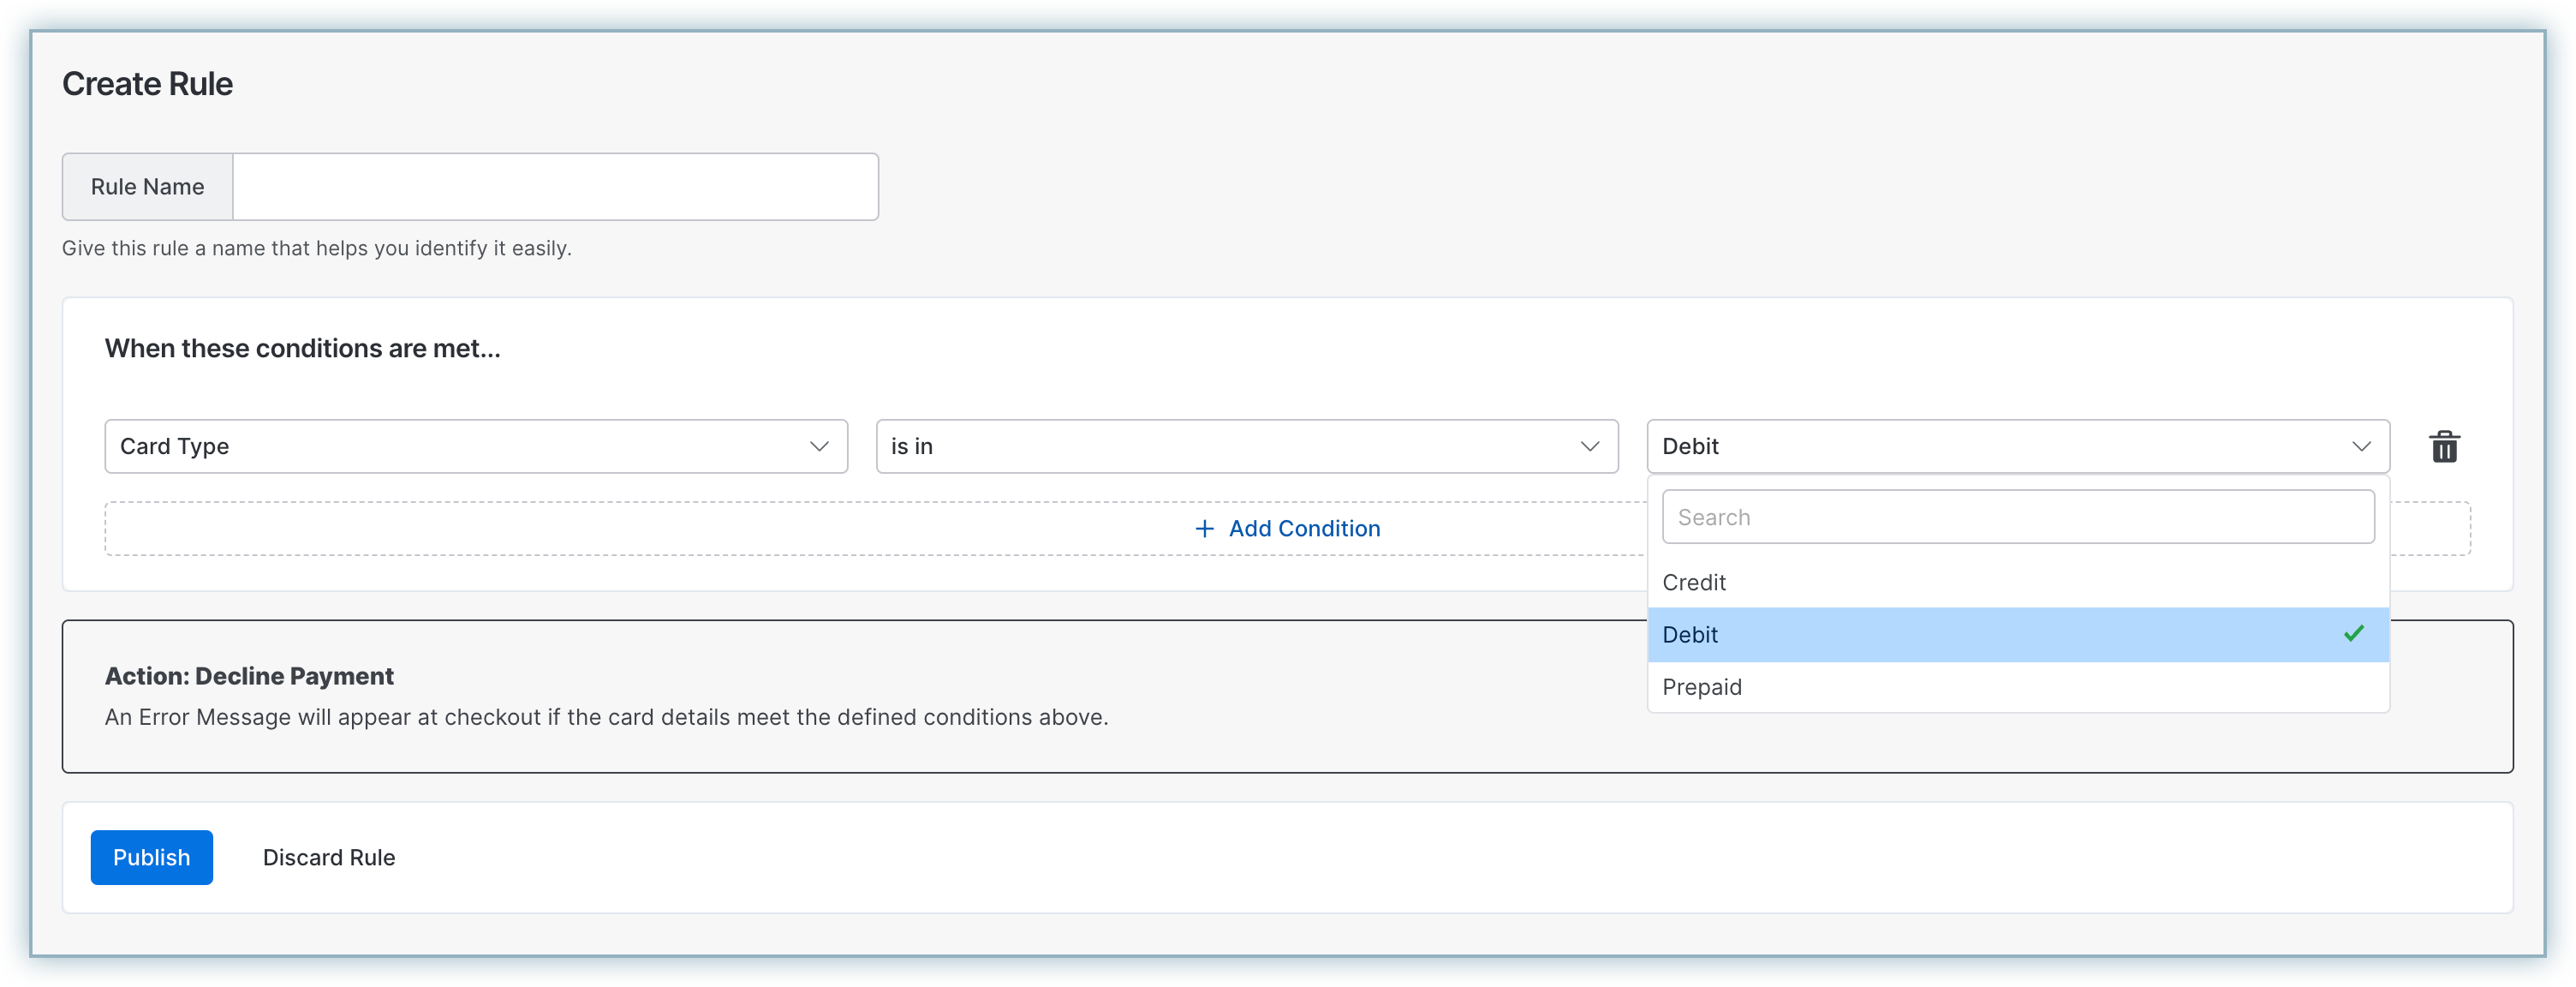
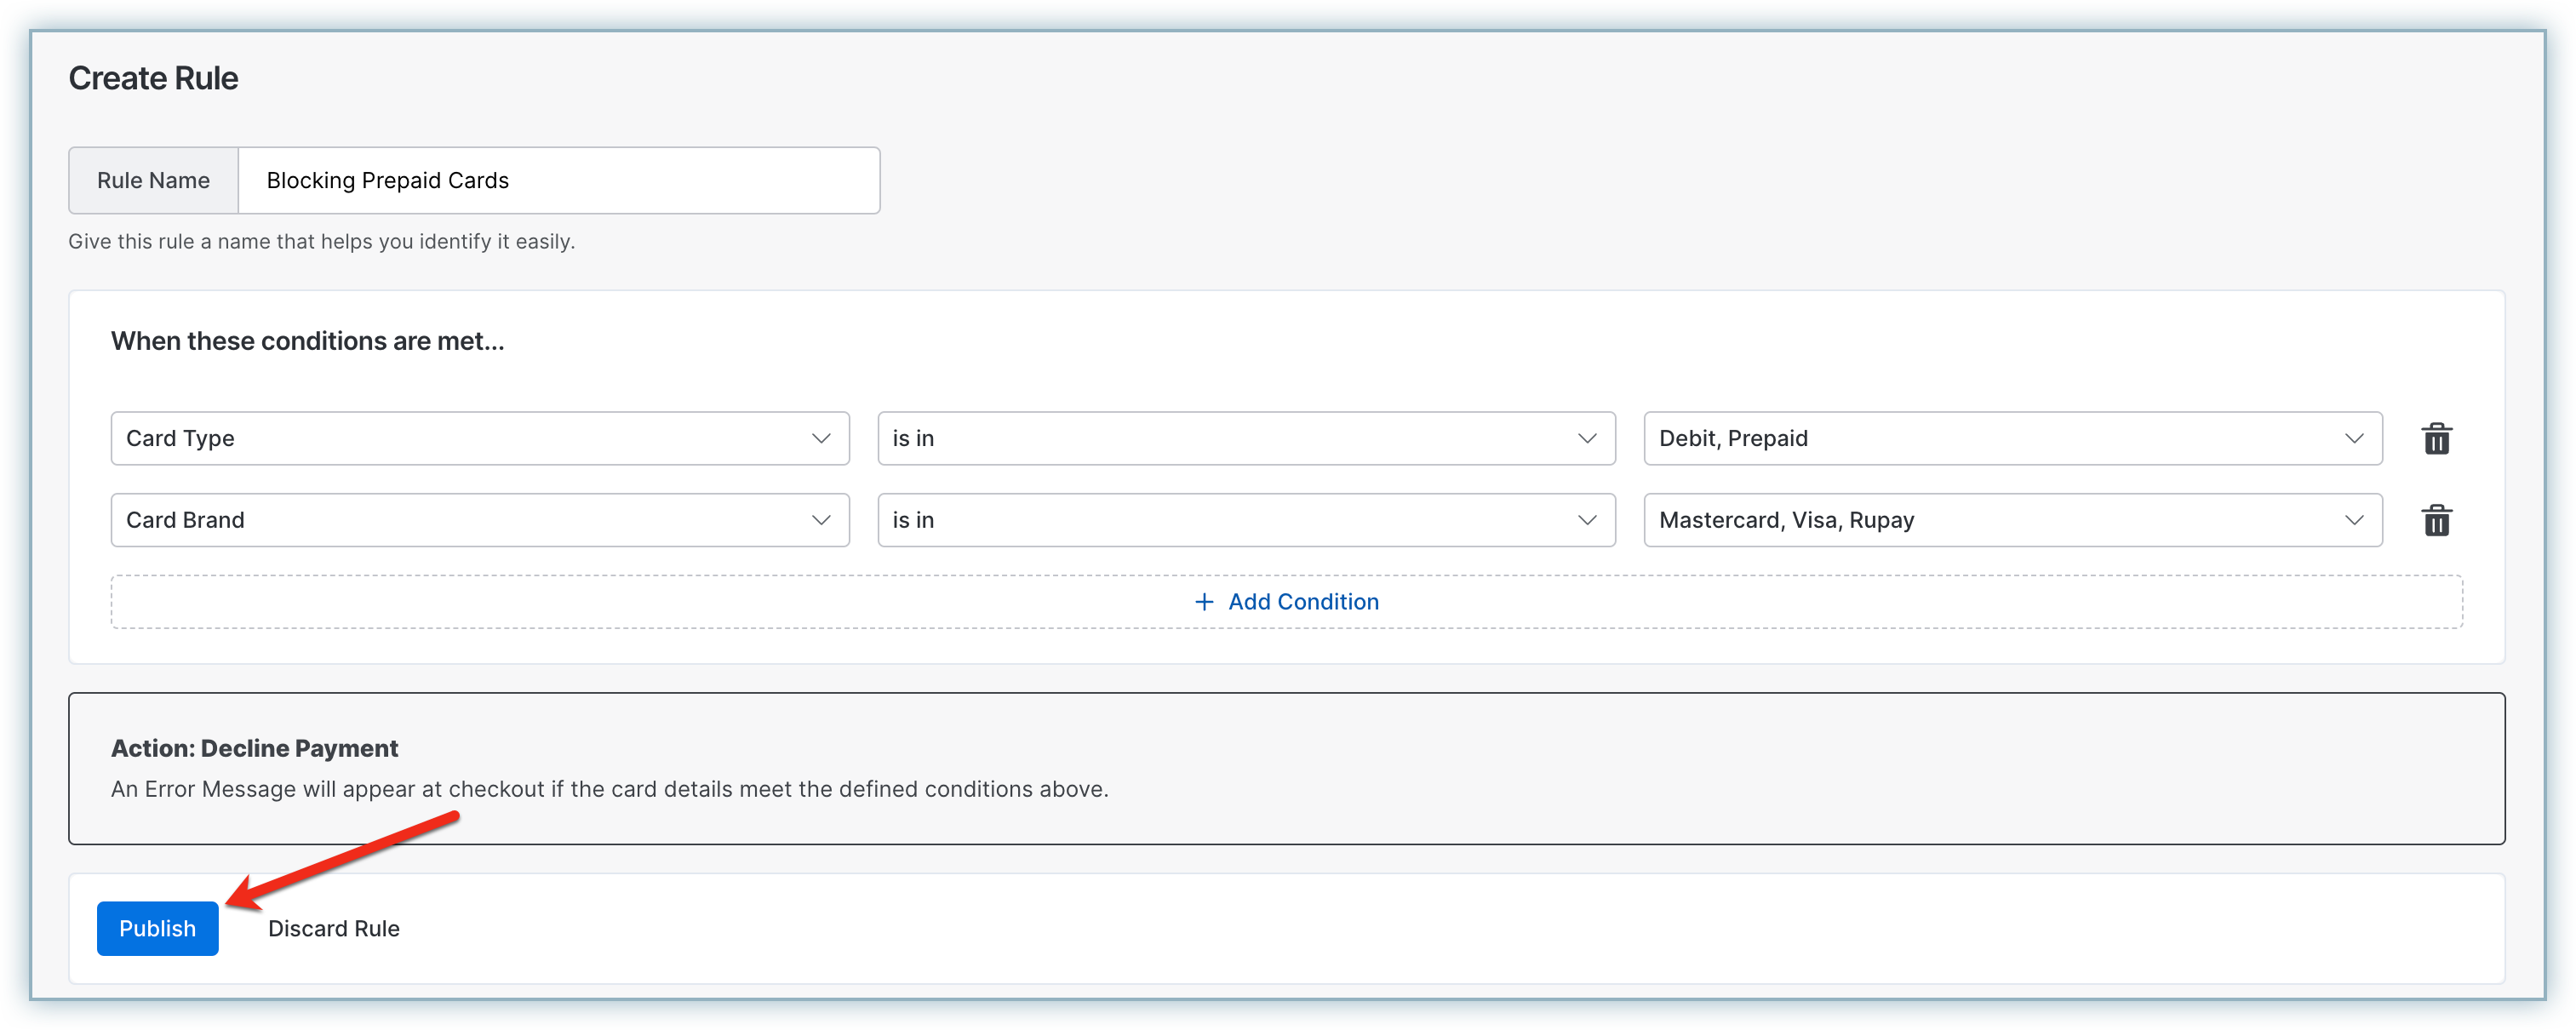
Once you've reached the Verification page, it's time to create a verification rule. Creating a verification rule allows you to tailor your verification strategy based on your business needs. Verification Controls enable you to define multiple conditions within a single rule to achieve the desired outcome.
For example, a composite rule could be:
"~If the card brand is AMEX and the card issuing country is Curacao, then decline the payment~."
This flexibility helps you enforce specific payment policies, reduce costs, and minimize risks effectively.
Follow these steps to create a new verification rule:
Go to the Verification page and
Click Create Rule.
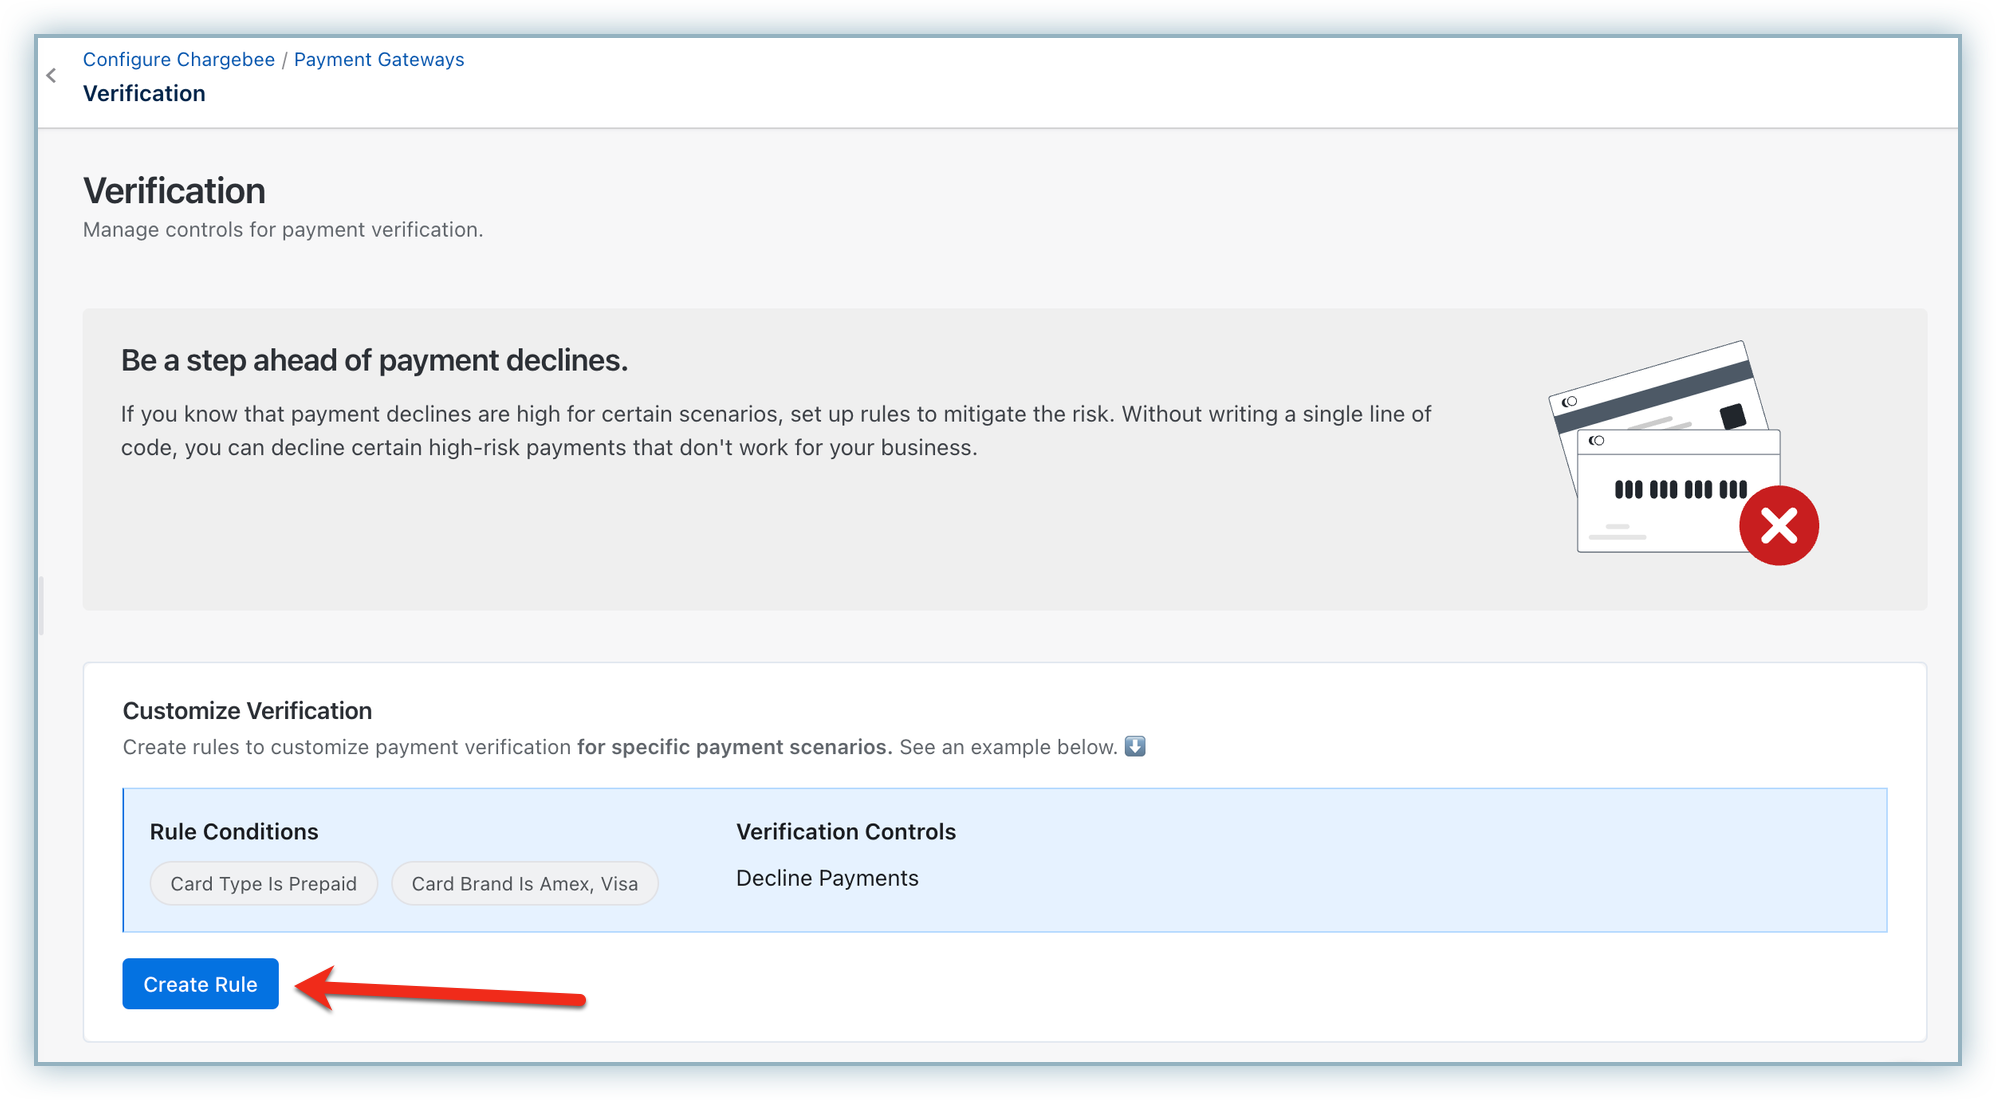
Configure the Rule on the Create Rule page:
Verify the rule settings and click Publish to activate the rule.
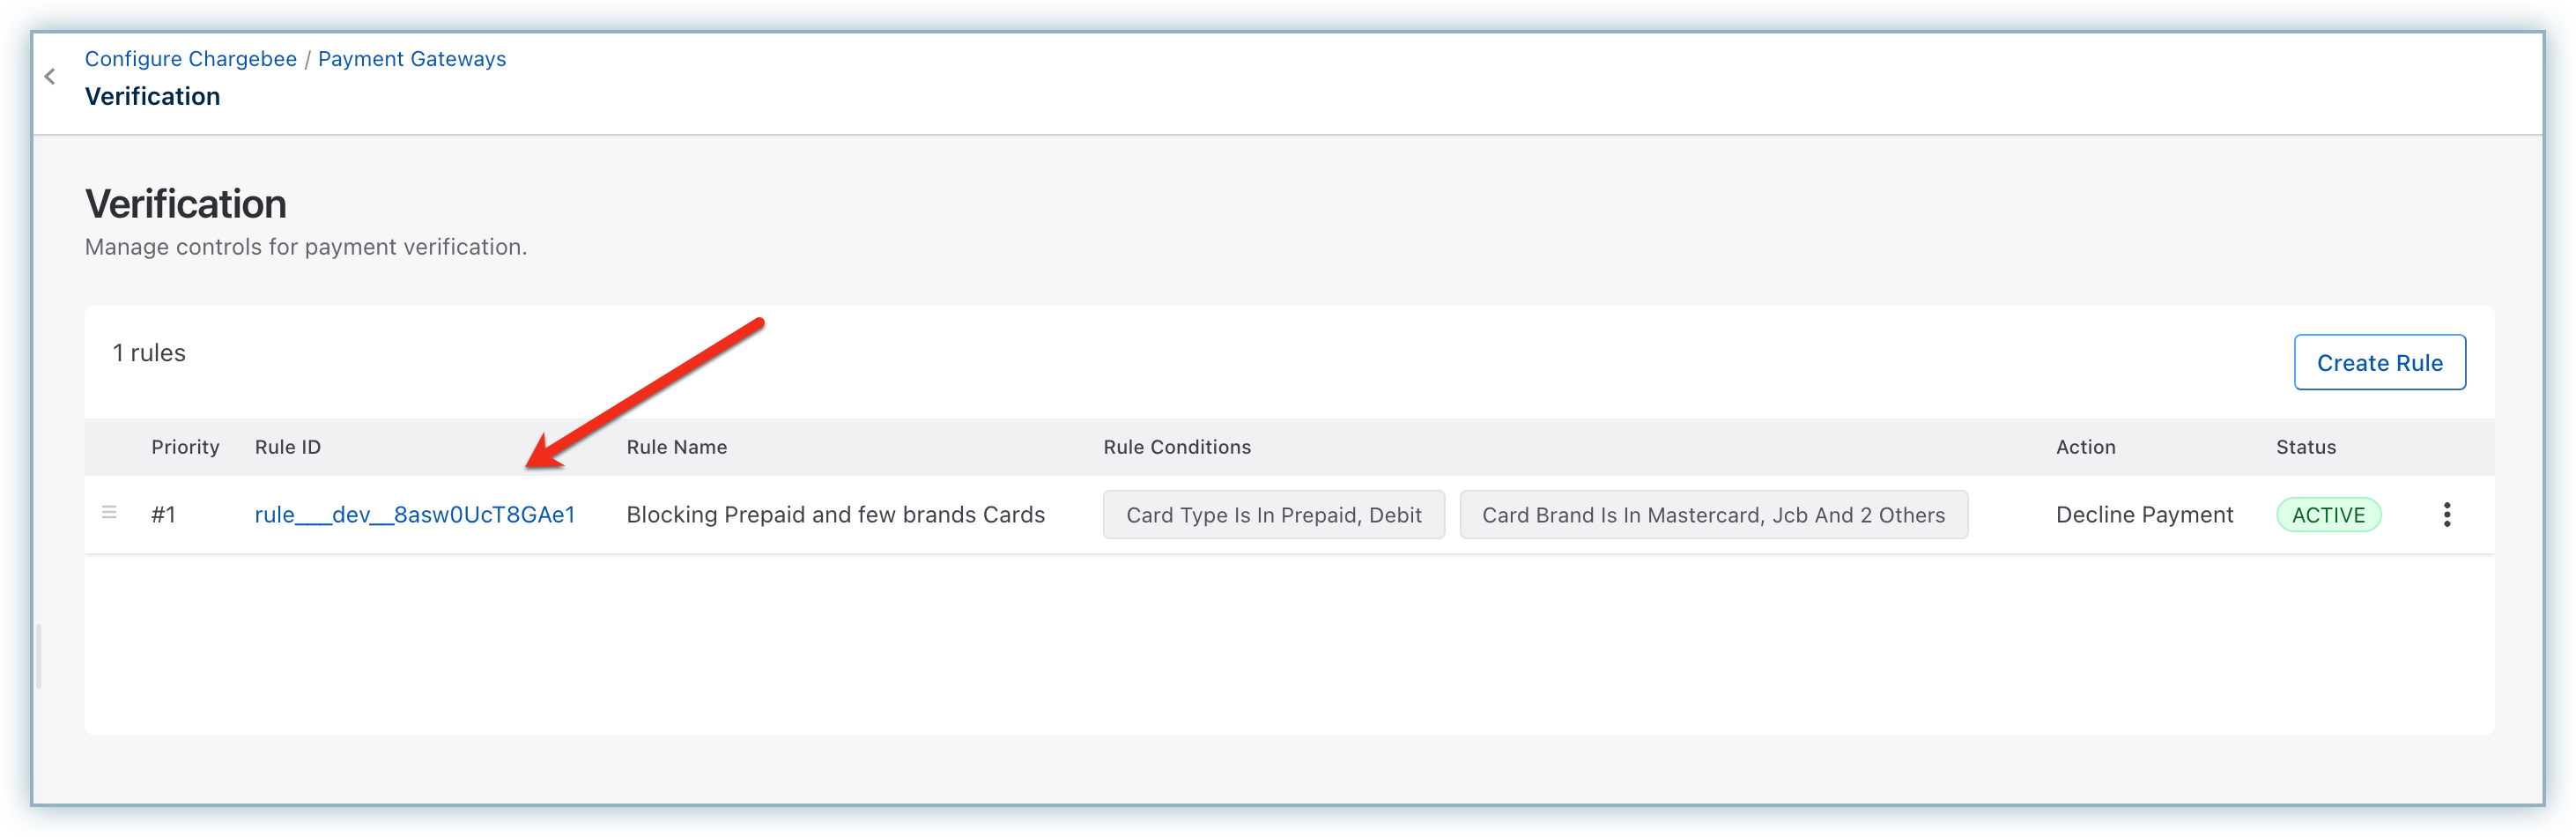
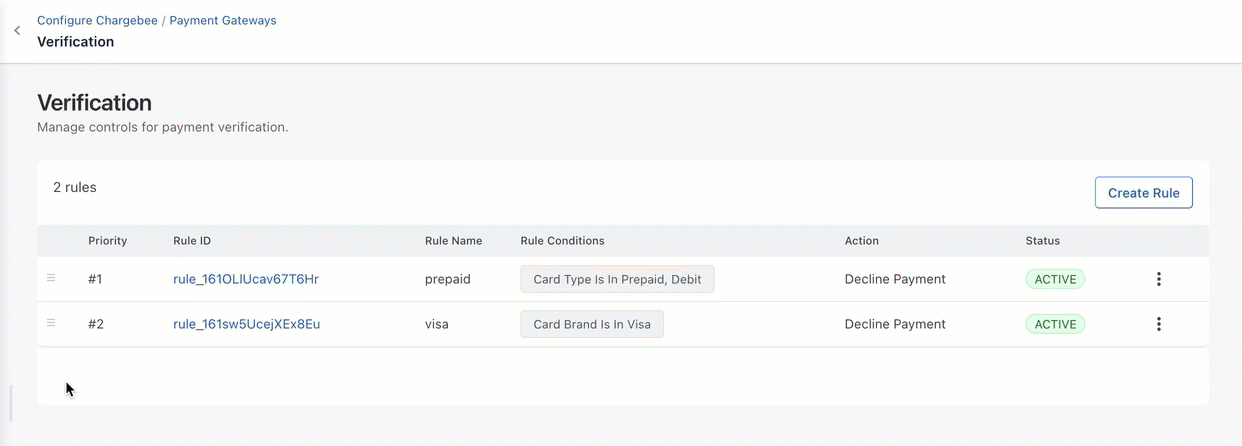
The verification home page will reflect the published rules.
While evaluating rules, If none of the rules match, then no action will be taken and the customer will move to the next step in the checkout process
You can update, delete, disable, and sort the rules for Verification Control using the following operations:
View Rule Details: Click on the Rule ID to view the details of a configured rule.

Edit, Enable, Disable, or Delete Rules: Click the ellipsis icon next to a rule to perform these actions as needed.
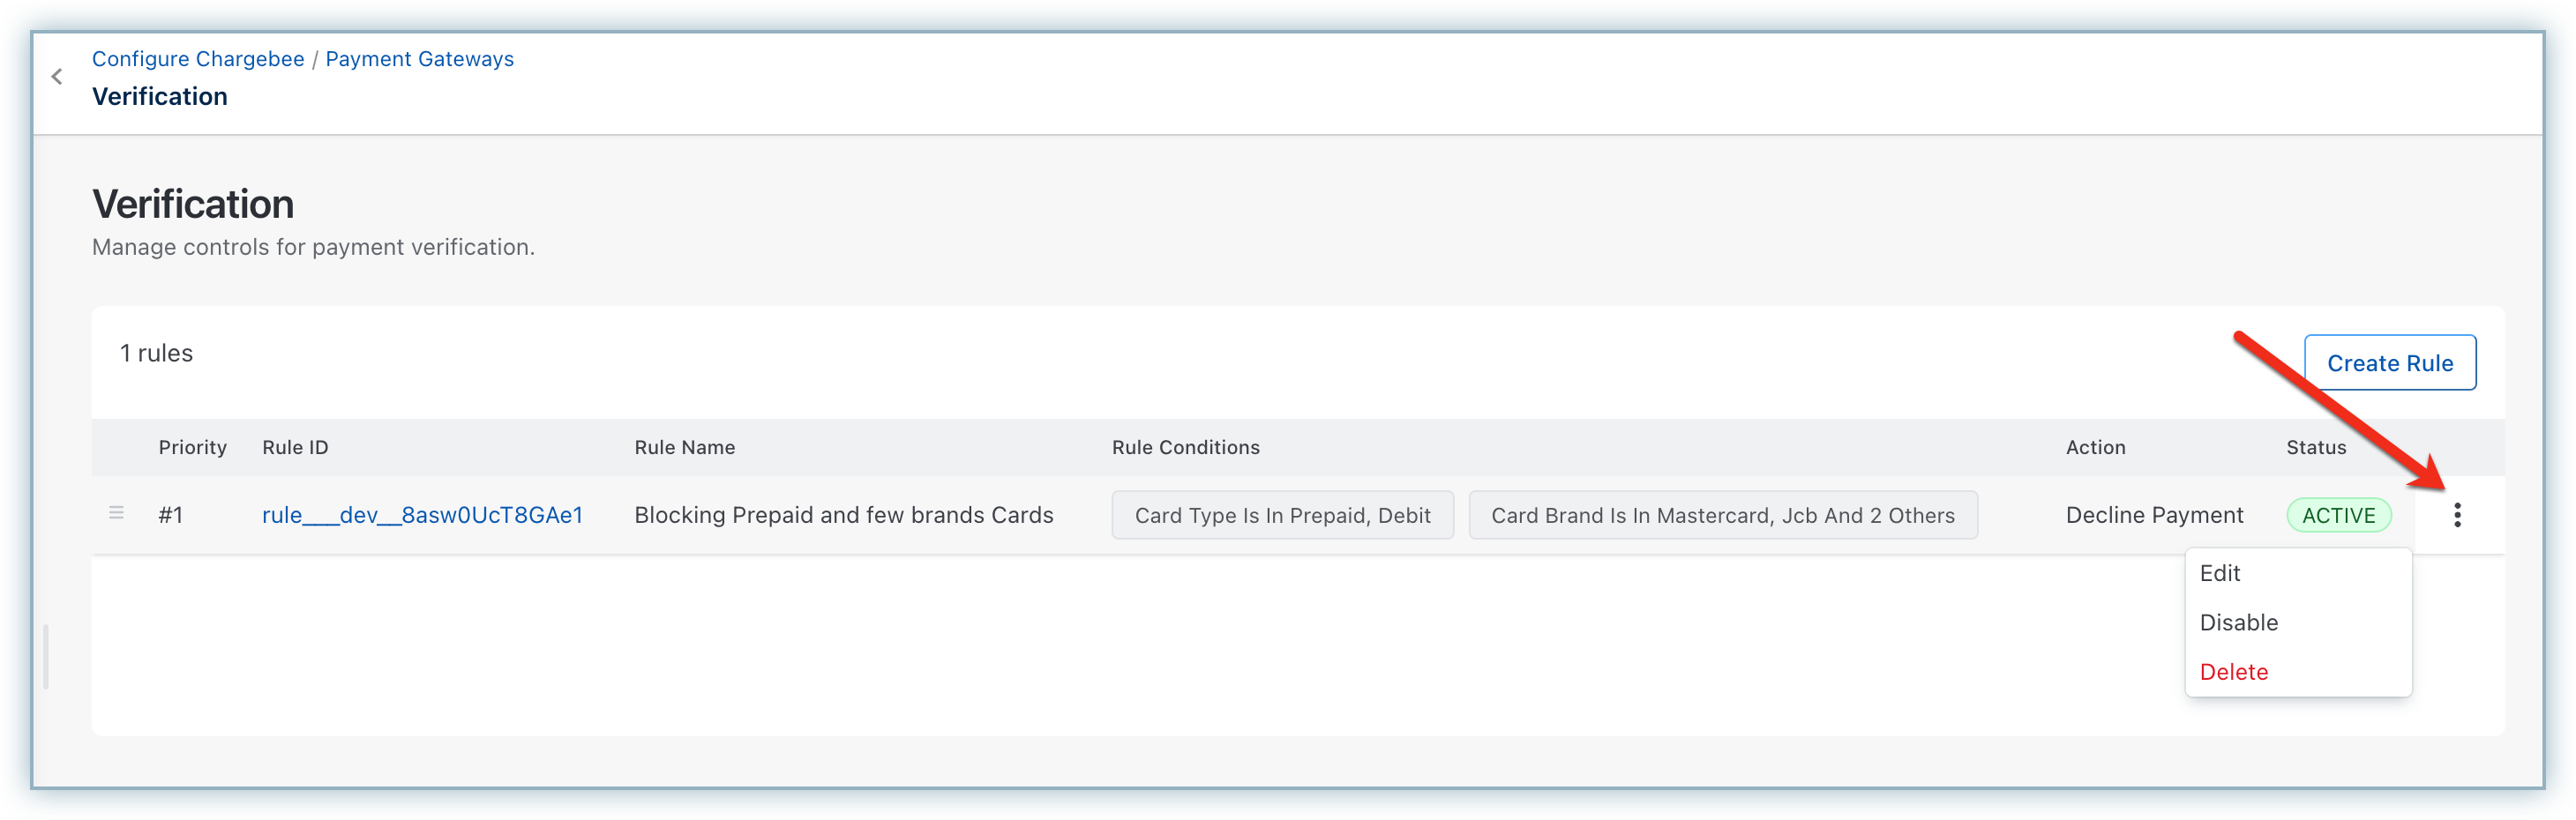
Set Priority Order: When multiple rules overlap, the rule with the highest priority is executed first. To adjust priorities, click the hamburger icon next to a rule, drag it to the desired position, and publish the changes.
Need Help?
If you have any questions or need assistance with Verification Controls, please reach out to Chargebee Support .


 Articles & FAQ