Docs
This is a Private Beta Release available only to users of Chargebee Payment Components . Contact Chargebee Support to enable the Advanced Routing feature for your test and live sites.
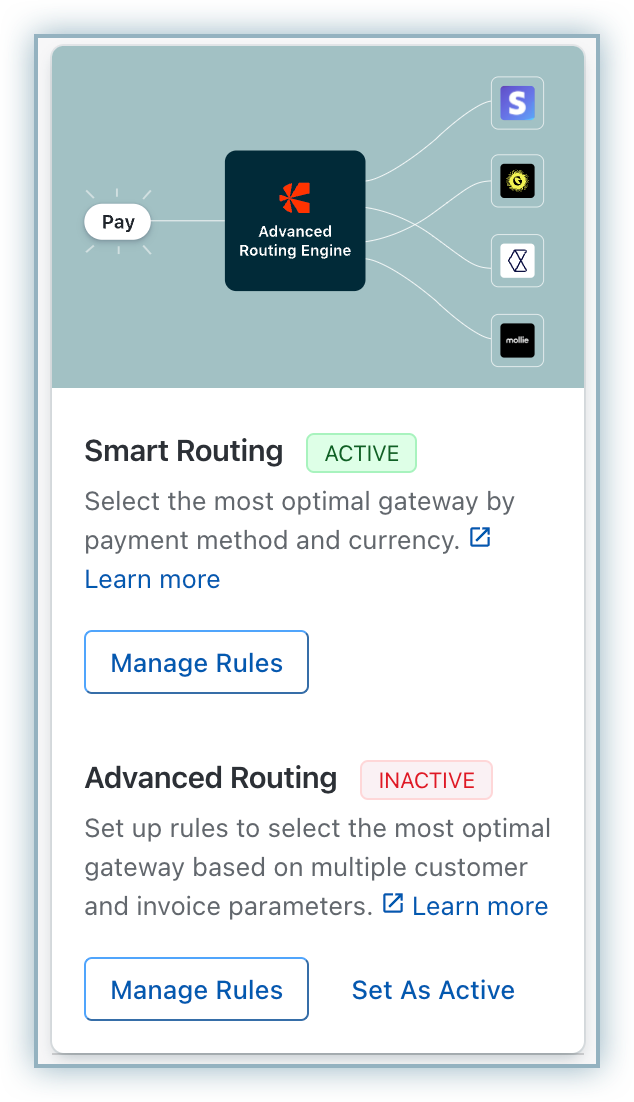
Advanced Routing offers significantly enhanced flexibility over the existing Smart Routing capability, enabling more precise and tailored payment gateway routing. Smart routing is limited to setting up routing based on only payment methods and currency where, whereas Advanced Routing aims to bring in more ways for the business to determine their routing strategy, including customer region, plan amount, product catalogue, etc.
Advanced Routing can enhance your payment processes in several ways:
These are just a few examples of how Advanced Routing can benefit your business. The engine is flexible and can be customized to meet your unique payment routing needs, ensuring optimal results.
The following are the key features of Advanced Routing:
If you need more variables, submit a request for them here . We will consider them for our next iteration.
Configuring Advanced Routing involves the following set of steps:
Let us dive deep into these:
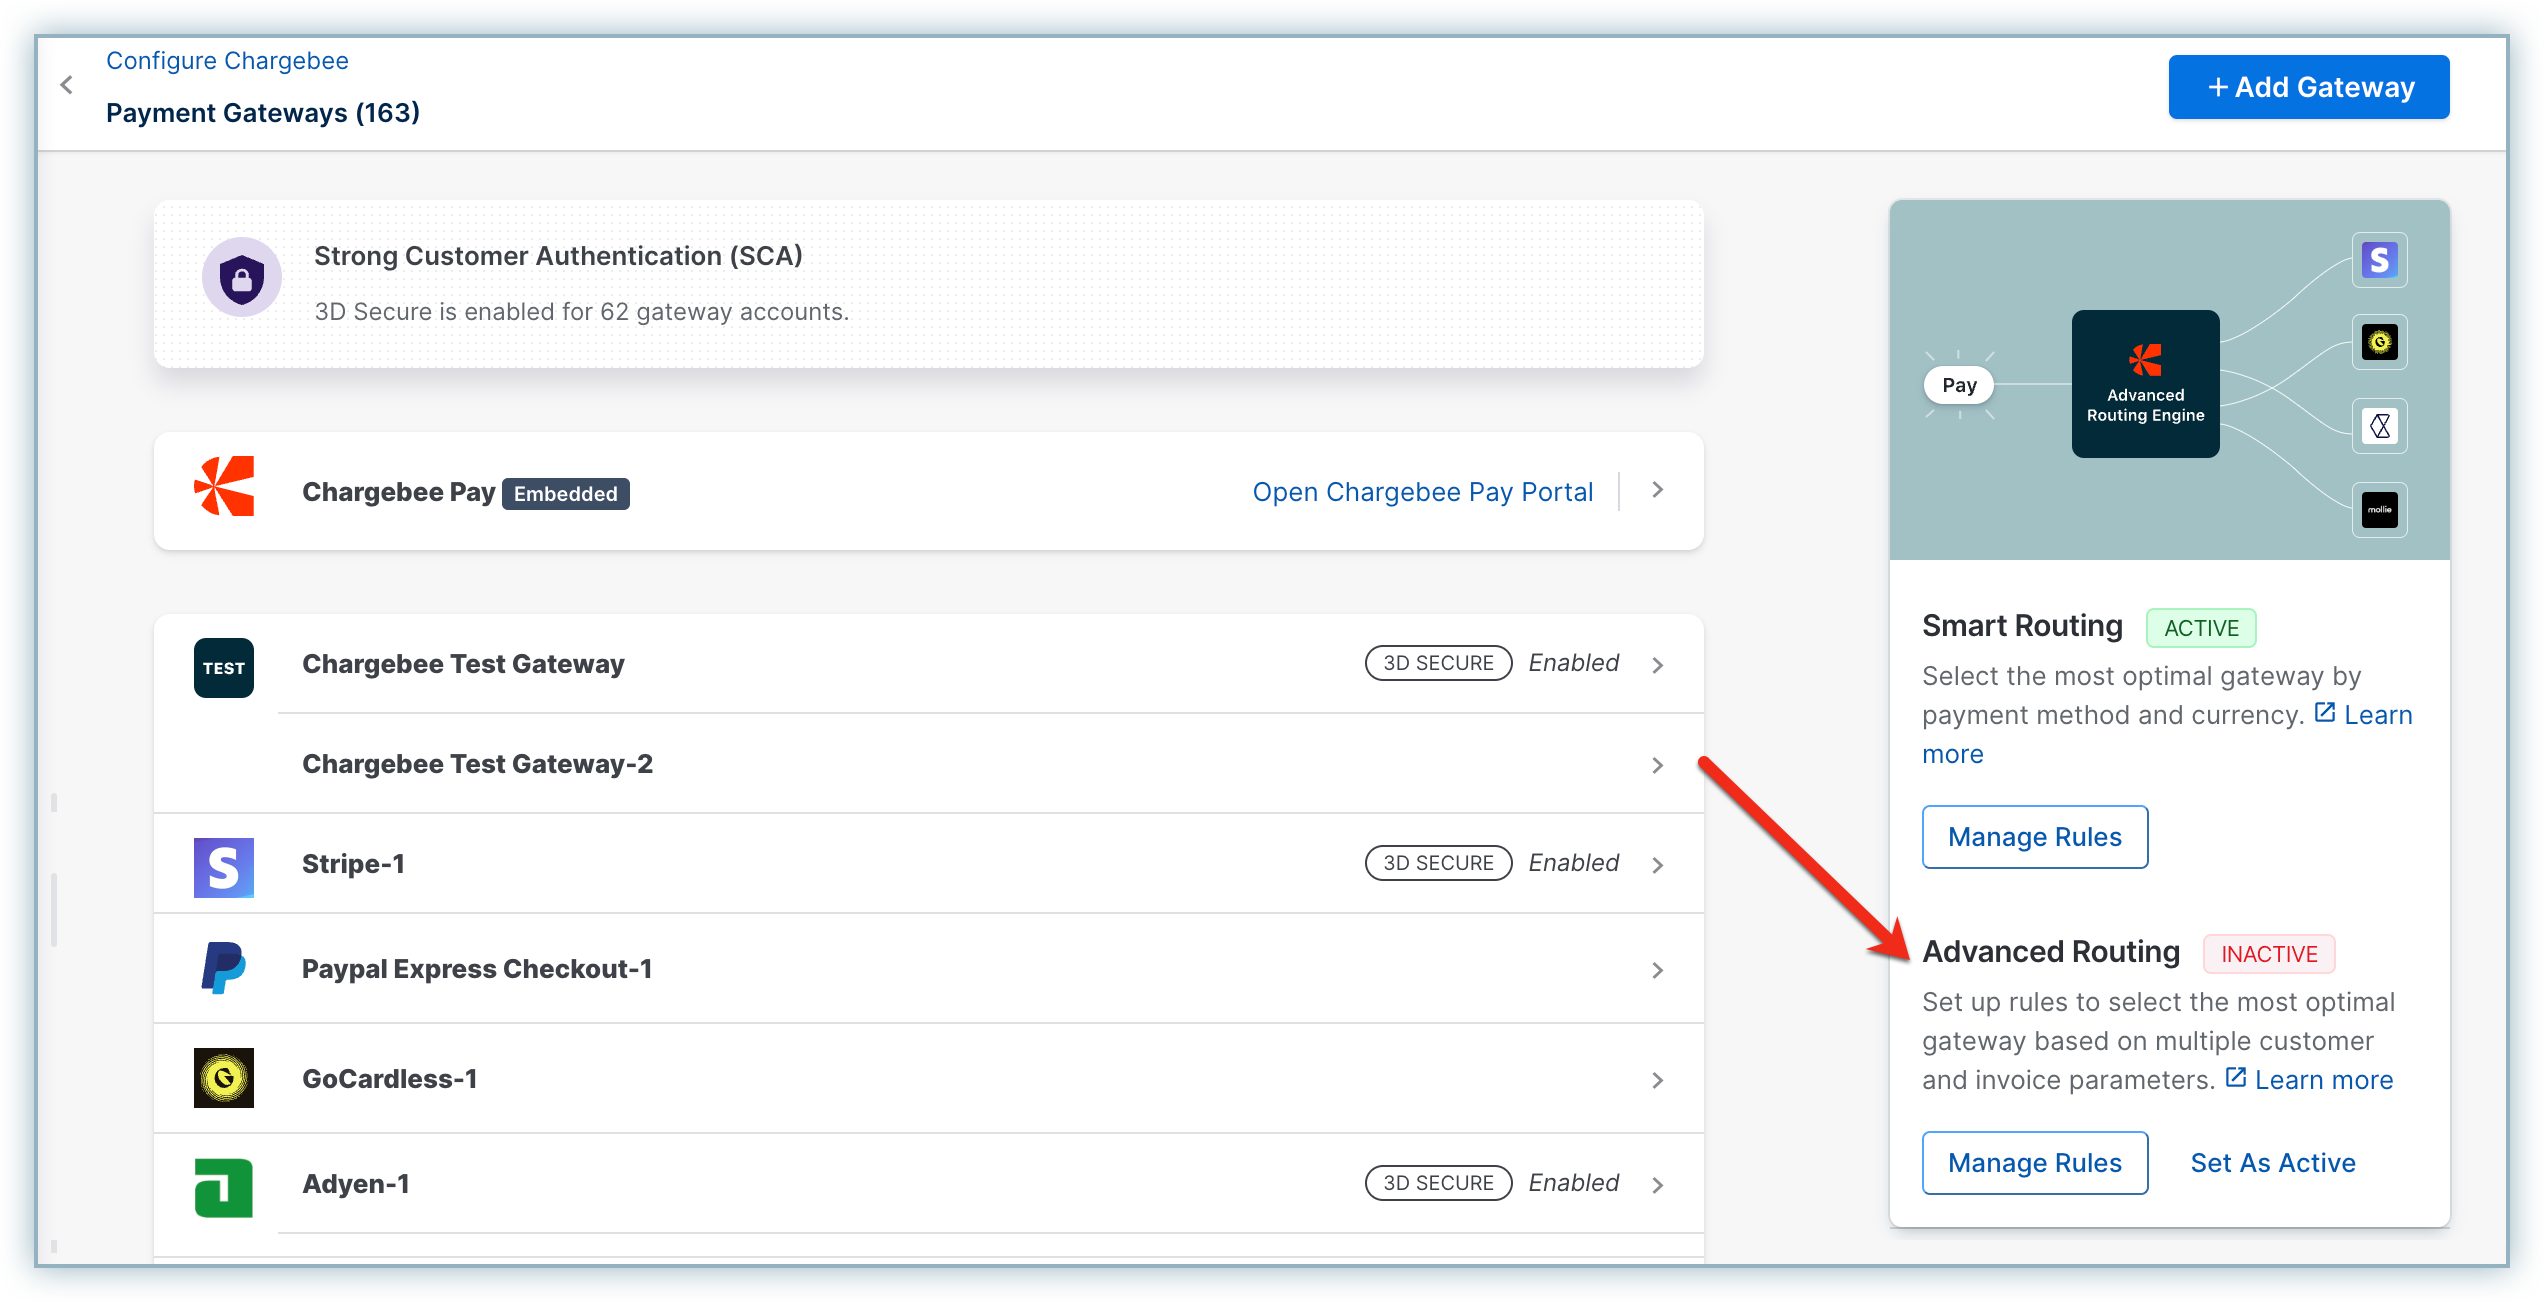
Before moving on to the specific sections, follow these steps to arrive at the Advanced Routing page:
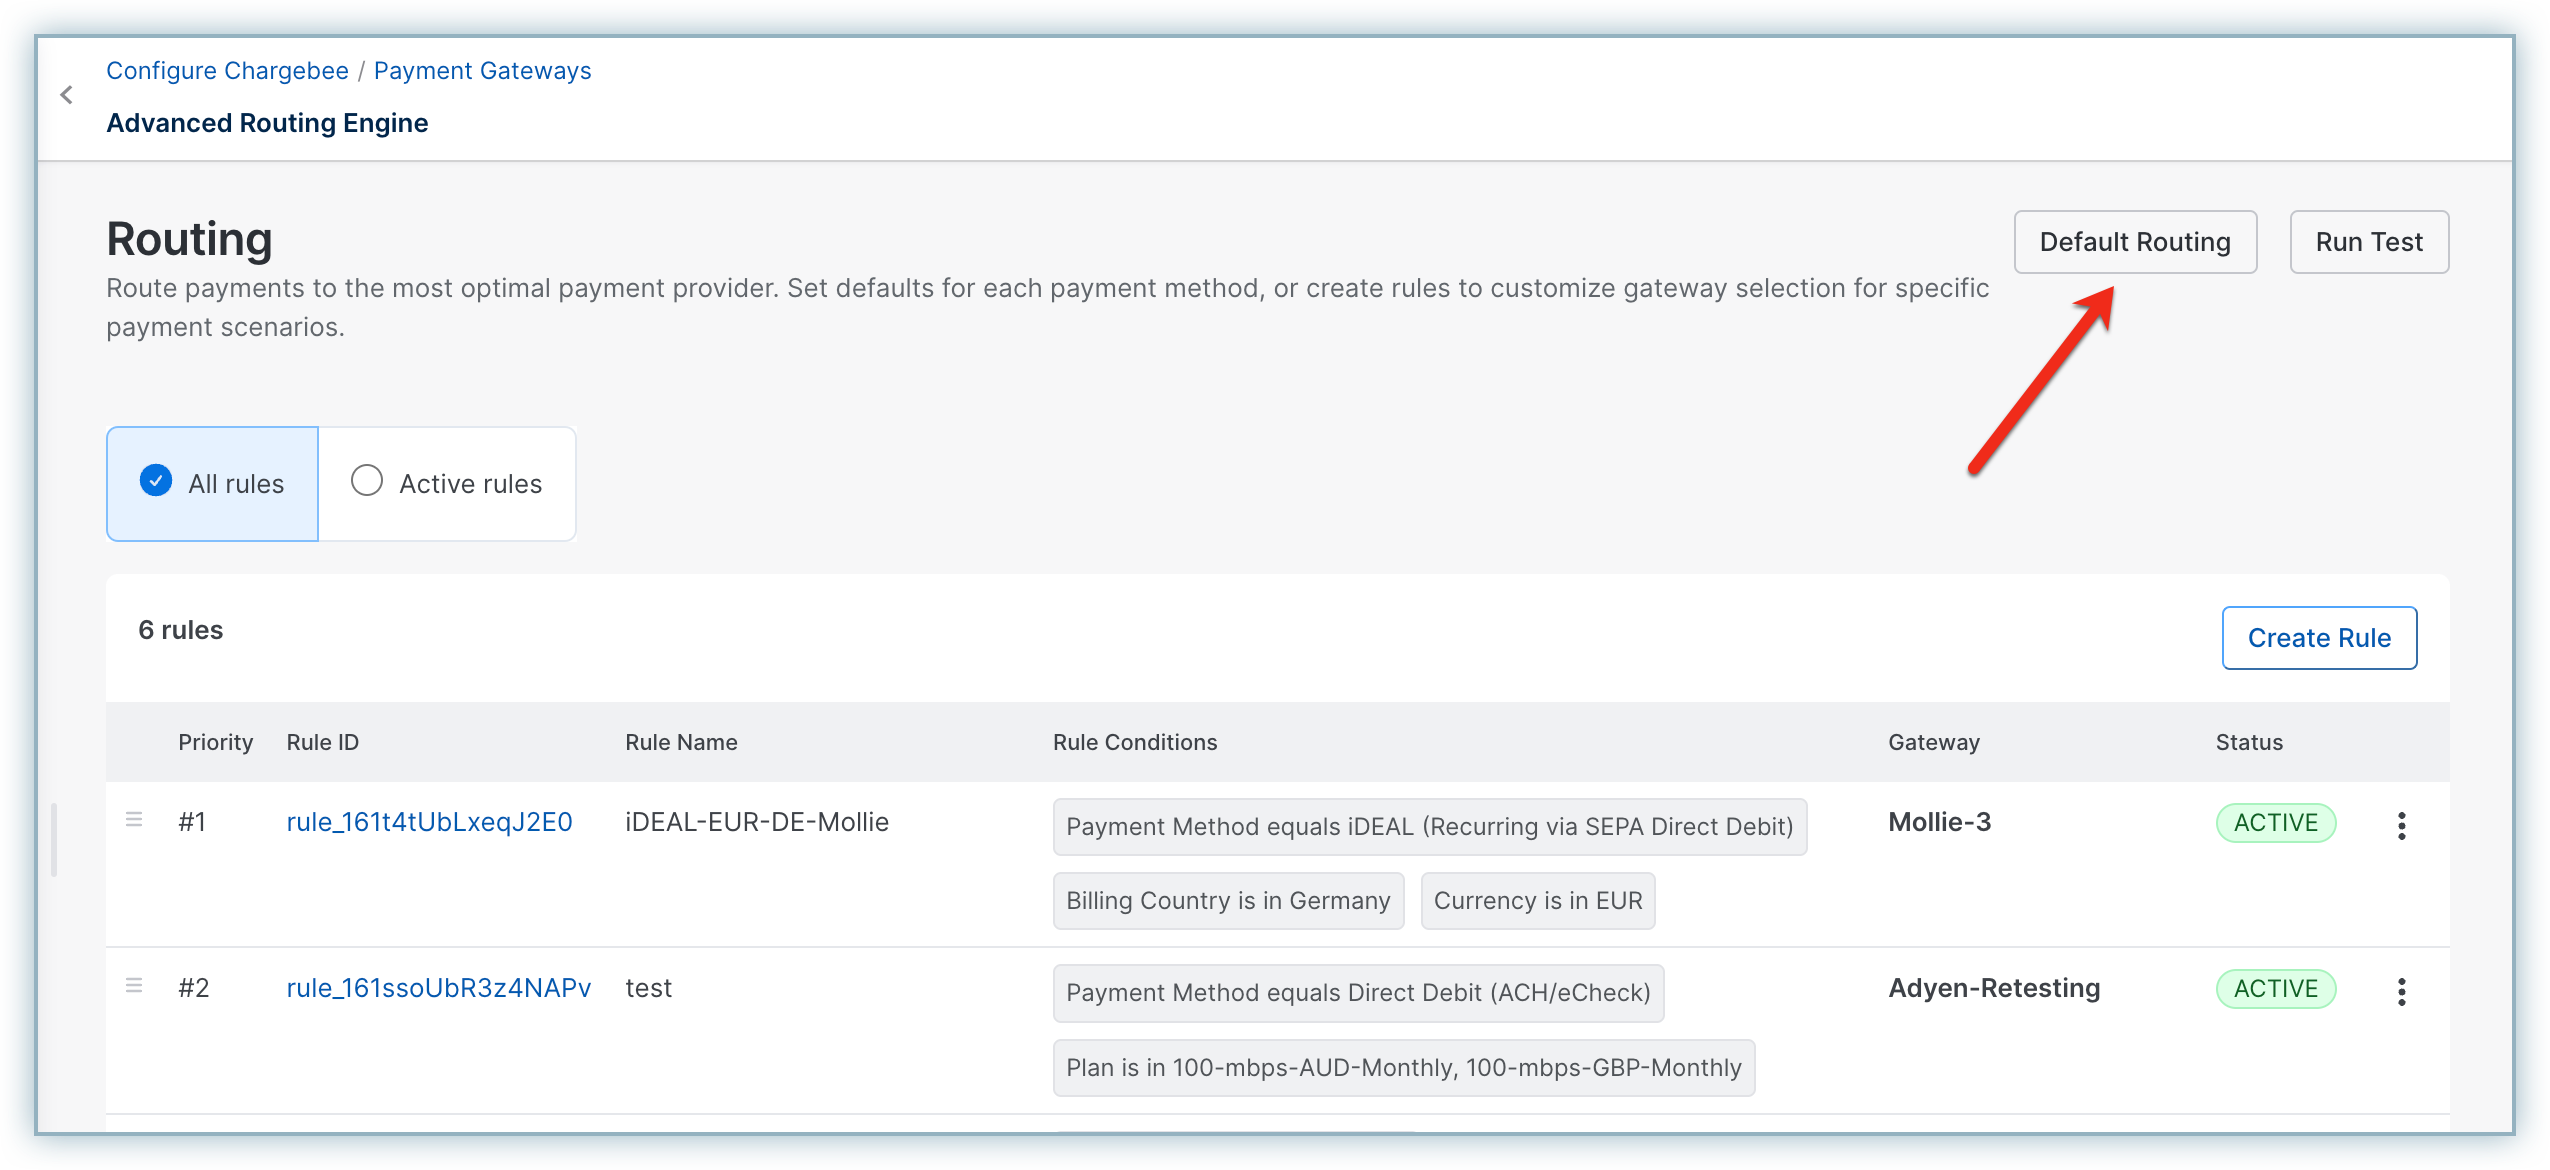
Using Default Routing, payments are routed to the most optimal gateway for each payment method. This step is very crucial as the configurations here will decide the safe default gateways to be used for different payment methods when none of the configured rules are matched. Default routing applies only when no rules are defined or if no rules match the payment scenario.
Follow these steps to configure Default Routing:
On the Routing page, click the Default Routing button.
Set a fallback gateway from the Primary Gateway drop-down for each payment method.
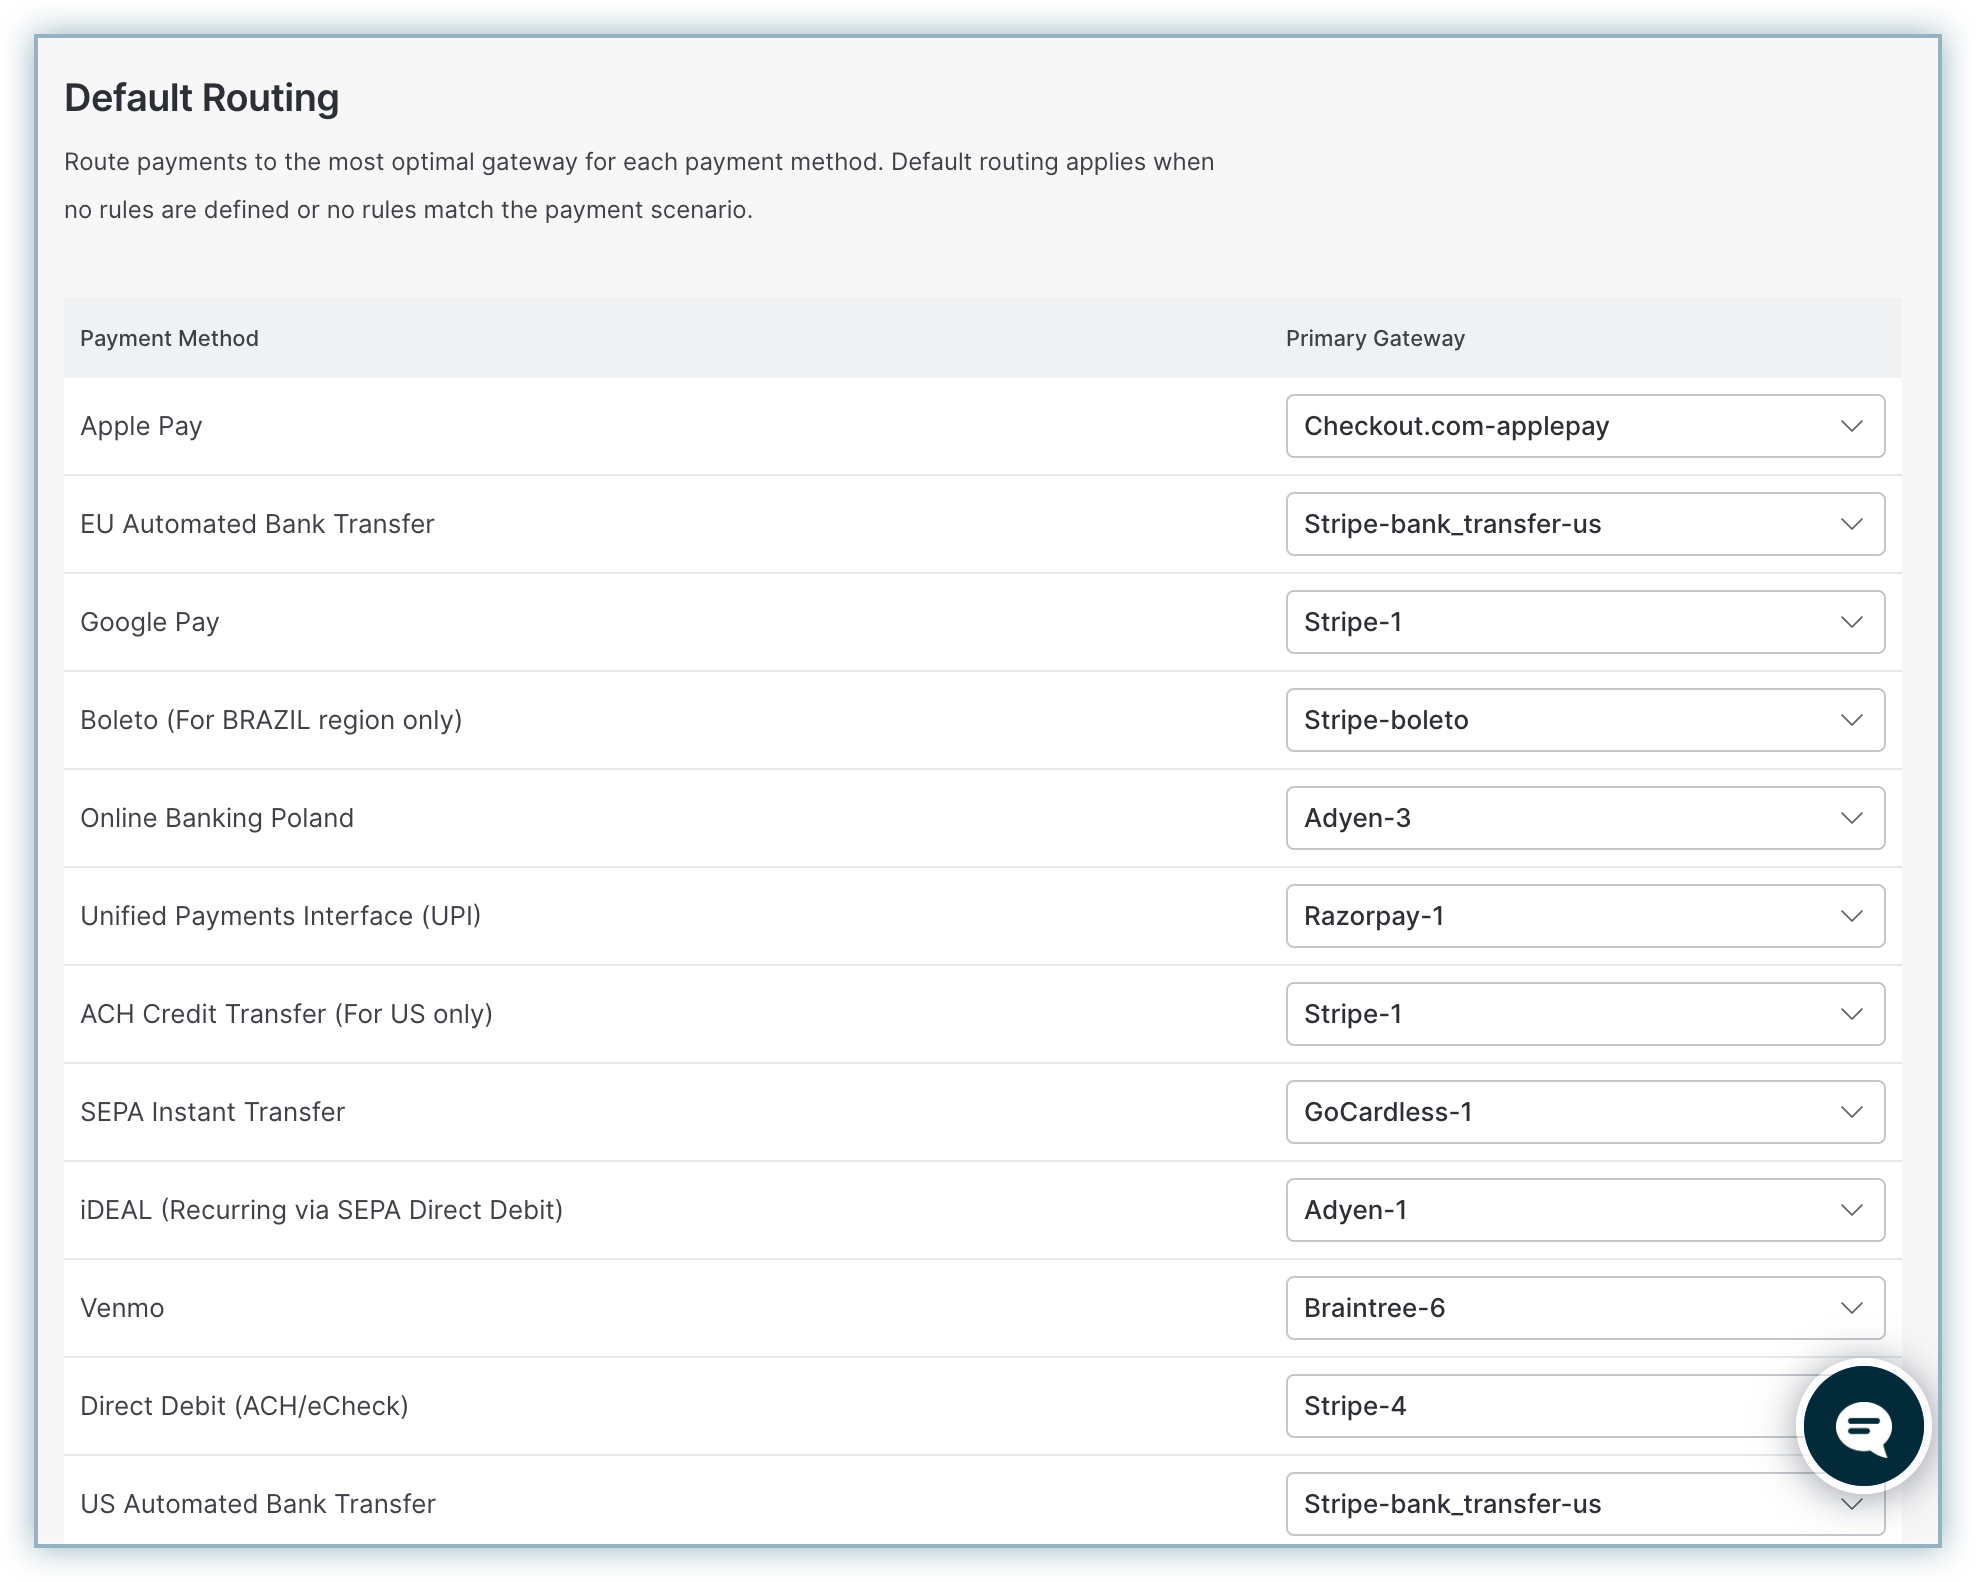
The first time defaults are set, your smart routing rules will be automatically migrated. Make sure to verify and validate the prefilled gateways and make modifications if required
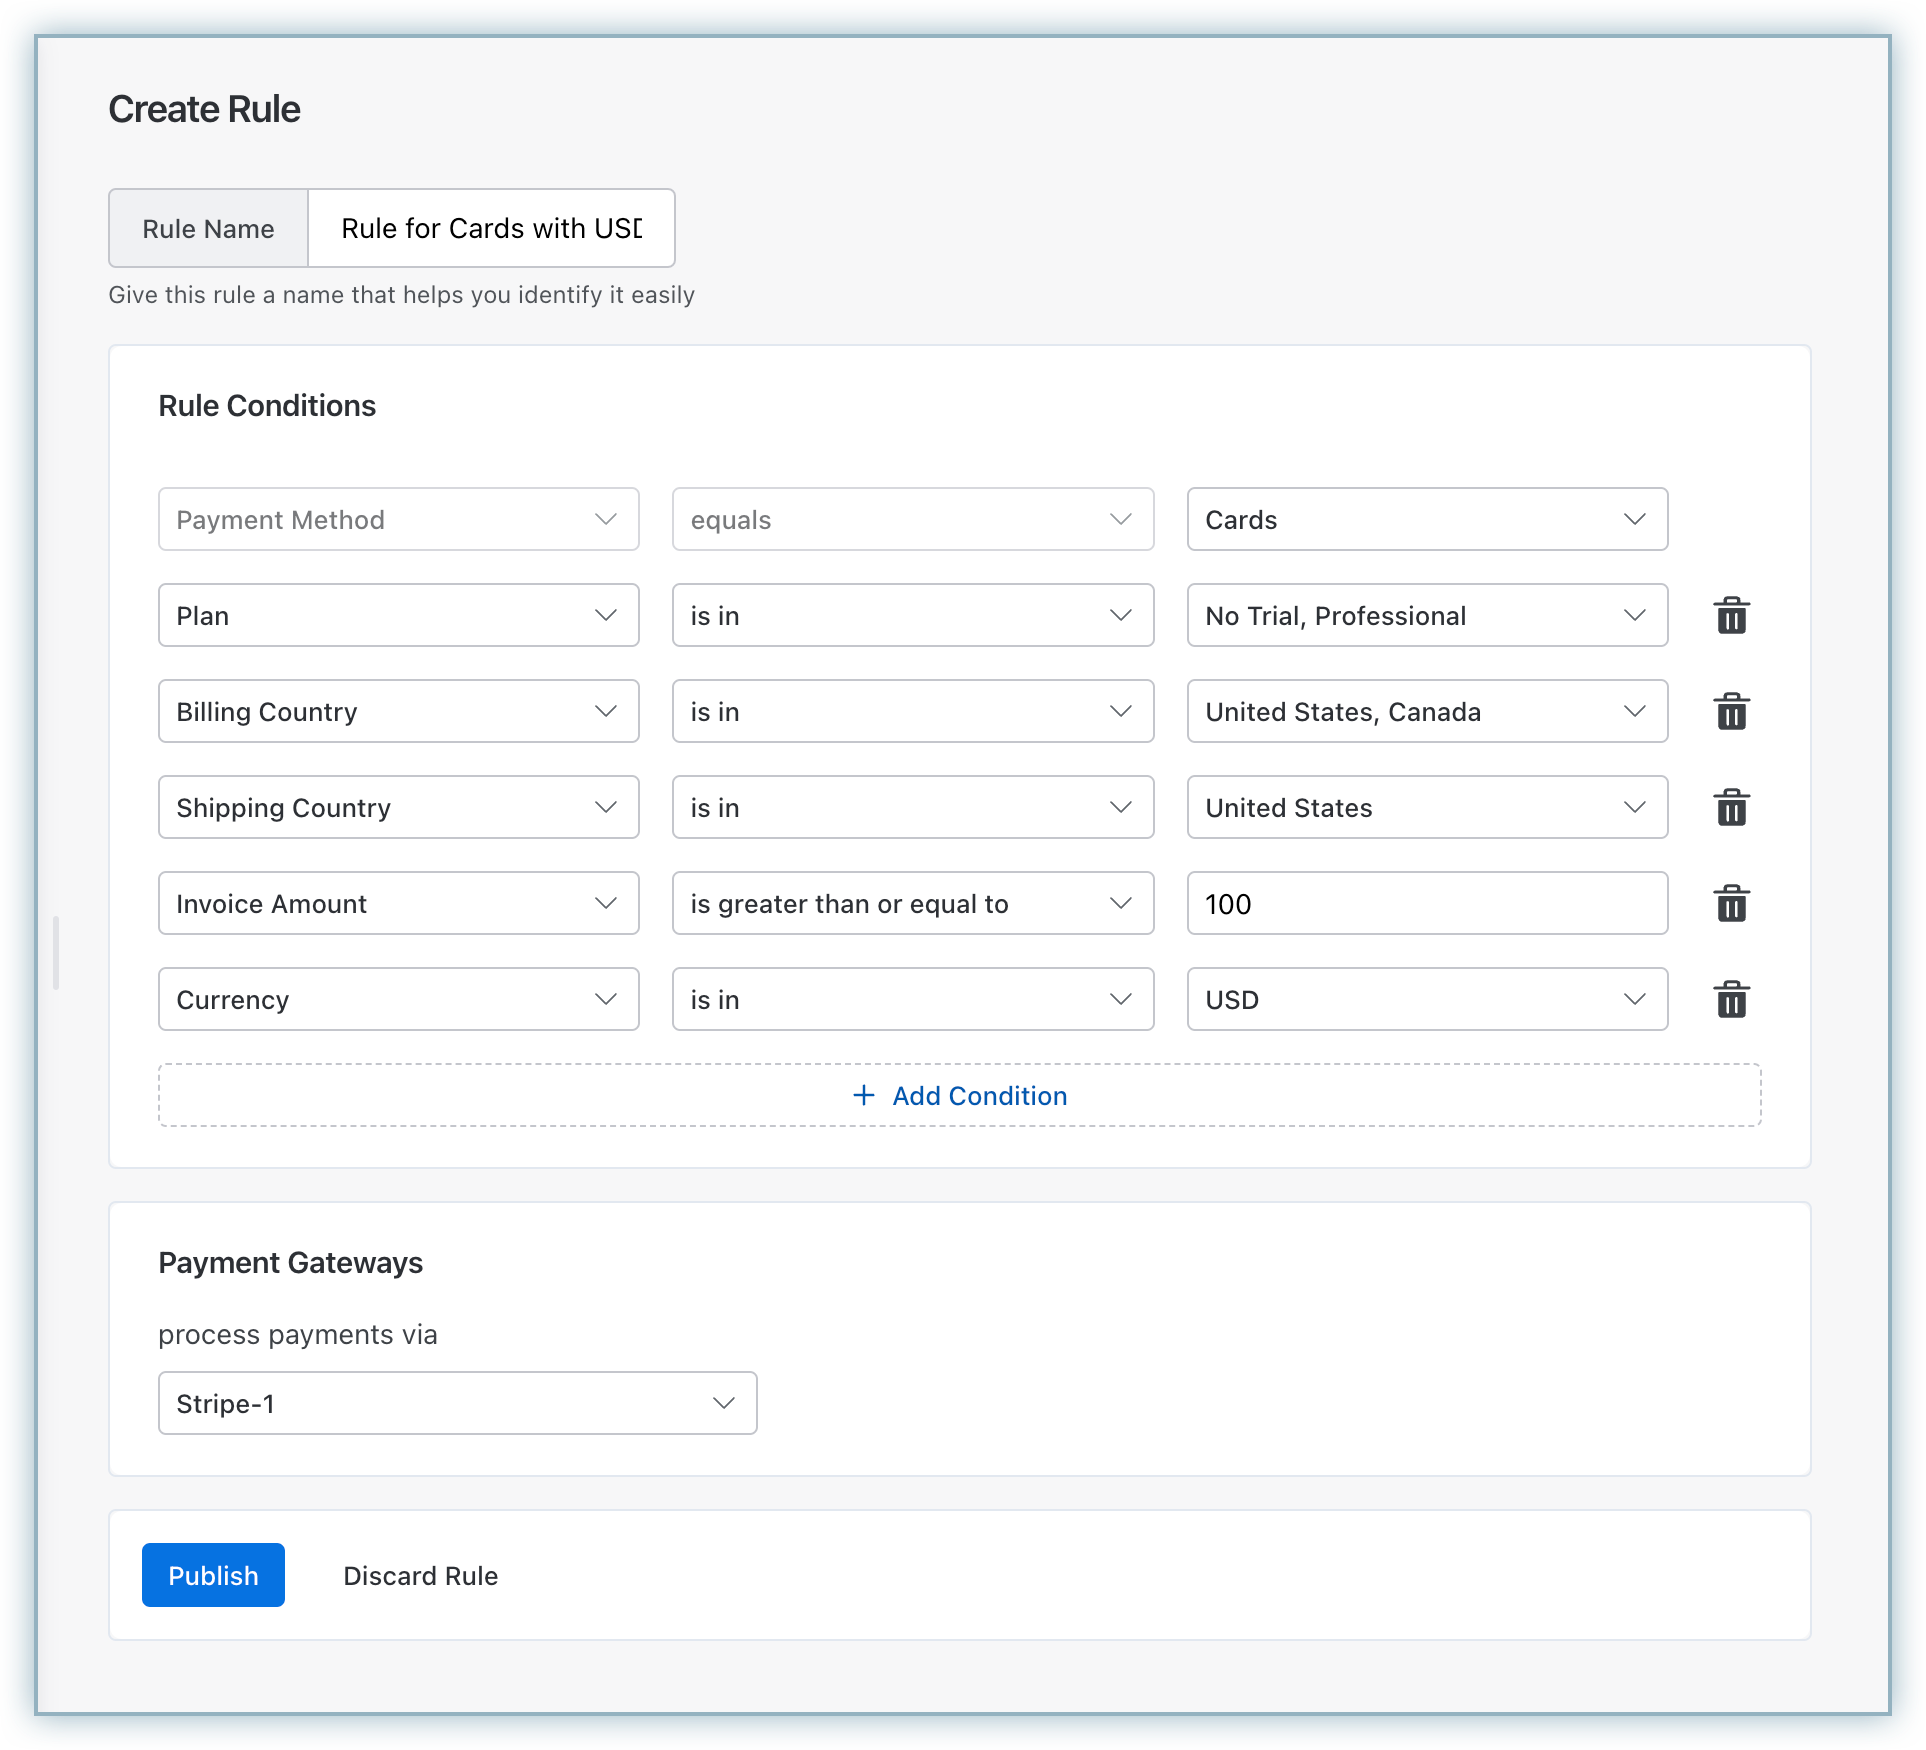
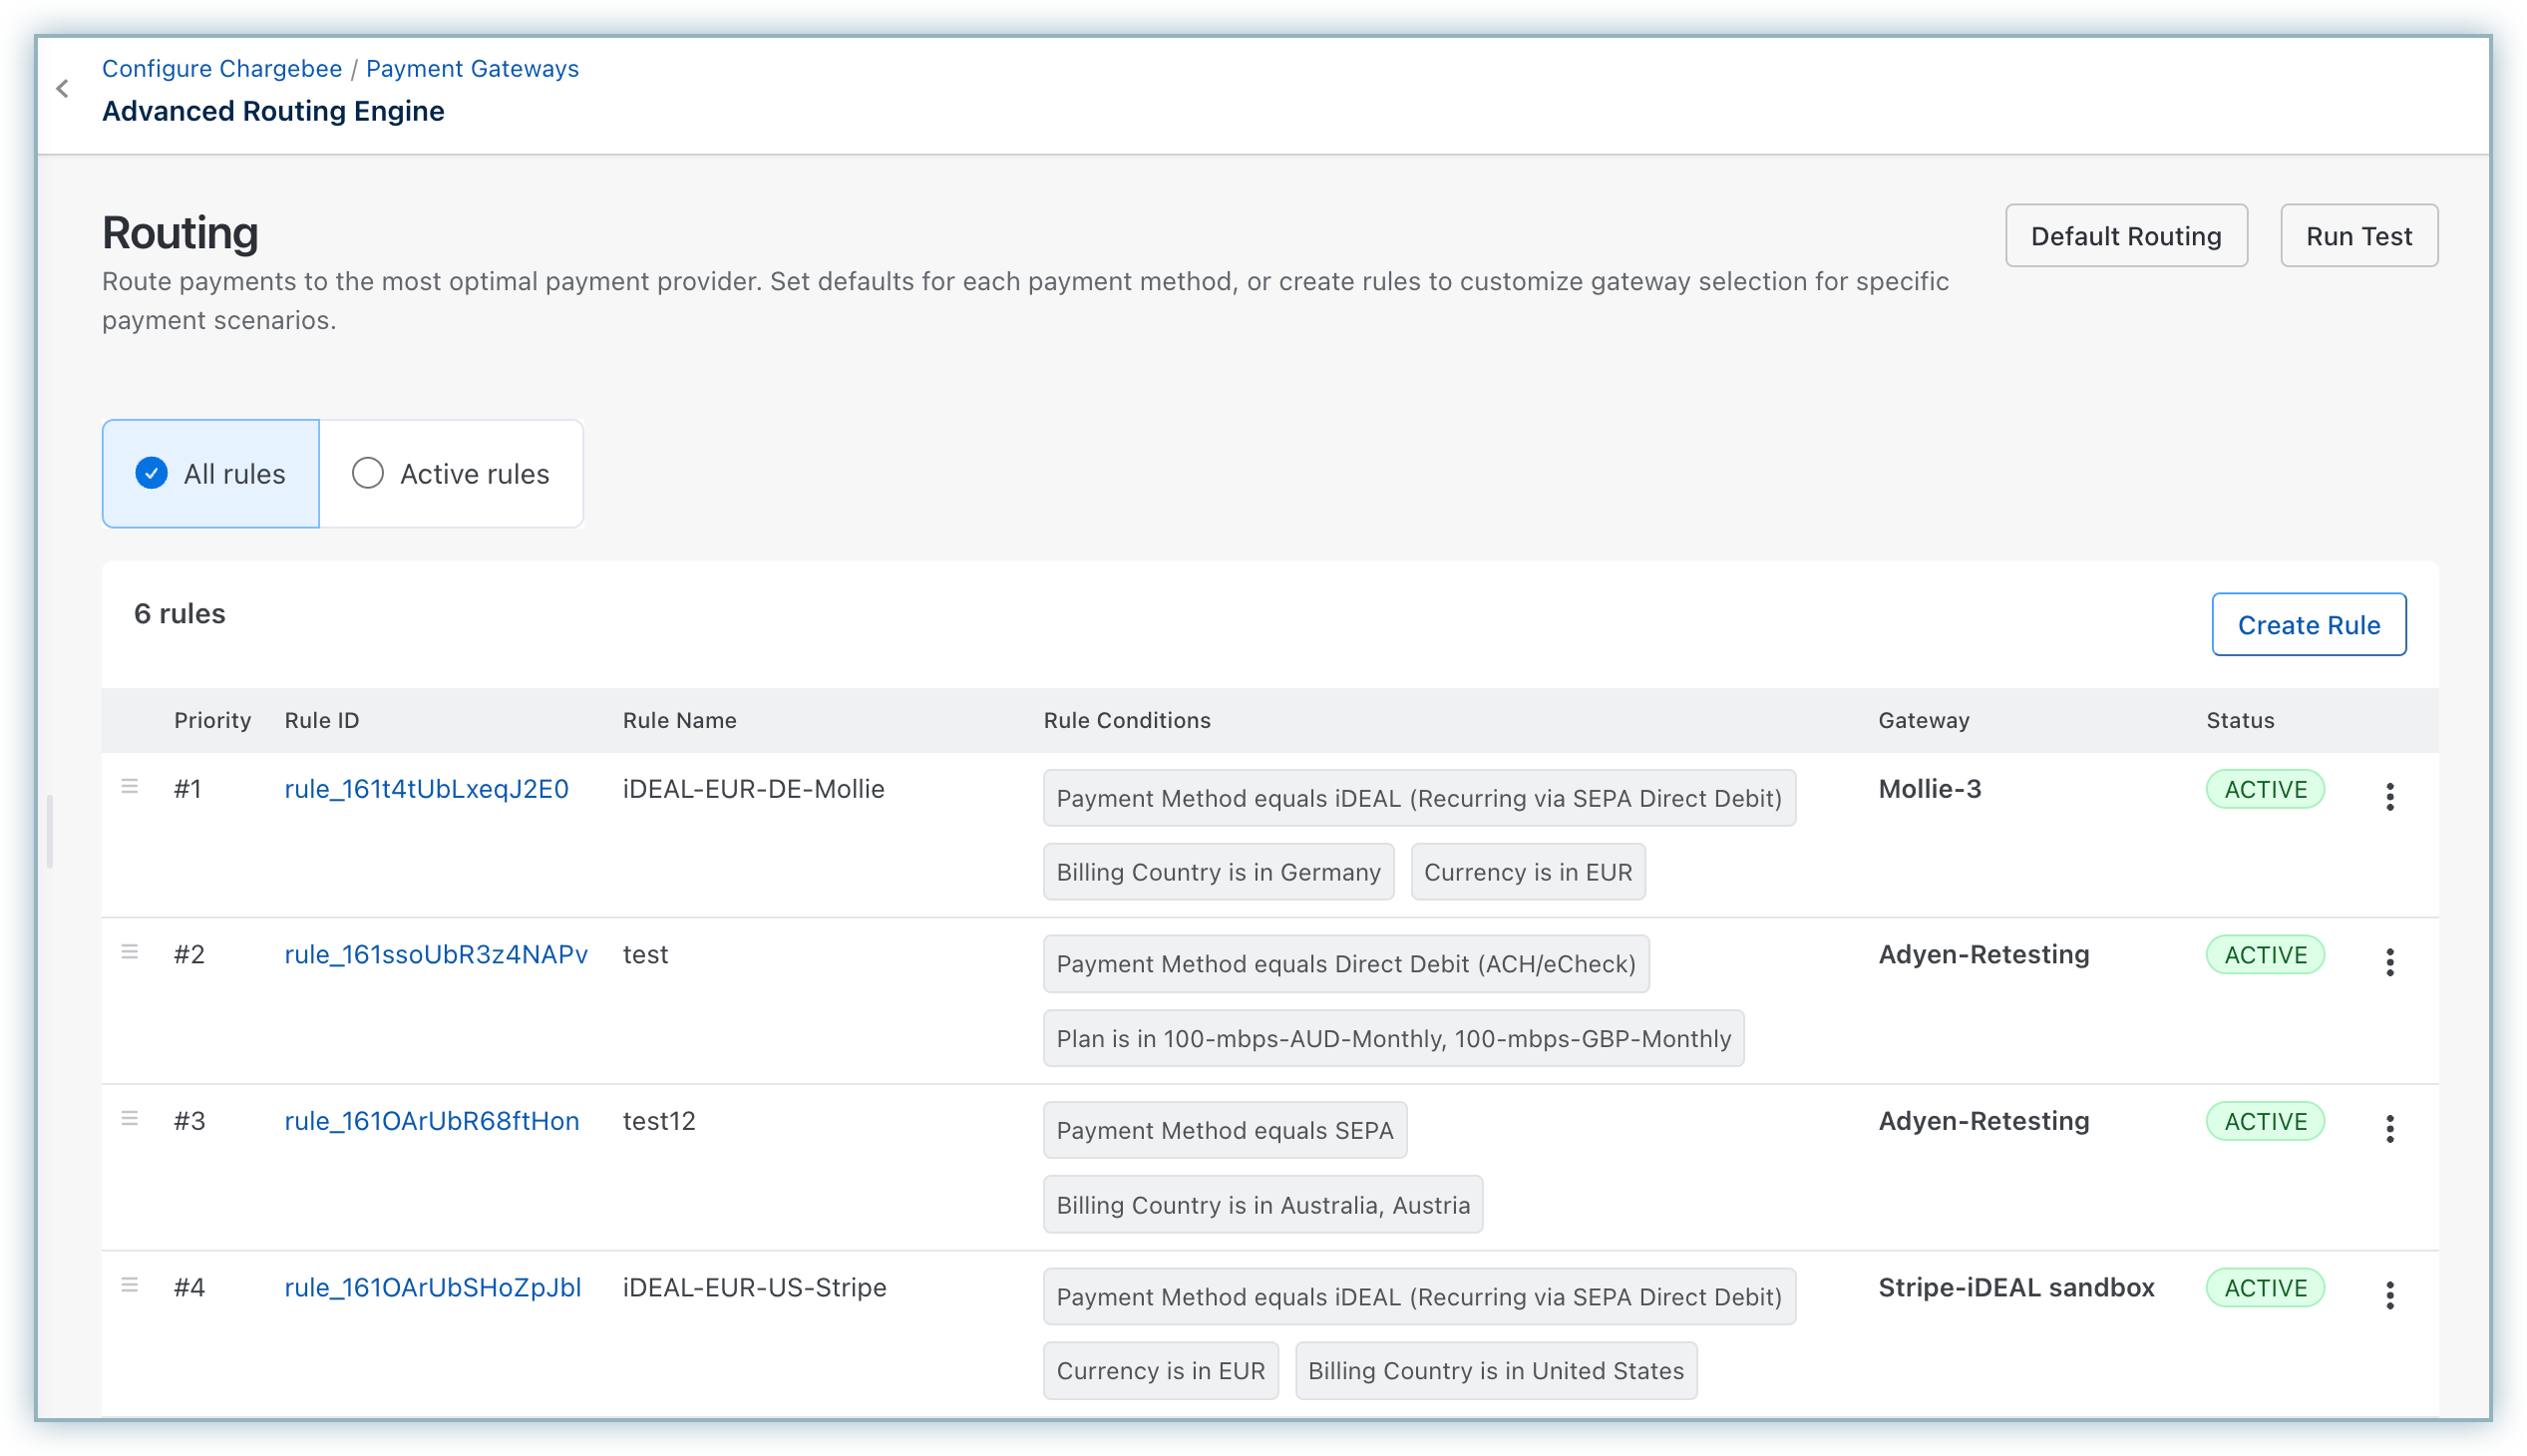
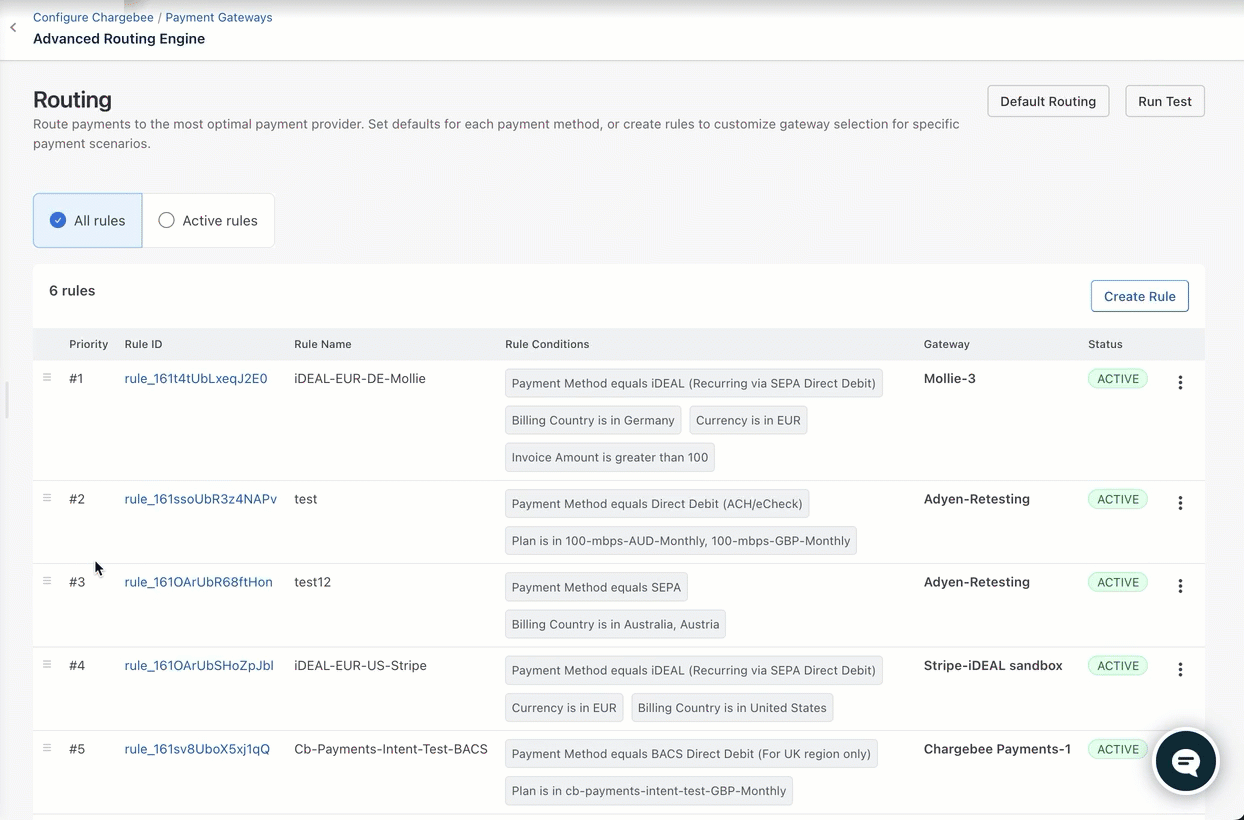
Creating a routing rule is crucial for customizing the routing strategy based on your needs. Advanced Routing allows you to add multiple conditions under a rule to achieve the required result. For example, a rule can be like: ???If the invoice amount is greater than 100 and the currency is USD, use Stripe payment gateway.???
Follow these steps to create a new rule:
All existing Smart Routing rules appear automatically under Advanced Routing rules. You can modify the existing rules to match your requirements. Please make sure to validate and verify the migrated rules from smart routing and make modifications if needed.
Click Create Rule on the Routing page.

On the Create Rule page, perform the following actions:
a. Add a Rule Name.
b. Add the required conditions such as Payment method, Plan, Billing Country, Shipping Country, Invoice Amount, and Currency.
c. Select the Payment Gateway.
Click Publish.
It is important that you check your Advanced routing rules and test them to see how they would behave during an actual checkout scenario. We recommend that you do this the first time you set up and activate Advanced Routing and later whenever you change the routing rules.
Once you've configured the defaults and advanced routing rules, you can activate Advanced Routing to apply it in Chargebee Payment Components. If needed, you can seamlessly switch back to Smart Routing at any time.
Once the advanced routing engine is activated, you can check the transaction page for details on which rule was applied for a particular transaction.

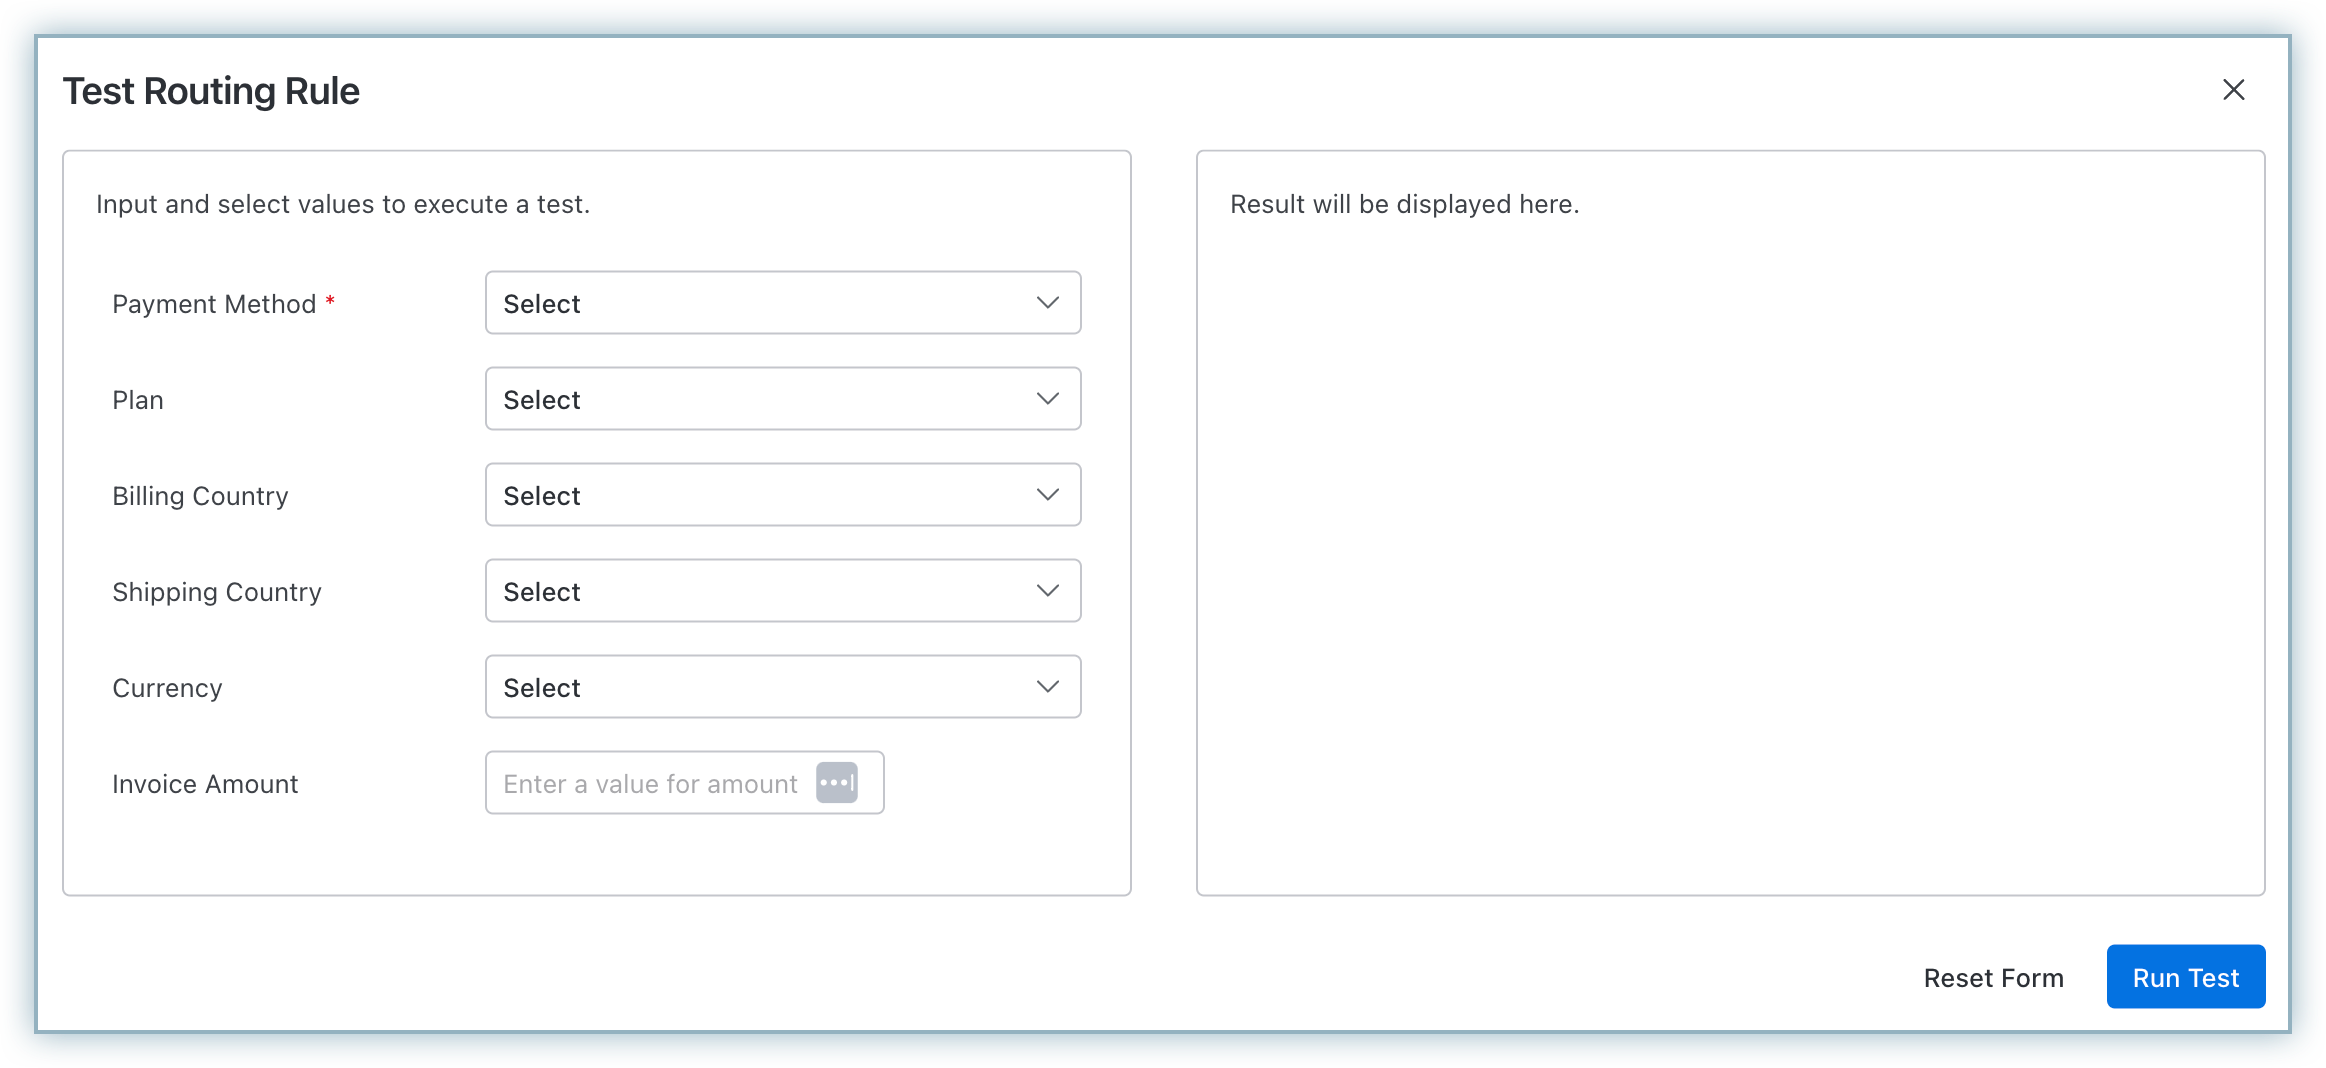
Before deploying a rule, it's essential to test it to ensure it meets your requirements and behaves as expected.
Follow these steps to run a test:
If the expected rule appears on the Result page, congratulations! Your rule is correctly configured.
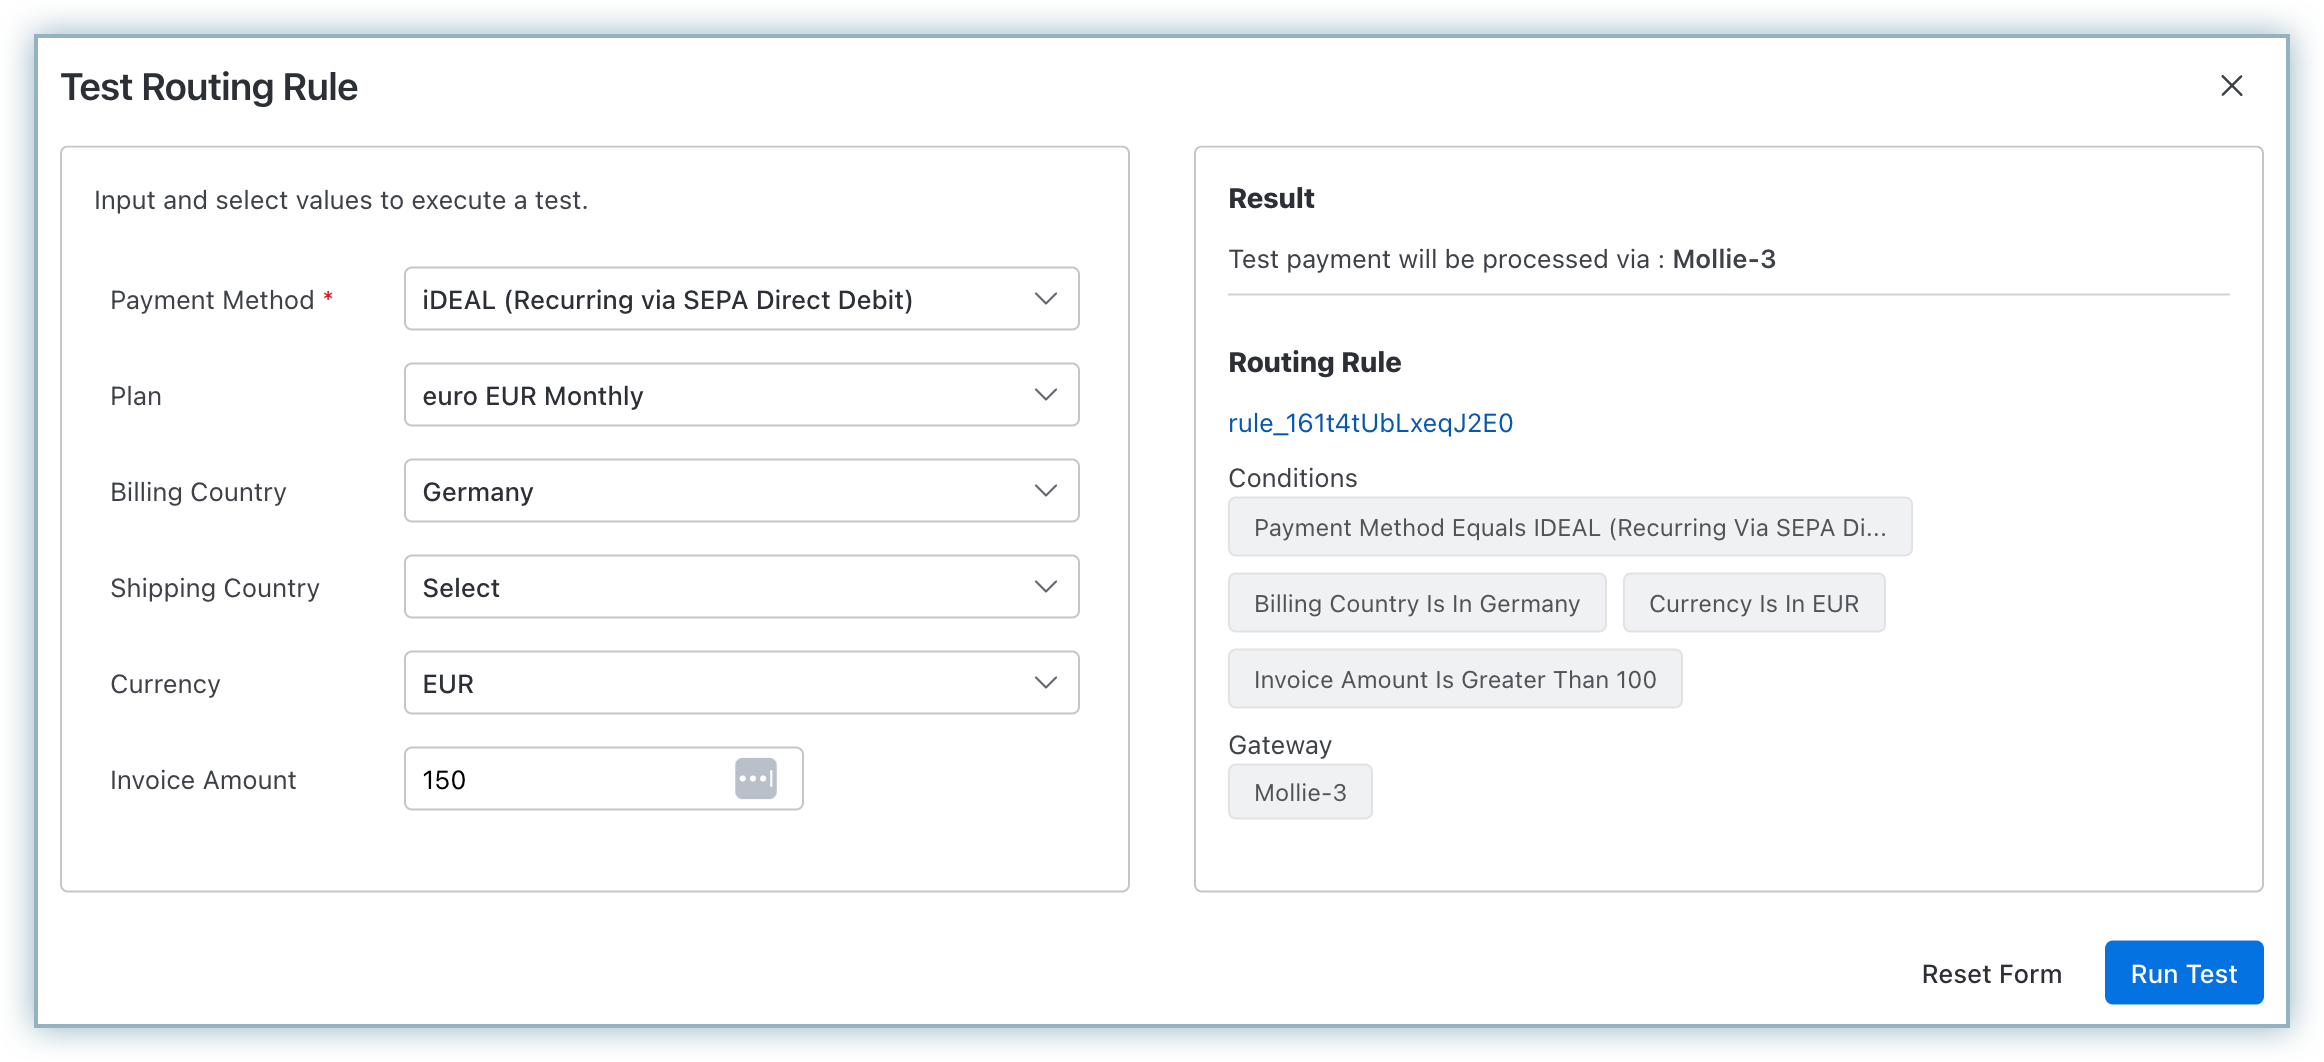
Let's walk through an example:
Suppose you've created a rule with the ID rule_161t4tUbLxeqJ2E0, which states:
"If the invoice amount exceeds ???100, the Payment Method is iDEAL, and the currency is EUR, then use the Mollie payment gateway."
To test this rule:
If the correct routing rule appears in the results???great! Your rule is working as expected. If not, close the Test Routing Rule pop-up, review the rule configuration, and test again.
You can manage routing rules with the following operations:
Edit, Enable, Disable, or Delete rules as needed. Click the ellipsis icon against a rule to perform these operations.

Set Priority Order: When rules overlap, the one with the highest priority is executed first. Adjust priorities accordingly. Click the hamburger icon next to the rule and drag it to the desired level. Publish the changes.
If you have any further questions or need assistance with Advanced Routing, please email Chargebee Support .


 Articles & FAQ