Certificate-Based Authentication - Migration Guide
Starting August 13, 2025, Cybersource will no longer support username and password authentication for SOAP toolkit users. To ensure uninterrupted service, Chargebee users must migrate to P12 certificate-based authentication by this date.
What is changing?
- Deprecated: Username/password authentication (SOAP toolkit).
- Required: P12 certificate-based authentication.
- Enforcement Date: August 13, 2025.
- Impact: API requests using username/password will be rejected.
Who is this for?
This guide is intended for Chargebee users who have integrated CyberSource as a payment gateway using the SOAP toolkit.
Migration Overview and Step-by-Step Guide
To switch to certificate-based authentication, you will need to:
- Generate a
.p12certificate from the CyberSource Business Center. - Extract the private and public keys.
- Update keys in your Chargebee settings.
Step 1: Generate a .p12 Certificate File
Follow these steps to generate a .p12 certificate file from the CyberSource Business Center:
- Log in to the Business Center.
- From the left navigation, go to Payment Configuration > Key Management.
- Click + Generate Key.
- On the Create Key screen:
- Select Simple Order API
- Click Generate Key
- Set a new password, confirm it, and remember it for later use.
- Download the
.p12file.
Learn more in this CyberSource document.
Note
The .p12 file contains your Simple Order API key. Ensure it is stored in a secure location with restricted access.
Step 2: Generate Your Private Key
Run the following OpenSSL command(it uses the password you entered when the certificate was generated in the Dashboard):
openssl pkcs12 -in <path_to_certificate_file> -nodes -nocerts -out <certificate_name>_private_key
This will generate a file *_private_key containing the :
-----BEGIN PRIVATE KEY-----
<Content of the private key in base 64>
-----END PRIVATE KEY-----
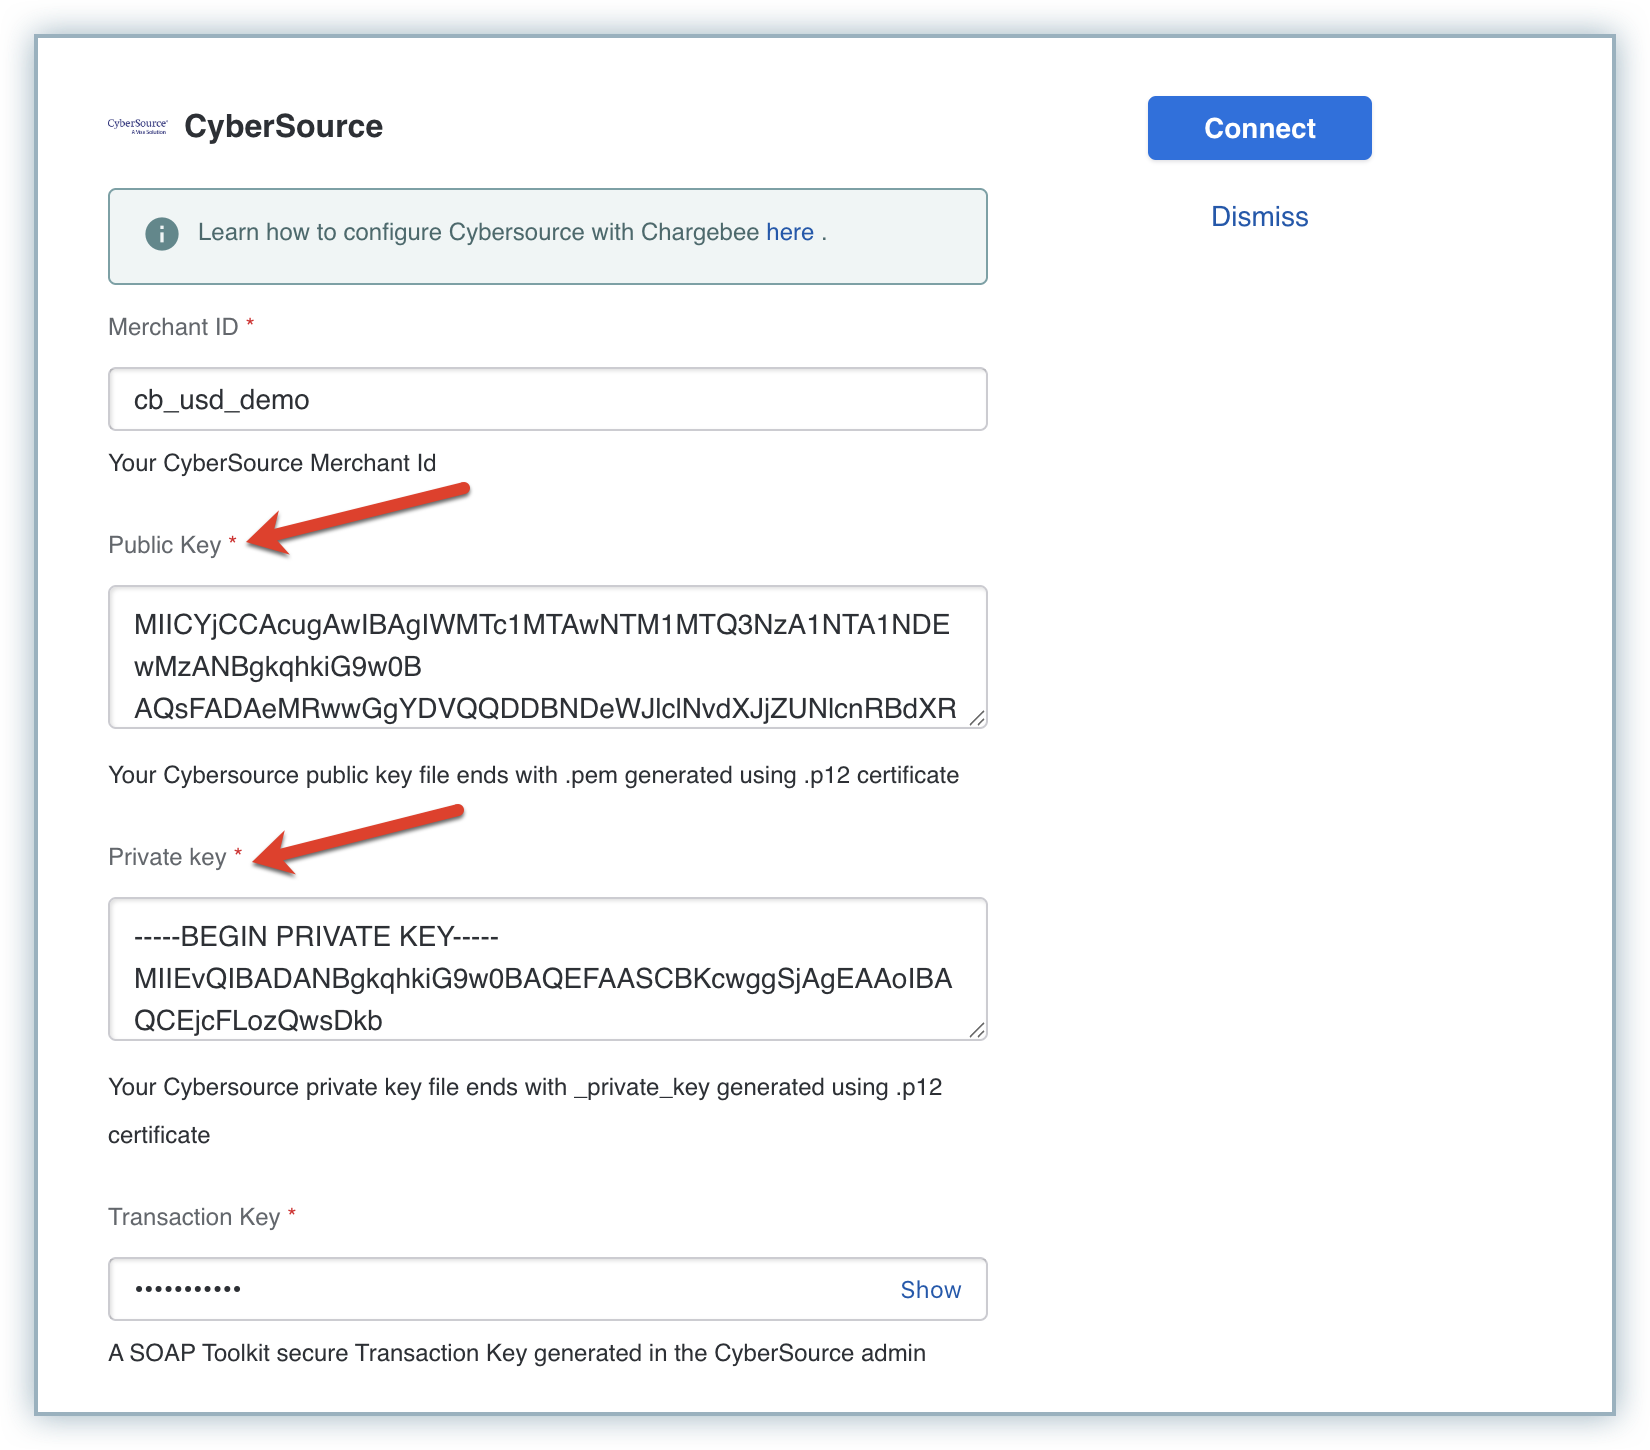
Use this entire content in Chargebee's Private Key field.
Step 3: Generate Your Public Key (Certificate)
Run the following OpenSSL command (it uses the password you entered when the certificate was generated in the Dashboard):
openssl pkcs12 -in <path_to_certificate_file> -clcerts -nokeys -out <certificate_name>.pem
This will create a .pem file with a block like:
-----BEGIN CERTIFICATE-----
<Content of the public key in base 64>
-----END CERTIFICATE-----
Use the base64 block alone for Chargebee's Public Key field.
Step 4: Add Keys to Chargebee
- Log in to your Chargebee Billing site.
- Go to Settings > Configure Chargebee > Payment Gateways.
- Click Cybersource > Manage.
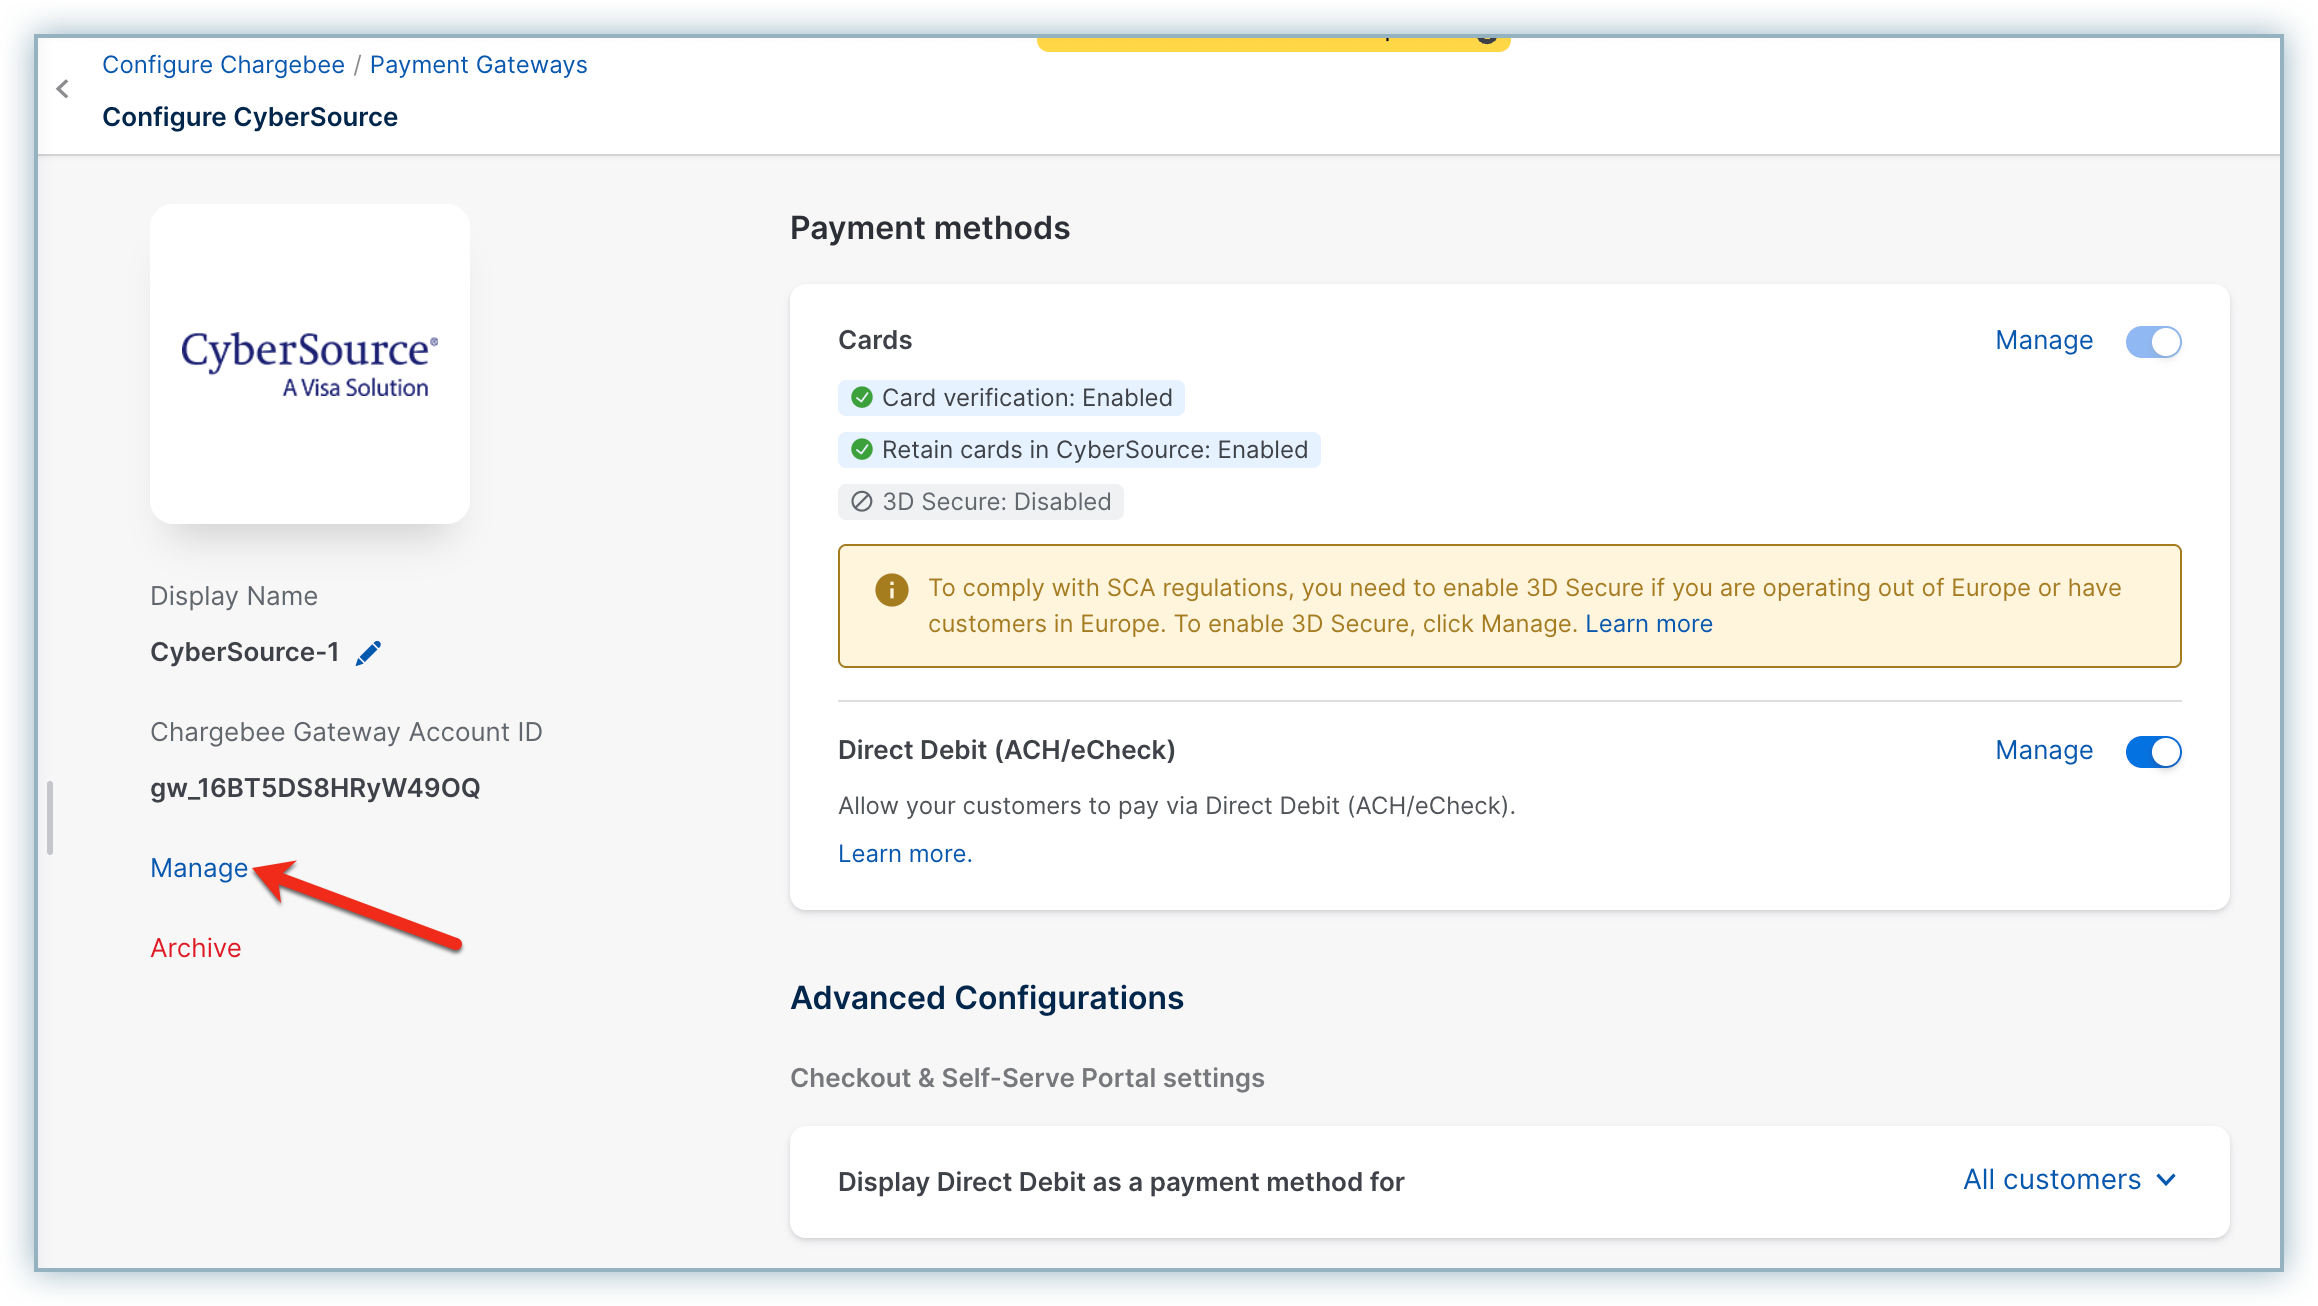
- Paste the Private and Public keys in their respective fields.
- Click Connect.
Deadline Reminder
You must complete this migration by August 13, 2025, to avoid authentication failures.
Additional Resources
Was this article helpful?