If you want to start accepting payments via ACH with Authorize.Net, you've come to the right place! This document will help you configure your settings on the Chargebee web interface and the Authorize.Net web interface so you can get your direct debit payments up and running ASAP.
To be able to accept ACH payments using Chargebee,
You must be a US based merchant selling to customers in the US.
You must have an Authorize.Net account configured in Chargebee
Your account must be enabled for eCheck.Net processing by Authorize.Net
Authorize.Net ACH is only supported on Single page Checkout when used with the Minimal, Elegant or Inspire themes. It does not work with Chargebee's Rhapsody theme.
After configuring your Authorize.Net account with Chargebee and once your Authorize.Net account has been enabled for eCheck.Net processing, follow these steps to configure ACH Payments in Chargebee.
Allowing customers to pay via their bank accounts
Go to your Configure Authorize.Net gateway page, and enable the Allow customers to pay via their bank accounts option.
Authorization:
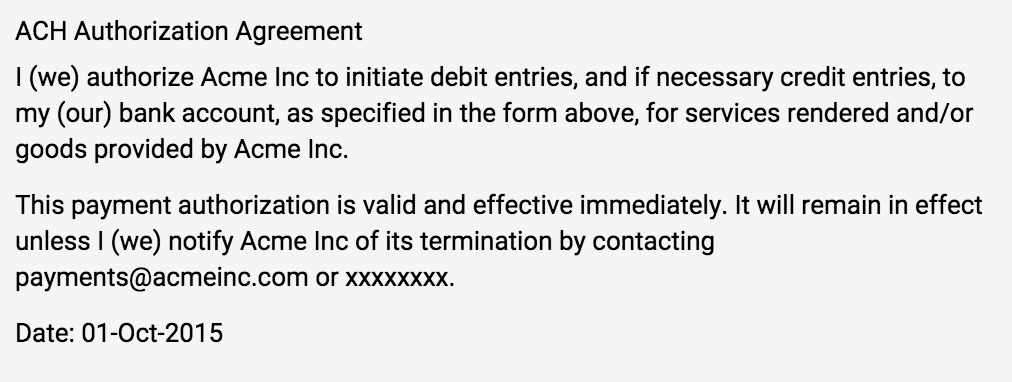
National Automated Clearing House Association (NACHA), as well as federal legislation mandate that you should have an Authorization Agreement with your customer to charge their bank account. When customers choose to pay via their bank accounts and enter their bank account information, an authorization agreement is displayed by Chargebee.
A sample Authorization Agreement is as shown:

Enter the name, email address, and phone number that you'd want to be displayed in the Authorization Agreement.
Once this is done, you can start collecting payments via ACH.
Finally, you need to enable an option in the Customer's profile to allow them pay via their bank account.
When customers choose to pay via ACH, they will have to provide their bank account information.
The following information is captured as part of an ACH transaction:
You can also use the API to collect the bank details from the customers. Refer this link to learn more.
After customers accept the Authorization agreement, and confirm their payments, Chargebee initiates a payment by routing this order information to Authorize.Net.
After performing certain basic validation checks on the transaction, the information is taken as an ACH request.
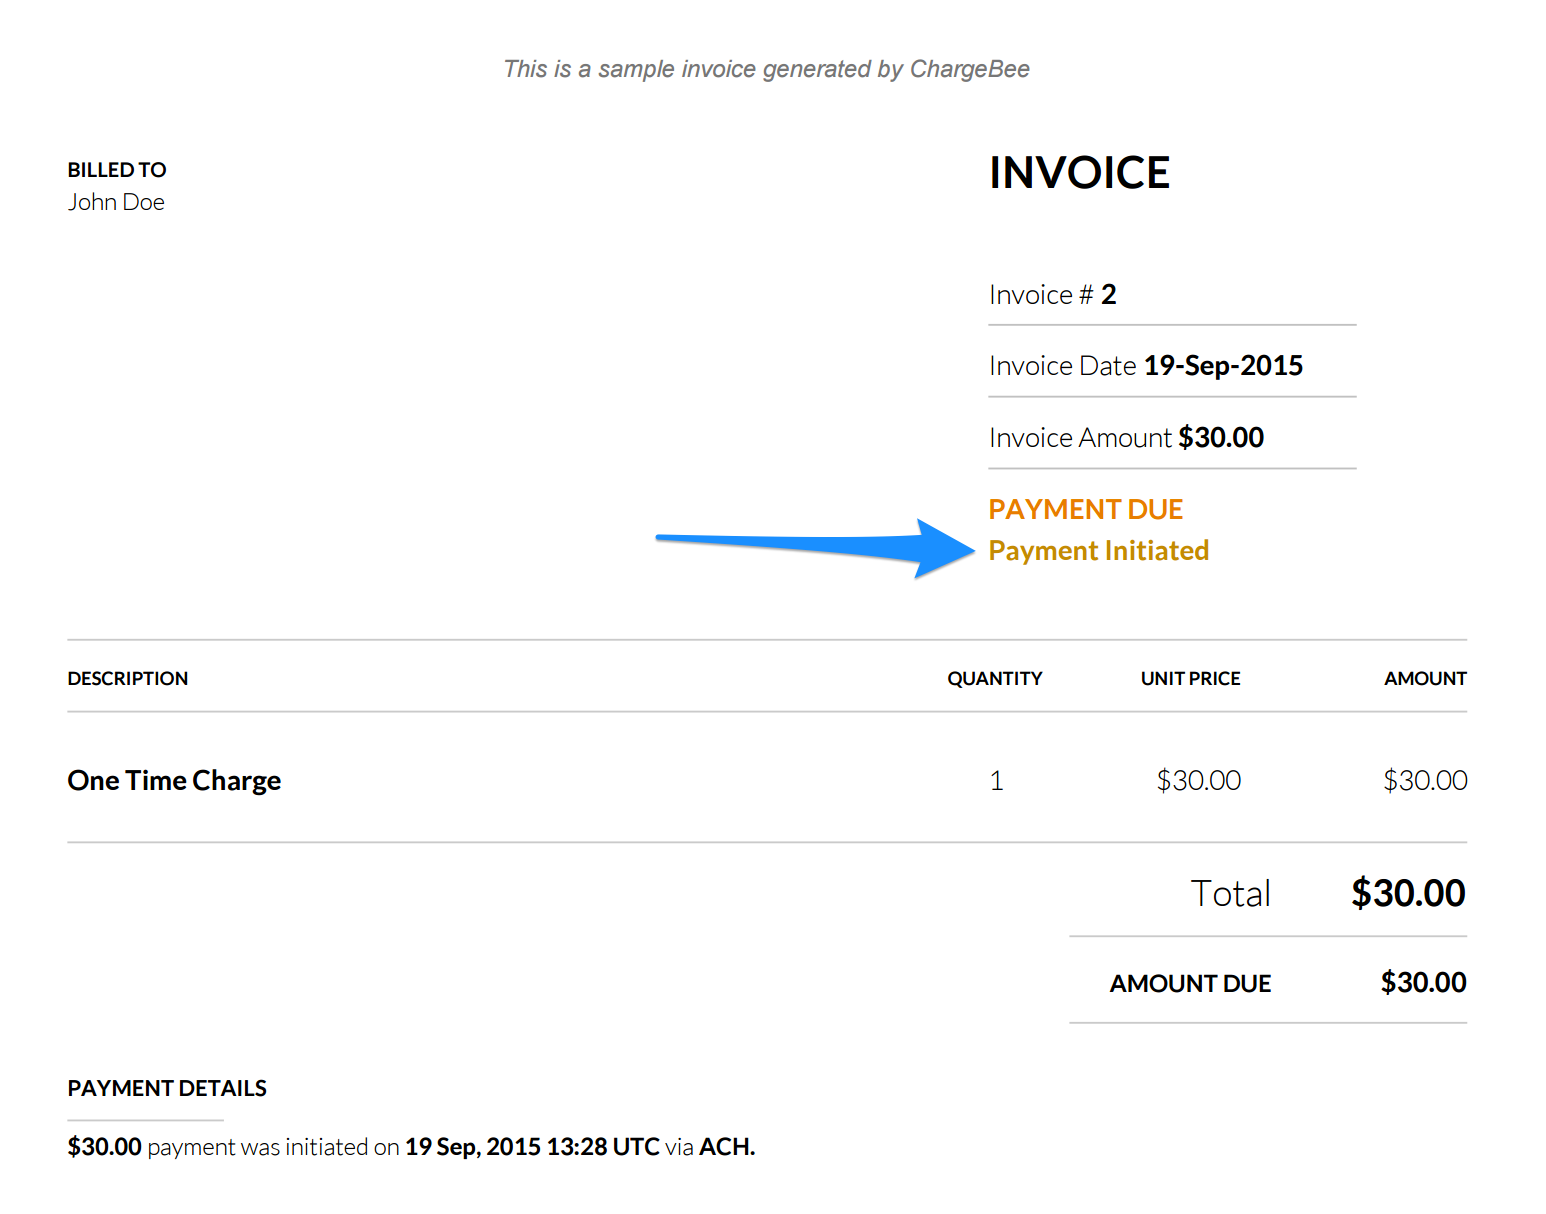
When the transaction is accepted, Chargebee generates a Payment Due invoice with the tag Payment Initiated as shown:

After the funds are transferred from the customer's bank account and the payment is received, the invoice is marked as Paid.
If the payment fails, due to certain errors such as insufficient funds, the invoice is marked as Not Paid and payment must be retried or collected using an alternate method.
If there are three consecutive payment failures using the direct debit payment method, it will be marked as invalid in Chargebee. In such cases, you should remove the existing payment method and ask your customer to add a new one.
You can add or update the bank account information of an existing customer in the following ways:
Via the Web Interface
In the Payment Method Details section for a customer of the Customer Details page, use the Add Bank Account option, you can add the bank account information on behalf of your customer.
This option is available only if a payment method is not present for the customer.
Via the Customer Portal
Customers can update their bank account information by logging in to their customer portals. They can make use of this option only if you have enabled the customer portal for them.
Via Hosted Pages
Customers can add/update their bank account information via the following hosted pages:
Customers can pay via their bank accounts (via the hosted pages & customer portal) only if you enable the option for them.
Three types of email notifications are available for ACH payments:
Payment Initiated: To inform customers that a payment has been initiated via Direct Debit from their bank accounts.
Refund Initiated: To inform customers that a refund has been initiated towards their bank account.
Payment Failure: To inform customers that their payment has failed.
Additionally we would strongly recommend you enable the Subscription Renewal Reminder notification, as customers have to be given an advance notice before they are charged via Direct Debit.
You can also configure the Invalid Payment Method notifications to inform your customers about card expiry or payment failure.
You can setup these notifications by clicking Settings > Configure Chargebee > Email Notifications > Invalid Payment Method.
Unlike card payments, where the authorization and transfer of funds happens immediately, the authorization and transfer process has a waiting period for payments via ACH. Settlement takes about 3 working days in total.
In case the payment fails during the renewal, Authorize.net will notify Chargebee of this. Chargebee will then try to charge the customers, if dunning has been enabled. In cases where payment has not been collected or dunning is disabled the final action set in the Dunning settings will take place. Read more on Dunning.
The payment method will be marked as Invalid after 3 consecutive payment failures.
How is the waiting period handled in Chargebee?
Chargebee waits until 3 days to check the status of the transaction. After 3 days, Chargebee updates the status of the transaction as success or failure based on the input from Authorize,net. Sometimes despite the transaction being marked as settled in Authorize.Net, there are chances of an ACH return. Therefore, Chargebee checks in periodically with Authorize.Net to see if there are any returns (between 7-15 days). In cases of failures, Chargebee records an offline refund and marks the Invoice as 'Not Paid'. Payment can be collected for that invoice again.