Bulk action to extend the trial period by a few days/months from the Subscription Index page
Problem Statement
This article helps you understand bulk action to extend the trial period by a few days/months from the subscription index page.
Solution
Summary
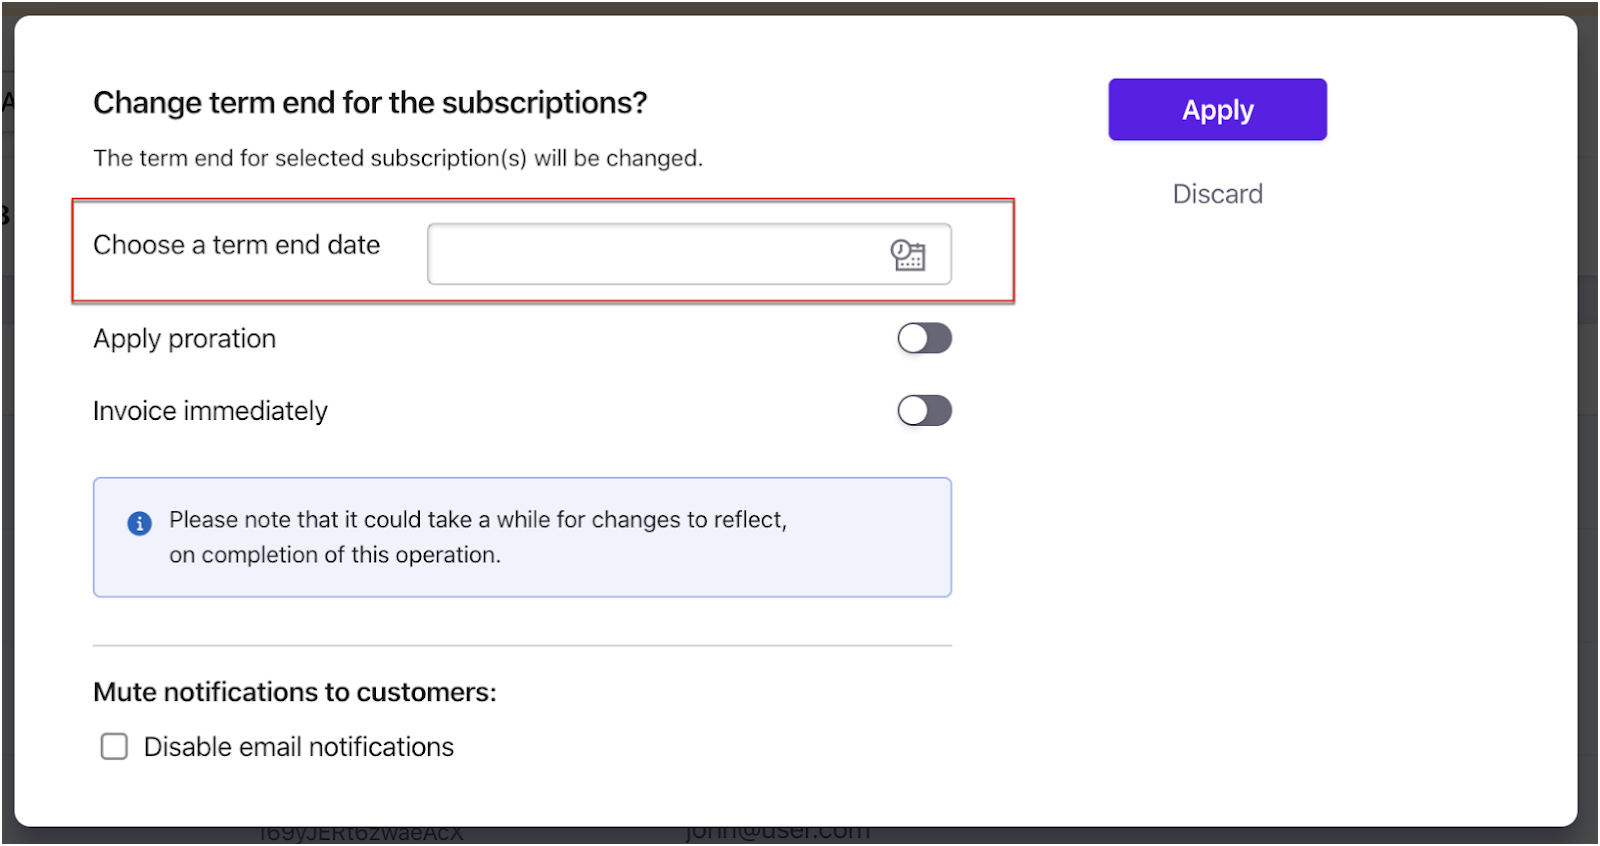
When you have multiple subscriptions, where you need to extend your customer's trial period by changing the trial-end dates you can use the "Change term end" action (for the subscriptions that are currently in trial status) to set the new trial-end date.
Earlier the export data format and import data format varied which involves a lot of manual intervention. With the new enhanced Export file option, you can either export a file using Download Data or use Download import-friendly file from Settings > Import & Export Data > Product Catalog. Refer to this link for more information. Refer to this link for more information.
To Change the next billing date. Follow the steps below.
-
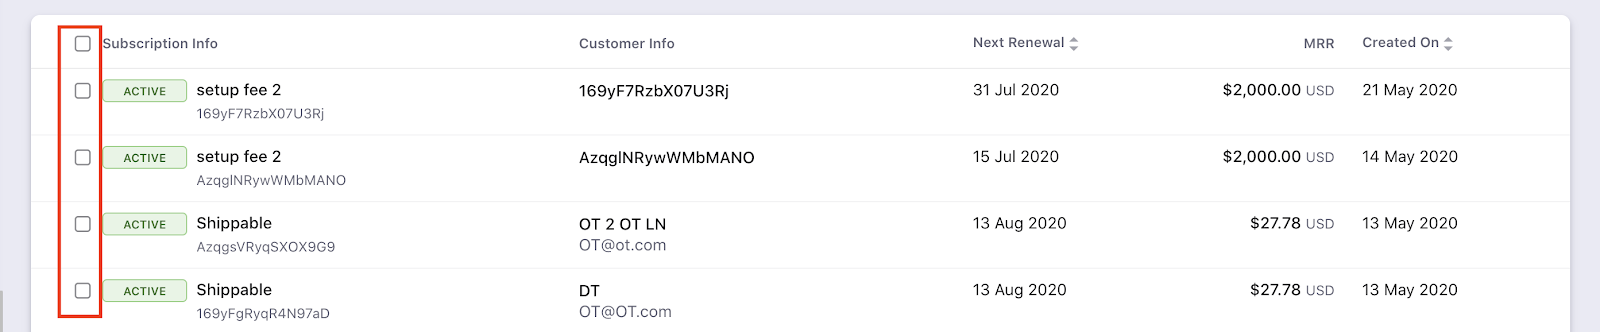
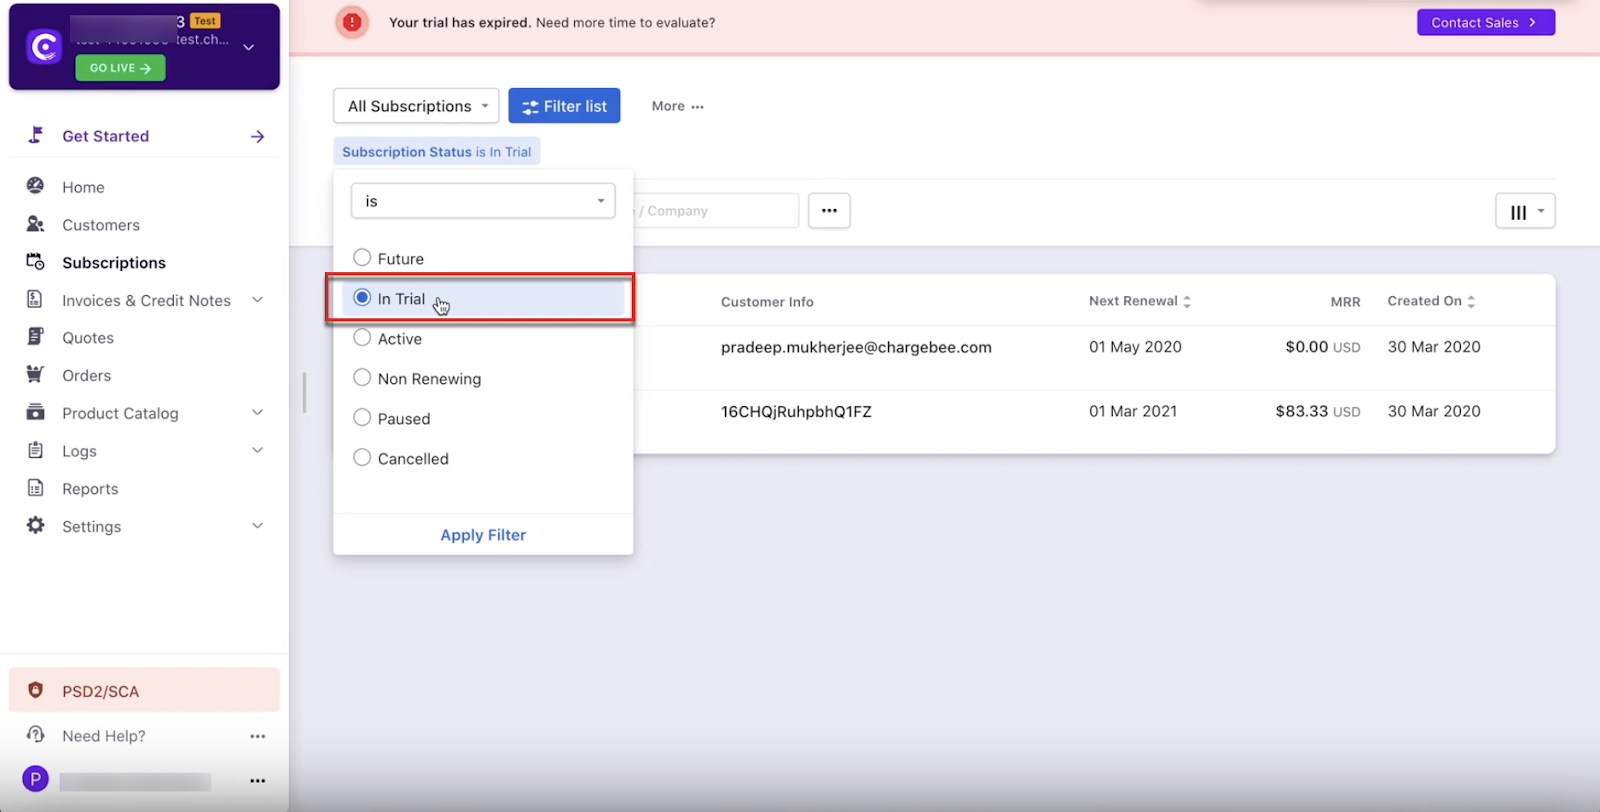
List the right set of Subscriptions "You can use your filters to get the right set of customers."
-
Click the checkbox to the left.
-
Click "Change term end" to the top of the page.
To send your customers an email notifying them of the change in their subscription, you can follow the below steps.
Go to Settings
Configure Chargebee
Email Notification
Custom Emails
Add Notification
Subscription index page
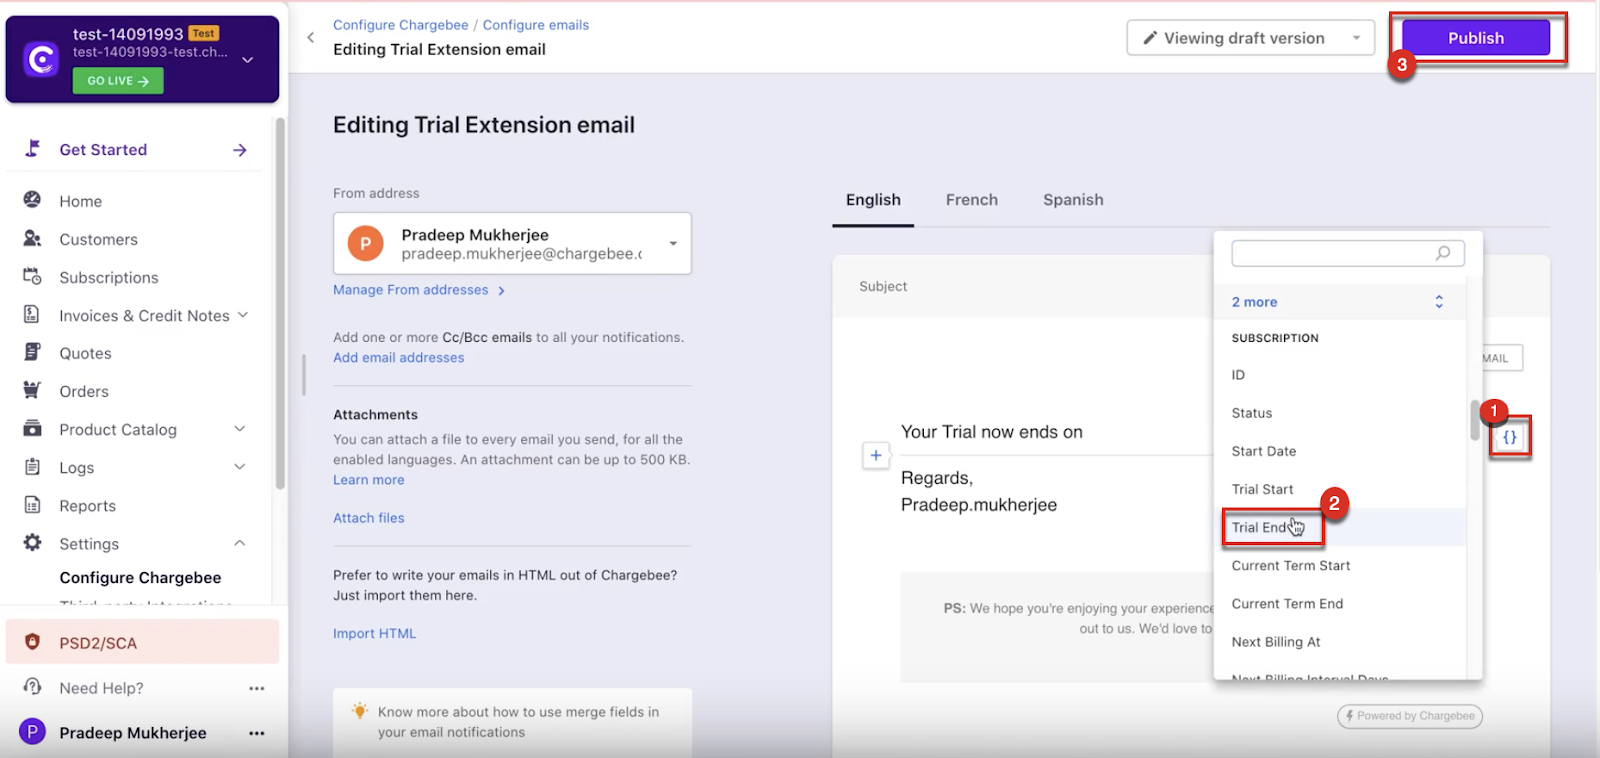
Set the name to Eg-Trial Extension Email
Click Add Notification.
You can customize the email merge-var function to automatically populate the trial end date and related subscription information for your customer.
To do this, click the "+" icon to the left and add a text field. Now click the "" icon to the right to select the Merge-Var you require.
Once you are done your email is ready to go.
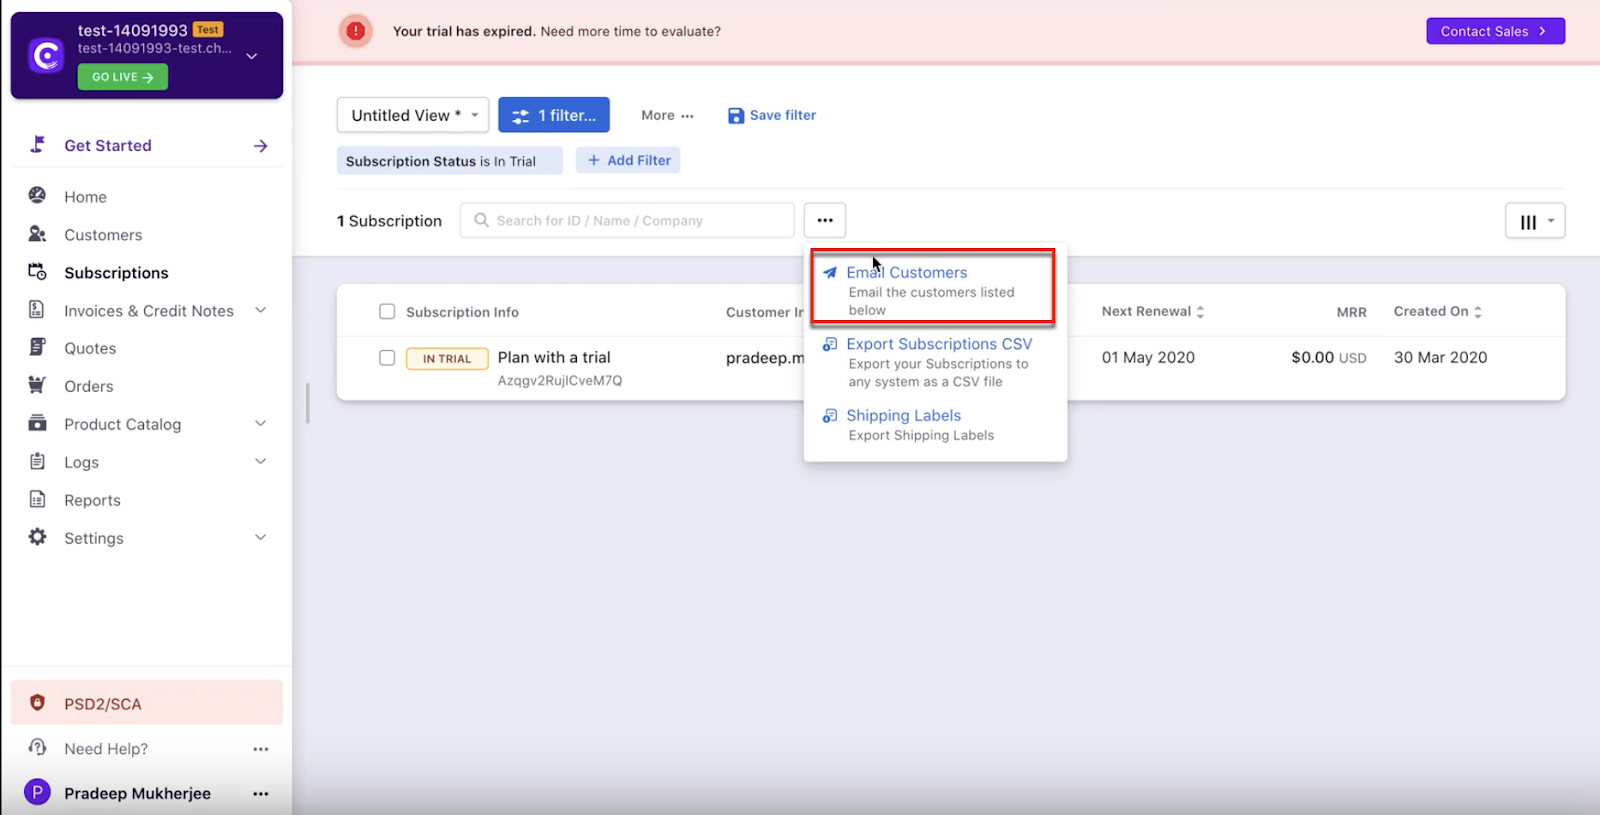
To email, your customers whose subscription trial has been extended use the same filter as above (Step 1 - so that you have the same set of customers) and click Email Customers > select the email you created earlier in this article.
NOTE:
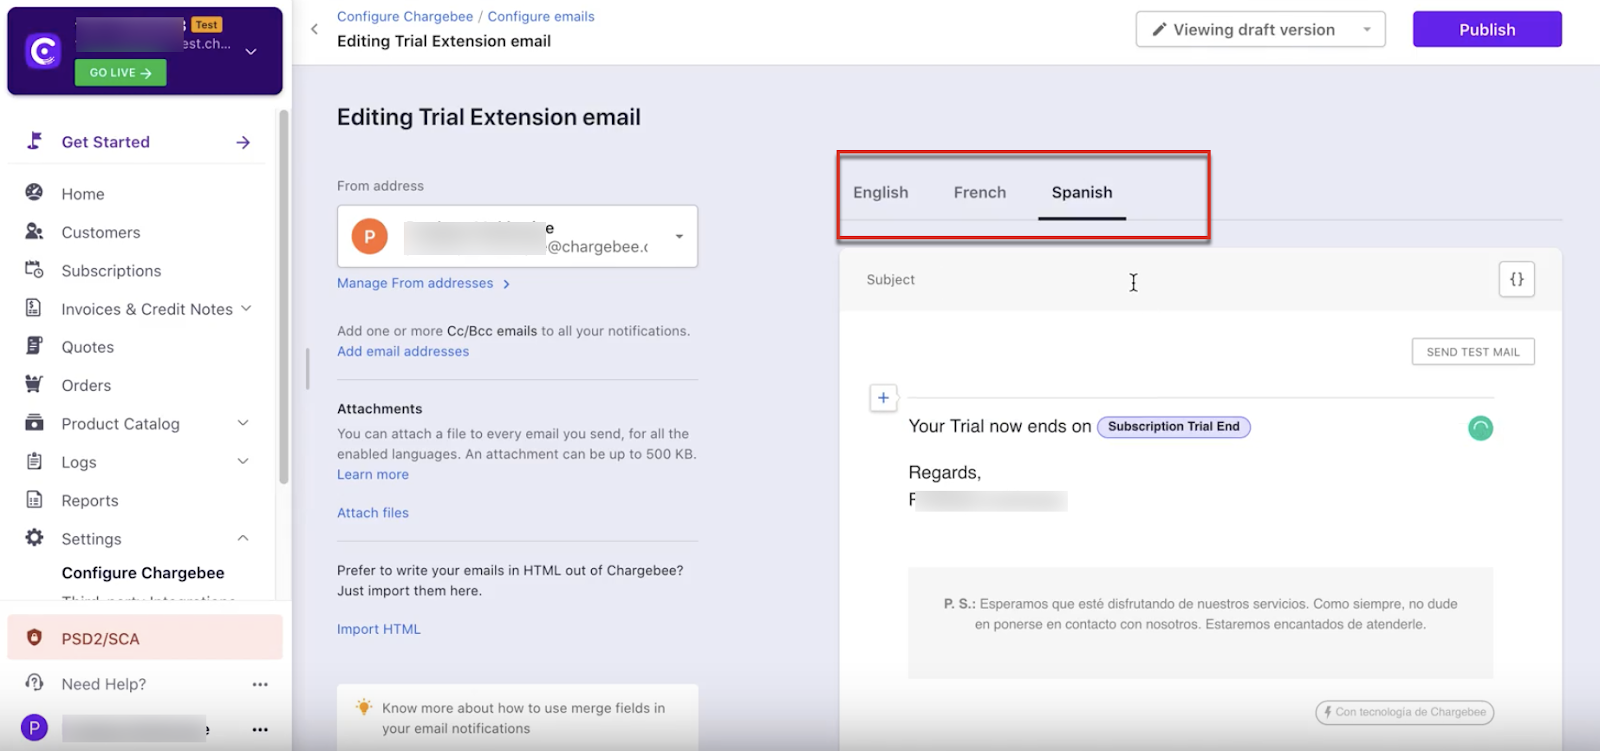
To enable multi-language content, make sure you customize the content in all languages for your emails.
Here's a video demonstration of the above function.
Was this article helpful?