Introduction
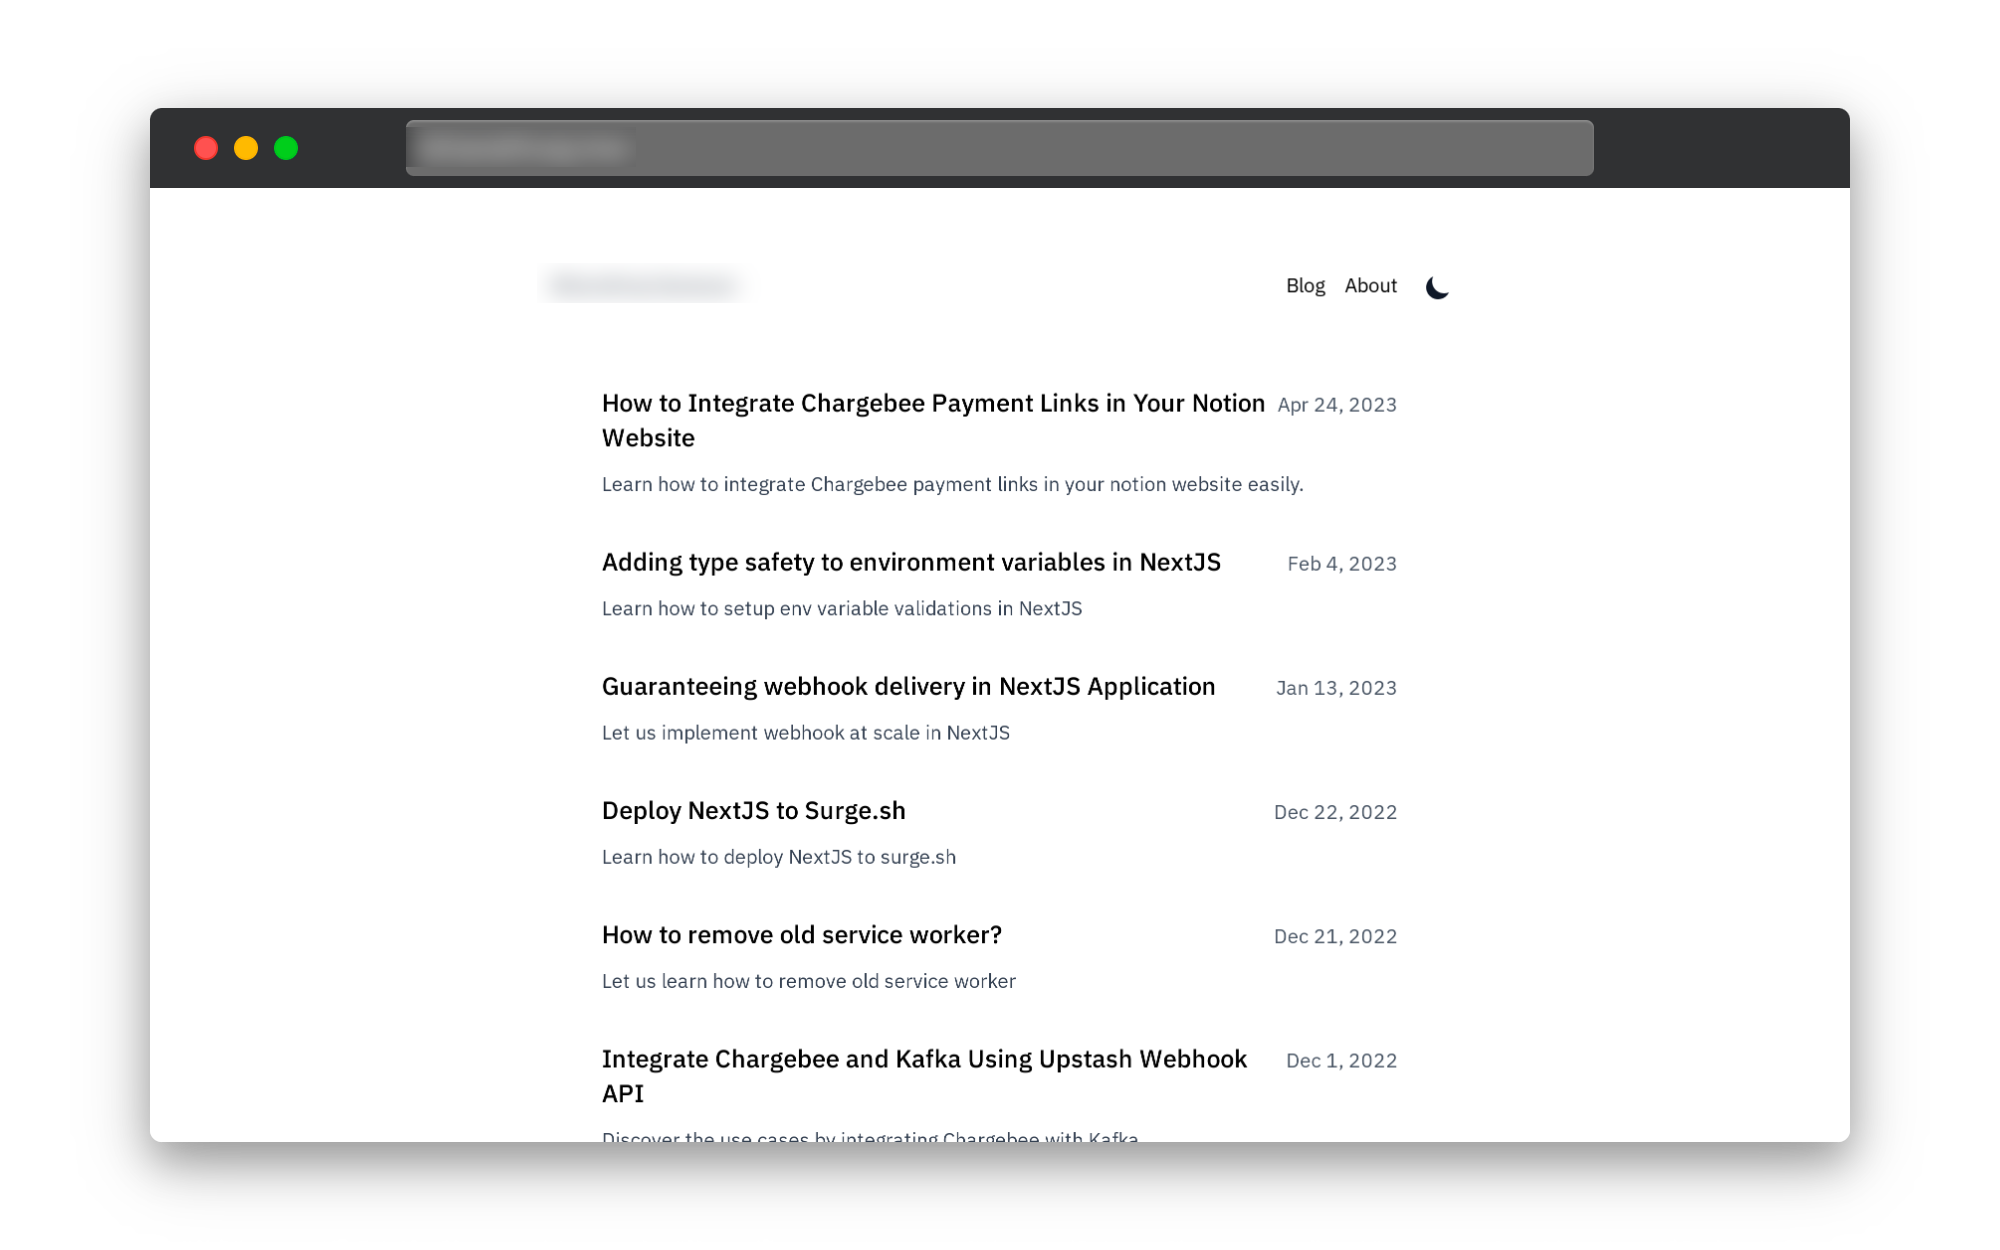
The Chargebee Notion Blog Starter is a Next.js-based sample starter site that integrates Notion as a Content Management System(CMS) and utilizes Chargebee for managing memberships. This tutorial will guide you through the steps to quickly set up and start using the Charegbee blog starter template.
Step 1: Setup and Configuration
Follow the steps below to set up the notion template to customize according to your blog requirements.
Click Duplicate to start duplicating this Notion template.
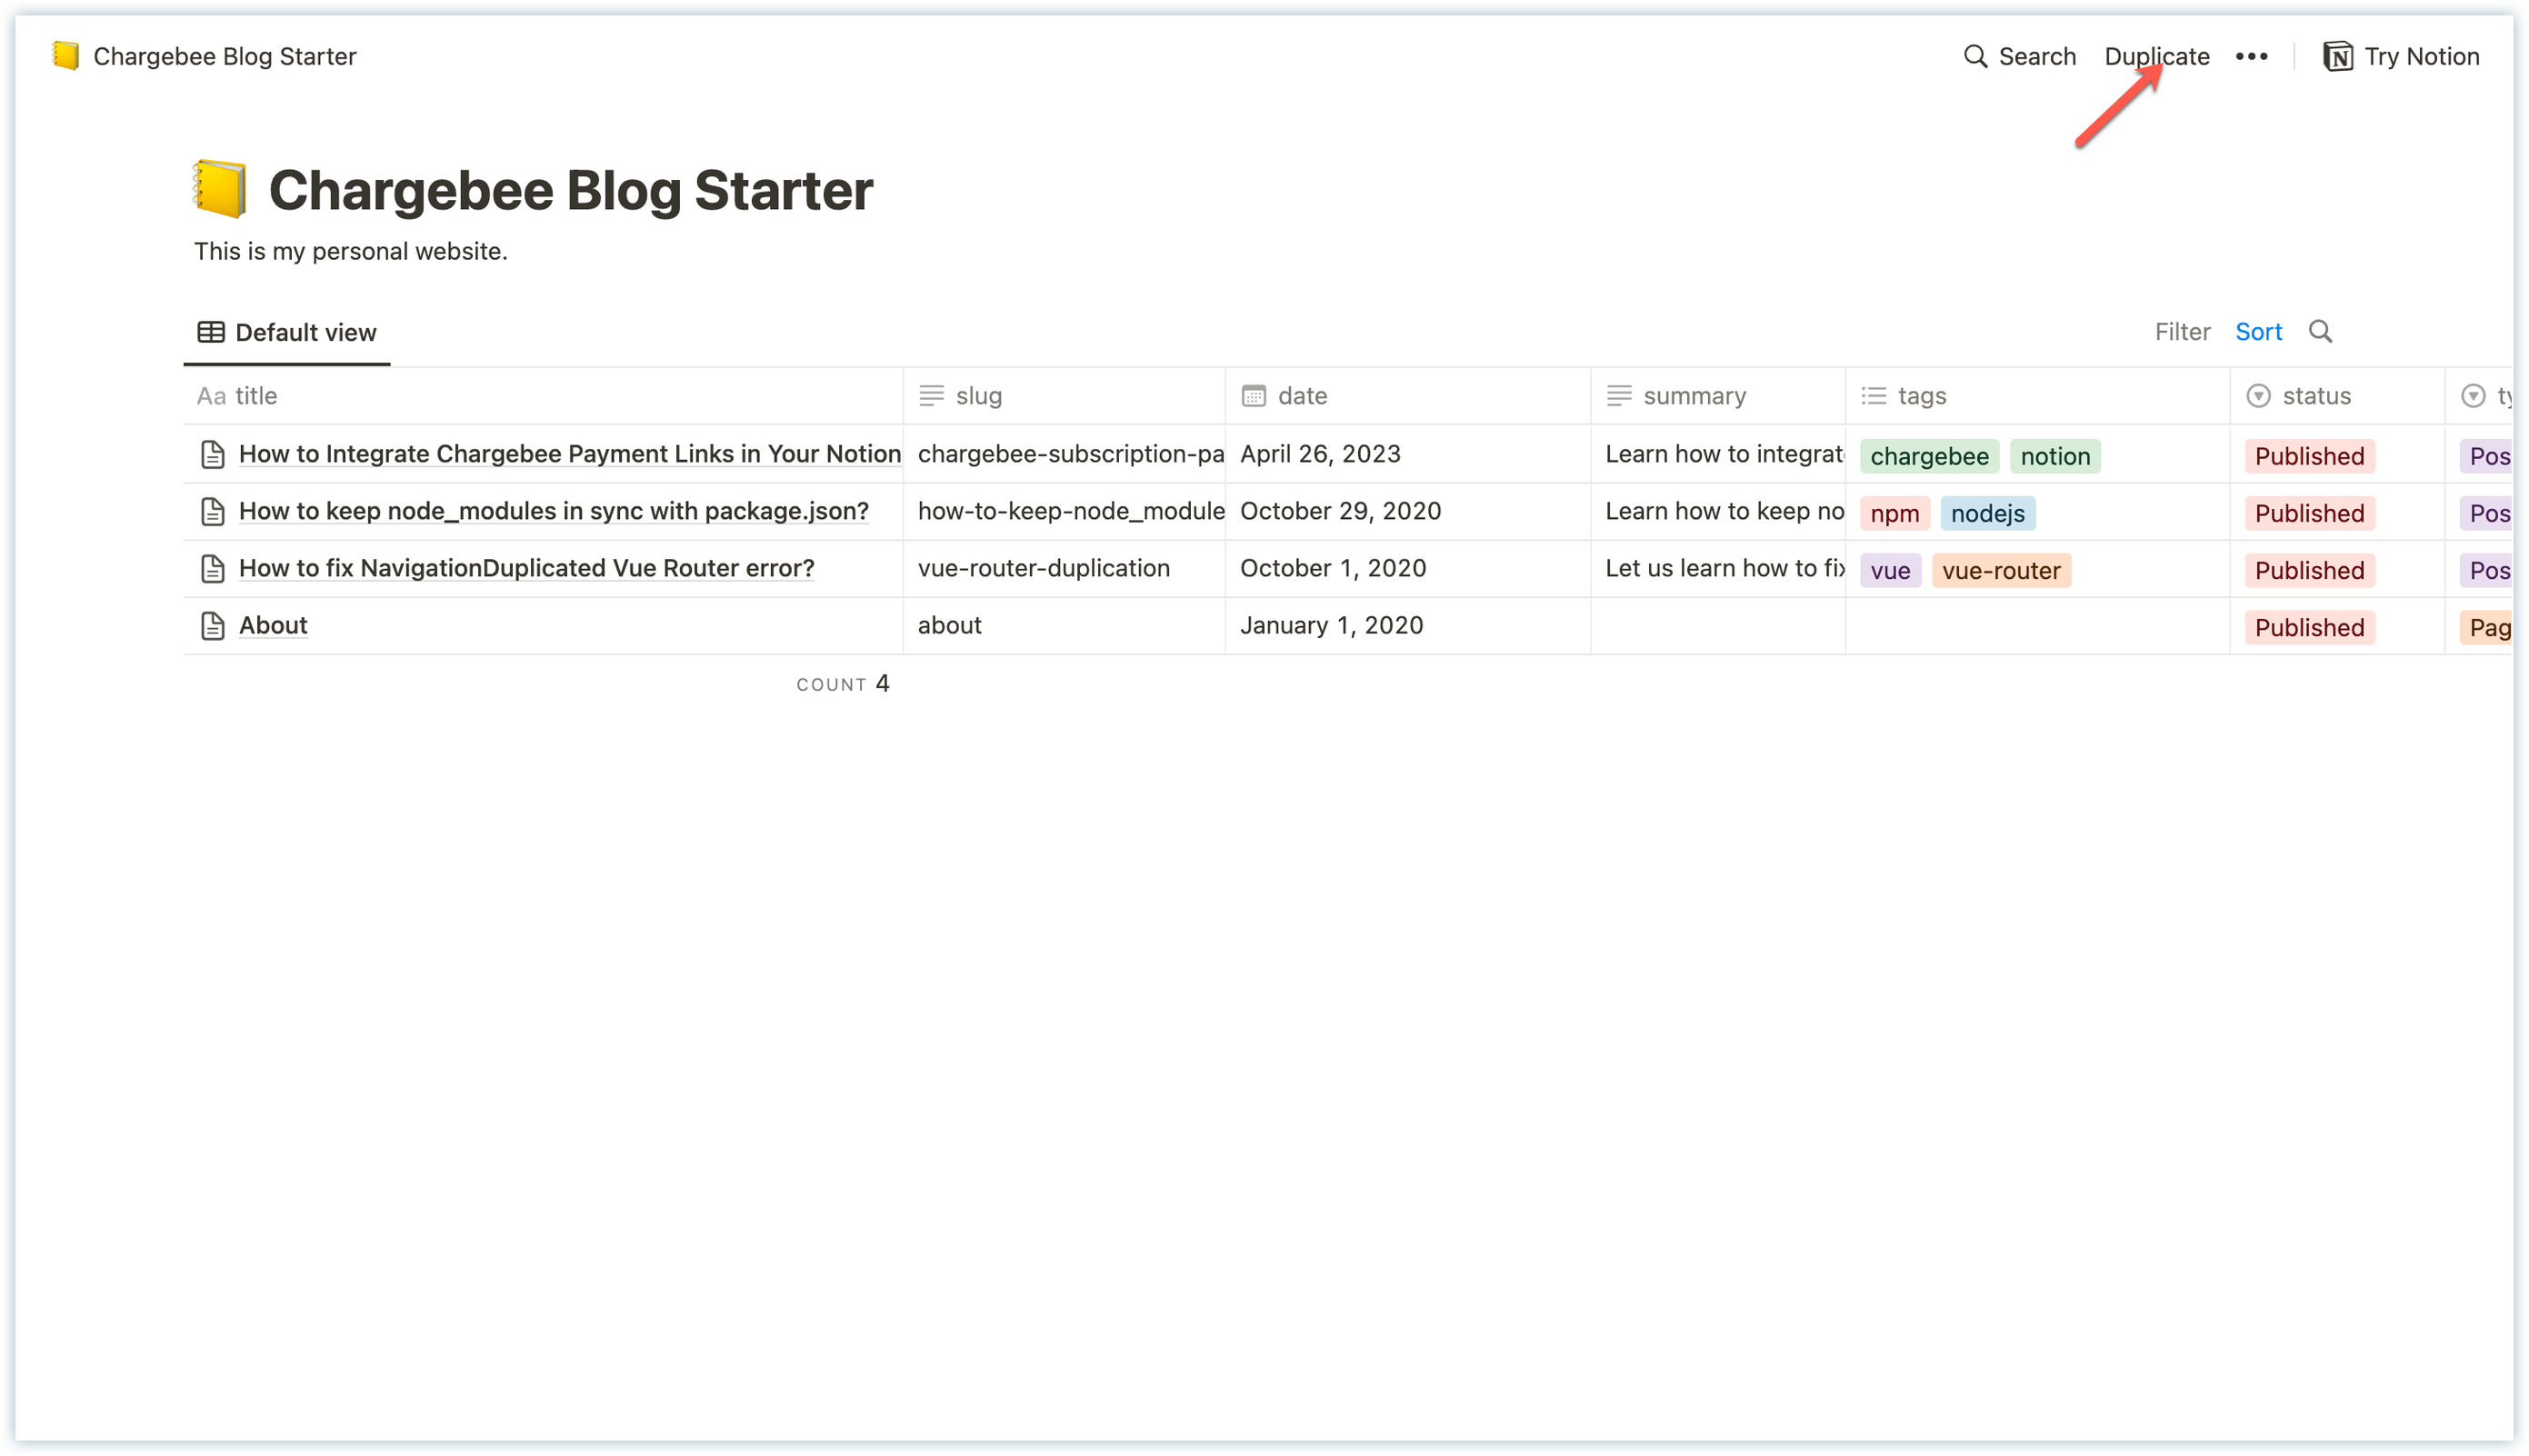
Notion Template Make sure the copied template is private and not published to the web.
Click Use this template button to fork the Chargebee Notion Blog Starter project on GitHub.
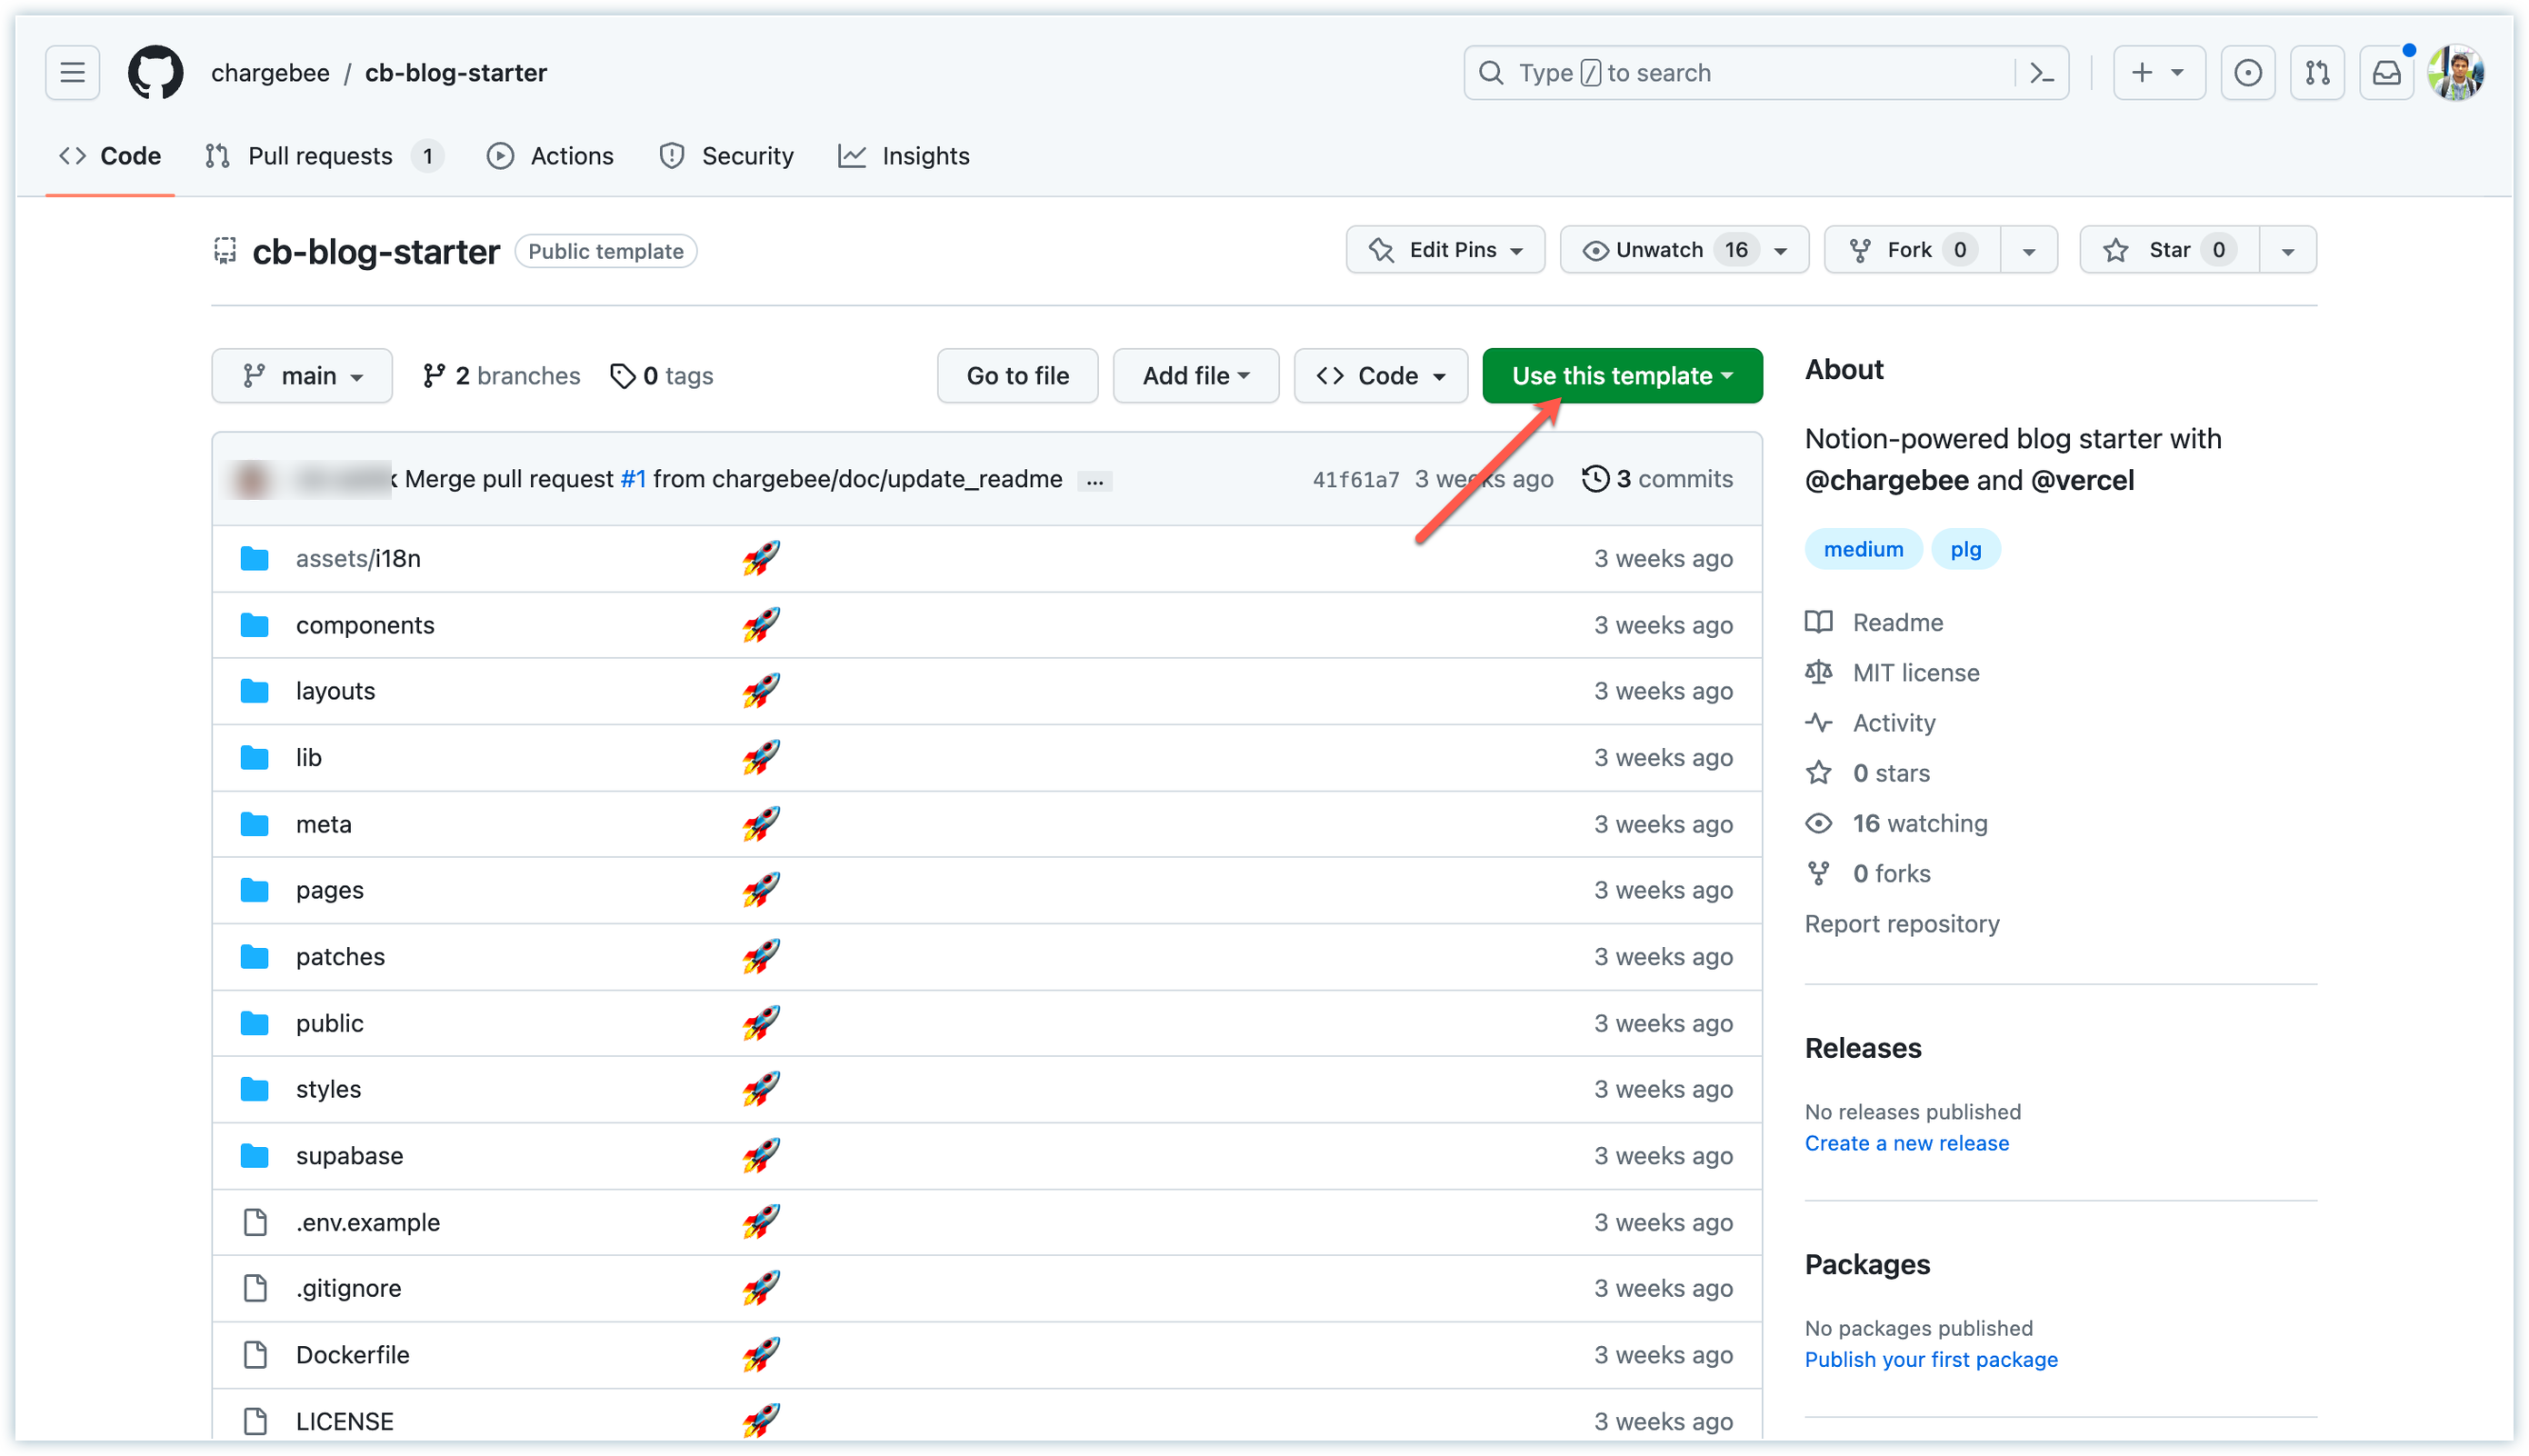
Chargebee Repository Customize the blog.config.js file at the root to adjust the configuration settings according to your requirements. You can set the title, description, theme, timezone, and analytics configuration here in one place.
For local development, create a
.env.localfile by running the terminal commandcp .env.example .env.localin the project root. Then, update the environment properties in the.env.localfile with the required values.The below table describes the properties that need to be used:
Property Description NOTION_PAGE_ID The ID of the Notion page you previously shared to the web, usually has 32 digits after your workspace address NOTION_ACCESS_TOKEN Notion Access Token. SUPABASE_SERVICE_KEY Supabase Admin Key. NEXT_PUBLIC_SUPABASE_URL Supabase project public URL. NEXT_PUBLIC_SUPABASE_ANON_KEY Supabase anonymous key. NEXT_PUBLIC_CHARGEBEE_DOMAIN Chargebee Domain name. CHARGEBEE_API_KEY Chargebee's Full access key. DEFAULT_PLAN Your default item plan id. Example: free API_ROUTE_SECRET Admin Secret Key to access our API. Refer here on how to find the values for these environment properties.
Replace the
favicon.pngfile in the/publicfolder with your own favicon. This step is optional.
Step 2: Configuring Dependencies Locally and Seeding Data
Follow the steps below to configure dependencies locally and start seeding data.
Ensure you have a recent version of Node.js installed on your system. We recommend using recommended version 16 or after.
Install pnpm package manager.
Install the project dependencies by running the command
pnpm installin your system terminal.Run the seed command
pnpm seedto set up the necessary product catalog configuration in Chargebee.
This step is essential for the blog starter to function correctly.
You can log in to your Chargebee web console to modify the product catalog based on your needs.
You now have your blog running locally.
Step 3: Deployment and Environment Configuration
Follow the steps below to deploy and configure the environment for going live with your blog.
Deploy the project to Vercel using the Vercel deployment button. Make sure to update the environment property values mentioned above during the deployment process.
Configure Supabase:
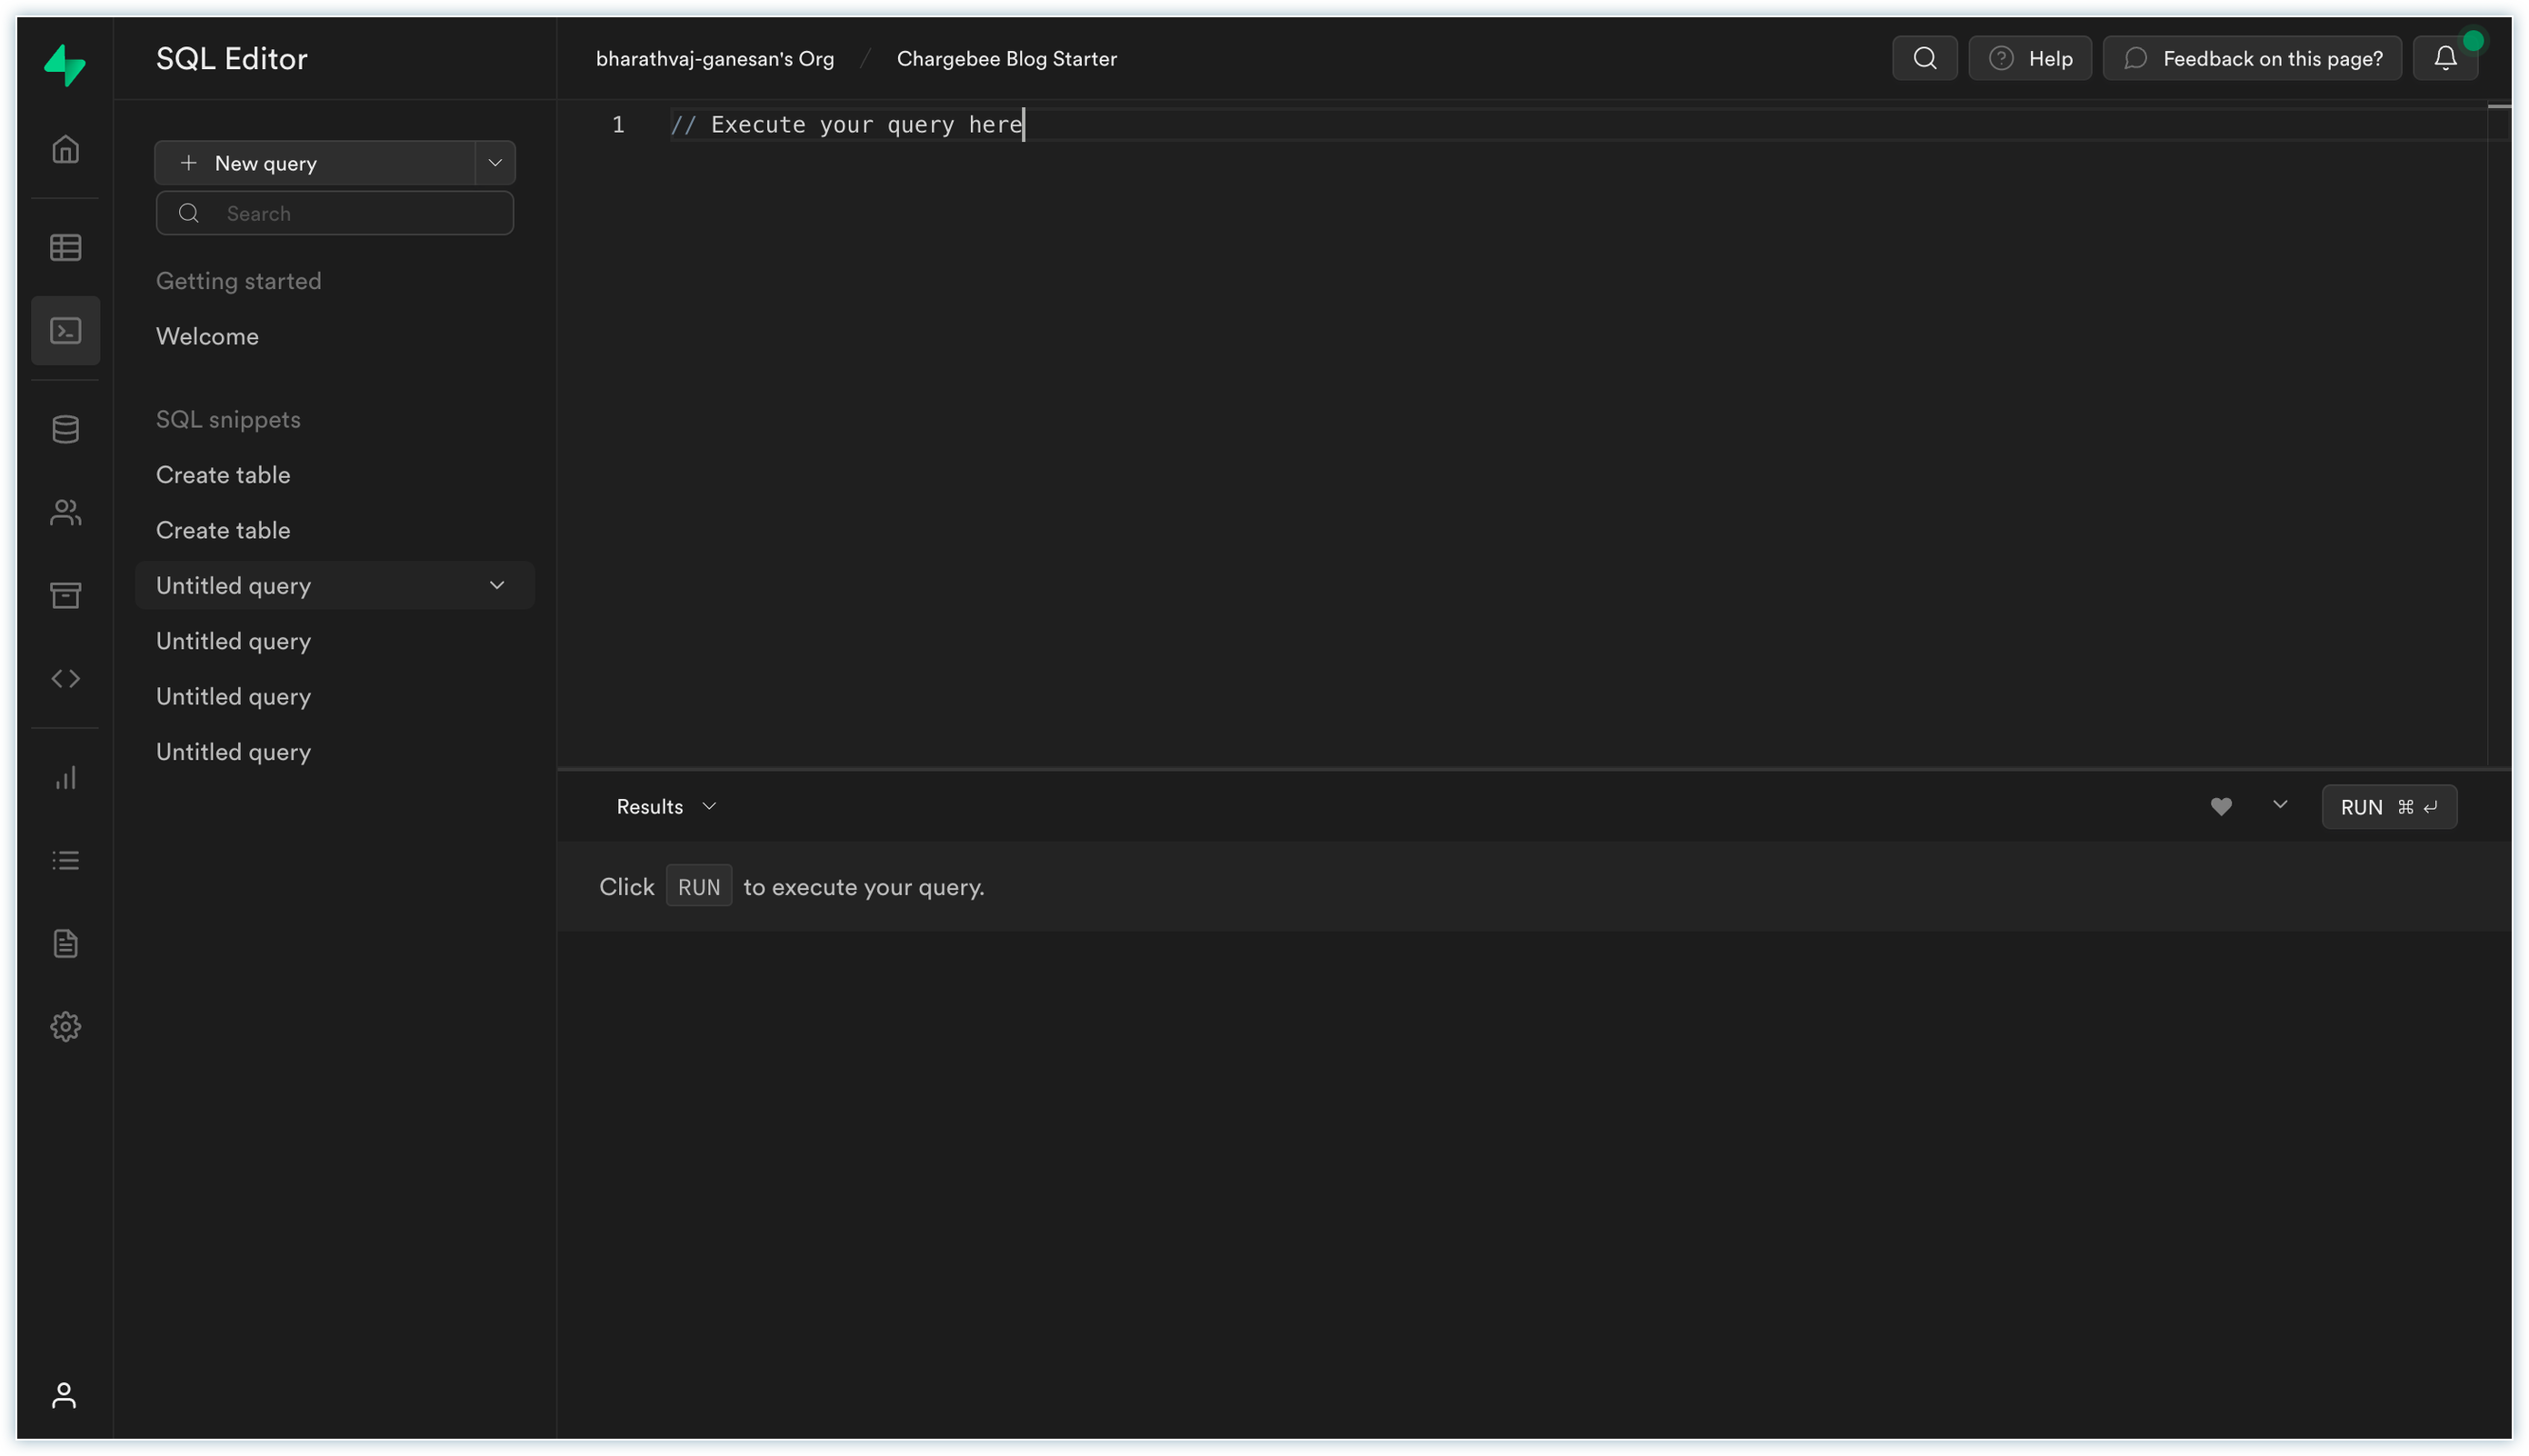
- Copy the seed.sql script provided in the tutorial and execute it in your freshly created Supabase project's SQL Editor. This script will create the required tables, triggers, and functions.
Configure Supabase - Set up a webhook in Supabase to watch for row insertions and trigger an HTTP request to our endpoint
/api/create-customerthat creates a new customer in Chargebee. Pass theAPI_ROUTE_SECRETvia HTTP Header as shown below.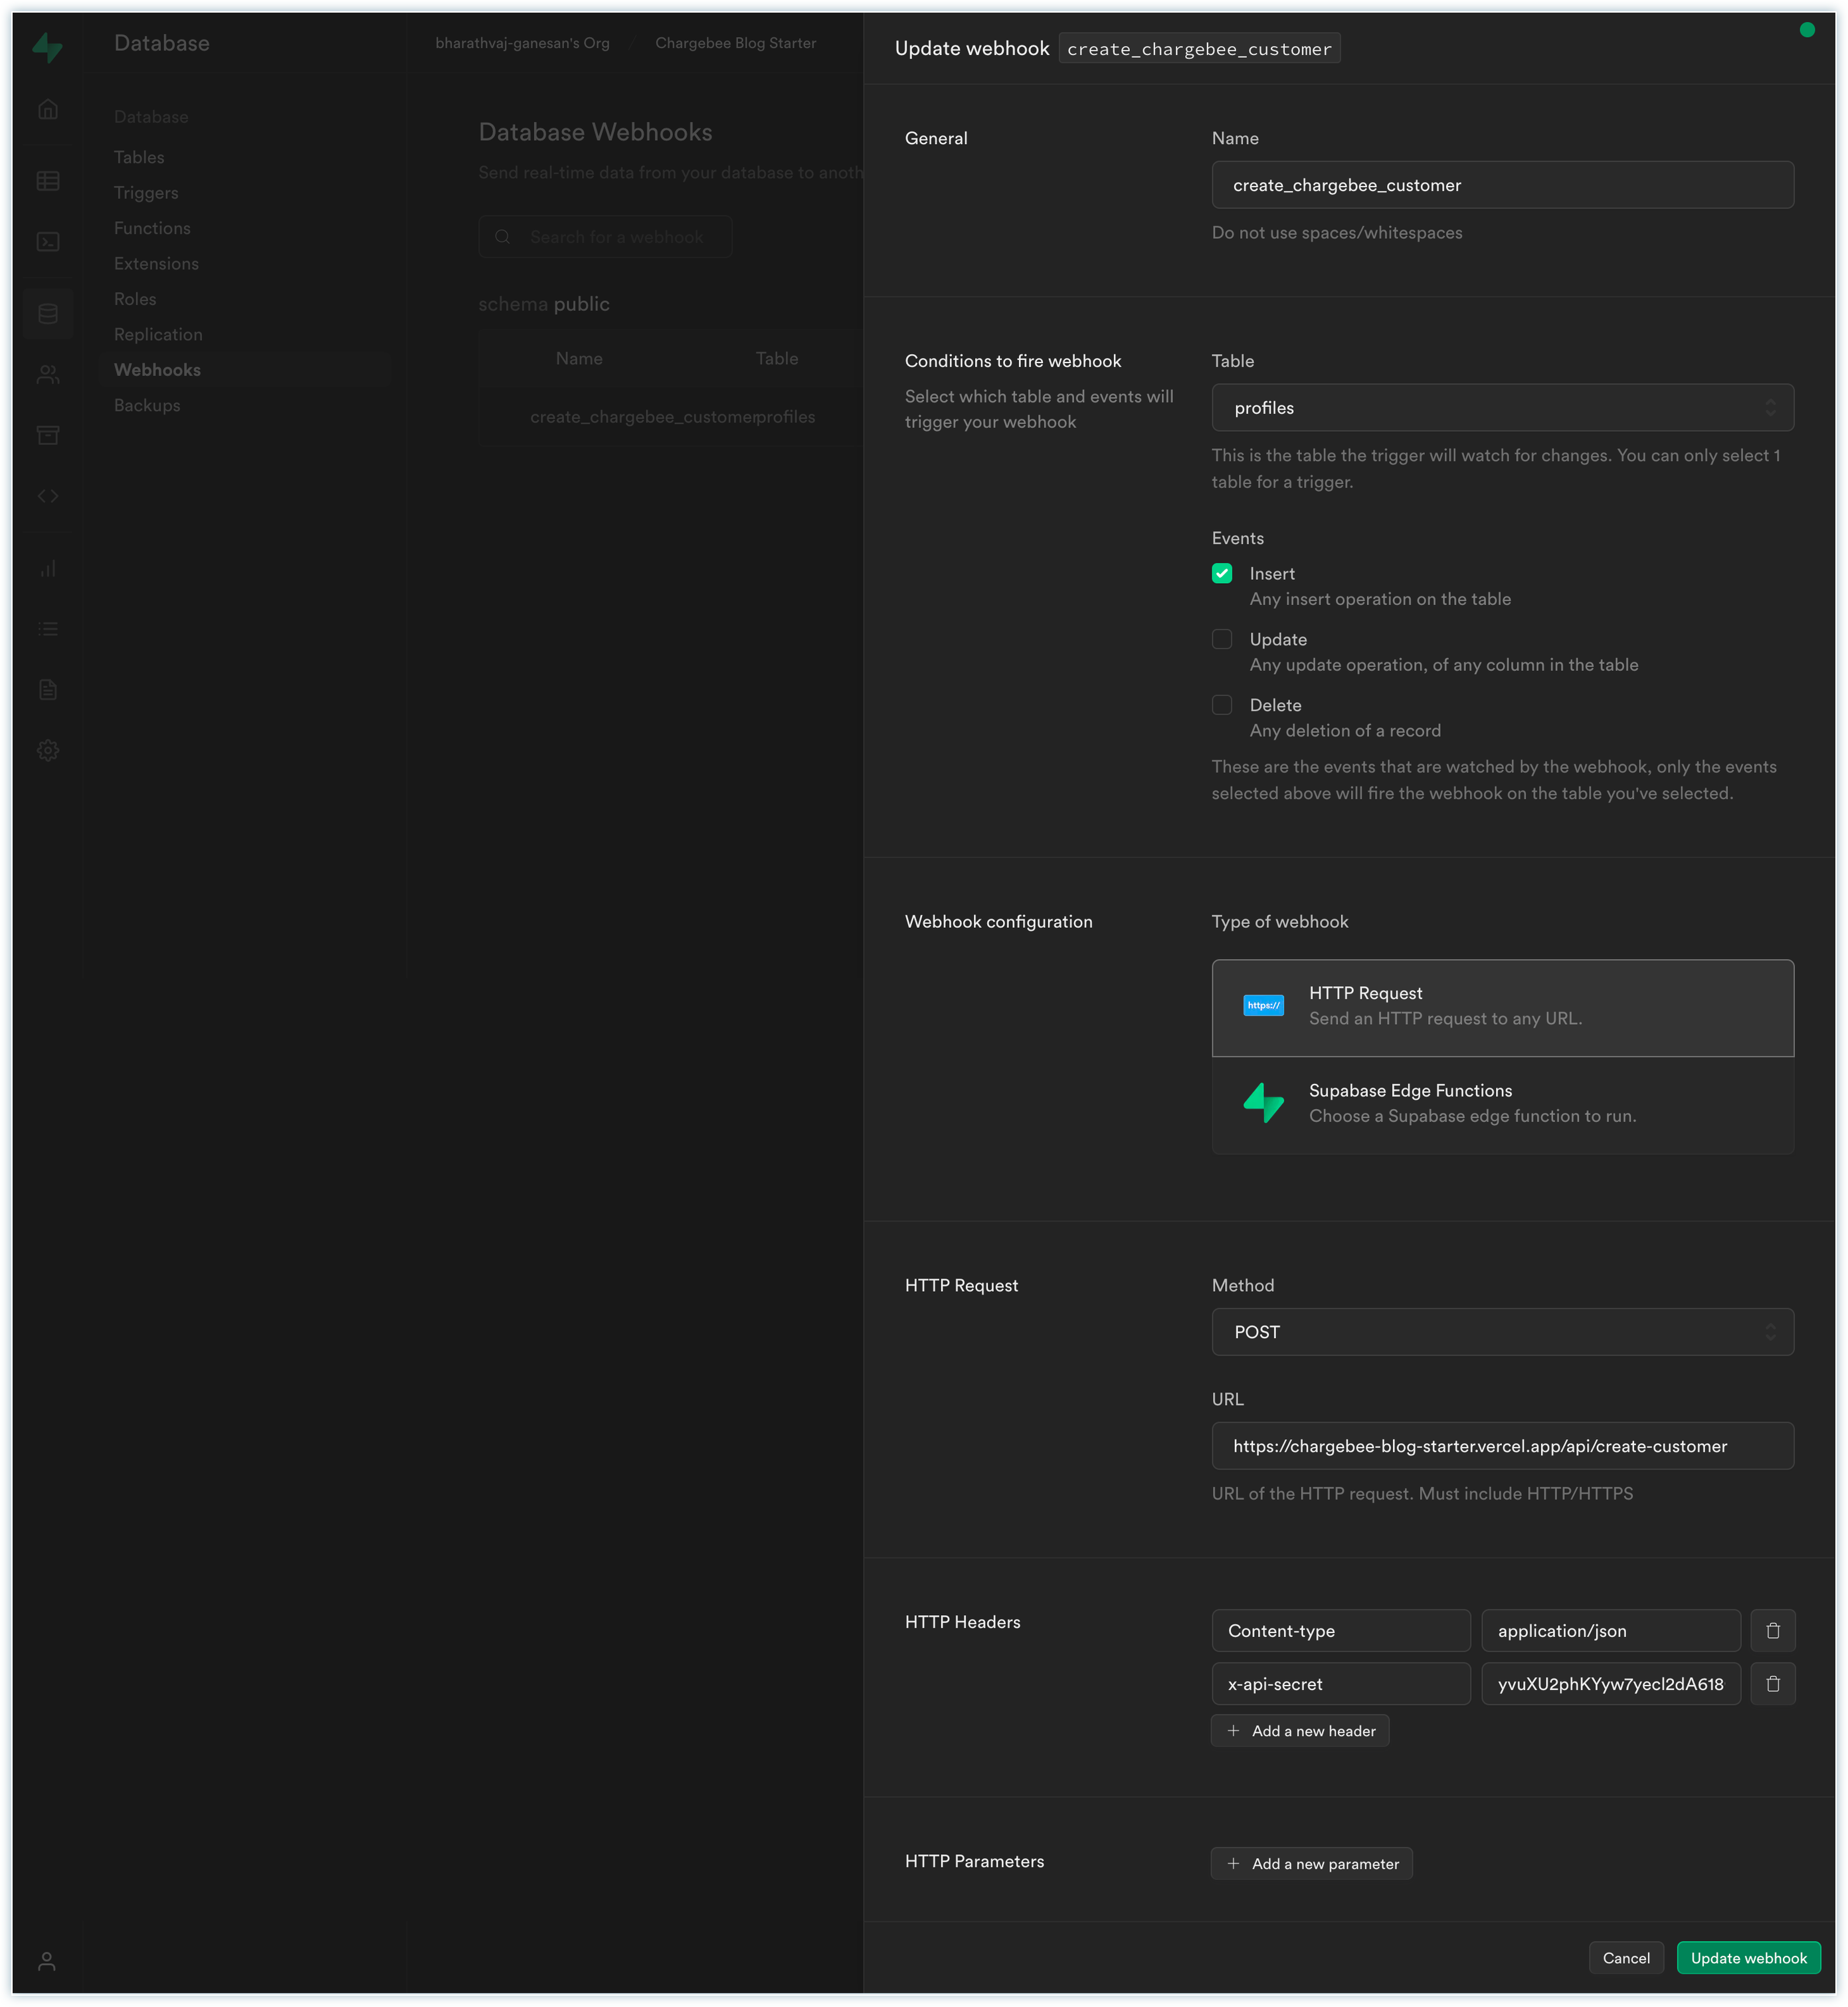
Configure Webhook - Configure Supabase Authentication based on your specific requirements, including adding social SSO. You can choose your preferred Social platform. You have to create the project on the selected platform accordingly as mentioned here.
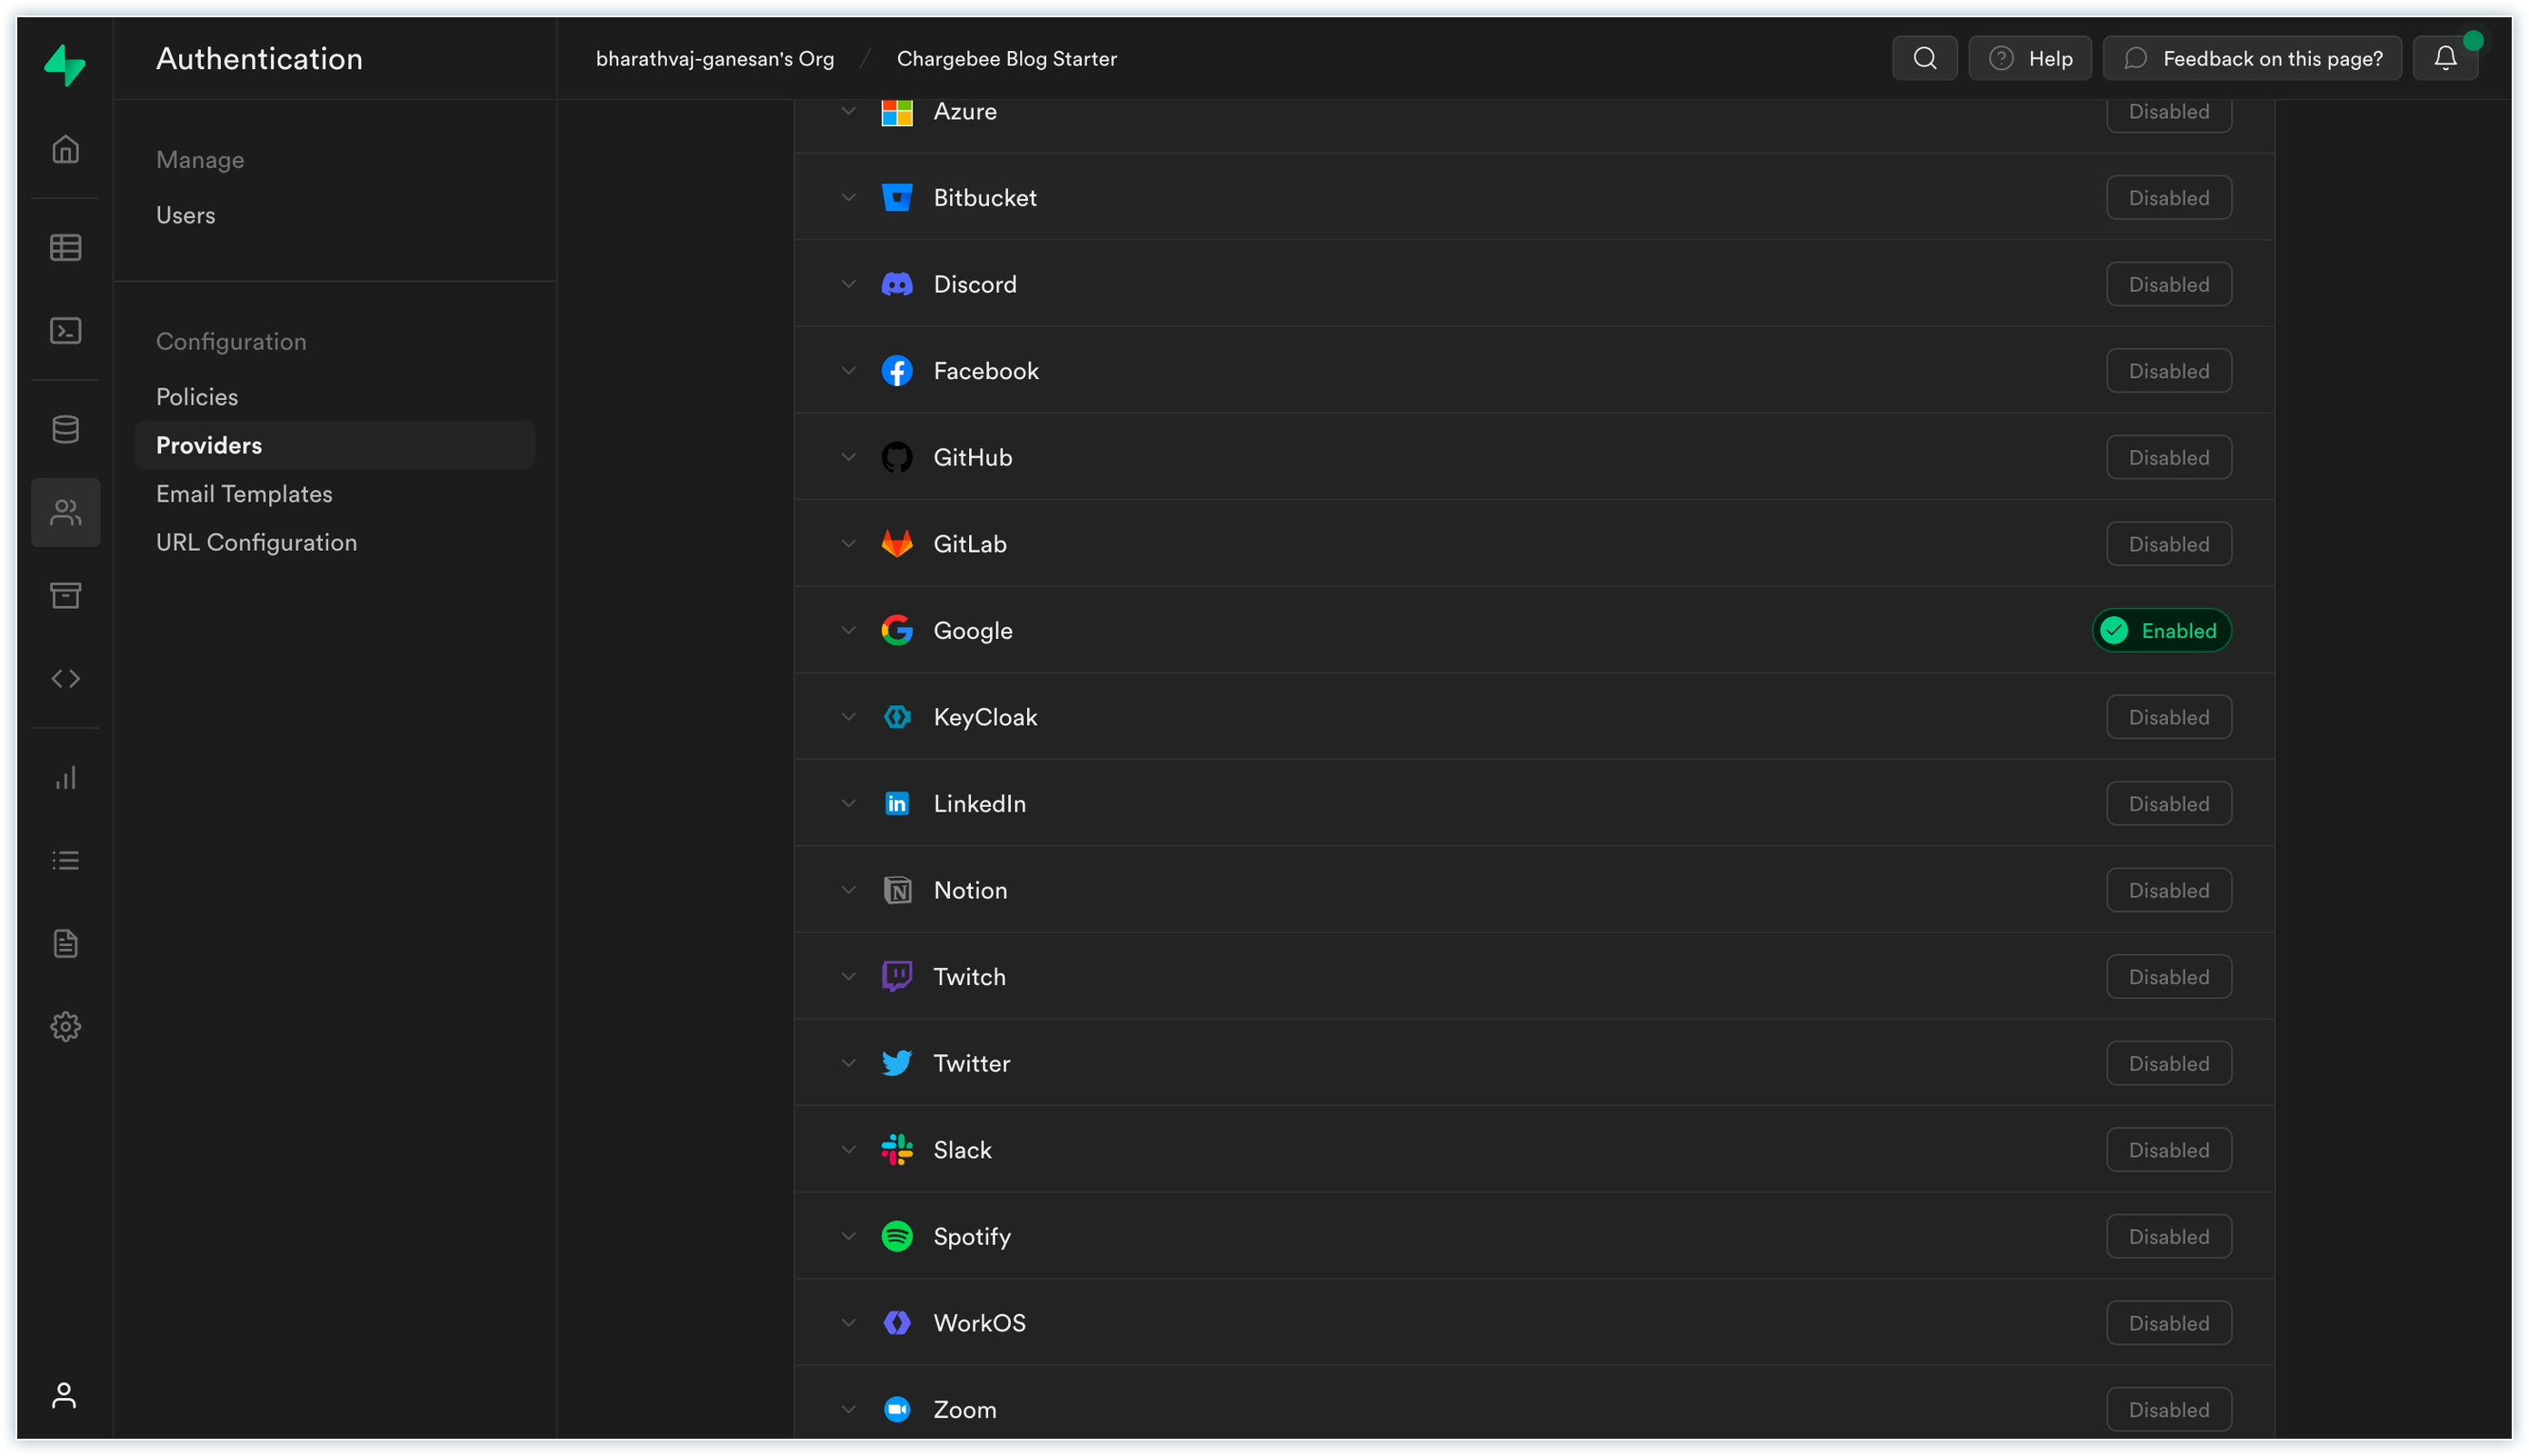
Configure Supabase Authentication
- Copy the seed.sql script provided in the tutorial and execute it in your freshly created Supabase project's SQL Editor. This script will create the required tables, triggers, and functions.
Configure Chargebee:
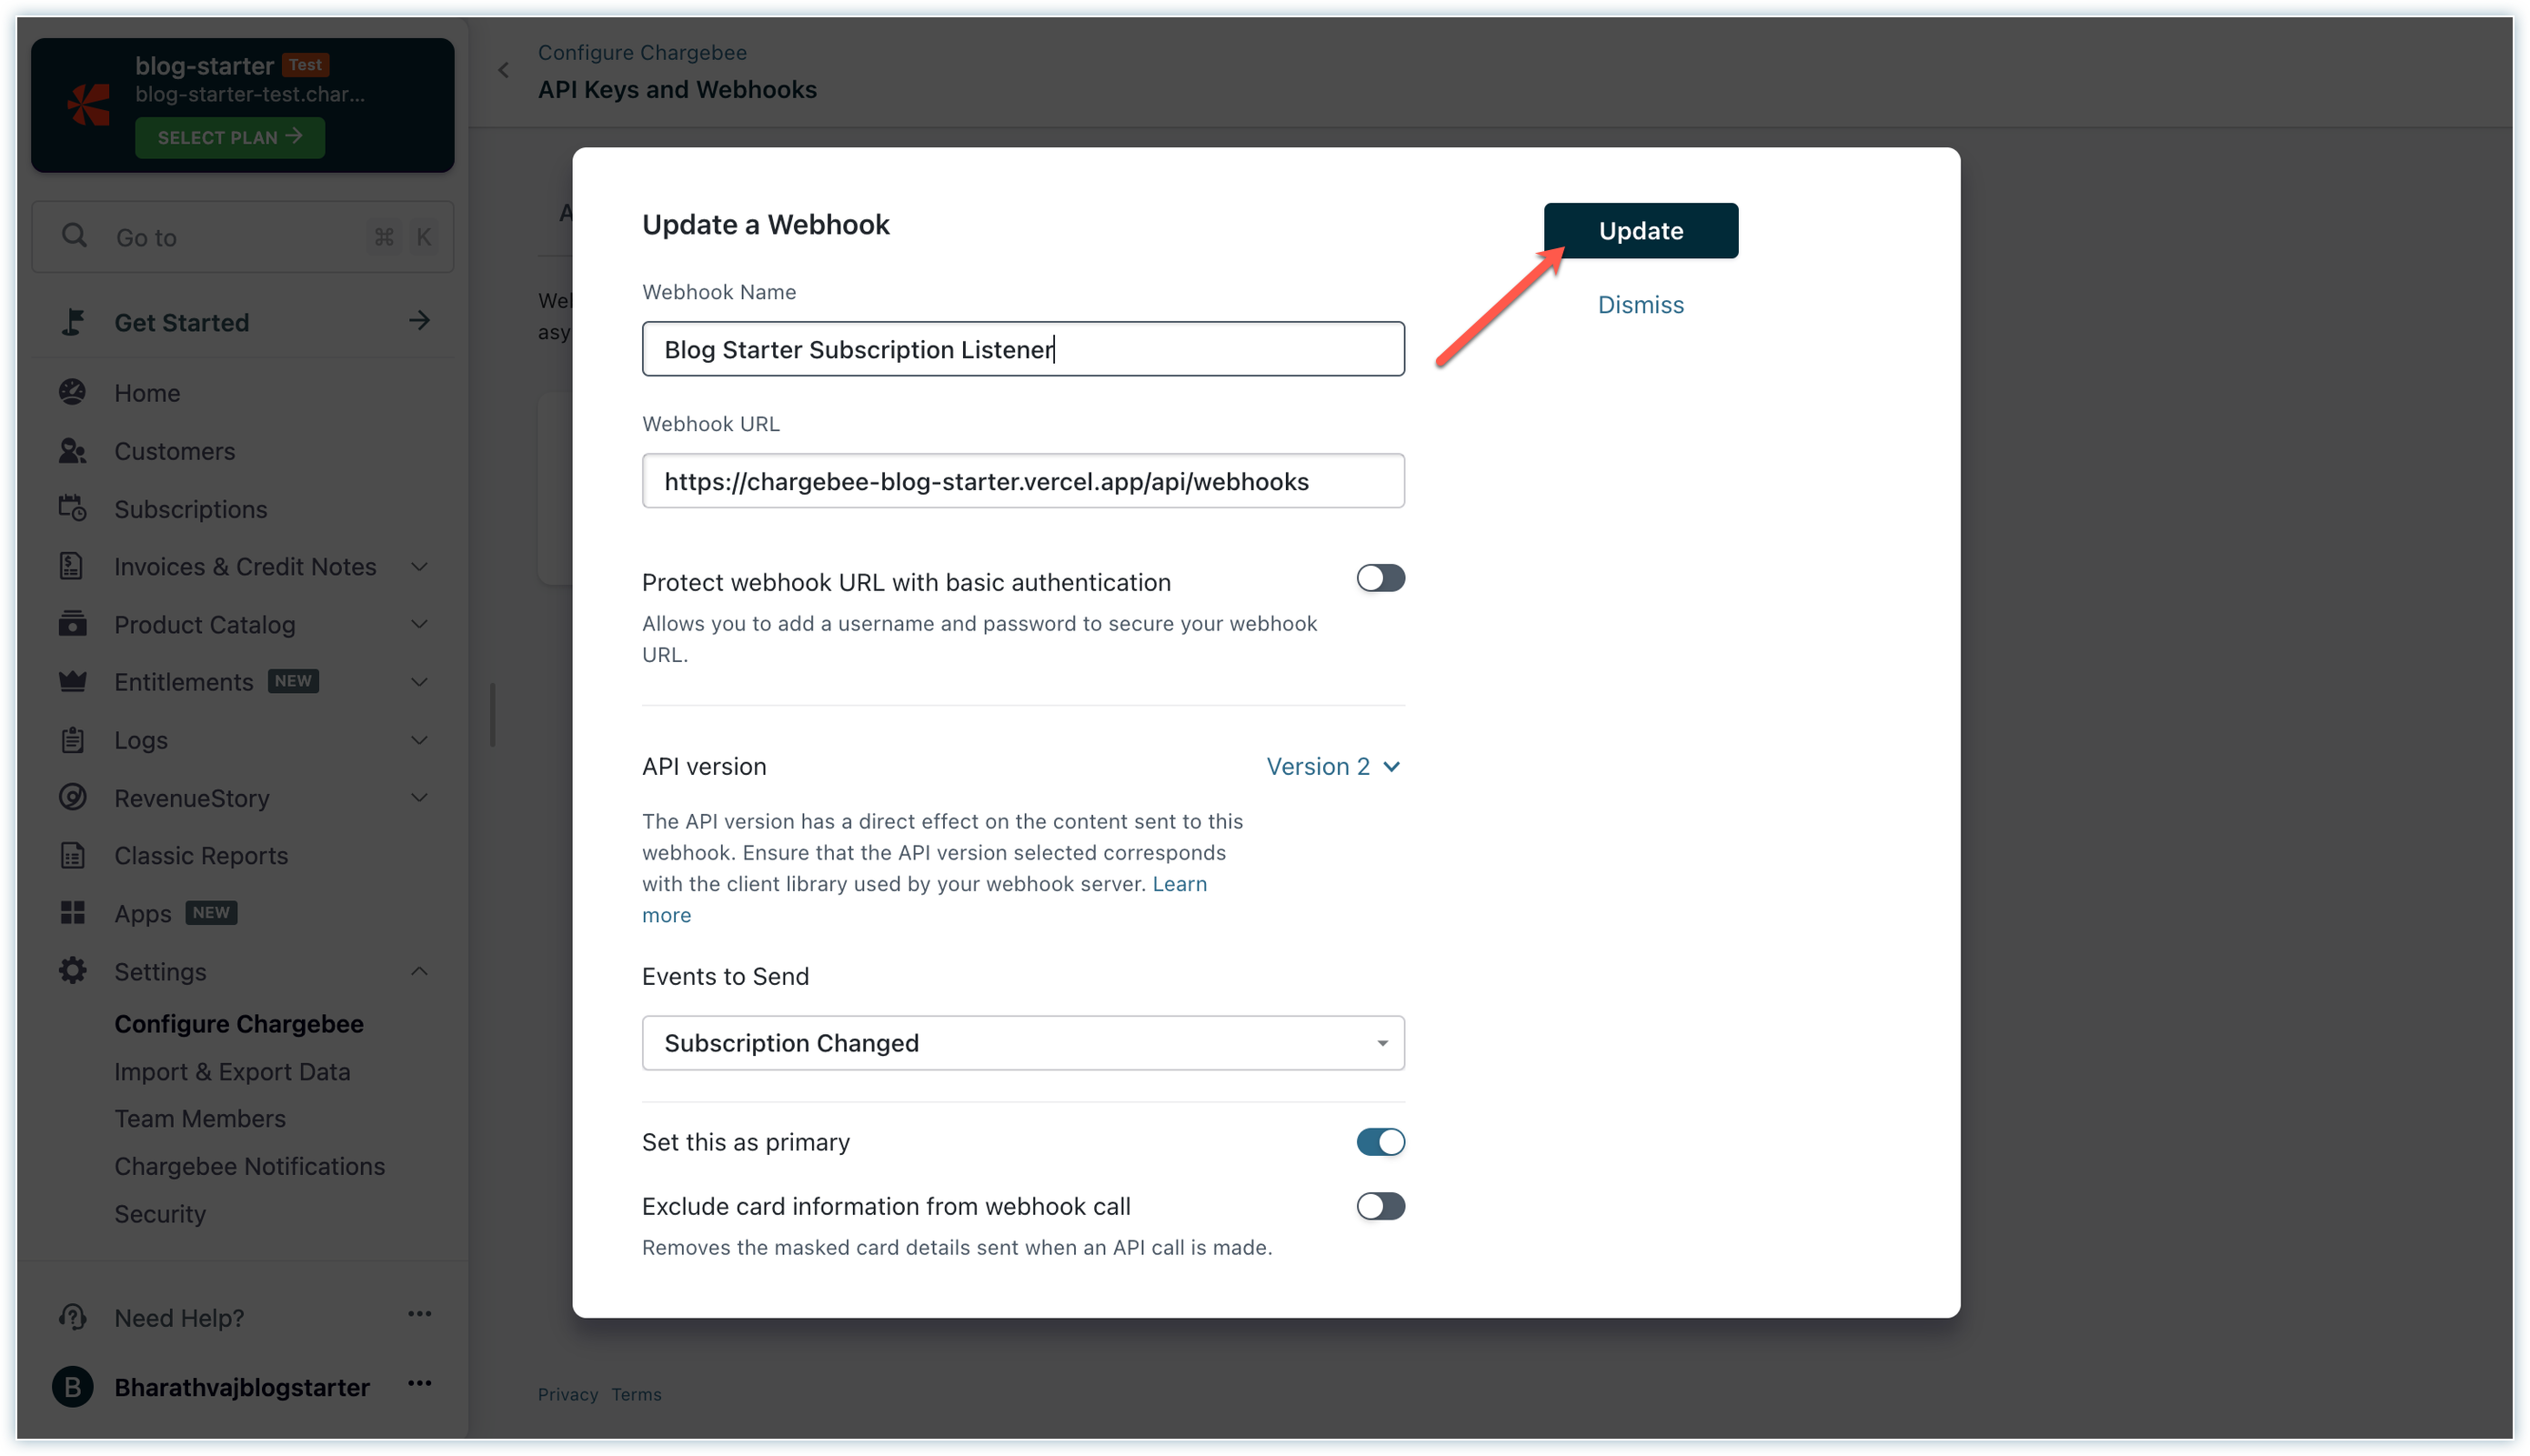
- Create a new webhook in Chargebee with the url
REPLACE_YOUR_BASE_URL/api/webhooksas shown below. This webhook will allow Chargebee to notify your application about subscription changes. - Click Update.
Configure Chargebee Webhook
- Create a new webhook in Chargebee with the url
Step 4: Writing Content and Customization
With the setup complete, it's time to start writing your blog content. You can use Notion to create and manage your blog posts easily.
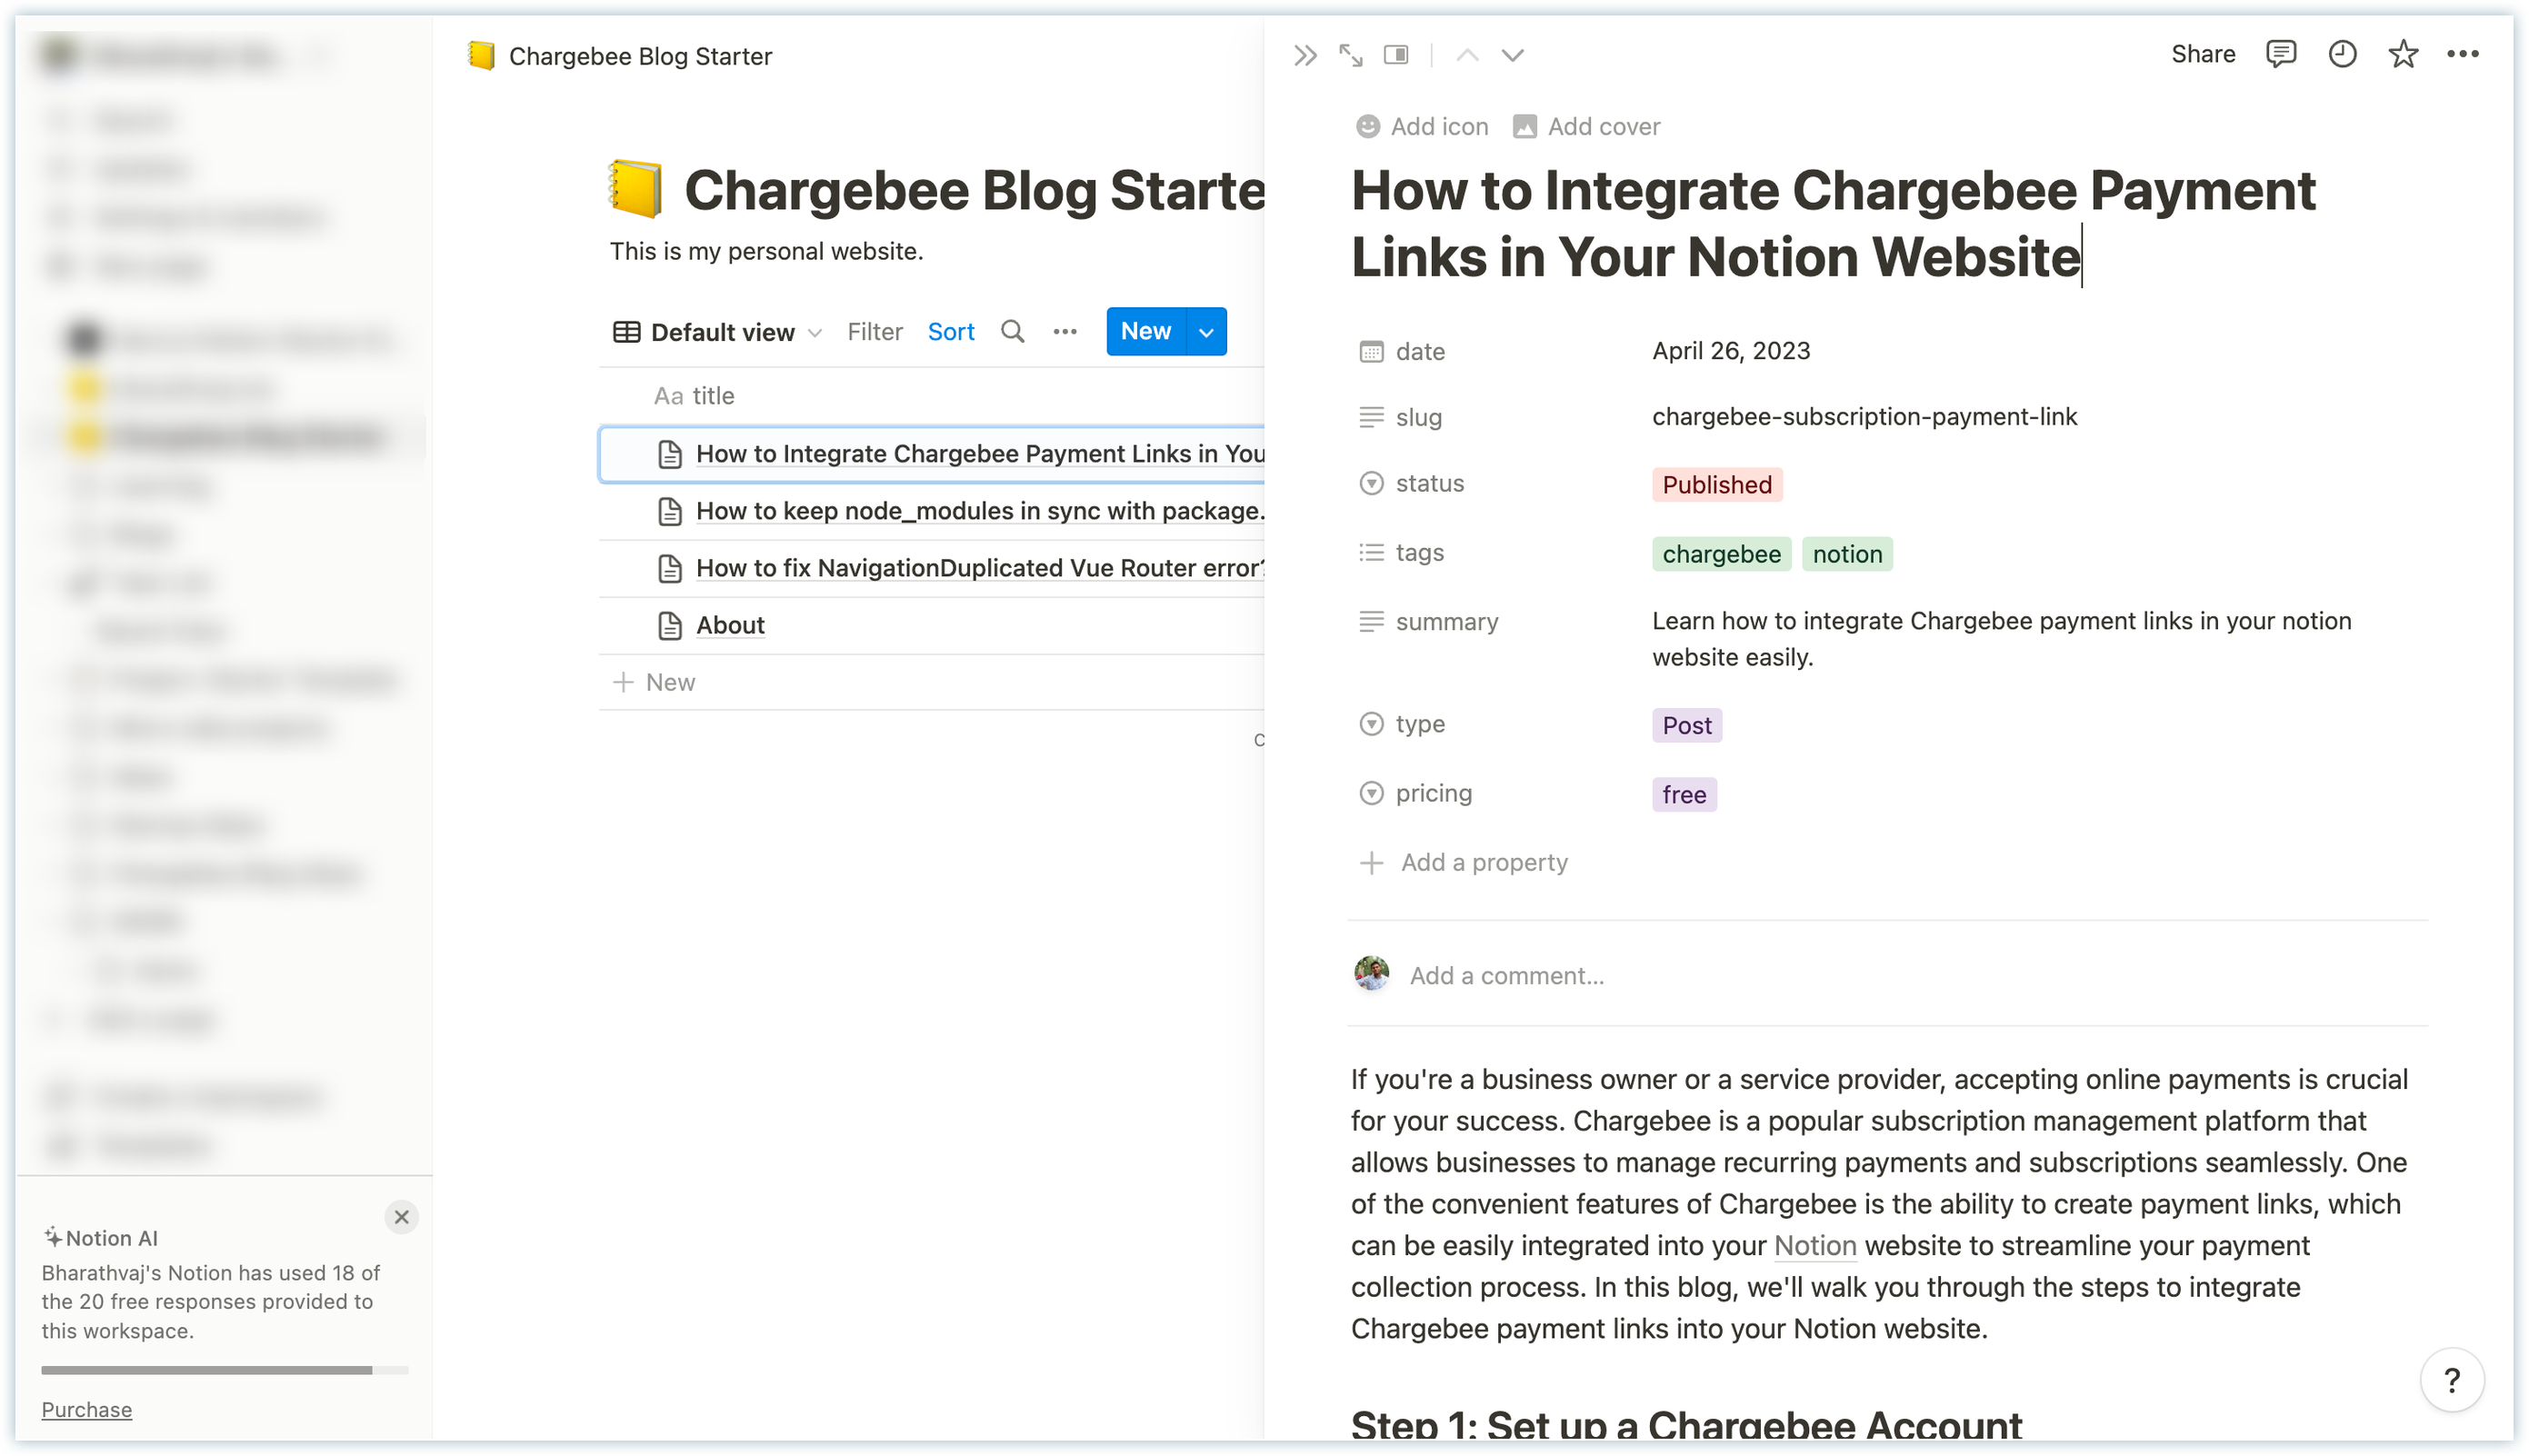
You can explore the various features available in the Chargebee Notion Blog Starter, such as comments, full-width pages, quick search, tag filtering, RSS, analytics, and more. The starter template is built with Tailwind CSS, making it easy to customize the styling to match your branding and design preferences.
You have successfully set up and started your own blog using the Chargebee Notion Blog Starter template. Feel free to modify or contribute to the repository.
Enjoy blogging with the Chargebee Notion Blog Starter!
If you encounter any bugs or issues, you can contribute by opening an issue on the GitHub repository.
Feel free to make pull requests to add new features, improve the user experience, or fix bugs.
The starter template is open-source under the MIT License. You can find the license information here.
We're always happy to help you with any questions you might have!
support@chargebee.com